Categories
Uncategorized

Quilting in the Time of COVID

*NOTE:  This is an opinion blog. 

If all goes according to my plans, this blog will post on June 10, 2020. At this point, North Carolina should be well into Governor Cooper’s modified phase 2 opening schedule. I say modified, because in the original phase 2 plans, places of business such as gyms, bars, and dance studios should have been able to open. They were not allowed to do so. But that is neither here nor there. What I want to really talk about today is how COVID has changed and will change the face of quilting and our quilting reality. Some of the changes I like. Some of them I don’t. Either way, this is a pretty personal blog (consider it part of knowing me better). It’s definitely an opinion piece, but keep in mind this is coming from someone who has quilted for well over thirty years and has done a reasonably good job on watching for trends and troubles in the quilting arena for the past 15 years.

It goes without saying COVID has changed everyone’s life.  No matter if you’re shopping, grabbing a meal out, or going to the doctor, the entire way of doing everything has been totally upended.  And I was able to deal with this upending for a while. Until…

Until it took weeks for my daughter (who has had cervical cancer) to get her last Pap Smear results back.  Her appointment was in early April.  We did not get her test results back until Thursday, May 22.

Until I got up and began to do office work on a Sunday because I couldn’t remember what day of the week it was (I’ve worked from home since March 9).

Until I got sick and tired of not finding items my family needed at the grocery store when we needed them.  Please note: We did not hoard.  We did not purchase things like paper towers or toilet paper or hand sanitizer in bulk because we were keenly aware  others needed more than our two-member household.  But when I can’t find a four-pack of Charmin for Bill and myself after I’ve shopped at four stores, something is wrong. 

I’ve said before that I am stick-a-fork-in-me done with a lot of this.  And while, yes, I realize what I’ve written in the preceding paragraphs is a rant (I own it), my frustration does nothing to negate the fact that COVID has changed everything from the way we eat out, to the way we work, to the way we shop, to the way I get my hair and nails done.  But to add to my … frustration… about the situation, COVID has also messed with my Holy Grail of quilting and to be frank…well…that pisses me off.  Quilting is my place of solace.  Quilting and quilters are my lifelines to sanity in my world of an insanely high-pressure job.  Fabric and everything that comes with it calms me at the end of my day, when most hours in that day have been stressed, pushed, and more hectic than I can adequately describe.

I am tired of living in fear of this virus.  For years I lived my life in the shadow of “What Might Happen.”  I refuse to do that ever again.  I am over this over-hyped virus anxiety.  Do I believe the virus is real?  Yes.  Do I do things to avoid coming in contact with it or spreading it to others?  Yes.  I social distance, wash my hands several times a day, and wear a mask.  It’s not that I’m unaware of COVID and its possible repercussions, it’s that I’m virus-fatigued.  You would stand a much better chance of me acknowledging new information about COVID if it would stop being all the news all the time

However, let me tell you something I do know.  I was born in 1961 (do the math if you want to know how old I am…I’ll wait).  My generation – the folks that I grew up with – have seen and dealt with some major events throughout our lives.  We’ve lived through:

  • The start of the Cold War
  • The Bay of Pigs
  • The Construction of the Berlin Wall
  • A Presidential assassination and at least two other assassination attempts on other Presidents
  • Watergate
  • The resignation of a President
  • The assassinations of Robert Kennedy and Martin Luther King, Jr.
  • Putting a man on the moon
  • Integration and Civil Rights when seemed both would tear our country apart
  • Women’s rights and finally getting a woman on the Supreme Court
  • Challenger and Columbia
  • The Collapse of the Berlin Wall
  • The End of the Cold War
  • Vietnam
  • 9/11
  • More wars in the Mideast than I can keep up with
  • A recession and The Great Recession
  • Corrupt political leaders
  • Gas rationing

What I’m saying is this:  My generation has lived through times which have upended our way of life.  We’ve done this several times.  And you know what?  We’ve gotten through it.  We’ve pulled ourselves up, worked together (most of the time), and developed solutions which have allowed us to raise our families, educate ourselves and our children, and create a society that – for all its faults and problems – is one most people would risk their lives to have.  Maybe it’s because our parents didn’t hover.  Our parents (for the most part) were the children of World War II society.  Our grandparents instilled in our parents the desire to make sure the next generation (us) had it better.  That we grew stronger.   That we were smarter and better educated.  But they sure as heck didn’t hand it to us.  They allowed us to struggle our way through some really difficult situations.  But the struggle instilled in us this supreme belief: No matter what was in our way, we could overcome it.  I have absolutely no doubt in my mind we will do the same thing to this virus…

If everyone would quit whining and work together.  Seriously. 

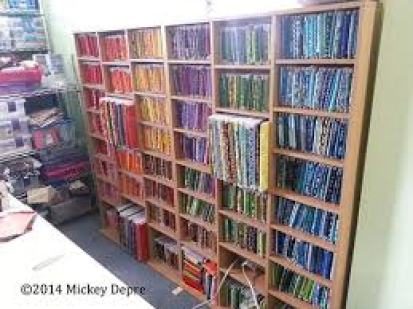
How does this virus and all of its press and social media coverage affect our quilting? Besides the obvious shortages of some supplies (think ¼-inch elastic for masks – lots of us quilters are making masks), shopping was the first major area it touched. For a while some North Carolina brick and mortar quilt stores couldn’t open.  Once they were deemed “essential” (for mask making), they could re-open.  But it was primarily curb-side service.  Once our Phase 2 came into play, retail businesses could “get back to normal,” but with strict social distancing, mask-wearing, deep cleaning, and hand sanitizing stations in place.  It’s a different retail world out there right now.  Most quilt stores are not huge establishments like Hancocks of Paducah.  The average quilt store owner is lucky if they have a couple of thousand square feet of shopping space.  This means only so many customers are allowed in the store at a time.  Which may also mean you come with a list so you can shop quickly and don’t browse too long. The owners must let other customers into the store in a timely manner.  In my mind, all this adds up to more on-line shopping and possibly even more brick and mortar quilt shops closing (I personally know two long-established stores that closed this week).  And there goes another piece of our quilting culture.  But at least we can still buy supplies. 

For me, the next quilting boat COVID sunk was guild meetings, bees, sit and sews, and classes.  Right now, none of these are meeting.  I imagine once we’re given the okay to meet in large-ish groups again, guilds will plan their meetings.  I am using the High Point Quilt Guild as an example because that’s the group I’m most active in.  I’m also on the executive board so I kind of have an idea of how things may work.  In one way our guild is blessed.  We’re small (but mighty).  We have around 40 members, of which about half show up at meetings.  So, the next meeting we’re allowed to have (hoping for July here – we had our last meeting in March) I anticipate we will have approximately 20 folks.  Fortunately, the fellowship hall we meet in is large enough to handle at least 30 members and keep social distancing in place.  We’re blessed.  However, I imagine serving refreshments may be out for a while.  It will probably be BYOS (bring your own snack).  But what about larger guilds or guilds that have smaller meeting rooms?  Will they look for another meeting place? A task certainly easier said than done.   Or will they split their guild into two groups, with the groups alternating the months they can meet, and Facebook livestream the meeting for those who aren’t meeting that month?  There’s not a whole lot of options out there for large guilds.  This has me worried because Quilt Guilds are a huge part of our quilting community.  The charity work they do, as well the education and preservation of quilting arts, is phenomenal. 

Quilt bees and sit and sews will also probably need to restructure.  Most of these groups aren’t too terribly large, but they generally meet in peoples’ homes.  Many of these groups may need to find alternate meeting places until the virus dies out or we get a vaccine.  Many, I’m afraid, may disband all together.  And that’s sad.  Really, really sad. And while I do think that quilt shops will continue to have classes, I imagine the class size will be limited due to social distancing rules.  The shops may need to have more classes to accommodate those who want to attend.  If a normal class size is 10, but social distancing dictates the store can only have four students plus the instructor in the room, offering the same class in two different time slots may be the answer. Of all the issues the virus has touched, classes may be the most workable. 

As COVID swept across our landscape, quilt show after quilt show cancelled – both small and large.  And this is understandable.  While a lot wasn’t known about the virus, we did know it spread easily.  If you’ve been to any quilt show (especially large ones such as the Paducah AQS Show or the Houston International Quilt Show and Market), it’s a fact the foot traffic through the quilts and vendor areas is shoulder-to-shoulder.  Given the social distancing guidelines, we know we can’t do this in the future.  At the present, the only solution I can see for larger quilt shows is to spread  the attendance out over more days.  I have a good example to back this up.

I live in High Point, North Carolina.  If you Google High Point, NC, one of the very first facts you’ll find is  we are the International Furniture City.  Twice a year, once in the fall and once in the spring, we host the Furniture Market.  Literally thousands and thousands of furniture buyers from all over the world descend on our city to purchase all the latest in home dec.  Due to COVID, we couldn’t have the spring market.  However, the market and city leaders decided  the fall market must go on…but differently.  They extended the normal market time from five days to nine, thus allowing more time for buyers to get in and out safely.  Of course, there will be other stringent measures put into place – mandatory mask-wearing, temperature checks, hand sanitizing stations, and announcements reminding folks about social distancing. 

It will be different, but the show will go on

I think the larger quilt shows may have to implement similar measures in the future if no vaccine is discovered for several more months.  Smaller, local, guild quilt shows may face an entirely different scenario.  I imagine the first issue will be actually finding a venue that A) will let you have a quilt show and B) be reasonably enough priced to let the group stretch the show out to another day if necessary.  This is super-tricky for guilds, who can tell you no venue is cheap and all of them can be hard to come by.  Usually, foot traffic at local shows is much less than at large ones, but part of paying for the show comes from the number of vendors you have on the floor.  If the vendors themselves not only have to social distance and have the space in their booth to allow their customers to social distance, you have to ask how many vendors can we put on the floor space available? How much will this impact not only the number of quilts that can be shown, but also the number of vendors we can have?  And how does this affect our net profit? 

And worst of all, is it even worth it to have a show?  Most guilds (mine included) raise the bulk of their operating funds from their bi-annual shows.  If possibly adding an extra day or limiting vendors bites away too much of the bottom line, guilds will have no choice but to look at other fund-raising options.

Lastly, let’s talk about quilt retreats.  I’ve always encouraged my readers and every quilter I know to attend at least one quilt retreat in their lifetime.  Some retreats are huge.  Again, we may have to extend dates and rotate one group in when another group rotates out.  We may have to limit the number of people that attend.  Or we may have to offer several retreat opportunities throughout the year.  Smaller retreat groups may not be affected at all, unless they cannot find a place to meet.  I do think that quilt classes and quilt retreats will be the areas least affected by life post-COVID.

Like everything else, the quilting landscape has now changed.  And despite my earlier rants, some of these changes I like.  As a former teacher, I’ve always manically wiped down things because cold viruses can live on surfaces, light switches, doorknobs, etc., for a good while. I’m completely on board with that.  And as far as making events less crowded, I’m good with that, too.  At times I’ve felt nearly claustrophobic at large quilt shows due to the press of people.  I’ll also add that washing your hands several times a day prevents a lot of viruses from spreading – not just COVID.  And I have absolutely zero problems wearing a mask.  I also have a hunch – based the number of sewing machines and yards of fabric sold during the Stay at Home orders – we may have a new bunch of quilting converts descending on guilds in the future.  I surely hope so.

But letting fear run and ruin the rest of your life?  I’m not good with that.  For my mental health, my quilt life must return to some semblance of normal now.  Shopping may be different.  Meetings might be different.  But if we wait until our quilt lives can return to complete normalcy, we may be waiting a long time.  I’m not willing to do that. 

The last issue I want to discuss is the politics of this entire event. I realize I’m probably dipping my toe in some boiling water at this point but please hear me out before clicking out of the blog.  If there is any area that absolutely should not be politicized, it’s quilting.  Quilts, quilting, quilters…they’re all an oasis for me.  All three soothe my soul and make me happy.  Unfortunately, the more I read on social media and interact in other arenas, I’m finding this no longer probable.  Quilts, quilters, and quilting have always been my safe space.  Political arguments may occur on the news (it never stops here), on some social media platforms, and in other group settings, but most of the time these differences haven’t raised their ugly heads in my quilt groups – either in person or on-line.  If differences of opinion have been raised, usually those differences have been respected.  I’m afraid COVID has split the camps even more divisively, even in my Holy Grail of Quilting.  I’m putting this advice out here from Thumper:

It’s okay to have different opinions. That’s part of what makes quilting and America great.

It’s not okay to be ugly to someone who has an opinion that’s different from yours.

Seriously.

Be nice.

Be kind. 

And love each other.  Life is too short.

Love and Stiches,

Sherri and Sam

Categories
Uncategorized

A Lifeline

When this blog is published, it will be sometime around the first week of June.  But if you remember my writing habits, you realize I’m writing this in May – as I like to work several weeks in advance.  So, if it’s somewhere around the first week of June, and North Carolina is still opening per Governor Cooper’s phase program, we’re now in the second phase.  Let me put something out right here:

COVID-19 sucks.

At this point, I haven’t had it and neither has anyone in my family, although I have a sneaky suspicion I may have had it around the last of January.  Remember my family’s trip to Disney World after Christmas?  We all came back with a “bad upper respiratory illness.”  Did the doctors call it COVID?  Nope.  But at that time, no one here was using that terminology.  We were all sick, it took weeks to get over, and we were all feeling terrible.  During the time we were at Disney, social distancing was non-existent.  It was crowded, cold, and had visitors from all over the world.  According to CDC reports, COVID could have been in this country since late November. So maybe….

Anyway, I really want some normality back in my life.  See….this is my life right now.

Can you spot Sam in the doorway? Notice the confused look on his face? He’s thinking, “Why is Mom home so much now?”

Summed up in two pictures, this is pretty much my existence.  I’m telecommuting for work and making masks.  I thoroughly dislike working from home.  I can never find where I put things, there’s always something else at the main office I need, and I miss people.  I’ve made over 500 masks, and while many of my quilting buddies are getting tons of UFOs finished, I’m not there.  I feel driven to fill a need (masks), and don’t have the hours in the day open for sewing.  All of this (as well as the sometimes daily hunt for basic needs like toilet paper), is making me feel off-kilter and anxious. 

In short, I’m stick-a-fork-in-me done with this.

However, there is one process  that gets me through some tough, trying times:  A list.  I realize this sounds lame, trivial, and on some level, asinine, but it works for me.  For those of us who have been lucky enough to see Frozen 2, the running theme throughout the entire, wonderful movie is “When you don’t know exactly what to do about a situation, just do the next right thing.”   And that’s what lists have done for me during this season of COVID 19.  I don’t have to think.  I don’t have to worry.  I just do the next right thing on my list.  Somedays it’s not real complicated.  Empty the dishwasher.  Finish the laundry.  Take the chicken out of the freezer to thaw for dinner.  Make a dozen more masks. Other times it’s more complicated.  See if the doctor will do a virtual appointment.  Fill  out the PPP papers.  Get ready for the workers comp audit that will be done via Zoom.   Buy a sympathy card for a friend whose father died from COVID (because there is no visitation or viewing or hugging during this time). 

I’ve been a list-maker for as long as I can remember.  It keeps me focused and on-task.  For quilters (or any other artist or crafter), they serve a two-fold purpose.  A list can tell me what I need to purchase to complete a project.  It also can put subtle pressure on me to finish certain steps so I can complete a quilt in a timely manner.  I don’t have to wonder what to do when I step in my studio – I just “do the next right thing.”  To me, a list is a gift.  It’s a road map.  It’s a GPS.  I may have to think to make the list out, but at least after, all I have to do is follow it.

List making is also an art.  Too much to do on the list can make you feel too much pressure to get it all done.  And that can result in not wanting to do anything, because you realize you’ve just set yourself up for failure.  There’s only so many hours in a day and not all of them need to be spent marking items off a list.  There has to be balance.  There has to be grace.

And sometimes there needs to be the grace to throw the list to the wind, because suddenly priorities have shifted.  Planners…plodders…people like myself who break down large commitments into smaller chunks of “doable” ideas love to live by a list.  But if we lack the ability to know when the list itself becomes the least important thing, then we haven’t grasped the concept of mercy and grace. 

So, what does all this have to do with quilting?  Arguably, lists are great for quilters.  They keep us on task.  They help us avoid starting yet another project before finishing the last one (okay…sometimes they do this).  They keep us from going off all willy-nilly in fabric stores and websites purchasing things we don’t need (okay…sometimes on this one, too).  They help us keep up with guild obligations.  They are wonderful quilting companions. 

Yet, sometimes, when life and circumstances throw us curveballs we never, ever expected, those lists become lifelines.  Do the first thing.  Then the second.  Get through the day.  Get through the week.  Get through forty days and then fifty.  Then two more weeks.  Two months.  Time marked by the rising of the sun, a list, and sunsets – that’s what it’s been like at my house.

I’m looking forward to the day I don’t have to look at rising COVID numbers and can find toilet paper and hand sanitizer at the grocery store.  I’m waiting in anticipation to the time I can find ¼-inch elastic at Hobby Lobby, Joanne’s, or almost any sewing website.  I can’t wait for guild meetings and in-person Sit and Sews.  I think I will faint with joy the next time I hear, “Booth or table?” 

I know some of you are feeing sort of the same way, and I wanted you to know, I get it.  I really do understand because I’m right there with you.  So, for perhaps just a little while longer, make your list.  Give yourself grace.  Social distance.  Wash your hands.  Wear a mask.  Make a mask.

And hold on tight to the thought that we will make it through this.

Love and Stitches,

Sherri and Sam

Categories
Uncategorized

Star-Crossed Blocks

“There is nothing like looking, if you want to find something. You certainly usually find something, if you look, but it is not always quite the something you were after.”
― J.R.R. Tolkien, The Hobbit, or There and Back Again

This morning, I went on a quest.  I went looking after a fact, a process that led me down the Google rabbit hole and didn’t let me back up for nearly three hours.  What was I looking for?  A number…an estimate…a guess of just how many quilt blocks have stars in them.  Know what I found?

Nothing.

Oh, I found star blocks aplenty, but as far as a firm number of exactly how many of these there are, no one was offering even an educated guess.  The closest I got to a figure was Pinterest – which had at the time of my search — 5,275 images of quilt blocks with stars on them.  Not satisfied with this, I opened my EQ 8 and searched for star quilt blocks.  This time I came up with 570 quilt blocks with stars in them. 

Annnndddd I found out that North Carolina has its own “official” star block!

North Carolina Star

Talk about being star-crossed.

Within the ranges of star blocks, there seemed to be just as many names for these blocks as there were blocks themselves.  And besides having a hard time pinning down numbers and names, the history behind star blocks is muddled.  One of the first ­printed mention of such a block is found in 1884 in Farms and Firesides Magazine.  And the article featured this star block:

This block has several different names, but it’s primarily known as the Sawtooth Star.  I imagine it was given this moniker because the starbursts around the center square reminds the viewer of the jagged teeth of a saw.  In this blog, I want to keep things as simple as I can, so I’m lumping star blocks into four different categories:

  1.  Sawtooth Stars/Variable Stars
  2. Feathered Stars
  3. Diamond Stars
  4. Set-in Stars

We’re not working with diamond stars or set-in stars right now.  I haven’t discussed the techniques used in those blocks yet.  We will get there, I promise, and those will come later.  We also will not touch on foundation pieced stars or stars made by English Paper Piecing.

Variable Star

Feathered Star

I lump Sawtooth Stars and Variable Stars (and to a degree, Feathered Stars) in the same category because of their construction elements.  While none of those star blocks look exactly alike, the construction process is similar – which is why I put them all in one category.  All of these blocks are comprised of squares, half-square triangles, and flying geese units.  With the Variable Star blocks, there is also the large square in the middle that you could design in a variety of ways (which is why I think it is called the Variable Star).  Sometimes you can even throw in a Quarter-Square Triangle unit. 

By now, if you’re  a regular reader of my blog, you can see what I’ve been leading up to over the past several weeks.  After spending some serious time learning about the construction of HSTs, FGUs, and QSTs, now it’s time to begin to put them to practice.  Let’s start by throwing some of the blocks in a grid. 

Gridded Sawtooth Block

When we put the Sawtooth Star in a grid, we can see that it’s really a star in a nine-patch setting.  It consists of flying geese, four small squares in each corner, and a large square in the middle. 

Gridded Variable Star

As grid out a Variable Star, we find out it’s a nine-patch, too, even though it may not look like it.  Four-patch units make up the corner squares and the middle square has been converted into its own nine-patch unit made up of a four-patches (to echo the corner squares), squares and rectangles.  Flying geese are used at the top, bottom, and sides.

Gridded Feather Star

Now let’s really kick it up a notch and look at a Feathered Star.  It’s is a little more complicated, but it’s one of my favorite blocks, especially when they’re set on-point.  At first glance, you may think it’s a nine-patch, but it isn’t. The diamonds at the tip of the star are set-in diamonds.  The large triangles on the sides and squares in the corners are also set-in.  What I want you to notice about a Feathered Star block is this:  It’s primarily made of half-square triangles, triangles, and squares – all techniques we’ve worked to perfect and  we know how to correctly handle the bias.    So while this complicated-looking block will have to wait until we work with set-in seams, I want you to be aware that as of this moment, you already successfully possess 90 percent of the skillset needed to correctly and confidently make this block.  Don’t be put off by its difficult looks.  Although I will be the first to admit when attempting this block, I would paper piece it because the half-square triangles are so small. 

Setting the Feathered Star aside, (that is another block for another day) because we know the Sawtooth Star and the Variable Star are nine-patches, we’ve just opened up a world of creativity.  By now you should know how to execute perfectly wonderful half-square, quarter-square, and flying geese units.  You know how to make four-patches and nine-patches.  You also should know your preferred technique to make these units. Theoretically, we should be able to take the either star block and make it look either traditional:

Or a little more exciting:

Because star blocks are used so often in quilt designs, it’s important not only to know how to make them well, it’s also essential to think about how color can completely change up your design look.  Take the Sawtooth Star Block for instance.

This is the traditional look:

If we picked modern quilt colors, we get this effect.

If we use a two-color scheme, it looks completely different.

And if we reversed the background color and the star color, we get another completely different vibe. 

Now let’s play with scrappy.

As you can see, color choice and placement can give a completely different look to a block.  When you’re considering fabric for these stars, just remember that “cool” colors (blues and greens) will look as if they’re receding into the background while warm colors (reds, yellows, and oranges)  will “pop” out from the background. 

Both of these quilts are Sizzle, a 2019 BOM from The Quilt Show. It was designed by Becky Goldsmith. The top quilt features predominately cool colors and the bottom one is primarily warm colors. Similar though the patterns are, note how differently the warm and cool colors not only affect the appearance, but also how you feel about each quilt.

So, in the future if you’re working with a star block like this:

You may want to use cool colors on the parts of the stars that appear further back and use a warmer color in the parts that appear closer to the viewer.  Just remember the rule about purples and lime greens – even though technically they fall in the cool spectrum, when placed next to a warm color, they tend to “heat up” a bit. 

Lastly, let’s consider how most effectively set star blocks.  Working with this block:

Let’s put it in a traditional horizontal row setting with sashing and cornerstones. 

This is a nice quilt.  But look what happens when you construct your sashing out of the same fabric as the background in the star blocks:

And look at what happens when you completely remove the sashing:

Can you see the secondary design?

To me, the appearance of the star blocks radically change in the last two quilt settings.  Now let’s do the same thing, but let’s set the blocks on point.

Traditional:

Sashing the same color as the background.

Sashing completely removed.

Can you see the secondary design on this one?

On-point setting for the star blocks with connector blocks.

On point setting with the star blocks used as the connector blocks. 

To wrap this blog up, it’s important to remember that quilting is like any other thing you want to learn – the more you do it, the better you become and in order to do the more advanced steps correctly, you first have to learn the beginning steps really well.  Over the past several blogs we’ve discussed how to make half-square triangles, quarter-square triangles, nine-patches, four-patches, and flying geese.  For most of these units, we’ve looked at several different techniques for each of them.  It’s important for you to find out which technique works for you.  On top of this, we’ve worked through the different mathematical formulas involved in estimating the yardage needed for these techniques. 

In other words, you should be well prepared to move onto the next few blogs about a few more advanced techniques – Y-seams and 60-degree angles. 

Stay tuned.

Until next week, Level Up That Quilting!

Sherri and Sam

Categories
Uncategorized

QSTs, Geese, and Ganders

We’ve talked a lot about triangles this year – setting triangles, corner triangles, half-square triangles – we’ve parlayed around the three-sided form in lots of aspects.  We’ve discussed how to make them, how to cut them, and how to trim them.  We’ve learned how to handle bias, that spray starch is a life saver, and (hopefully) by now you’ve discovered which is your favorite way to make triangles.  Then we took this information and combined it with some math so we could learn how to estimate the yardage we need for our own quilt.    

While we were playing around with estimating yardage, you saw me put the blocks into grid form with EQ 8.  Knowing if a block is a four-patch, nine-patch, sixteen-patch, or-even-bigger patch is the first step in deciding how much yardage you need, and going through this process, we only used HSTs.  However, this week I want you to grasp the concept that there is more than one way to fill in those units in your quilt block – they don’t have to be HSTs, although those are used quite often in design work.  Today I want to talk about two other backbone-units used in quilt blocks – the Quarter Square Triangle (QST) and Flying Geese. 

A picture is worth a thousand words.  This is a QST:

It’s a square comprised of four triangles.  Here are some quilt blocks that use these:

And there are some quilt blocks made entirely of them.  These blocks are sometimes called Hourglass Blocks.  Like HSTs, the design possibilities are endless. There are some other pros about these block units, too:

  1.  They’re only a tad more difficult to make than HSTs.  As a matter of fact, you begin with HSTs.
  2. The “Sandwich Method” of construction can be used.
  3. You never have to deal with bias edges.
  4. There are no special tools you need to purchase, although you may want to purchase a square ruler when trimming the block to size.
  5. You can make them larger than required and then trim them down for complete and utter accuracy.
  6.   It’s easy to estimate yardage.
  7. They don’t need to be paper-pieced, so no papers to be removed.
  8. Like HSTs, you can make two at a time.

There are a few cons:

  1.  Using this method with three or four fabrics creates mirror-Image blocks, and most patterns require identical blocks.
  2. The blocks must be marked on one of the backs.

So, while the pros outweigh the cons, there just may be a few issues you have to be particularly careful about. 

You can take nearly any block that you can grid out and use a QST in one of those grid units.  They can be turned and rotated to look the way you desire.  Then you can use the QST formula to make them.  It’s really EASY – simply take the finished size of the QST and add 1 ¼-inches to it.  Cut one square this size from two different fabrics.  Let’s try it. 

This is the lovely Ohio Star Block.  I’m using this block for a couple of reasons.  First, I have a lot of quilting friends that are from Ohio.  Second, this is about the easiest QST to work with.   This block finishes at 6-inches and has four QSTs.  When we grid this block out:

We know that each grid unit is 2-inches, finished.  Now let’s apply the QST formula to see how big to cut our fabric squares. 

2-inch finished blocks + 1 ¼-inch seam allowances = 3 ¼-inches.  We need to cut our fabric squares 3 ¼-inches. 

To make the QST, we cut two 3 ¼-inch fabric squares out of two different fabrics. 

Now we proceed to make HSTs, using the Sew and Slice method.  Draw a diagonal line from one corner to another on the back of the lightest colored fabric square.

Stitch ¼-inch away from each side of the line.

Cut the square apart on the diagonal line drawn on the backside of the block.

Tada!  Two HSTs.  Press the HSTs seam to the darker fabric.

On the back of one of the HST units, using a ruler and pencil, draw a diagonal line from one corner to the other.  This line bisects the original seam. 

With right sides together, alternating light and dark fabrics, align the outside edges of the two units and nest the seam allowances together. 

At this point, I use a couple of pins to hold everything together.  Then you proceed as you normally would to make a HST.  Stitch ¼-inch away from the drawn diagonal line, then cut apart along the drawn line. 

Tada!  Two QSTs. 

Notice I pressed the final seams open to reduce bulk.

If you have used the formula that adds a 1 ¼-inch seam allowance to the finished block unit size, all you have left to do is trim off the dog ears and continue on with the block.  But if you’re like me and would rather make your blocks a bit bigger and then trim them down, here’s the formula to use:

Size of finished block unit + 1 ½-inches for the seam allowance.  So, taking our 2-inch finished block unit, here’s how that would look:

2-inch finished block unit + 1 ½-inches for the seam allowance = 3 ½-inch square.  I’ll cut my fabric squares at 3 ½-inches and then proceed to make my HSTs.  Once those are done, do NOT cut those down to the correct size.  Continue on to make the QSTs.  Once those are made then you cut them down to the correct 2 ½-inch size, unfinished. 

To trim these oversized units, find the center of the block until by dividing the unfinished size by 2.  In this case we divide 2 ½ by 2 and get 1 ¼.  Find the intersection of this number on your square ruler and place this point over the center of your block, aligning the 45-degree line with one of the seam lines.  Trim the excess fabric from two sides. 

Turn the block so that the other two edges are in position to be cut.  Align the midpoint at 1 ¼-inches on the ruler with the center of the patch.  The cut edges should like up with the unfinished block size of 2 ½-inch mark on your ruler.  Trim the final two edges. 

This technique works well until you change up your block to something like this:

And since the triangles in the QSTs are different fabrics, this time the QSTS require a bit more planning, but it can be done!  The steps are the same as the QSTs above, we just have to plan our fabric placement a little more carefully.

First, let’s find out the finished size of our QSTs.  In this case, the we’re keeping them the same size as our previous block – 2-inches.  So, let’s do the math.

2-inch finished block + 1 ¼-inch seam allowance (or 1 ½-inch if you want to make them larger and cut them down) = 3 ¼-inch (3 ½-inch).

We will need to cut out two different pairs of fabric squares –

One 3 ¼-inch (3 ½-inch) block of blue fabric + One 3 ¼-inch (3 ½-inch) block of white

And

One 3 ¼-inch (3 ½-inch) block of blue fabric + One 3 ¼-inch (3 ½-inch) block of green fabric

Then proceed as we did above. 

The primary issue you’ll need to keep in mind with this particular technique is it produces mirror image blocks.  Sometimes you can use them, but sometimes you would have to discard one of the pair.  If there are lot of identical QSTs in the quilt and you can’t think of anything creative to do with the discarded QST, it may be a good idea just to opt with cutting the individual triangles out and sewing the QST together that way.  Otherwise you’re wasting a lot of fabric and money.

It’s important that QSTs are taken into consideration when designing your blocks and your quilts.  It adds a little bit more zing to how things look.

The other “backbone” block we’re looking at today is Flying Geese.  

And while I’ve made probably literally thousands of these, it wasn’t until a few years ago when I found the construction method that worked for me, that I stopped dreading making this block.  That’s right.  For years I dreaded making this block because they always seemed to come out wonky, the wrong size, or I would chop the beak off the goose.  Once I discovered a few techniques that prevented all of these issues, I became good with the Goose.

The first step I want to go through with Flying Geese is to graph a couple of blocks out.  First let’s look at this Flying Geese block:

When it’s shown in a graph, we discover each of the geese is actually made from two HSTs.

 It’s the fabric placement that makes the Flying Geese unit (FGU).  If you choose to use HSTs to make the FGU, there are some trade-offs.  You don’t have to worry so much about cutting the beaks off, but if the HSTs aren’t lined up just right, the beak will not be centered.  If you make FGU this way, the Sew and Slice method can be used, which should make estimating the yardage easy for you by now.

A Chevron Block I made for my guild’s 2020 Mystery Quilt. It looks like rows of flying geese, but it’s simply carefully arranged HSTs.

Now let’s take a gander (get it… goose…gander?) at the other type of Flying Geese block. 

When this block unit is shown in a graph, we can see that it’s not made from HSTs.  It’s comprised of a large triangle in the center and two smaller triangles on either end. 

When you look at those three units, the first thought that may go through your mind is “That’s a lot of bias to deal with.”  And if that’s what you’re thinking, you are absolutely right.  If  you cut three triangles out to construct this Flying Geese Unit, even if you heavily spray starch them, the odds are that the bias will stretch and your unit will come out the wrong size, wonky, or stretched hopelessly out of shape.  When I began quilting in the early 1980’s, I was taught to make three triangle units and sew them together.  This was the start of my animosity towards Flying Geese.  I knew little to nothing about bias then and nearly all of my units had something wrong with them.  I avoided Flying Geese at all costs. 

Then I learned about paper piecing and for years I paper pieced them. This worked well, but if there were large FGUs in the quilt, that was a lot of additional fabric (because remember in paper piecing, you’re trading fabric for precision).  While I was assured of intact beaks and perfect size, I was paying for a good chunk of extra fabric.  Thus began my search for other ways to construct my FGUs.  And while I found several different methods, I still resort to paper piecing these if they are A) small units or B) they are the Circling Geese Units. 

Circling Geese Block.

The first option in FGU construction is Flip and Sew method.  I mentioned this method when we were working with Snowball Blocks in the blogs concerning on-point quilt yardage and connector blocks, but didn’t explain the method.  It’s not difficult to do and it’s easy to figure yardage, so it’s a win-win. For this method, first take find the width and height of the finished FGU.  Flying Geese Units are rectangles, so while the methods of estimating yardage and construction are the same, you have to remember that  for at least one step of this procedure you won’t be cutting out squares, but rectangles.  Let’s say we’re making FGUs that finish at 2-inches high by 4-inches wide. 

For the “Goose” part (the large triangle in the center) you take the finished width and height and add ½-inches to each for seam allowances.  So, you would cut the “Goose” unit 2 ½-inches x 4 ½-inches. 

For the “Sky” part of the FGU (the two small triangles on either side of the large triangle), we will start with squares instead of triangles, which means we’re not dealing with any bias.  These squares will need to be the height of the FGU plus ½-inch for the seam allowance, and in this case that means the squares should be cut at 2 ½-inches.   On the back of these squares, draw a diagonal line from corner to corner.

Line the one of the sky squares up on the goose rectangle like this:

And sew on the drawn diagonal line. 

At this point, I flip the lower half of the square up and lightly finger press it to make sure it looks okay.

If it doesn’t I rip the stitches out, re-position, and sew again.  If it looks fine, I trim the upper half of the square off, leaving a ¼-inch seam allowance.

Then I press with a hot dry iron and shot of spray starch. 

Position the second square like this:

And proceed the same way as you did with the first square.

At this point, your FGU should look like this.

It’s super important that there is a ¼-inch seam allowance at the top of the large triangle.  If you don’t have this, there’s a chance you’ll cut off the top of the triangle when you join your FGUs together (also known as chopping the “beak” off of the goose). 

The way to avoid this as you’re sewing your units together is to look for the “X” the “sky” triangle seams made.  When joining the FGU, make sure to sew slightly above the center of the “X” (my preference), or in the middle of it.

Way too many stray threads in this picture! In my defense, it was late!

Untrimmed Units

If you’re designing your own quilt blocks, you may wonder how to proportion an FGU.  It’s a little more challenging since we’re working with rectangles.  How do you know how tall and wide to make these?  It’s not hard.  The height is exactly half the width. Take for example a block unit width of 4-inches, finished.  That means the height is 2 inches.  The FGU would be 4-inches wide x 2-inches tall.  If you need to calculate by height instead of width for some reason you would multiply instead of divide.  If the space you need to fill is 2-inches tall, then you would double that to find the width – 4 inches.  This formula keeps the FGU proportionate, but it’s not a hard, fast rule.  You can play with the space and proportions to fit your needs, but the FGU won’t look like a “traditional” one.  But that’s okay – we’re all about creativity. 

There is a way to make the FGUs a little bigger and cut them down.  Simply add ¾-inch to the finished size instead of ½-inch.  So, for our 2-inch x 4-inch finished unit, we would cut the rectangle out at 2 ¾-inches by 4 ¾-inches and the squares out at 2 ¾-inches.  The only issue you must be careful about with making the units larger and then cutting them down is the “beak.”  If you trim too much, you stand a chance of cutting the tip of the triangle off. 

Thus far we’ve talked about paper piecing and the Flip and Sew Method for making the FGU.  There is one more way to make these units and this by far is my favorite way to construct them.  There is no bias and no fabric waste.  As a matter of fact, this technique is called the No Waste Flying Geese Method.  This makes four FGUs, two at a time.  Once again, no actual cutting of triangles is involved.  And unlike the Flip and Sew Method, we only cut out squares.  The math for this is a little different, too.  Let’s go over that and then we will move onto the actual construction. 

Still working with our 2-inch by 4-inch finished rectangle, we take the width (4) and add 1 ¼-inches. 

4-inches + 1 ¼-inches = 5 ¼-inches.  Cut a 5 ¼-inch square out of the “goose” (large triangle) fabric.

Now for the “sky” (smaller triangles).  To get this, take the height of our finished FGU (2-inches) and add 7/8-inches to it. 

2-inches + 7/8-inches = 2 7/8-inches.  We cut the smaller squares 2 7/8.  And you will need four small squares of sky fabric for each large square of goose fabric you cut out. 

As you can see, this is easy math and it makes estimating yardage easy, too.  But now comes the fun part – the construction.  To me, making FGUs this way is a little bit like magic.

  •  Place two of the small squares, right sides together, on opposite corners of the large square.  The squares will overlap a little in the center and that’s okay.  They’re supposed to with this technique. 
  • Draw a diagonal line from corner to corner through the small squares and pin them to the large squares.
  • At this point, things work a little like the HST Sew and Slice method.  Sew a seam ¼-inch away from both sides of the drawn line. 
  • Cut along the drawn line.
  • At this point, your FGU looks like this:  Kinda looks like wonky hearts doesn’t it? 
  • Take one of these units and place a small square on the corner of the large triangle.  Draw a diagonal line on the small square and pin it to the “goose” fabric.  I know some of you don’t like to pin, but I’ve found with this method, if I don’t pin, my fabric shifts too much, especially if I’m chain piecing.
  • Again, sew a seam ¼-inch away from both sides of the drawn line.  Cut apart along the diagonal line.  Press towards the small triangles.

  • To trim the block, find the center point of the height of the unfinished block and line up that measurement with the 45-degree angle on the square ruler. 
  • With these unfinished 2 ½-inch x 4 ½-inch blocks, the center point is 2 ¼-inches.  Trim across the top and right-hand sides.  Rotate the block and trim the remaining sides.  You won’t be able to use the 45-degree angle, so line the point up with the ¼-inch mark on your ruler, with the trimmed edges aligned at the 2 ½-inch and 4 ½ ruler lines.  Trim the block to 2 ½ x 4 ½-inches. 

Some words of wisdom (or warning) at this point.  From time to time when making FGUs, your block may be off.  There are lots of things that contribute to this – weight of thread, your needle bobbles, your fabric shifts, the cat jumps up on your sewing table (not that Sam would ever do anything like that…).  If your block is off a bit, never, ever cut the tip off your triangle.  Shift your ruler up or down to ensure that point stays intact.  This may mean your block is slightly larger or smaller, but you can always ease it into the block when you sew  your pieces together. 

I like to mix my FGUs up.  The standard “idea” about these geese is the prominent fabric is the “goose” fabric and the “sky” fabric is a lighter color.  But look at the difference it makes when you reverse these. 

I also like to take my left-over scraps and make my “sky” blocks out of different fabrics.  This really helps pull a scrappy quilt together. 

Let me also throw this fact in here — there are specialty rulers designed for nothing but flying geese. You can google that quilting tool and literally dozens of options appear. However, I’m one of those people who won’t buy a ruler if I can’t use it for more than one thing. If I purchase a specialty ruler for one technique, you can bet your bottom dollar, it’s a heck of a ruler because as a rule, I don’t do that. This is why FGU specialty rulers aren’t in this blog. I want to use rulers and tools that you should already have in your quilting space.

Now you have two more block units to add to your design tool chest.  There are lots of construction methods in your quilting arsenal, too.  And you know how to estimate fabric.  Any thoughts on where this may be taking us?

Until Next Week, Level Up Your Quilting!

Love and Stitches,

Sherri and Sam

Categories
Uncategorized

On-Point Planning

This week we’re back to estimating fabric yardage again, but now we’re looking at on-point quilts.  If you have not read my two April blogs dealing with estimating yardage for a horizontally set quilt, it would be a good idea to go back into the archives and read those first.  I’m glossing over some of the details of the process in this blog because I spent so much time on them in the two previous blogs.  In general, on-point quilts take a bit more material than horizontally set quilts, due to setting blocks, side triangles, and corner triangles.  If sashing and additional borders are included, the yardage increases again.  Personally, I love an on-point setting.  There’s just so much to work with.  And while estimating the fabric yardage goes through much of the same steps as a horizontal row quilt, there are two additional steps we have to deal with – the side triangles (also called the setting triangles), and the corner triangles.  Not only are both types of triangles different sizes, they are also cut differently.  I’ll show you how to work with these later on in the blog. 

Step One:  Analyze the Main Block

We need to determine what kind of block this is.  Is it a four-patch?  A nine-patch? 

By looking at the block’s graph on  EQ8, we know it’s four block units across and four block units down, so it’s a sixteen-patch (4 x 4= 16).  The block is also 10-inches finished.  We have to know how large to make each block unit, so let’s divide 10-inches by 4 units per side.  This give us 2 ½-inches.  Each block unit in our 10-inch block will need to finish at 2 ½-inches square.  We also can see that each block unit is a half-square triangle.  This is good, because despite how much more complicated this block appears when compared to the Birds in the Air Block we used in the other blog, it’s actually really easy to estimate the yardage.  Let’s get to it!

Step Two:  Make a list of all the different types of HSTs in the block

Four HSTs in blue and white

Four HSTs in purple and white

Four HSTs in yellow and white

Four HSTs in blue and purple

There are twelve 10-inch squares in the quilt, so we know that the amounts we figure for each HST will be multiplied by 12 to give us the total.

In order to preserve the bias, we will also use the Sew and Slice method to make the HST units.  This means we can get two HSTs per block unit cut from our strips. 

  1.  For the blue and white HSTs, we know they need to finish to 2 ½ inches.  In order to use the Sew and Slice method, we need to add 7/8-inch to 2 ½-inches.  This gives us 3.375 or 3 3/8-inches.  Couple of personal issues I deal with at this point.  First, I hate dealing in eighth-inch increments on a cutting mat.  The lines are small and at my age and eyesight, it’s super-easy to end up with a bunch of inaccurate cuts.  Second, I like to make my HSTs larger and cut them down.  So, I am rounding that 3 3/8 up to 3 ½-inches.  This will allow me to trim for accuracy and make the math much easier.  Since there are four blue and white HSTs per block and there are 12 of these blocks in the quilt, that means I have to make 48 blue and white HSTs for this quilt.  Working with 40-inches of usable fabric and cutting 3 ½-inch blocks, we divide 40 by 3 ½ and know we can get 11.42857  squares per 3 ½-inch strip.  Round that down to 11. We also know we can get two HSTs per 3 ½-inch square, so we can divide the 48 needed by 2.  We need to determine how much blue fabric we need for twenty-four 3 ½-inch squares.  To find this out, divide the 24 squares needed by the 11 squares we can get per strip.  This gives us 2.181818 – or three 3 ½-inch strips.  Multiply 3 ½ by 3 and then divide by 36 inches per yard to get the amount of blue fabric required – 3 ½ x 3 = 10 1/2      

               10.5/36 = .291667

or 1/3 yard of blue fabric.  Put that amount on your fabric chart.  I will also add 1/3 yard to the white fabric on my chart, since the other half of this HST is white.

  •  There are also four purple and white HSTs in a block, so the math is just a repeat of what we did for the four blue and white HSTs (I told you this block was super-easy). 

4 purple and white HSTs x 12 blocks in the quilt = 48 purple/white HSTs

40 inches usable fabric/3 ½-inch blocks – 11 (rounded down)

2 HSTs per 3 ½-inch block cuts the 48 needed in half to 24

24 squares/11 squares per 3 ½-inch strip = three 3 ½-inch strips

3 ½ x 3 strips needed = 10.5

10.5/36 = .291667 or 1/3 yard

           We need 1/3 yard of purple fabric and another 1/3 yard of white fabric, since the other half of the purple HST is white.  Taking what we know and moving it forward to the yellow and white HST, since all of the numbers are the same, we know we need 1/3 yard of yellow material and another 1/3 yard of the white.  Be sure to add all of this to your fabric chart. 

  •  The purple and blue HSTS that form the pinwheel in the middle of the block are estimated the exact same way, but remember to add an additional 1/3-yard to the blue and an additional 1/3-yard to the purple. 
  • Make the HSTs and trim them down to the needed 2 ½-inches. 

Step Three – Design your setting blocks

At this point, we need to return to our design concept.  Do we want sashing between the on-point blocks?  Do we want our setting blocks to be plain or do we want to use some connector blocks?  Do we want sashing and pieced blocks?  This is a personal decision, but I want to work with sashing and pieced blocks.  I will use the traditional snowball block and will use non-pieced sashing, just to keep things easy right now.  If I decided to piece my sashing, I would simply treat the sashing like a quilt block and estimate the fabric amounts in that same way.  So right now, let’s take a look at the snowball block and work with the design of it to figure out how much yardage we need. 

With this block, we’re looking at a lot of open space in the middle and blue triangles in the corners.  However, when we try to “grid” this block out to find out if it’s a sixteen patch (like our primary design block), we get this:

Not a whole of help, is it?  Let’s look at what we know.  Since the primary design block finishes at 10-inches, we know that the snowball blocks will need to finish at 10-inches, too.  That’s the easy part.  But we want the triangles in the corners to match the triangles in the HSTS.  We don’t want them too small or too large.  What we must do at this point, is divide 10 by the number of grids on the side of the primary design block, which in this case is four – 10 divided by 4 = 2 ½.  The triangles will need to fall into that 2 ½-inch grid allotment. 

I’m using the Flip and Sew method to make the triangles, which is the easiest way to do corner triangles on a snowball block or flying geese.   Instead of cutting triangles out, we’re cutting out squares, sewing on the diagonal, and then trimming the extra away.  This method doesn’t expose the bias, so it keeps everything from stretching out of shape.  To do this, we need to take the 2 ½-grid allotment and add 7/8 to it.  This gives us 3 3/8.  And as much as I hate working with eighths, I’m going to have to do it at this juncture because I can’t make these larger and trim them down like I did in the HSTs in the primary design block. 

There are six snowball blocks, with four blue triangles in each corner.  The math for this estimate will work like this:

6 snowball blocks x 4 block units for each corner = 24.  We need to cut twenty-four 3 3/8-inch blocks. 

Working with 40-inches of usable WOF, divide 40 by 3 3/8 and that equals 11.85185.  Round that down to 11 – we can get eleven 3 3/8 blocks per strip of fabric. 

Divide the number of blocks needed – 24 – by the number of blocks we can get per strip – 11—and that comes to 2.181818.  Round that up to three. 

To get the blue yardage needed, multiply the 3 strips by 3 3/8.  This equals 10.125.  Divide 10.125 by 36-inches in a yard and we get .18125 or ¼-yard.  Add an additional 1/4-yard to the blue fabric on your chart.

The white fabric is a bit easier to math out.  We need six 10 ½ inch squares, which will finish to 10-inches.  Divide 40-inches of usable WOF by 10 ½  and we get 3.809524.  We can get three 10 ½-inch squares per strip of fabric.  We need six blocks, so we know we need to cut 2 strips.  Multiply 10 ½-inches by 2 to get 21.  Divide 21 by 36 and that comes to .583333 or 5/8-yard.  Add an additional 5/8-yard to the white fabric on your chart. 

Step Four – Sashing and Cornerstones

I think I want to make my sashing 3-inches, finished.  The first question I must ask before I estimate yardage for this, is does 3-inches conform to  the Golden Ratio?  I’ll have to math it out to be certain.  We multiply the size of the finished block – 10-inches – by the GR – 1.618.  This gives us 16.18, which we divide by 4 (since the block has four sides).  Now we have 4.045 or 4-inches.  That would be the widest we could make it.  When figuring the smallest sashing we could make, we come up with (10 x .618)/4 = 1.545 or 1 ½-inches.  Since 3-inches falls between those extremes, I’m good to go.

We will need to cut 48 pieces of 10 ½ x 3 ½ strips of blue fabric.  To determine this yardage, we need to:

Divide 40-inches of usable WOF fabric by 10 ½  (the length of the sashing strip) = 3.809524.  We can get three 10 ½ sashing pieces per cut. 

Divide 48 by 3 to see how many strips to cut = 16 strips

Multiply 16 by 3 ½ (the width of the unfinished sashing strip) = 56.

Divide 56 by 36 (the number of inches in a yard) = 1.555556 or 1 ½-yards.  Add 1 ½ yards to the blue fabric category on your chart. 

Since the sashing is 3 ½-inches wide, the cornerstones will need to be that width, too.  If we look at our design, we can see we need 31, which we need to break down into 17 squares and 14 triangles.  Let’s see how to cut the triangles first, because we already know how to do the squares. 

I will be introducing a new number here — 1.414.  What is this number?  Consider it kind of the Golden Ratio for triangles.  Technically it’s called the Root Mean Square (RMS) and it’s used to determine 45-degree angles.  It’s also used when determining voltage, but that’s another blog for another day.  Simply think of it as kind of the Golden Ratio for triangles.  I’ve also heard it called “Quilter’s Cake.” To use this, we take the finished size of the block needed and multiply it by 1.414 and add 1 ¼ -inches for seam allowances.  So, let’s use this to determine the triangles needed in the cornerstone setting. 

We know the finished size of the cornerstone square is 3-inches.  Multiply 3 by 1.414 and we get 4.23725 or 4 ¼ -inches.  Now add 1 ¼-inch to 4 ¼-inch and we get 5 ½-inches.  We need to cut 5 ½ -inch squares and then sub cut these twice on the diagonal for our triangles.  I’m going to park this little fact right here:  There will come a time in this quilt design when we divide by 1.414 to get our corner triangles for the quilt center.  The reason we multiply by 1.414 and get a larger number this time is that we need to cut these triangles with their long side on the straight of grain to avoid as much stretching as possible.  With an on-point quilt, any side triangles – whether they be in cornerstones or setting triangles – are multiplied by 1.414 before adding the 1 ¼-inch seam allowance.

Now for the math part.  We will need to cut 5 ½-inch squares and we know we need 14 triangles.  Since we get four triangles per 5 ½-inch square, divide 14 by 4. 

Cut the sashing triangles and the setting triangles twice on the diagonal,

14/4= 3 ½ — Let’s round that up to four 5 ½-inch squares.  Then we divide 40 WOF by 5 ½-inches to see how many squares we can get from a strip of fabric:

40/5.5 = 7.272727.  We know we need one 5 ½-inch strip of fabric.  When we divide that out for yardage (5.5/36) we get .152778 or 1/8 yard.  I’m making my cornerstones out of yellow fabric, so I add that to the yellow yardage. 

That takes care of the triangles, now we have to work with the squares, and this should be pretty straight forward by now:

We need seventeen 3 ½-inch squares. 

40 WOF / 3.5 = 11.42857

We can get eleven 3 ½-inch squares per strip, so we need two strips of yellow I order to get our 17 squares. 

2 strips x 3 ½-inches = 7 inches

7-inches/36-inches in a yard = .194444 or ¼ yard.  Add ¼ yard to the yellow fabric. 

Step Five – Setting Triangles and Corner Triangles

 If you look at this diagram of the quilt at this point, you can see we have to add some triangles along the sides and corners for our top to have even edges, so we can add borders.  By looking carefully at the diagram, we can see that the triangles along the sides are larger than the triangles at the top and bottom corners.  And since we’ve cut our triangle cornerstones, we are already acquainted with the math formula we need to get the side triangles right (these are also called setting triangles and often the two terms are used interchangeably). 

The finished block size of our primary design block as well as our snowball blocks is 10-inches. 

10 x 1.414 = 14.14 or 14 1/8-inches.

14 1/8 + 1 ¼ seam allowance = 15 5/8.  We will need to cut the square to make the setting (side) triangles 15 5/8-inches.  We need 10 setting triangles.  Since we can get four triangles per 15 5/8-inch block, we divide 10 by 4 and get 2.5.  We round that up to three –we need three 15 5/8-inch squares.  To figure out how many squares we can per strip of 40-inch WOF, we divide 40 by 15 5/8.  This gives us 2.56.  Round that up to three.  We will need to cut three 15 5/8-inches wide.  Multiply 3 x 15 5/8 and that gives us 46.875 or 46 7/8 inches.  I will round that up to 47. Divide 47 inches by 36-inches and we get 1 1/3-yard.  Since I’m making my side triangles out of purple, I’ll add the 1 1/3-yard to the purple. 

The left and right, top and bottom corner triangles are cut differently and estimated differently than the side triangles.  Let’s work with the estimating first, and then I’ll explain how the cutting process works. These triangles are smaller than the side triangles, so instead of multiplying, we divide.  Take the size of the finished blocks and divide by 1.414, and then add 7/8-inch for the seam allowances.  In this case, these figures look like this: 

10-inch finished block/1.414 = 7.072136 or 7 1/8-inches.

7 1/8-inches + 7/8-inch seam allowance = 8-inches.  We need to cut our squares at 8-inches.  However, instead of cutting this square twice on the diagonal, only cut it once.  With this being the case – getting two triangles per 8-inch block, we need to cut two blocks to get the four needed triangles.  So, let’s estimate the fabric needed.

40 WOF inches / 8 = 5 – so we only need one 8-inch strip of fabric.

8 / 36 = .222222 or ¼-yard.  I need to add an additional ¼-yard to the purple fabric.

We cut these squares once on the diagonal so that the short sides of the triangles will be on the straight of grain and (hopefully) won’t stretch out of shape, as they are on the outside edges of the triangle.

Step Six – Borders

The first border added to this quilt is a solid border.  It will be 6-inches in width and the vertical strips will measure 85 ½-inches and the horizontal strips will measure 67 1/8-inches.  I think the blue fabric would look really nice in this position, so let’s estimate the material needed.  Like our horizontal row quilt, we worked with a couple of blogs back, we will cut the borders WOF.  Proceeding as normal….

Multiply 85 ½ x 2 (because we need a left and right vertical border) = 171-inches of fabric needed

171 divided by 40-inches of usable WOF = 4.275.  We will need five strips of 6 ½-inch fabric.

5 strips x 6 ½-inches per strip = 32.5 inches of fabric

32.5 divided by 36-inches in a yard = .902778 or 7/8 yard.  I would round that up to 1 yard and add that yardage to the blue fabric on your chart.

For the horizontal top and bottom border, we know at this point, the quilt measures 67 1/8-inches.

Multiply 67 1/8 x 2 = 134.25 or 134 ¼-inches of fabric is needed

134 ¼ divided by 40 WOF = 3.35625.  We need four strips of 6 ½-inch fabric.

4 x 6 ½ = 26 inches of fabric

26 divided by 36 = .722222 or ¾ yard.  You could leave this yardage or round it up to a yard.  I’m rounding it up to one yard more of blue fabric and putting that on my chart. 

This is how I plan on designing the last border:

I like this arrangement for a couple of reasons.  If you can’t find the perfect focus fabric for the border, this design would still pull all the quilt’s colors together, and t uses up scraps.  In addition, if you are making a quilt from solid colors, this is just a perfect finish.  You could piece this border in color blocks just about any way you want to – it depends on how you want the quilt to look.  And by now, you should certainly have the math skills to do it.  At this point, the left and right side of the quilt measures 85 ½-inches.  I want this last border to measure 8-inches wide, which will go nicely against the 6-inch solid blue border. I really wish I could throw in some magical math formula that could show how I came up with the proportions I designed, but in all honesty, I just played with sizes until I came up with something I liked.  The purple part of the border is actually two pieces of fabric, each 29-inches long (unfinished).  The yellow blocks are 15-inches long (unfinished).  I did not want any of these blocks pieced, as I feared it would affect the quilt’s appearance too much.  Therefore, the math works a little differently with this part.

Each of the purple strips is 29-inches x 8 ½-inches unfinished.  I need four of these. 

8 ½ x 4 = 34-inches

34-inches divided by 36-inches = .944444 or 1 yard.  Add that to the purple material.

The yellow blocks are 15-inches long and I can get two per 40 WOF strip.  So, I need two 8 ½ -inch strips of yellow.

2 x 8 ½ = 17-inches

17-inches divided by 36 inches = .472222 or ½ yard.  Add that to the yellow fabric. 

Now for the top and bottom borders.  These are 83 3/8-inches.  Since these aren’t the same size as the left and right borders, we can’t use the same size blocks as we did on the vertical borders.  The first step I took with the top and bottom borders was to go ahead and figure in the blue cornerstones.  Those are square, so each of those finish at 8-inches x 8-inches.  Let’s estimate that yardage.

There are four cornerstones, so:

4 x 8 ½ = 34-inches

This means I can cut all four cornerstones from one 8 ½-inch strip.

8.5 divided by 36 = .236111 or ¼-yard.  Add that to the blue fabric. 

The purple blocks are 22 3/8-inches, finished.  When we add the ½-inch seam allowance, this measurement comes to 22 7/8-inches.  Once again, we will have to cut four 8 ½-inch strips for these blocks.

4 x 8 ½ = 34-inches

34-inches divided by 36-inches = .944444 or 1 yard.  Add one more yard to the purple fabric. 

The yellow blocks are 11 ¼-inches finished.  Add ½-inch seam allowances to that and it comes to 11 2/3-inches.  We can cut two of these per 8 ½-inch strip, so all we need is two additional 8 ½ strips of yellow.

2 x 8 ½-inches = 17-inches

17-inches divided by 36 = .472222 or ½-yard.  Add this to the yellow fabric. 

Now it’s time to add up all the fabric requirements to get the yardage. 

I won’t go back over backing or binding, because those two items are estimated the same way for either on-point quilts or horizontally-set quilts.  If you have questions, read back over Mathing the Yardage I and II that I posted in April. 

It’s my hope that even though these blogs have been math-heavy, you realize the math isn’t hard.  What I really, truly want is this to set you free as a quilter – to know that you have the skills and the ability to look at a quilt, take a quilt pattern and alter it, or design your own quilt – and estimate the yardage.  Now go!  Be fearless with your quilting and don’t fear the math!

Until next week, Level Up That Quilting!

Love and Stitches,

Sherri and Sam

Categories
Uncategorized

How to Build a Stash

Stash happens….

This week I’m dealing with a topic that most quilters love to discuss —  fabric.  Initially, the plan was to continue estimating fabric for an on-point quilt.  We just finished up the process with a horizontally set quilt, and it was natural to just jump to the next step and deal with setting triangles.  However, as I read back over those two blogs, I discovered something: That was a lot of math.   And even though it was pretty simple stuff, there was a lot of numbers tossed around.  I realize while math doesn’t really bother me much, I’m could be in a minority.  So, while we will “math out” an on-point quilt next week, this week, we’re taking a break from number crunching and will talk about fabric – more specifically your stash.

I’ve quilted for nearly 34 years.  In that 34-year time span, I’ve been to a lot of quilt shows, shop hops, and quilt/fabric stores.  I’ve inherited stash from quilters who have passed away or had to stop quilting.  I have bought serious inventory from quilt/fabric stores going out of business.  Yet, by some quilters’ standards, my stash is modest (for those of you who aren’t acquainted with the word “stash,” it’s the extra fabric quilters hoard store to use later).  I know some quilters that have floor-to-ceiling-come-to-Jesus stashes.  I’m not one of them despite what my family says. The last quilting statistics I read about such stockpiles suggested the average fabric stash is worth about $6,000.00.  And I believe every cent and yard of it.  Fabric has become more expensive in the past ten years because world-wide cotton crops have not done well.  One of the reasons I love to go Lancaster, PA is the range of quilt shops there and the reasonable prices.  I can pay for the trip in what I save in  fabric.

I do try to carefully cultivate my fabric.  While on occasion, I will come across some fabric I just love and will purchase the entire bolt, that is the exception and not the rule.  Through the years I have developed a purchasing plan for my material.  This plan allows me to use what I purchase regularly and keeps me from busting my budget.  And nothing gives me a bigger thrill than looking through my stash and finding everything I need to make a quilt. 

The very first thing that must be considered when cultivating your stash is your storage space.  When I began quilting, my sewing machine was in my kitchen because that was the only space available. The house we lived in then was much smaller than our present one and had no extra rooms.  This was actually an ideal situation because my daughter was just a few months old and the location allowed me to keep an eye on her while she played in the family room (which was literally three feet away), and gave me access to our kitchen table (where I cut everything out).  But this set-up meant my storage space was limited to two file drawers and one cabinet.  My time was also limited, between having a small child and a job.  Fat quarters became my go-to fabric purchase because I only made small projects due to time and material limitations.  These took little storage space and I could procure a wide variety without breaking my budget (which in the mid-eighties was admittedly tight).  If your storage space is small, you may want to limit your purchases to fat quarters or other small pre-cuts or to only the amount of fabric a quilt pattern calls for.  You don’t want to over run your storage space.  This makes it difficult to keep it organized and hard to see what you have.  Nowadays, my storage space is much bigger – I have a large studio and a storage closet – so my stash is greater.  I store fat quarters and up to one-yard cuts on small bolts and my flat-folds are stacked on shelves.  Fabric destined for a particular project is kept together in boxes along with the pattern and is labeled.  This works for me – and it’s a process I came to after years of trial and error.  Survey your storage area and research a plan that will work for you.

After you’ve mapped out your storage area, the next issue to wrangle is what to buy.  The longer you quilt, the more opportunities you’ll have to go to fabric sales and shop hops and participate in fabric exchanges.  Quilt shows – especially large ones – are easily overwhelming.  If you don’t go in with a plan or a pattern, you may end up coming home with material you’re not sure what to do with, so it ends up in the back of a drawer or closet.  If you shop with a pattern, it’s easy to come away with what you need.  But if you’re in a situation when you don’t have a pattern in hand or you’re just not sure what to buy, it’s always great to have a purchasing strategy for two reasons.  One, you won’t overspend on fabric you won’t necessarily use, and two, if the sale is a really good one, you will invest minimal cash in resources that will be used to its fullest capacity.  It’s this second reason we’re focusing on with this blog – what I call investment fabric resourcing.  Listed below are the types of material I purchase regularly when presented with a fabric resourcing opportunity:

Solids

Admittedly, solid fabrics are not my favorite.  I like prints because they give movement to a quilt.  However, solid colored fabrics make up the backbone of quilting and quilt shops.  One of the first pieces of information I pass along to beginning quilting students is to obtain a color wheel – either a physical one or one on their phone. 

Use this tool to help you purchase solid fabric.  For instance, if you’re at quilt shop or purchasing from an on-line site, and they have all of their solid green fabrics on sale in March for St. Patrick’s Day.  It’s a sale you really can’t pass up, because it’s all $3.99 a yard.  But you’re not sure what color to purchase with the green fabric for a quilt.  If you take a color wheel and find the greens, you will see yellow and blue are next to it and reds are across from it.  All of those colors will work with the greens.  The colors on either side of the color you’re considering and the one directly across from it will harmonize together.   

Another good suggestion is purchase some of your favorite colors.  This sounds like a really simple idea – and in many ways it is – but it’s a good thought to keep in mind.  If you’re making quilts, you’re going to find a way to work in colors that appeal to you.  For instance, I can count on one hand the number of the quilts I’ve made that have a lot of brown in them – approximately three.  But purple?  I work it into every quilt I can.  Same thing with blues, pinky-reds, and yellows.  Buy the colors that make you happy and I can guarantee you’ll use the fabric up.

A deep red I’ve used as a “zinger” in a Christmas quilt

One of my favorite ways to use solid colored fabric is to utilize it as the “zinger” fabric.  In most quilts I make, there’s one fabric that’s used to give it a little extra “sparkle.”  Nine times out of ten, I use a deeply saturated solid fabric for this.  It’s used sparingly and evenly over the quilt top, usually in smaller patches where a print would lose its integrity because the space is too small to frame it. 

So, when I get a chance to shop for solid fabrics, I use a color wheel and look for my favorite colors in deeply saturated tones.  With this in mind, let me introduce you to my favorite solid colored fabric line:  Painter’s Palette by Pineapple Fabrics. 

I love this fabric more than Kona.  It pieces like a dream, but it’s so soft that it’s wonderful for hand applique or hand piecing.  If you’re interested, you can find it at Pineapplefabrics.com.  I recommend you order their color card – it’s exactly the color of the fabrics.  I’ve never been disappointed

Painters Palette Color Card

Backgrounds or Neutrals

Let me state this first and get it out of the way:  I realize that nowadays, what’s considered a background or neutral can be nearly any color.  I acknowledged that about seven years ago when the Best of Show at Paducah used bright yellow as the neutral.  However, for this blog, we’re using the term neutral and background in its purest forms – all varying colors, shades, and hues of beiges, ecrus, grays, blacks, and whites.  If you’re at a fabric sale and can’t find anything you need or like, you can’t go wrong with a few yards of a neutral.  Neutrals and backgrounds will always be used. 

Personally, my favorite background or neutral always has either tone-on-tone or a fabric with some kind of background figures.  Solid ones almost look too stark (in my opinion), unless you’re making a modern quilt or an Amish one. 

Some of my low-volume fabrics

Another background or neutral you may want to add to your stash are the low-volume fabrics.  These are generally neutral colored fabrics that have another colored figure printed on them, but the spaces between the figures is fairly large and the print is so small that the material “reads” solid (looks solid from a distance). Low-volume neutrals are quickly becoming my favorite neutral.

Prints

Prints are my favorite quilting fabric.  They offer color and movement, in addition to nearly endless variety.  Prints fall into four categories:

One of my favorite small print fabrics. You can tell how small the print is in relation to the quarter. This is such a fun fabric! So many colors!

Small Prints – These prints are so small that they they can almost look like a solid from a distance. The above print is too colorful to appear as a solid.

Medium Print Fabric. Again, compare the quarter to the print.

Medium Prints – I tend to categorize these into fabrics with designs that are no larger than a quarter.

Large print fabric — the figures are humongous compared to the quarter, but it’s such a fun print!

Large Prints – Fabrics with prints that are larger than a quarter.  These are typically used in border work, but if you have large blocks with large units, they work great in those.  What’s even more fun is when you can fussy cut a large print to use in a block unit.

Fussy cut large print fabric in the center of the star block

Blender Print – I love blender fabric!  It’s just so versatile. Loosely defined, blender fabric is a tone-on-tone fabric (though typically not a traditional neutral), that can pull two or more of the quilt fabrics together.  It can look like a solid from a distance, or it may offer a bit of contrast, although the colors will be in the same family.  I like them because they tend to give movement to a quilt. 

Blender fabrics. This particular print is one of my favorite lines — I love the movement that the vines and leaves give the fabric.

Within these four categories, you will probably want to have some of the following: Polka dots, checks, plaids, geometric prints, stripes, and florals.  I have found that stripes and checks really make interesting binding, especially if they’re cut on the bias. 

A bit of my carefully cultivated stash. Notice the Alamance Plaids on the far right. I’m an Alamance County native and these hold a special place in my quilting heart.

Holiday Prints

I put holiday prints in a separate category from “regular” prints because not everyone purchases them.  I am one of those people.  While I do have a few Christmas, Halloween, and Easter prints, I tend to purchase colored fabric that reminds me of the season (greens, reds, blues, blacks, acid greens, oranges, purples and a bevy of jelly bean colored material). I’ve never been one to buy yards of fabric with Santa Claus, Jack O Lanterns, and the Easter Bunny on them.  In my mind, the seasonally colored fabric could be used even after the season, where as any material with a direct holiday print would be limited in use. 

However, if you’re one of those folks that love holiday prints, let me caution you to keep this collection balanced (small, medium, and large prints, as well as blender fabric).   I would also keep this group small in comparison with the rest of my stash, since it is really limited in its use.

Precuts

Some of my precut collection — fat quarters, layer cakes, and charms.

To have or not have precuts in your stash is a personal choice.  Some quilters love them and others…not so much.  When they first began to appear on the shelves of my LQS, I was skeptical.  I finally (after much thought and internal debate) did purchase a jelly roll on sale and brought it home to try.

And was completely underwhelmed.  While the fabric selection was stellar, I found the cutting to be inaccurate.  Not all the strips were exactly 2 ½-inches, and some were off as much as a quarter inch.  But fast forward to 2020, and it’s a completely different ball game.  The cutting is accurate (for the most part), the selection is through the roof, and there’s a great deal of variety – charm squares, layer cakes, jelly rolls, cinnamon buns, mini-charms. 

If you find yourself increasingly cutting 5-inch squares or 2 ½-inch strips, you may want to consider adding these precuts to your stash.  If you like patterns that call for precuts, definitely add them to your stash as you find them on sale and in the colors you want. However, if you’re not sure where you stand on precuts, then I would hold off.  If  you find a pattern that calls for 2 ½-inch strips of a neutral, you may find it a better budget deal to purchase a jelly roll in neutrals rather than buying yardage of several different ecrus, grays, or whites.  I personally have found doing this is less expensive and a time saver – no cutting involved.

You gotta love a neutral jelly roll.

Personal hint here:  I’ve always found jelly rolls to be “linty” when they’re unwrapped.  To avoid hundreds of stray threads all over my floor and sewing machine, I’ve learned to open them outside and run a lint roller over the top and bottom of the roll before I begin to sort the strips.  While this won’t get rid of all the lint, it does go along way to dispose of most of it. 

With all of these in mind, how do I know how much to buy to build an effective stash?

This question has several issues to consider, and even then, there’s no really right answer.  Most of it has to do with you, your quilting space, and what kind of quilter you are.  When you’re purchasing fabric for a quilt, it’s really easy to round up the yardage and purchase “just a little bit extra” – round that half a yard up to a yard, etc.  So the first two concerns to be addressed concern money and space – can I afford the extra fabric and do I have space for it?  It makes no sense to bust your budget and it’s equally unwise to overflow your storage space. If you can’t afford it and/or don’t have a place to put the extra, the answer is “No” – don’t buy the additional fabric. 

But … if you have the money and the storage space, you should ask yourself, “How much do I love this fabric?”  I truthfully have used a fabric I’m not crazy about in a quilt simply because it worked well in the color scheme.  Given a choice, once that quilt was done, I would never use or look at that fabric again.  This would not be a wise choice for my stash.  If, in the process of purchasing fabric for a quilt, there is a blender, solid, focus fabric, or print that you love, a half-a-yard extra or so would be a good addition to your stockpile. 

If you’re not purchasing material for a quilt, but simply shopping a sale, it’s always a good idea to bulk up on traditional neutrals, solids, and blenders – especially in the colors you love.  It’s also a wonderful idea to inventory your stash before you go to a sale – not a hard review, but know what areas are lacking.  If you need blenders, shop for those.  If you need small prints, look for those.  My yardage suggestions are just that – the guidelines that work for me.  If I’m purchasing for my regular quilting stash, I will buy between one and three yards.  Since I applique, I’m constantly on the look out for fabric that will work well for flowers, leaves and vines.   For material with applique potential, I generally buy one-yard cuts. 

However…with focus fabrics or that once-in-a-great-while event when I fall head over heels in love with a print, I purchase five yards.  Why five?  Two reasons – no matter what size quilt I make, five yards will cover the yardage need and probably the binding, too.  The second reason is a manufacturer will rarely ever re-print a line of fabric once it’s sold out.  Buy it now or regret it forever.  And if I love it enough to buy five yards, I will quilt it all up, I promise. 

To sum it up, you’re the one that will have to determine the size of your stash and what it consists of.  The type of quilter will also play into this – do you only piece or do you applique, too?  Do you make primarily bed quilts or wall hangings or small quilts?  Those characteristics play into the size and monetary value of your stockpile.  I encourage every quilter who has fabric storage room, to balance that stash and shop wisely:  Have a list, shop local, use sales and coupons.  But I also will leave you with this – if you see a fabric you love, just buy it.  Pay full price and have no regrets.  Life, as it has shown us lately, is too short to wait on some things.   

Until next week, Level Up Your Quilting!

Love and Stitches,

Sherri and Sam

Categories
Uncategorized

You’re Worth My Time and Fabric

Is everyone out there okay?

Are you dealing with Stay at Home orders from your state government?

Are you washing your hands?

Are you wearing a mask out in public?

 Are you making masks?

Are your bored out of your gourd? 

Are you sick and tired of cooking?

If you have answered “Yes” to three out of seven of those questions, this blog is for you. 

I am okay at this moment.  I’m okay, my DH is okay, my kids and grandkids are good, my mom is fine (although bored to tears and back again).  The business that the DH and I own is considered an essential trade, so we’re still working, although I am working from home.

Let me tell you a little something about working from home:  I hate it.  While my office isn’t exactly an oasis in the middle of a demolition and environmental empire, it’s my office and not my dining room table converted into a makeshift work area.  On one hand it’s great – I can go to work in my pajamas! On the other hand, there is no separation between work and home and I’m keenly reminded exactly why, years ago, that the DH and I decided to run our business out of another location and not smack-dab in the middle of where we live.

Another thing I haven’t mastered is the restaurant issue.  There are only two people in our household, so most nights (pre-COVID) we ate out. There was really no reason to cook for just two people.  Now I am confused.  Not so much with the not- being -able -to- eat- in- at- a restaurant issue, but this whole ordering thing.   Before when take out was desired, we either ordered ahead on-line or called it in.  Now I have to find out if the restaurant is still open, when I can place the order, and how I pick it up (Is it curb-side?  Do I go in?).  Some of our favorite places to eat are only open on weekends.  Some aren’t open at all.  I just pray that they all make it through this mandatory Shelter at Home edict.

A lot of my friends are quilting like crazy.  Every now and then my phone pings and I get pictures of completed UFOs or new projects they’ve started.  And I’m glad for them.  I, however, am not among those folks. 

I am making masks.  And that’s who I really want to talk to this week – the mask makers.  I’m not jonesing to make any quilter who isn’t making masks feel badly.  But for those of us who are undertaking that project, this blog’s really for you.

There are dozens of mask patterns out there, and you hear the pros and cons for each.  I chose the pattern off of Craftpassion.com because I felt it gave a little more secure coverage.   By this time in mask production, I imagine you’ve found the pattern that works best for you, and you’ve got your mask-making down to an assembly line construction process.  I have. I prep my fabric over Friday and Saturday.  I cut out on Sundays and sew the outside fabric and interfacing halves together as well as the linings.  Then on Tuesdays through Fridays, I make masks.  On a good night I can make 20.  I’ve currently made a total of  several hundred.  Part of those will be shipped out to Baptist Hospital.  The others are earmarked for family and friends and others who have medical conditions that warrant a mask. 

It’s not hard work, but it is wearing.  I think about who I’m making those masks for and where they’ll be used.  But the burden that weighs me down is the why.  Why I’m making them.  The reason.  And the fact that we all may be wearing masks for a while.  Which means on some level, even after the hospitals and other medical facilities have all of them they need, we may still be churning masks out (although probably not to the degree we are now).  Are you feeling this burden, too?  If you are, I wanted you to know you’re not alone.

During World War I and II, women (and some men) knitted socks, made bedding, and rolled bandages.  Now during the COVID battle, we’re once again picking up fabric and thread, and fulfilling a need for our fellow humans.  This time the enemy can’t be seen, but he is there…lurking…not really caring if we’re democrat or republican, jobless or essential, or what our socio-economic background is.  He attacks without discretion.  And just like those before us that did all they could to combat the enemy, if making masks helps, I’m in. 

So, if you’re among the mask-makers, take heart.  Although you may be one solitary figure at your sewing machine, there are thousands and thousands that are sewing along side of you in spirit. Soon (hopefully) we can file away our mask patterns, stop shopping like mad women and men for ¼-inch elastic, and go back to our quilts.   I sincerely hope it’s sooner rather than later. 

But until that time, sew on, fellow mask-makers.  You’re not alone.  I’m right there with you.  Their lives are worth our time and fabric.

Love and Stitches,

Sherri and Sam

Categories
Uncategorized

Mathing the Yardage II

Last week we worked through the first three steps of estimating yardage for a quilt. This week we will go through the steps of calculating the amount of fabric needed for the rest of the quilt.

Step Four – Sashing Yardage and Quilt Setting

At this point, some design decisions will have to be made.  Will I use sashing?  If I do decide to use it, how wide will it be?  Will I use cornerstones?  If so, what kind of cornerstones will I use?  Will I set the quilt in horizontal rows or on-point?

Birds in the Air Quilt — no sashing or cornerstones

While the answers to some of these questions depends on how I want the quilt to look, some of them also depend on the quilt’s usage.  How big do I need the quilt to be?  If I have 20 Birds in the Air blocks that finish at 9 inches, and plan on setting the quilt in rows, I will have five rows with four blocks in each horizontal row. Without sashing, this means the quilt top will be 36-inches wide and 45-inches long – which makes it a great size for a crib quilt or play quilt, but not very practical for an adult.  It appears, if I stick with the horizontal setting, I need to plan on adding some sashing.

Using the Golden Ratio, we multiply 9-inches x 1.618 and get 14.562

Since there are four sides to a block, we divide 14.562 by 4 and get 3.6405 which comes to 3 5/8 in fraction form.  This mean the widest we can make the sashing is 3 5/8 inches.  Anything larger will look disproportionate. 

I would be the first to admit that 3 5/8-inch sashing is pretty wide sashing in my quilting world.  However, if I had a quilting pattern in mind for these units that would really show off the quilt, I would use the width to my advantage.  Likewise, I’d use that width if I planned on piecing my sashing.  And if I make my sashing that wide, this means my top will be 55 3/8-inches wide and 66 ¾-inches long.  Depending on the width of the borders and how many I decide to use, the top’s width and length could increase as much as 8-inches both ways (63 3/8 x 74 ¾).

Now let’s take it to the other extreme – how narrow could we make the sashing?  For this we take 9 and multiply it by .618.  When we do this, we get 5.562.  Again, we divide this number by 4 and come up with 1.3905 or 1 3/8-inches.  The narrowest we could make the sashing and it still be proportional is 1 3/8-inches.  If we use this measurement, the center would be 42 7/8-inches wide x 53 ¾ -inches long.  Add a possible 8-inches for borders and we would have a quilt 50 7/8-inches x 61 ¾ -inches. 

If neither of the smallest or  largest heights and widths work, remember you can always use any number between the largest and the narrowest widths.  So, if you want to use 2 ½-inch sashing, it will look fine.  Three-inch sashing is your thing?  Go for it.  Four and a half inch sashing?  Nope.  It’s larger than 3 5/8-inches.  Likewise, with my favorite 1-inch sashing.  It’s too narrow.

Since I want my quilt to be large enough for an adult, I will use 3-inch sashing.  Why didn’t I go with the largest number?  Convenience, really.  While mathematically I don’t mind working with difficult fractions or decimals, when I’m cutting out fabric, fractions like 7/8 and 5/8 are harder to cut accurately because my 58-year-old eyes have a hard time seeing those tiny lines on my cutting mat.  Go large or go home.  The 3-inch sashing falls between the largest and the narrowest widths, so it will look fine.   

Let’s look at my layout at this point.

Since I’ve decided on 3-inch sashing, I know that those units will need to be cut at 3 ½-inches to allow for seam allowances.  I will need a total of forty-nine 9-inch units that are 3 ½-inches wide, unfinished. Again, let’s work with forty inches of usable WOF.  When we were working with the triangles, we were adding 7/8-inches to the finished size to allow for seam allowances.  This time we will need to add a ½-inch to allow for ¼-inch seam allowances. We divide 40 by 9 ½ and get 4.2 – we can get four 9 ½-inch units per 3 ½-inch wide strips.  Now, we divide 49 by 4, to determine how many 3 ½-inch strips we need – which comes to 12.25.  We will need to round that up to 13.  Multiply 13 by 3 ½ and we have 45.5 inches or 1 ¼-yard.  If the plan is to use any of the fabrics used in the triangles, add the 1 ¼- yard to that material on the chart.

If cornerstones are in my plan, now I have to figure those now.  They’ll be 3 ½-inches square, and I’ll need 30.  Working with 40-inch WOF again, divide 40 by 3 ½-inches to get 11.42857, which means we need three 3 ½-inch strips of fabric to get all 30 cornerstones.  Multiply 3 x 3 ½ and that’s 10 ½-inches, or 1/3-yard.  If those are coming out of any of the fabric I’ve got on my chart, I need to add it to that yardage. 

My fabric requirements up to this point.

An on-point layout would require a different number of blocks and borders.  Although the math is easy, there is quite a bit of it.  I will cover on-point layout fabric requirements in a follow up.

Step Five – Border Yardages

Borders are wonderful things.  They can pull the quilt top together by color and they can adjust the size of the quilt top.  Quilts with only one border is one of my pet peeves.   I’m not sure why, but it bothers me – even if the border is beautifully pieced and appliqued. 

  1.  Determine how many borders you want to use and the size of the borders.  Let’s go back to my Birds in the Air quilt top.  Per my usual preference, I will add two borders to this quilt top – a narrow first border, and then a wider final border.  And for the sake of illustration, I’m working with primarily plain borders, but I will add cornerstones to the outer border for interest.   
  2. The next thing that should be determined is how I want to cut the borders – do I want to cut them on the straight-of-grain (length of fabric), or do I want to cut the across the width of fabric? Again, for the sake of illustration with this blog (and since it’s the way most quilters make borders), we’re working with WOF. 
  3. At this point, my quilt top is 51-inches wide x 66-inches long.  I need to think of the border like just large quilt blocks.  I want the first narrow border to measure 3-inches wide, so I will cut them out at 3 ½-inches.  Working with 40-inches of usable WOF, I will need to make two cuts per vertical border, for a total of four 3 ½-inch strips.  I can work the top and bottom borders a bit differently.  I can get by with only three 3 ½-inch strips for these.  The math works out like this:  With two cuts, I get a total of 80-inches.  The width of the quilt top is 51-inches.  I subtract 51 from 80 and get a remaining 29 inches.  I can add the left-over fabric 29-inch fabric from the first horizontal border to the remaining third strip and have plenty of material, even with diagonal seam allowances.  So, let’s figure the yardage – this brings the total of 3 ½-inch strips to 7.  When that’s multiplied out, we get 24 ½- inches, or 2/3 of a yard (24.5/36).  I need to add this to my chart. 
This is where the yardage requirements are at now. I will use the green from the large triangles in the block to make my larger outer border and the dark purple from the small triangles for the 3-inch inner border

4. At this point, my quilt now measures 57-inches wide by 69-inches long.  My next set of borders will finish at 5-inches, so I’ll cut those out at 5 ½-inches.  Let’s begin with the left and right borders (I always put my vertical borders on first, and then proceed to the horizontal borders – it was the way I was taught).  Since each side border will measure at 69-inches, and we’re still working with 40-inches of usable WOF, I will need to cut four 5 ½-inch strips.  The top and bottom borders work a little differently, because we’re adding cornerstones.  Normally, I would add the width of the two side borders to the center width of the quilt and get my length of fabric (57 + 5 ½ + 5 ½ = 68)  However, the additional two 5 ½-inch spaces will be filled by 5 ½-inch blocks of different fabrics.  I only need to make the horizontal borders 57 ½-inches long (the ½-inch is the seam allowance), and the sew the cornerstones onto this length to make the top and bottom borders the correct size.  I will need to cut three  5 ½-inch strips to make the horizontal borders.  Just like with the 3 ½-inch borders, I can take the leftover fabric from the first horizontal border I make and add that to the third strip and have enough material.  Let’s do the math:  That’s seven 5 ½-inch strips, which equals out to 38 ½-inches, or 1 yard and 1 ½-inches – or 1 1/8 yards of border fabric.  Add this to the fabric chart.

5. Okay, last border measurement – the cornerstones.  Each cornerstone will need to match the border width, so they will be cut at 5 ½-inches square and we need four of them.  When we multiply 4 x 5 ½, we get 22-inches.  With 40-inches of usable fabric, we know we can get all four cornerstones with one cut.  Divide 5.5/36 and we get 0.152778 or 1/8-yard.  Add that to the fabric chart.

Completed Birds in the Air Quilt

Just a couple of reminders about sewing borders.  Always sew the border strips together on a diagonal, just like you’re making binding.  There is some solid reasoning behind this.  First, a diagonal seam is less noticeable than a straight seam.  Second, it also holds up better to regular wear and tear.  I’ve also been giving you what I call “flat” numbers for this quilt.  We all know there are variances in construction – your needle or fabric will bobble.  Your ¼-inch seams may not stay consistent.  These “flat” numbers are figures done on paper (the paper is flat, therefore, they are flat numbers).  In other words, while fairly accurate, they’re not completely realistic.  Always measure your quilt top in three places both horizontally and vertically.  Take each set of these numbers and get the average.  That number is actually how long you’ll need to make the borders.  If you’re squaring up after every step, the three numbers shouldn’t be off by much.  The “flat” numbers are simply letting you know how much fabric you should plan to use.  And if you’re feeling really fancy and want to miter your borders, you’ll need extra fabric.

The last two steps in estimating the fabric for the quilt top concern the binding and the backing.  After putting on the last set of borders, the quilt should measure approximately 67-inches wide by 79-inches long. 

Step Six – The Binding Yardage. 

I’m working with a couple of assumptions here.  First, we’re using classic French Fold Binding, and second, we’re not cutting the binding on the bias.  Binding measurements work with the perimeter of the quilt — the sum of all four sides.  Simply add 67 + 67 + 79 + 79 to get the perimeter, and this measurement adds up to be 292-inches.  Our binding will need to cover 292-inches worth of quilt.  Binding strips are sewn on the diagonal, and this takes a bit more fabric.  We also will need to leave a “tail” of 10 to 12-inches to allow for joining the binding ends (I always use 12-inches – it’s far easier to cut extra binding off than stop and sew on additional binding). 

Let’s add 15-inches to the 292-inches of binding we know we need.  The extra 15-inches will take care of the additional bit of fabric needed for diagonal seams as well as the “tail” required for joining the binding ends.  This brings the total inches needed to 307-inches.  Divide this by 40-inches of usable fabric and we get 7.675.  Round that up to eight – we need to cut 8 strips of binding.  I always cut my binding 2 ½-inches.  Binding width is a personal preference.  Some quilters cut their binding 2 ¼-inch wide. I’m using 2 ½ with this blog.  I multiply 2 ½ x 8 strips, which equals 20-inches.  Divide 20/36, and I know I need ½-yard of binding fabric.  Usually binding is made from some other fabric that’s been used in the quilt.  Decide which fabric you want to construct the binding from and add the ½-yard to that.  I will make mine out of the fabric I used for the last border. 

Step Seven – The Backing Yardage

Backing is a personal preference issue.  For those quilters who quilt with their checkbook (pay a long or mid-armer for their services), it may not be so personal, but simply boils down to what the long or mid-armer prefers.  However, for those of us who quilt our own quilts, it gets a little more complicated.

With this quilt finishing at 67-inches x 79-inches, it’s well within the range to use the 108-inch quilt backing material.  And I’ll be honest right here – that’s my personal preference.  LeAnne the Long Arm just works better when she doesn’t have to go over a seam.  Big Red doesn’t care.  Neither does my Juki Mid-Arm.  If I need to purchase a quilt backing fabric, I must remember that the width runs along the vertical edge when it’s rolled off the bolt.  The 79-inch edge will be flush with that side of the fabric.  The shorter, 67-inch side will match up with the length of the backing material.  To math-out the yardage, divide 67 by 36.  This comes out to 1 7/8 yard.  The 1 7/8 yard will exactly cover the back.  However, I have to keep in mind since quilts generally draw up a bit in quilting, I need to have some additional margin in both the backing and the batting.  There’s quite a bit of debate among quilters about exactly how much the margin should be.  My personal preference is 6-inches per side.  I add this much because it leaves plenty of margin for my long arm clamps to grip (I baste the top of my quilt, but not the sides – I use the clamps).  So, I will need to add 12-inches to both the length and width of my quilt.  Now my backing needs to measure 79-inches wide by 91-inches long.  I’m still good with the 108-inch wide backing, but I need to divide 91 by 36 to revise my yardage.  That comes out to exactly 2 ½-yards.  If I’m purchasing 108-inch backing fabric, I need 2 ½-yards.  Add that amount to the fabric chart.

But what if (like me) you’re trying to be responsible about your stash and use what you have on hand?  And what if the fabric in your stash is the standard 45-inch wide, cotton quilting fabric?  Well…it’s completely doable, but there’s a little more math involved and some additional pre-planning before you start piecing the quilt back. 

The first step is measure your quilt top.  We know the top we’ve constructed in this blog is 67-inches by 79-inches, and our pieced backing needs to be 79-inches by 91-inches to allow for the quilting margin. 

The second step is picking the fabric.  This is where you can get all kinds of creative.  You can add leftover blocks (one of my favorite ways to piece a back).  You can use any fabric that’s left over from the quilt top.  You can purchase extra fabric.  Just remember the following:

  1.  Solid colored fabric will show up every quilting stitch.  If you’re a proficient quilter or your long arm artist is wonderful, a solid colored backing is great.  However, a “busy” backing can cover a multitude of quilting sins.
  2. There are other fabrics that can be used besides the 100 percent cotton quilting fabric.  Minky and flannel are also great choices and quilt beautifully.  Just be aware that they both are stretchy fabric and minky is so soft and slick it slides all over the place.  After backing my first quilt with flannel, I discovered washing my quilt top before quilting it is a great idea — especially if I didn’t pre-wash my fabrics from the get-go.  The reason behind this is while flannel won’t shrink, a 100% cotton top will.  If I washed the completed quilt, the top would shrink and the flannel back wouldn’t, and that can cause some issues. 
  3. It’s really tempting to use sheets.  They are certainly big enough and less expensive than quilt backing fabric.  I’ve tried using sheets as backing, but haven’t been happy with the results (this was years before I had a long arm – it may work out differently now).  The higher the sheets’ thread count, the more difficult it is to sew.  I have quilting friends that used 100 percent cotton flannel sheets as a quilt backing and loved the results – just be sure to wash and dry the sheets first. 

The third step is consider the seam allowance.  Pieced quilt backs have a larger seam allowance.  The standard ¼-inch seam allowance doesn’t work here.  Seam allowances for pieced quilt backs should be ½-inch.  These seam allowances need to be a bit bigger because the back of the quilt undergoes more stress than the top.  It’s always against something – the bed, couch,  or a wall.  Those extra-large seam allowances help the back deal with that stress.  Most of the time the added margin of 6-inches per each side of the quilt takes in the ½-inch seam allowance, but if you’re cutting it really close measurement-wise with your fabric, take those widths into consideration.  The last thing you want is to come up short on your backing. 

The fourth step is sewing it all together.  I touched on this in a blog in 2018.  Since that’s been a while, I will explain the process again.  The seams used to piece your back can run either horizontal or vertical.  What you don’t want to do is sew a width of fabric cut to a length of fabric cut.  Sew a crosswise grain to a crosswise grain and a lengthwise grain to a lengthwise grain.  If you don’t, the back will come out all kinds of lopsided.  And if what you’re making is a quilted wall hanging, the backing will “droop” noticeably. 

Typically, to make the most of your fabric, you will want the seams to run horizontally for quilts that are 40-inches to 60-inches. 

Quilts that are larger than 60-inches should have vertical seams.   

The quilt we’ve constructed in this blog is 67-inches x 79-inches.  Since it’s larger than 60-inches, we want the seams to run vertically.  We know when we add the 12-inch margin to the 67-inch width, it brings the measurement up to 79-inches.  Still working with 40-inches of usable fabric, we know we’ll need two pieces of 40-inch fabric for the backing.  The top is 79-inches long, and when we tag the 12-inch margin to that, we get 91-inches.  Divide 91 by 36 and we get 2 ½-yards.  Since we will need two pieces, we multiply 2 ½ x 2 and get five.  We need to purchase 5 yards of backing fabric.

As a fabric consumer, here’s where I really do some comparative shopping –especially if I have to purchase additional fabric for the back.  If I purchase 108-inch backing fabric, I only need 2 ½ yards, as compared to 5 yards of the standard cotton quilting fabric.  Sometimes (especially if you have a coupon or it’s on sale), the wide backing fabric is more economical than the 5-yards of standard fabric.  Either way, add what you need for backing to your chart.

Step Eight – Add it all up.

Now it’s time to add up the yardage you need to make this quilt.  This process takes some time, but in the end, you know exactly how much you need.  It’s much better than just trying to eyeball the quilt and assume the amount of material you need.  When I just guess at how much fabric I need, I either end up purchasing way too much or too little.  And if it falls in the “too little” category, it seems I can never find the exact fabric I need again. 

And always…shop your stash first.  Then shop at your LQS (if you still have one in your area). 

Until next week, Level Up Your Quilting!

Love and Stitches,

Sherri and Sam

Categories
Uncategorized

Mathing the Yardage I

How many times has this happened to you?

You see a quilt you want to make.  Maybe it’s from across a crowded quilt show…it beckons you over.  It seductively calls to you and mesmerized…yes, even hypnotized by its beauty…you stroll over.  You try to be cool about the whole situation.  I mean it’s probably a great looking quilt, but you’ve seen great looking quilts before….this is nothing new.

And then you examine it closely…every stitch is perfect.  The colors are divinely inspirational.  The quilting stitches ooze class.  It’s then you realize, somewhere deep down in your quilty consciousness, “I’ve got to make this quilt.”  Oh, you still try to be casual about it.  You snap a few pictures on your camera phone (making sure to get the name of the pattern on at least one of the pictures) and remark to the person next to you that this quilt is really beautiful and you either can’t understand why it didn’t win any ribbons or why it didn’t win more ribbons.

You’ve been bitten by the quilt bug and just like that rabid high school crush you had years ago, your quilting hormones are raging, and you know what you’re going to do when you get home. The minute you get through the door (or maybe on the way home if someone else is driving), you Google that quilt.  You search for it on Pinterest. 

All to find out that your search is in vain.  You can’t find it.  So, you begin to text your quilting friends – have they heard of this pattern?  Do they have it? (Seriously…I have been on group text with 30 people when one of us is searching for a pattern).  None of them know the pattern nor do they have it.  Last resort, you put it out there on Facebook, Ebay, and maybe even Twitter. 

And come up empty. 

Let me commiserate with you at this point.  I’ve had the same thing happen to me.  Usually this pans out in one of two ways.  Either I discover the pattern is out of print, or the pattern is the original property of the quilt maker.  If I find the pattern is out of print, Ebay has saved my quilting sanity more times than once.  However, if the pattern is an original design of the quilt maker…it’s more difficult.

But maybe this isn’t the scenario.   Perhaps you’ve come up with your own design.  You were inspired by a pattern in some tile or wallpaper.  No matter how it happened, suddenly you have this idea for your own quilt and your quilter’s soul won’t give you a minute’s peace until you’ve decided to make this quilt for yourself. 

Thus, the process begins.  Some quilters draw their quilts out on paper (usually graph paper) and some use a software program like EQ8 (I fall into that category most of the time).  This is the easy part.  You can get the quilt all drawn out but then you have to determine how much fabric you need.  With EQ, this is easy – it’s point, click, and print.  The program will tell you how much of each fabric you need.  I’m putting this right here though – EQ usually tells you exactly how much you need nearly down to the inch.  If you use EQ for this, add a little more fabric for margin not that any of us make mistakes.

I also realize not everyone uses EQ, and I also know sometimes inspiration strikes when you can’t access it the software.  You can sketch the quilt out, but how do you determine how much fabric is needed to make that quilt?  This is what I want to address today – because when inspiration strikes, it’s always good to have a plan.

So…

Step One:  Choose your design and your size.

Keeping the standard mattress sizes in mind, decide if you’re making a twin, double, king, queen, or crib.  If it’s a throw or cuddle quilt, figure out how big you want it (my standard size for cuddle quilts or throws for me is 76”x76” – exactly a foot bigger than I am tall). 

After you’ve decided on the size, then determine how much of the quilt area will be blocks and how much will be borders and sashing.  This can be determined by sketching your quilt out some paper.  Graph paper is a particularly wonderful tool to have at this step.  You can assign a size per block – for instance, five blocks are equivalent to 10 inches.  I’ve always found that ten is an easier number to work with than twelve because I seldom make quilts with blocks that are larger than 10-inches square.  If you want your blocks larger, you may want to assign your graph paper differently. 

Step Two:    Consider the overall appearance of the top.

The first item to consider is the block size in comparison to the size quilt you want.  For instance, if I were planning a standard queen-sized quilt, I’m looking at 84-inches x 104-inches (that’s the bigger end of a queen-sized quilt).  This is a fairly large area and I know  if I tap into my inner Dear Jane and make 4 ½-inch blocks, there will be lots of piecing in my future.  There’s nothing wrong with that, I just know heading into this project, lots of cutting and piecing will take place.  If I decide on 12-inch blocks, I won’t have as many blocks to piece or as much fabric to cut out. 

The second detail to consider is the borders.  Will I have them?  If I want them, do I want to cut them on the crosswise grain or the straight of grain?  How many do I want?  Do I want to miter them?

The last element to be considered is the actual setting.  Will the quilt be on-point or in rows?  If the quilt is straight set (rows and columns), the math is pretty easy.   If I decide to use an on-point setting, I simply multiply the finished size of my block by 1.41 to determine the width of the on-point block. 

If I do decide on an on-point setting, there is one last design decision I have to make – will the setting triangles be pieced or plain?  And I have to remember that the four-corner setting triangles are smaller than the setting triangles used along the sides.  In addition, not only are those triangles different sizes, they are also cut differently.  Either way, there’s lots and lots of math involved and it can be kind of daunting…

Unless you have one of these:

Quilting Calculator … oh, how I love this thing!

Either as a phone app or a physical calculator like I have, this is a wonderful tool to have in your possession.  Decimal numbers will figure into this process a lot.  This can be a bit intimidating, since as a whole society, we’re not fluent in how to convert decimals into yards.  A quilting calculator converts a decimal into a fraction with a touch of a button.  If you don’t have one of these little jewels, there are literally hundreds of conversion charts available  on the internet.  Download one and keep it handy. 

Step Three:  Analyze the quilt blocks for yardage needs.

This is where some graph paper or EQ8 comes in handy.  Generally, most blocks are considered to be four, nine, or sixteen patch blocks – they have the same number of block units both horizontally and vertically.  The proportion of these blocks may change, and the appearance of these blocks may change, but the fact remains most blocks are either four, nine, or sixteen patch blocks – with a nine-patch block being the most frequently used.  Please take a close look at the illustrations below:

Despite all the differences in appearance, all of the above blocks are nine patches.

This gives you a good idea about how much we can alter blocks by changing proportion and by dividing the grid blocks into HSTs, QST (quarter square triangles), or any other type of block we want to insert into the square on the grid. 

Instead of feeling creatively stifled by this proposition, this is really liberating.  If we know the grid of a block, not only can we alter it to fit what we want, we also can predict the amount of fabric we need.  Let me walk you through this process. 

Take this Birds in the Air block: 

Birds in the Air block

When we graph this block out, we determine that it is a 9-patch block – three horizontal squares across and three vertical squares.

Birds in the Air graphed out on EQ8.

Let’s say we want to make 20 of these blocks, each identical to the other.  The block finishes at 9 inches square. 

  1.  Divide the finished size of the block, 9-inches, by the number of rows across or down – which is three.  This figure tells us how big each square on the grid must be – and keep in mind as we are “mathing” a block, we always work with the finished sizes and add on the seam allowances at the very end.  It’s just easier this way.  
  2. Most of the nine grids in this block contains HSTs.  For sake of illustration here, we’re using the Sew and Slice method, since HSTs have a bias edge and I can wait until the last minute to expose the bias. At this point, I have to decide if I want to cut and sew the HSTs to the exact size or do I want to make them a bit bigger and cut them down.  If I make them true-to-size needed, I take the finished size of the HST unit (3-inches) and add 7/8-inches to it.  I will need to cut the fabric squares for the HSTs 3 7/8-inches.  Since I like to make my HSTs a bit bigger and then cut them down to the size needed, I’ll add one whole inch to the finished size – so I would cut my fabric squares at 4-inches.  Added caveat here – a whole number is easier to “math out” than a fraction such as 7/8.   
  3. Each block has three dark purple triangles that I plan on cutting out at 4-inches square each (since I plan on making them larger and then cutting them down for accuracy).  I want to make 20 blocks, so multiply that by three per block, making 60 triangles.  Since I’m using the Sew and Slice method, I can make two triangles per square, so I divide 60 by two and know I need to cut thirty 4-inch squares. 
  4. I know that most quilting fabric has about 40 inches of usable fabric (it just seems selvages keep getting larger and larger – I’ve seen some as large as 1-inch on each side).  Divide the 40-inches of usable fabric width by four and I know I can get ten 4-inch blocks per strip. 
  5. Now we take the 30 blocks we need and divide it by ten, which equals 3.  I will need to cut three 4-inch strips in order to get the 30 blocks.  So, 3 strips multiplied by 4-inches equals 12 inches.  To figure yardage I divide 12-inches by 36-inches (number of inches in a yard), and I get 1/3 (and for those of you really mathematically inclined, yes, you can simply reduce 12/36 = 1/3).  I will need 1/3 of a yard of dark purple fabric to make thirty 4-inch squares, which will in turn make 60 HSTs.  I will also need 1/3 of a yard of the light fabric to make the HSTs.  At this point, if you’re like me and are a pre-washer, you may want to bump the yardage up to a half a yard to allow for shrinkage – or if you want to give yourself a little margin for any errors, you may also want to consider ½-yard. 
  6. Let’s look at the large triangle now.  Each triangle is three grids high and three grids wide, making for a 9-inch finished square size.  The math in this one is not any harder than the HSTS, but we’re not going to round the fractions up to whole numbers and then cut the triangles down.  We will take the 9-inches (the measurement of the finished quilt block) and add 7/8-inches to it for the seam allowances – 9 + 7/8 = 9 7/8.  We will need to cut 9 7/8-inch squares from the fabric.  Now let’s figure how many blocks we need.
  7. We’re making 20 blocks and each block has one large triangle.  That’s 20 triangles.  However, we’re making these triangles by cutting squares apart on the diagonal, so we can get two triangles per square.  That means we only need ten 9 7/8-inch squares. 
  8. Now we have to determine how much fabric we need.  A 40-inch width of fabric divided by 9 7/8-inches (the size of the square needed), equals 4.05, or 4 squares per strip cut WOF.  The ten squares required divided by 4 per strip, comes out to be 2.5 strips.  We’ll round that up to 3 strips, each 9 7/8-inches wide. 
  9. To figure the yardage needed, multiply the 9 7/8 by the 3 strips and you get 29.6 inches.  Round that up to 30.  We need 30 inches of fabric, or 7/8-yard (30 divided by 36 equals 7/8).  At this point, you can either use 7/8-yard of your fabric stash or purchase 7/8 of a yard.  To me, it would be easier just to round it up to a yard wherever I get my fabric.

It’s important that I have some kind of chart or notes with this information on it because I may have to add to these amounts as I plan out the rest of the quilt, because this leads us to steps four and five, the sashing and borders — which we will discuss next week.

_____________________________________________________________________

Personal note here: This is how my sewing table looks right now.

Quilting has been set aside for awhile. In its stead, a steady stream of face masks are under my needle. Now, before anyone hops on the issue that these are not medical grade masks, I’m well aware of that. Wake Forest Baptist Hospital asked if some of us could make these as additional protection for their medical personnel. I couldn’t refuse — not after everything they did for my daughter.

As I stitch these up, I’m reminded that sewers (primarily women), have answered the call for medical supplies in the past — socks and bandages and bedding. I know for a fact I have ancestors that contributed to the need during times of war and hardship. I can do no less.

One day, hopefully in the not too distant future, there will be no more need of these and I will pick my projects up where I left off. I’m looking forward to that time — when I can see my mom again, hug my friends, go out to eat at a local restaurant, and quilt with my girlfriends.

Until then — wash your hands, practice social distancing, and be kind to others and yourself.

Love and Stitches,

Sherri and Sam

Categories
Uncategorized

The Eyes Have It

I’ve written prior blogs about balance in a quilt.  Colors should be balanced, and quilting should be equally distributed throughout.  This sounds intimidating, but fortunately, most quilters do this intuitively. And while the intuition may need some fine tuning, it’s not an instinct you have to start from scratch and build on.  Negative space is another aspect of a quilt top that must be balanced.  It’s no secret that quilts like this:

1718 Coverlet

Make me just a little bit crazy.  I know this is the 1718 Coverlet, and it was made literally hundreds of years ago, and styles were different back then.  However, I have two major issues with quilts like this:  First, there is nowhere for your eyes to take a breather, and second, I don’t know where to look first.  Truly this quilt is a thing of beauty and a joy forever (it was done in silk, and English Paper Pieced), but I can’t look at it very long because I have no idea where to look first.  It’s like my entire brain just shuts down.

I have no idea where to look first on this Crazy Quilt.

I have the same issue with most Crazy Quilts. 

I need a roadmap and rest stops when I look at a quilt.  I need to have some direction on where to look and some space where my eyes can rest while my brain processes what it’s just taken in.  And that’s really the topic of this week’s post – how you can design your quilt to help the viewer take in the entire quilt top and have a great time when they do this.  We’ve already hit on this topic in two ways:  The use of negative space in a quilt and connector blocks.  Both of those subconsciously help the viewer really take in the quilt and visionally digest it.  For those of us who love quilts that are set on point, the setting triangles and/or squares do the same thing.  And for some quilts, the blocks themselves, when set together without any sashing or setting squares/triangles, help our eyes move across the quilt top because the blocks give you visual cues where to let your eyes move.  Take for instance, this block:

Jacob’s Ladder Block

This block is Jacob’s Ladder and it’s one of my favorite “old” blocks.  When set either in rows:

Or on-point:

The triangles and four-patches seem to march across the top of the quilt and your eyes follow those paths.  Granted, there is little negative space, but these blocks are usually set with a limited color scheme and that makes up for the lack of open space. 

But what if you have a block like this? Most of the triangles are pointed inward.

If you set them together either on-point or in rows, this is what it looks like.

Horizontal Rows
On-Point — although I am digging the secondary design in this.

Not quite the same effect as Jacob’s Ladder, is it?  The outside triangles of the design block point inward towards the center of the block.  Your eyes aren’t quite sure where to look except for the center of the block.  This is where some well-designed sashing can come into play that will not only give direction to the quilt top, but will also supply a bit of negative space.

I’ve spent a great deal of time and blog space on triangles for a couple of reasons.  First, they are a basic unit in hundreds of quilt blocks and it’s important to know how to make them well.  It’s also important to be aware of what construction technique works best for you.  The second reason triangles are having a lot of play time in my blogs is they give direction to the quilt top.  Think about it.  Arrows are used to give direction.  At the tip of an arrow is a triangle.  We are used to triangles pointing in the direction we should go, and they serve the same purpose with a quilt block and sashing.  Just like this block

Prompts our eyes to look inward…

This block triggers our eyes to look outward.  When paired as part of the sashing with the design block, instead of your eyes being locked into the center of the block, they are prompted to look outward towards the rest of the quilt.  This takes a little planning and a little extra fabric, but it’s worth the effort. 

Why is forcing the viewer’s eyes outwards to the rest of the quilt important?  The first obvious reason is that it empowers the viewer to take in the rest of the quilt.  For as much dedication and detail you’ve put into those squares, you want the viewers to take in the entire quilt, not just the block(s).  Most quilters spend a lot of time on their blocks, whether those are appliqued or pieced.  But you’ve also spent a lot of time on the borders and quilting.  Those should have equal viewing time.  Any type of sashing that gives visual direction helps the viewer to look at the entire quilt.  There are other blocks that lend themselves to sashing cornerstone configurations that do the same thing.

Friendship stars:

Lattice Work:

And other pieced sashing:

Right now, some of you may be asking about on-point quilts.  With these, we’ve abandoned the structure of vertical and horizontal rows.  Everything is diamonds and triangles with these.  Do these quilts need visual cues?  Yup.

Let’s look at this quilt.

It’s a nice quilt.  And I’ve never hid the fact that an on-point setting is my favorite.   So, immediately, any on-point setting catches my attention.  However, when some sashing is included that adds some direction:

Or some connecting blocks that do the same thing:

You get an entirely different look, that in my opinion, is better. 

However, at this point, let’s delve into a different type of quilt.  Let’s talk about a Medallion Quilt.  I’ve mentioned these before, but to review a medallion quilt is a quilt whose layout has a central area that often dominates the overall design. Other design elements are sewn around the center, increasing the quilt’s size as new borders are added around the center.  A lot of work and thought can be put into the center block, as shown in my Halo Medallion.  The center block is a star, so the points naturally lead the eye outward to the rest of the quilt and all the detailed piecing. 

My Halo Medallion. Pattern by Sue Garman.

On this quilt, it’s a little different:

This is a quilt I’m making for my DH as part of his Christmas.  The center block is cut from a panel, so the borders I put around it would have to lead the eye outwards towards the rest of the quilt.  The block was also really colorful, and I decided I needed to use narrow, solid borders around it first for two reasons.  First, to calm it down and then to begin to introduce the fabric to be used in the rest of the quilt.  However, after that, I needed a border to push the eyes outward.  A sawtooth border did the trick.  A few more solid, fabric borders later (again to introduce my fabrics), and a star border made from HSTs was added.  More solid borders and then a square-in-a-square border will be added, again pushing the eyes outward towards the final border. 

In some ways, managing a medallion quilt is a bit more challenging than a row quilt or an on-point quilt because you’re balancing motion, careful introduction of materials, and space for the eye to rest.  To pull off an effective medallion quilt really shows your chops as a quilter and an artist. 

Between this talk of movement and visual cues with any of these quilts, what I am really emphasizing is interdependence.  Interdependence is defined as “the dependence of two or more people or things on each other.”  All quilts have interdependence – it’s a natural part of the design concept.  They have an order (rows, on-point, or medallion).  The interdependence comes into play when color, design elements, fabric, and borders are repeated.  As you plan your sashing to add movement, you repeat colors or fabrics you’ve used in the blocks.  If you’ve used triangles in your design blocks, you will want to use those in your connector blocks or sashing pattern.  If you went rogue and introduced circles as a design element, it would look…well, weird…

Unless you made a quilt like this, which uses circles in the design block and in the sashing.

Circle Jubilee

At this point, if you’re like me, you’re asking yourself, “How do I get myself to the point where I know I’m doing this right?  What do I need to do?”  Give yourself time, practice, and study quilts.   To some degree, a lot of this comes intuitively.  But the longer you quilt, the more it becomes second nature.  If you’re just beginning, I’d advise you to use good quilt patterns by designers that have a solid reputation as quilt teachers.  These folks have been around the quilt block (pun intended here) more than a time or two and by making their quilts you can gain a firm grounding on what elements make up a good quilt.  After a while, you can jump in with your own ideas and change up the quilt to make it more “yours” than “theirs.” 

Looking at historical quilts, award-winning quilts, and quilts made by stellar quilt artists (both in your local guild and those nationally/internationally known) will also give you some ideas of interdependence, movement, and good negative space.  It’s always surprises me a bit to acknowledge just how much my brain remembers from what I’ve read and looked at as I work on a quilt.  My brain just kind of files it away and pulls that information out when I need it.  I’m sure my brain isn’t the only one that works that way, so give yourself permission to Google or Pinterest in the name of quilting.  And a few great quilt books are a solid investment for any quilter’s library. 

To sum this up, it’s important to add some kind of design element to a top that helps the viewer move his or her eyes outwards to the edges of the quilt.  While the center of the quilt may be completely fabulous, you want people to look at the entire quilt you’ve spent time, blood, sweat, and tears designing.  You want to give them a chance to let their eyes take a rest (negative space), before moving on.  And you need the interdependence of repetition of colors, fabric, borders, and shape to keep the quilt in balance. 

Until next Week, Level Up That Quilting!

Love and Stitches,

Sherri and Sam