Categories
Uncategorized

The Demise of Loretta and Adding Soul to Your Quilt…

This week the topic is long arms.  What they are, how to decide on a design, and (if you’re not performing the long arming), how to talk to your long arm artist.  This blog doesn’t discuss loading your quilt, tension issues, or anything else involving the mechanics of a long arm.  A long arm is much like quilting on your domestic machine in that each machine is a little different and has a few quirks.  The sooner you know those quirks and how to deal with them, the happier the relationship between you and your long arm will be.

Loretta

Which brings me to Loretta.  Most of you know that Loretta was my long arm.  I’m using past tense here for a reason.  As I mentioned in an earlier blog, Loretta and I began to have severe communication problems.  She worked fine before I left for Saint Thomas in April.  Upon return, the tablet refused to talk to the long arm.  I rebooted her, plugged and unplugged her, searched for software updates – all to no avail.  I finally called tech support and was told that it sounded like I was having mother board issues.  I was to pack her up, take her to UPS, and ship her to Sewing Machines Plus in California (where she came from).  I did this and a week later she arrived safe and sound in sunny California.  The tech replaced the boards, gave her the spa treatment (cleaning and oiling), packed her back up and three days later, she arrived on my doorstep….

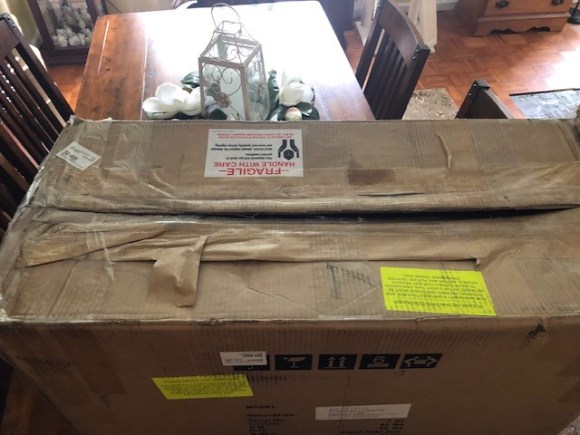
In a box with the sides dented in. 

Inside were the crushed remains of my sweet Loretta. 

One more call to my tech and she was packed up again, winging her way back to California.  I received the sad phone call she was beyond repair, but since it was Fed Ex’s fault she was crushed (I mean, Sewing Machines Plus had FRAGILE all over the box), I received a new long arm which is an upgraded version of mine.  LeAnne is similar to Loretta, but there’s still a learning curve. 

Oy-Vey.

But now let’s talk about long arming quilts in general.  Whether you’re long arming the quilt yourself or having someone else do it, the first thing that has to be considered is the style of the design.  And this basically falls into two categories – and all-over design (sometimes called edge-to-edge quilting) or custom quilting.  We’ll take a brief overview of both, kind of defining what each is and when to use them. 

A all-over design is a quilting pattern that literally goes all over the quilt.  If you long arm, you realize that this quilting is done in rows by using either pantograph or with a computerized design.  It has lots of repeats and it goes from one edge of the quilt to the other.  This is the easiest and quickest way to quilt a top (and if you’re paying some someone to quilt your quilt, it’s also the cheapest).  There are some standard edge-to-edge designs, such as the meander or loops, but there are also some really cool designs with flowers and leaves and almost anything you can imagine.  It’s easy to match either the fabric or the quilt block to the all-over quilting.  If you’ve used floral fabrics in your top, there are quilting designs with flowers.  If you’ve made a Christmas quilt, there are hundreds of all-over Christmas quilting patterns.  So, if you’re quilt isn’t an heirloom one, or one destined for a show, or some other significant quilt, an edge-to-edge design is a great choice.  This is particularly true if most of the fabric in the top is has a busy design on it.  If this is the case, the quilting really isn’t going to show that much, so don’t spend your time or money on a custom quilting job.  It won’t be seen, as the quilting will compete with the pattern in the fabric. 

Custom quilting is exactly as the name describes – the quilting is unique to that quilt, with different designs used in different places in the quilt.  Very little (or most likely, no) computerized quilting occurs.  It’s all hand-guided and can involve ruler work.  Labor intensive, it is generally reserved for heirloom quilts or show quilts.  If you plan on having a quilt top custom quilted by a long arm artist, be prepared.  It’s pricier than an all over design.  If you want custom quilting by your long arm artist, this is the time to have a very frank conversation with him/her and ask to see photos of their work.  Custom quilting can be limited by two factors – skill and available resources.  For instance, if you want lots of ruler work, and your long arm quilter doesn’t have the ruler needed, you may be asked to either contribute to the purchase of that ruler or change your design to incorporate only the rulers the quilter has in hand (these rulers are expensive).  If you want free-hand work, such as lots of feathers, and the quilter isn’t comfortable with the amount or type of labor involved with this, again, you may have to change the design plan for the quilt or work with another long arm artist. 

Whichever type of quilting you decide on, it’s important to bring a few things to the table, no matter whether you’re performing the quilting or someone else is.  And while this is not a blog about how to prepare your quilt for the long arm artist or your own long arm, let me throw this in here:  Every long arm machine has its quirks.  As a matter of fact, in my opinion, long arm machines are the most temperamental sewing machines out there (and that’s really all they are – a great, big sewing machine that will only perform a straight stitch).  If you have a long arm, you  become well aware of whether your machine likes solid backing or pieced, how to run the seams if you’re using a pieced backing, whether it can tackle a double batting, etc.  If someone else is quilting your quilt, it’s very, very important that you have a long discussion with your long arm artist before you deliver the quilt to them.  They will explain how to press your quilt top and your backing, how to mark the quilt if it has a distinct top, and lots of other things you probably haven’t thought of.  Communication is the key if you want your quilt quilted according to your design plans and the long arm artist remains sane.  Listen to them and ask questions.  Ask lots of questions.  If something is not clear, ask for clarification.  Trust me, the long arm quilter wants this.    

Besides these facts, there is something else you need to have in mind before you or anyone else puts a stitch in the quilt sandwich – you need to have a good idea of how you want your quilt to look when it’s quilted.  If you’re hiring out your quilting, do not tell the quilter, “Just do whatever you think best.”  Even if you’ve worked with this person before and they do just wonderful work, don’t say this.  What your idea is appropriate for your quilt and their idea of what would work with your quilt may be two entirely different things.  To avoid any hard feelings or disappointment, come to the table with some ideas.  If you simply want an all over design and it’s a Christmas quilt, ask what Christmas edge-to-edge designs they have in stock.  If it’s a Maple Leaf quilt, ask if they have a design with leaves.  Get the conversation started and the long arm artist can then add to your idea and come up with a quilting plan that will knock your socks off. 

If you’re thinking custom quilting may be the way to go with your quilt, still come with some ideas in mind.  You really need some kind of vision of what you want in order to get the conversation started with your long arm artist.  Once you give the quilter an idea of what you have in mind, quite often (most often, really), they can add to that and between the two of you, a quilting plan will fall into place that both of you will love.  I realize that creating a custom quilting design takes some time and a bit of research, but it is really worth it.  Here are some following ideas to get you started with your long arm artist. 

Go Opposite.

If your quilt has a lot of hard, straight lines, go with a quilting design that is curvy, loopy, or has circles or spirals.  These curved lines will help soften the design and actually enhance it.  Sometimes these curvy designs are built into the computer design component of a long arm (if it’s computerized) but sometimes they will need to be done freehand in order to make them fit the design of the blocks in the quilt top.

Let the Theme of the Quilt Decide the Quilting for You.

If the quilt has cute little houses that are either pieced or appliqued, quilted fences, clotheslines, gardens, etc., would be perfect, fun, and wonderfully whimsical.  If there are pieced or appliqued flowers, quilt bees, butterflies, dragonflies, and fairies into the picture.  Quilt the veins in the leaves.  If you have cats or other animals on the quilt, try for whiskers or dog bones or pet dishes.  This is actually a really fun way to quilt the quilt. 

Talk to Another Quilter, Do a Google Search, or Spend Some Quilty Quality Time on Pinterest.

Any of these can give you tons of inspiration and are a great starting point to get some quilting ideas moving along.  A screen shot of some of the ideas to show to your long arm artist will help him/her, too.

Doodle Your Blocks

This is actually my favorite way to design any custom work I do or have someone else do for me.  I either draw up each block, enlarge a drawing of the block to the exact finished size, or print the finished sized from EQ if I’ve used that program to design my quilt.  Then I take a pencil and begin to doodle on the block.  This usually begins after I’ve done some research on the quilt and looked at ways others handled the quilting.  After I believe I’m happy with the design, I set it aside for a week or longer and then come back to it.  If I still like the design, that’s what I go with.  If I’m quilting an applique quilt, I will do this for every block.  If it’s a pieced quilt and I have block repeats, I decide if every block that’s the same will be quilted the same or if I will change things up a bit.  The important fact to come away with here is give yourself some time to make sure you really like the design idea.  If you don’t, there may be many quality hours with a seam ripper in your future. 

If You Can’t Come Up With Anything Your Happy About, Set It Aside for Awhile.

Let me state at this point, I don’t mean abandon it.  And I don’t mean put the quilt away because truly “Out of Sight is Out of Mind.”  Lay the quilt on the bed  in a spare bedroom.  Hang it on the wall in your quilt room.  In my situation, I lay it on the dining room table because I pass through this room on the way to my quilt studio. The point is put it somewhere you can see it at least a couple of times a day.  After a week or so, that quilt will tell you how to quilt it.  I know that sounds a little hokey, and maybe even borderline psychic, but it will.  One day you will look at that top and it will plainly  tell you how to put those quilting stitches in it. 

Moral of the blog here is that quilting is not the quick afterthought after months of piecing a quilt.  It needs time to come up with ideas, perhaps do some research, and even some doodling.  It may mean some on-line searching for the just the right pantograph or software download.  And if someone else is performing the quilting component, it will mean at least one very frank and detailed conversation.  Probably more.  Quilting is more than just the stitches that hold the quilt together.  For me, it’s what adds the soul to the quilt.

Until Next Week, Quilt with Passion!

Love and Stitches,

Sherri and Sam

Categories
Uncategorized

Lower Those Feed Dogs and Proceed with Confidence!

Last week we discussed how important quilting some of your own quilts can be — how that really increases your skill level as a quilter. And we focused primarily on using the walking foot. However, as much as you may love quilting with your walking foot, there may come a time when nothing but lowering the feed dogs and free motion quilting will do.  There are no instructions in this blog about exactly how to do this, as it varies from machine to machine.  Big Red works differently than my commercial Juki. 

What I can emphasize to you is this technique talks practice and patience.  If you want to learn how to meander the life out of a quilt or use one of those wonderful new ruler feet and quilting rulers, it takes practice.  Sewers in general get used to the feed dogs doing the work.  We simply guide the fabric as the motion of the feed dogs move it under the needle and out the back.  When a quilter free motions, the feed dogs are dropped, and we have to be in charge of moving the fabric.  The results are uneven stitches and even some skipping.  This is normal.  However, like most everything else in life, the more you practice, the better you get at it. 

And you have to be patient with yourself while you learn.  If you’ve sewn for any length of time, it’s easy to get used to sitting down at your machine and whipping something out.  It’s easy to get frustrated with yourself as you’re trying to get this technique down pat.  Go easy on your machine and easy on yourself.  You’ll get better at it the more you do it.  Meandering, stippling, or simple wavy stitches are great for the beginner.  As you get used to the feel of dropped feed dogs and can control your stitches, try the harder techniques, such as dot-to-to quilting, spirals, using rulers, etc.  Draw or trace a design on a scrap quilt sandwich and see if you can follow the lines. It’s come to the point where I honestly can’t tell (unless someone tells me or there’s information pinned to the quilt) if some quilts have been quilted on a long arm or a domestic machine – that’s how far the quilting process has come. 

The statement that commonly comes up at this point is I’m afraid I’ll ruin my quilt if I try to quilt it myself.  I know the feeling.  I felt the same way.  And if I have a quilt I truly believe I will enter in a show, nine times out of ten I won’t quilt it myself.  At least not yet.  Not unless it’s a small one that I can do on my commercial Juki or Big Red.  I don’t feel I have the chops as a long arm quilter yet to do a show quilt justice.  There are some ways to overcome this, with the first one being simply practice. Make some small quilt sandwiches out of a solid fabric, no bigger than 18-inches square.  Thread your domestic machine with a contrasting thread.  Practice on one of these sandwiches every day if you can.  The more you practice the better you will be. If you’re low on batting or don’t have batting scraps, unthread your machine, drop the feed dogs and practice on a piece of paper.  Just know that after several of these paper practice sessions, you will probably want to change your needle, as paper will dull it faster than fabric. 

Try quilting a few charity quilts.  If you belong to a guild or a bee, they may have an organization they make quilts for.  Most of the recipients of these quilts don’t know a thing about quilting, they’re just grateful to receive a quilt.  The little mistakes you make won’t matter to them.  And most of these quilts are not really large ones.  It won’t take you forever to quilt them and it is a much-needed gift not only to the person that receives the quilt but also to your quilt group – most of which are constantly needing folks to quilt tops. 

Join an on-line quilting group that emphasizes the quilting processLeah Day’s website is chock-full of patterns and ideas.  Angela Walters has a Facebook Page called Build A Quilt that is a wonderful resource for domestic machine quilters (I think this is also on her website if you don’t Facebook).  She also has some great YouTube videos under the title The Midnight Quilt Show.  These are not only instructive, they are hilarious.  Each of these ladies generally has some type of quilt-along that I would encourage you to join. 

Make sure you baste your quilt sandwich wellThis step, although not needed when a quilt is long armed, is a necessary process when quilting with a standard home machine.  It keeps the quilt sandwich from wiggling out of place.  Some folks baste their quilts with needle and thread.  Some use safety pins.  Some use basting spray.  If you pin or use thread, make sure the stitches or pins are fairly close together – no more than an inch to an inch-and-a-half apart.  Personal observation here about basting sprays.  I love this product for small quilts, but anything much bigger than a twin-sized quilt has always caused me issues.  Over a  period of time needed to quilt a larger quilt, the “stickiness” seems to wear off and then I’m dealing with a shifting quilt sandwich.  And I usually must change my need after quilting a top that I’ve spray basted.  The adhesive rubs off on the needle shaft and that causes problems with the next thing I sew.  I’ve tried cleaning the shaft with rubbing alcohol, but that does not work as well as simply inserting a new needle.

Try to change top thread as few as times as possible.  I have found that unlike the long arm, I can have a different colored bobbin thread and top thread in a domestic machine.  In this aspect, a domestic machine is really easier to deal with than a long arm (more on why this is so in a follow-up blog).  Sometimes it’s necessary to change thread to match fabric, but it’s much easier to find a thread that will work over the entire quilt.  My favorite go-to thread color to use over an entire top is a light yellow.  And as with piecing, make sure you use quality thread.  You may want to even purchase a thread stand so you can use thread cones instead of spools.  These not only save money, but also time – less of a chance you need to change spools as your quilting.  Another time saver for me is to purchase pre-wound bobbins.  I do this for piecing and quilting.  These bobbins come with more thread on them than I’m able to get on the bobbins I wind.  Superior Thread is my favorite resource for these (they have alllllllllll the bobbin colors that match their spools and cones).  For me, having to stop and re-thread my machine or change the bobbin breaks my quilting rhythm. 

Thread Cone and Holder
Prewound Bobbins

Speaking of thread, make sure your needle works with the thread you’re using.  This seems like a little thing, but it’s not.  If you use a fine thread, such as a micro-stippling thread, in a too large of a large needle, it will constantly break.  Most thread will come with some information about what size of needle is best to use with it.  Personally, my favorite quilting needle is a new top-stitching or leather needle.  These have a sturdy shaft and a super-sharp point that will easily penetrate all the layers of my quilt sandwich.  Always use a new needle when you start quilting.  And if it’s a large quilt that’s being quilted, you will probably want to toss that needle after you’re finished.  It’s fulfilled its life expectancy.

When you’ve finished quilting the quilt, wash and block the quilt before you stitch on the binding.   This is a step which many quilters omit.  And I’ll be honest, if it’s a cuddle quilt for me or a play quilt for a child, I will forego this step.  However, don’t be deterred from performing this.  It makes all the difference in the world in the way the quilt lays or the way it hangs on a wall.  It’s easy to do.  After you’ve rinsed and spun the quilt on a delicate cycle in the washer, remove it and lay it flat.   The surface needs to be one that you don’t mind getting a little damp and don’t mind sticking pins in.  A bed really doesn’t work well for this – it’s too soft.  Pin the quilt down, step back and take a look at it.  If the corners aren’t square, begin manipulating the fabric and re-pinning it to get perfect 90-degree corners and straight edges.  Then allow the quilt sandwich to dry completely before binding.  This one step improves the appearance of a quilt and helps mask any quilting “goofs” pretty darn well.

I hope that this blog encourages you to begin quilting some of your own tops.  Start with small ones and work your way to larger tops.  Trust me, this process makes you an all-around better quilter.

Until next week, Quilt with Passion,

Love and Stitches,

Sherri and Sam

Categories
Uncategorized

Quilt as Desired? Seriously?

Here’s the scenario…you’ve cut your fabric.

You beautifully pieced or appliqued all your quilt blocks.

You’ve sewn those blocks into rows.

You’ve put on the borders (correctly…so they’re not waving at anybody).

Now you get to the last line of the quilt pattern instructions:  Quilt as desired.

Aaaannnnnndddddd that’s where a lot of us freeze.  Quilt as desired?  Really?  After all of the effort I just put into that quilt top now the last line of the instructions contains only three words?

While more and more quilt patterns and magazines do give suggestions, there still are quite a few sets of directions out there that leave the quilting entirely up to the maker’s imagination and creativity.  And while some quilters seem to have no trouble coming up with ideas to execute themselves or give to their quilting artist, others of us struggle.  Prior purchasing my long arm, I quilted a good deal of my tops on my domestic machine.  Then three years ago, Loretta became a reality and I learned how to quilt on her.  However, I’ll be the first to admit, I often have a hard time deciding how to quilt a top.  I will tell you that it gets easier with time and practice, but I still sometimes have issues with the quilting.  This blog will be divided into two sections (and possibly two blogs, depending on the length).  The first section will discuss ideas about quilting on your domestic sewing machine.  The second section will deal with long arm quilting, no matter if you’re doing the long arming or you’ve farmed it out to your long arm artist.  This blog does not address the technique of how-to free motion quilt on a stationary machine or long arm.  It simply offers ideas and few tricks.  Learning to free motion on either machine requires a book, not a blog.  This blog also does not discuss batting.

I firmly believe that everyone needs to quilt some of their own tops.  I think this process makes you a better quilter because it forces you to thoroughly deal with each step of the quilt-making process.  You see first-hand why squaring up is important.  You understand the need of keeping everything (as much as possible) on-grain.  So, if you haven’t already, take the plunge and quilt some of your own tops – even if it’s just small ones. 

I’m also assuming with this blog that everyone has access to a domestic sewing machine, as hand quilting is another blog unto itself.  Even if you have a small machine, such as a Featherweight, you can manage to quilt small tops. Quilting on a regular sewing machine is also called “Stationary Machine Quilted.”  This is a term that’s commonly seen at quilt shows either on the information attached to the quilt or in a brochure available at the show.  This simply means that the machine cannot be moved, the quilt sandwich has to be moved in order to quilt it.  If it’s a smaller show, this can also mean a mid-arm machine, as some of those are also stationary.  At other times, mid-arms will have their own category, especially if it’s a bigger show. A mid-arm quilter is (generally) larger than a domestic sewing machine, but smaller than a long arm. 

First some ideas that need to be considered whether you’re quilting on a domestic machine or long arm.

 What is the technique and design used on the quilt top? Is it an applique quilt or a pieced quilt?  Is it a little of both?  Each technique requires a different approach.  With pieced block, you can quilt in the ditch and then echo quilt that if desired.  With applique, you echo around the appliqued pieces, but then have to consider what will be put in the background.  Typically, you don’t quilt over the applique pieces, but again, that’s not a hard, fast rule.  If my applique pieces are large (such as in Country Inn), I will stitch over the pieces in some facet because if I don’t, the batting may sag there over time. 

Country Inn Quilt

What is type of fabric is used?  Here’s where you have to love print fabric:  It hides your quilting mistakes better than a solid will every time.  If you’re new to the quilting process, the tiny little “blips” are not as visible as they would be on a solid material.  Also, if prints are used (and I’m talking about pieced quilts here, not applique), fancy quilting, such as tight crosshatches or feathers, will not be as visible.  Unless you’re just jonesing to use those quilting techniques, they can be left off.  A meander, looping stitches, or a simple all-over design works well or simply stitch in the ditch and echo it.  The choice of a printed fabric should also be considered with the backing fabric – it won’t show obvious stops and starts or other goof ups as readily as a solid back. 

However, if you’re a confident quilter, a solid fabric can showcase your quilting chops beautifully.  Please use that solid fabric and let your talents shine.

What is the purpose of the quilt?  Generally, if it’s a cuddle quilt, play quilt, or a charity quilt an all-over design works well.  That type of quilting is quick and pretty mindless.  These types of quilts tend to be washed more than other quilts, so the quilting has to really secure the backing, batting, and top together and hold up to a washing machine and possibly a dryer.  A close meander or other edge-to-edge quilting is perfect for this.  If the quilt is destined for a bed, you may want to have a more custom quilted look.  And if you plan on entering the quilt in a show, you definitely want custom quilting.  More of this a bit later in the blog about long arm quilting.

Now let’s get into quilting on a standard sewing machine.  For years I quilted my tops on either this machine…

Janome 7700 — Big Red

Or this one. 

Juki 2010Q

The Juki is a commercial machine, and probably could be classified as a mid-arm.  I love quilting on Big Red – she has hundreds of specialty stitches and she’s a dream to sew on, but she is computerized.  While this New Horizon machine was the second in a line that Janome designed for quilters (these have a larger throat that enables you to manipulate your quilt easier), I got kind of antsy about how continually dropping the feed dogs on a computerized machine would affect it.  So, I purchased the larger Juki, which is a heavy-duty, commercial machine.  It only sews a straight stitch and doesn’t give so much as a whimper when you drop her feed dogs and free-motion the life out of a quilt. 

“Standard” Walking Foot

With either of those or any other domestic machine, the first thing I would urge any quilter to do is fall in love with your walking foot.  I’ve mentioned a walking foot before, in the blog I wrote about paper piecing.  A walking foot is wonderful because it uses a dual-feel mechanism that can push multiple layers over your feed dogs as one unit – nothing shifts out of place.  If you’re just beginning to quilt your tops on your sewing machine, a walking foot (when paired with good basting or pinning) keeps the quilt top, batting, and backing together and they don’t wiggle out of place.  If your machine doesn’t come with a walking foot, read through the sewing machine manual and find out if the machine is a high-shank or low-shank.  Then do a Google search to find if a generic walking foot is available or if your sewing machine brand has one available specific to your machine.  They’re not too terribly expensive.  I use my walking foot for paper-piecing, sewing on my binding, and quilting. 

There are several options for walking foot quilting.  You could stitch-in-the-ditch (sew along the seams that join the block units together) and then echo quilt out from that about a ¼-inch.  Let me also throw in here that some machine brands have a stitch-in-the-ditch quilt that is very helpful with this technique. 

Hanging Diamonds
Cross Hatch
Wavy Line Quilting

“Gridding” the quilt is another option.  This quilting technique includes crosshatching, regular grids, grids with wavy lines, and the hanging diamond grid.  When I first began quilting my own tops, these were always my go-to quilting patterns.  There were no obvious stops and starts – I quilted completely off the edge with each line of stitching. 

Applique Quilting

You can use the walking foot on some applique quilts.  My standard quilting technique for quilting applique is to stitch closely around the applique design and then echo stitch one or more times out from the initial close stitching.  If the applique block is small, I may just echo stitch the entire thing.  But if it’s a larger block, once the initial stitching and echo stitching are complete, I do some kind of close stitching in the background to make the applique “pop” off the block.  If the applique is large and has gentle curves, the walking foot can go around the applique just fine – you don’t have to use your darning foot and drop the feed dogs for this, although you may have to when you’re dealing with the background. 

There is one process that you must serious consider when quilting with the walking foot, and that’s how to mark your quilt.  If you’re stitching in the ditch, the seam serves as a guide to help keep the stitches straight.  But if you’re echo quilting, crosshatching, stitching a vertical and horizontal grid, or making hanging diamonds, the quilt top usually needs some kind of marking.  And it’s always easier to mark the top before  you make the quilt sandwich.  A long rotary ruler is handy to use as a straight edge.  It covers more space.  My favorite ruler to use for marking is this:

This is an extra-long yard stick my BFF Janet gave me a few months ago.  It came from her father’s business all the way from the great state of Indiana.  It is a handy, handy thing and I love it.

Almost any pen/pencil can be used to make your guidelines.  My favorite is this: 

Frixion Pen

Once the quilting is completed, simply run a hot iron over the top and the marks disappear.  I know there’s some debate about these (and other similar pens), but I make a really light mark, not a bold line, so I’m not too concerned.  There are also the wash-out pens…

Blue Wash-Out Pen

After the top is completed (but not bound), toss the top in the washer and use cold water to rinse the top out.  Hot water may make the marks permanent.  After the top is rinsed and spun out, continue to block the quilt and let it dry.  Then bind. 

And of course, there’s the good, ol’ #2 pencil.  Just don’t make a really dark line. 

Painter’s Tape

Then there is always Painter’s Tape.  If you read my blogs from last year, you may remember during my guild’s Small Quilt Challenge, I learned to use Painter’s Tape as a guide to quilt one of my small quilts.  I liked it so much that I went back to Walmart and purchased a roll of that tape in every available width.  It’s a great way to mark your quilts because it makes no marks on your quilt top, permanent or otherwise.  The trick with Painter’s Tape is you use it after you’ve made the quilt sandwich.  And one strip of tape can be used several times (just move it over as you quilt) before the sticky wears off and you need a new strip. 

Most walking feet come with this little gadget:

Walking Foot Quilting Guide

You may have wondered what it is.  It’s a quilting guide.  If used properly, there is no need to mark the quilt by any method.  It inserts in either side of your walking foot and can be moved according to the width desired between the quilting lines. 

This is how the guide fits in my walking foot

This is a handy-dandy accessory and I have found it works well with small quilts.  However, with larger quilts, where I’m manipulating a lot of bulk through my machine, the guide will shift and I’m constantly re-adjusting it.  Just beware that if you decide to use this, you will need to make sure that that the width between your quilting lines stays consistent. 

If you’re walking foot is similar to mine and it has an open area,

chances are you can also use some of the “fancy” stitches on your machine in the quilting process without changing to an open-toe foot.  The walking foot can continue to move the quilt sandwich over the feed dogs and beneath the presser foot and those fancy stitches can be used to outline blocks or fill in empty spaces.  If you machine has stitches other than a straight stitch and zig zag, use them.  The really do add a touch of whimsy to the quilt top. 

Part of using other stitches can include the buttonhole stitch used for raw-edge applique.  I do this a lot with my raw-edge applique quilts.  I find it especially useful in quilting the background before I applique the block.  Simply put a thin layer of batting behind the background fabric, just like you were making a quilt sandwich, but don’t put a back on it.  Go ahead and meander or crosshatch the background as usual, but stop and start 1/4-inch away from the edges.  This keeps the batting from being caught in the seam allowance when the blocks are joined together. Then applique as normal and finish as desired.  The quilting process won’t take as long because you’ve already performed a good deal of it during the piecing.

Whew. This blog is getting longer than I anticipated, so next week we’ll pick up free motion quilting on your domestic sewing machine.

Until next week, Quilt with Passion!

Love and Stitches,

Sherri and Sam

Categories
Uncategorized

Prints and Solids…Which Works Best

My favorite part of making a quilt is picking out my fabric.  Now let me make a quilting confession:  I couldn’t always say this.  It wasn’t until after I had quilted several years that my fear of choosing the wrong fabric began to fade.  Sometimes I still wonder if I have made the right choice, but between the years of 1986 until 2019, I think I’ve gotten better at the process, although there still is room for improvement – there always is.

This week I would like to share with you what I’ve learned to make me more comfortable with the process.  I once was a beginner and I understand the (often) overwhelming confusion when you enter a quilt or fabric store – especially a large one.  The first time I shopped at Hancock’s of Paducah (one of THE motherships of quilting), I literally had to back out, take a deep breath, and then go back in. The colors were a complete cacophony and I didn’t know where in the world to begin.  I was used to nice, neat little quilt shops that arranged their selection by designer and then by color.  Hancock’s of Paducah had aisles and aisles of fabric which equated to aisles dedicated to one designer, with all of that designer’s material arranged by families and within these families, arranged by color.   Instead of a few hundred square feet to look through, there were thousands of square feet to peruse and then there was the warehouse with all of the clearance items.  Oy-vey.  I was never so glad to have a shopping list and swatches in my life.

I realize that this is not usually the scenario for fabric shoppers.  In fact, if you’re lucky enough to have a brick-and-mortar quilt or fabric store near you that’s still in existence, you’re not going to be perusing bolts and bolts of fabric.  More than likely, you may be purchasing most of your fabric on-line.  So how do you begin to pick your fabric?  How do you know when to choose a solid colored fabric or a print?  Do the “rules” change from applique to piecing?

Let’s take that last question first – do you make different fabric choices if you’re appliqueing rather than piecing?  Generally, no.  The same rules apply.  If anything, you can go a little more rogue with applique by choosing fabrics that fit the image you want to portray rather than dealing with all-cotton piecing fabrics.  In other words, if you want to use something like sparkly lame’ for an appliqued wedding dress, you can do that.  While a non-cotton fabric will work with either machine or hand applique (just make sure you prep the fabric correctly), generally speaking, it would not work well with piecing. 

Let’s take an overview of fabric first and bear in mind we’re discussing color, hue, and print with this blog – what works best where.  This is not a color theory post – color theory requires a book, not a blog. 

The first place that’s really the easiest to begin (especially if you’re a beginner) is with a pre-chosen stack of fabric – like a pack of fat quarters or layer cakes – that are bundled together and for sale as one unit. 

Fat Quarters
Layer Cake

I realize there are other precuts available (jelly rolls, cinnamon rolls, etc.) but for most quilt tops, the fat quarters or layer cakes seem to be the most versatile.  The only fabric you generally have to add to either of these is a neutral, and that’s not too hard to pick out.  If you’re wondering how many pre-cuts a quilt top takes, I have a blog on that – just give it a Google.    The great thing about precuts is they’re huge time savers and wonderful teachers.  They save time because all of the fabric, except for the neutral, is already chosen.   They’re also great teachers because they can show you what fabrics go together.  This gives you a good overview of color theory.  The only drawback here (and I’ve mentioned this before in another blog), is that generally there is no true dark.  However, these are awesome beginning points and just because there may be no real dark involved in the fat quarter or layer cake doesn’t mean they should be discounted.  If you’re a beginner, use these to get you started.  If you’ve got some quilting miles under your belt, you can pick your true dark when you chose your neutral. 

Pieces of the layer cake that show varying scale or print.

There is another terrific reason for choosing precuts besides learning about colors, and that reason is scale.  Usually the fabric involved with precuts will also have varying-sized prints in them, and this is really the issue I want to talk about in detail – print fabric verses solid fabric and when to use both or either. Fat quarters and layer cakes will have prints that are so small they can read as solid fabric, as well as medium-sized and large prints (which you need to use with care – more on that later).  With precuts not only do the colors play well together, but scale of the prints also play well together.  So, choosing precuts just about assures nearly every fabric selection will look wonderful in your quilt.

However….if you’ve been around the quilting block a few times, you are probably like me and have curated a somewhat prolific (if not impressive) fabric stash, and that’s the first place you go to pick out fabric for your quilt.  This can be a little daunting but it’s also really exciting. There are very few things that make me happier than pulling all the fabric from my stash to make a quilt and not have to spend any additional money, except for perhaps the backing (and that’s because I like the wide quilt backing material). 

One of the first places I go for inspiration is Pinterest.  Sure, I have lots of quilt pictures stored on my phone but finding them may require significant search time.  With Pinterest, they’re neatly filed away, sorted by category, and it just takes seconds to find them.  I can study color and scale in those quilts and get a good idea about what type of fabrics I need to pull from my stash. 

Another way I begin picking my fabrics is to pull one piece of material that I really like and begin choosing fabrics around that fabric.  Take this print:

This is a new purchase from Fabric.com.  I am a sucker for fall-colored fabrics and when this showed up in my email box, and it was on sale, a few yards were called for.  I can pull lots of colors ideas from this print:  green, orange, yellow, and a medium white.  There’s even some of my very favorite color here – purple.  I can always use this fabric as a jumping off point to begin to pick my colors.  As a matter of fact, this is the way I begin at least 95 percent of my quilts.  A fabric that serves as a basis for the rest of the color selection of a quilt is called focus fabric.  And if there is any questions about what colors you need, take a look at the selvage of your fabric.

See these dots?  This is the manufacturer’s way of letting you know what colors were used when printing the material.  All of these colors will work well in your quilt. 

The important concept to keep in mind as you’re choosing your material is that you want the colors to be the same vibrancy as in your focus fabric.  You don’t want them “grayed down” or “lightened up.”  For instance, while I could use a green as a supporting color in this quilt, a mint green wouldn’t work.  The green in my focus fabric is more of an yellow-green – something a light green isn’t. 

Like wise the purple in this fabric has red undertones.  I wouldn’t want a lavender or deep purple.  Those just wouldn’t work, even though they’re in the same color family. 

You’ll want to pull a variety of colors that have the same vibrancy – from lighter to darker.  Don’t try to be too matchy-matchy (all of the same color greens or same color yellows).  If you do this, your quilt looks flat.  In addition, I also try to find a “zinger” fabric – something that is just a little off or unexpected.  I try to find a “zinger” for every quilt, but this doesn’t always happen.  Sometimes there just isn’t one in my stash or one in the store or one on-line that I can find. 

This would be my “zinger” fabric in the layer cake.

Now let’s talk scale.  You not only want some great colors in your quilt, you also want fabrics with varying scale as well as solids.  Let me park it right here and talk about why scale is important and why your quilt needs prints.  Without prints, your entire quilt will look flat.  And by that, I mean there’s no ebb and flow, no motion, nothing to direct your eye where to move…it’s like looking at a sink full of water with no bubbles.  It’s like eating a soft pretzel with no mustard.  It’s like a hot dog with no chili.  It’s like pulled pork with no good, ol’ Lexington, North Carolina barbeque sauce.

In other words….it’s boring.

While I readily admit that there are a very few quilts that lend themselves towards solids (think Amish quilts here), most of the time – for both applique and piecing – prints are needed to add movement and depth to a quilt.  While some solids could and should be used in a quilt, their use should be limited.

If you study fabric collections, you will notice the size of the prints vary.  There will be some like this:

This print is so small, it can actually “read” as a solid (it may appear to be a solid when looking at the quilt from several feet back).  Sometimes these small prints are the same color family as the background, and sometimes they are another color, so the print has a little more “zip” to it. 

They’re are also called “blenders” if the print is in the same color family as the background.  These are great to use in in any size unit of a quilt block.

Blender Fabric

And there are some medium sized prints. 

These prints, whether they are the same color as the background or an opposing color, are obvious to the eye.  These give definite motion to the quilt.  You do have to be a little careful that the block unit they’re used for is big enough so the print can be seen.

And then there are these: 

These are large prints and if you’re thinking at this point that most large prints would be focus fabrics, you’re right.  There are some tone-on-tone large print fabrics that are wonderful for applique backgrounds or can serve as a neutral for your quilt.

It is important to have a variety of prints in your quilt – small to large.  If you choose all small prints, your quilt will “read” solid and look flat.  But if you choose all medium or large…

It looks too busy.  If I just used these fabrics in a quilt, there would be nowhere for my eyes to rest and the quilt wouldn’t “breathe.”  You need some small prints as well as the medium prints. 

Now, let me throw in some words of caution here and a general “rule” I follow.  First, I am a firm believer that if at all possible, it’s good to sprinkle that focus fabric throughout your quilt, not just keep it for the borders.  If you do this, make sure that the patches you use it in are big enough to support the print.  For instance, with the fall focus fabric above, I wouldn’t want to use it in probably anything less than a 3-inch square or a 5 ½-half-square triangle.  Why?  I would lose too much of the print.  It wouldn’t show up.  And if you have a beautiful print fabric, you really want it to shine. 

Now for my general “rule” (and please remember there are no hard and fast rules about quilting other than you have a good time).  I try to designate my solid fabric for the smallest units in my quilt and I try to make that solid fabric one of the most vibrant in my quilt.  Again, take a look at the focus fabric above.  I really want to find a solid purple to go with this fabric.  It would be vibrant and hold its own against the black background and other prints.  In addition, if the solid fabric is used in the smallest patches, there are no worries about losing the integrity of the print in the unit. 

I know I have talked colors and tints and hues in other blogs, but I think this is the first time I’ve addressed the importance of scale to any degree.  And while solids will always be important, prints are the fabrics that add character to the quilt.

______________________________________________________

And now I have some sad news to share.  After three years of serving as my long arm, Loretta is no longer with us.  She developed mother board issues and had to be shipped back to Sewing Machines Plus in California a few weeks ago for repairs.  While she survived the trip to SMP just fine, she crashed and burned on the way home.  Fed Ex was not kind to my girl.

After some harried phone calls with my tech at SMP, I was asked to once again ship her back to them for repairs.  Last week I got the phone call that she was beyond repair and they were replacing her with a King Quilter Special Edition.  My new long arm head arrived  Saturday, and I’ve spent the last several days getting LeAnn up and running (which is another story for another blog… oy-vey).  I’ve still got to put on the last encoder (the X-axis encoder has been a pain in the tookus), and I’m waiting on the correct laser to be shipped to me.  Stay tuned…I’m looking forward to working with LeAnn.  I’ve got three quilt tops waiting in the wings….

Until Next Week, Quilt with Passion,

Love and Stitches,

Sherri and Sam