Categories
Uncategorized

(Almost) Everything You Need to Know About a Walking Foot

Sewing machines … even the most basic ones … come with a lot of stuff you may not know what to do with.  I faced this situation today.  My daughter and son-in-law decided to homeschool the grand darlings this year.  Before I get a ton of questions and comments about homeschooling (all the good, the bad, and the ugly), let me inform you this decision was made after a great deal of thought.  Last year, they were enrolled in a wonderful charter school, but with COVID pushing back in-person instruction here for at least the first nine weeks, and the learning portals having good days and bad days (they were down three out of the first five days of school), it was decided homeschooling would give the girls more consistency.  And, as a retired educator, I agreed. 

I am delighted that my daughter and son-in-law let me part of their curriculum.  For one hour every week I get the girls for sewing.  My oldest granddaughter has a sewing machine, but I had to buy the youngest one.  We settled on a Juki.  It’s a very basic machine with a finger guard.  However, I was pleased to find it not only had several decorative stitches, it also came with a drawer of stuff – seam ripper, oil, needles, an extra spool holder, and two extra feet.  One is an open-toe foot and the other is a walking foot.

Which totally threw Ellie for a loop.  “What’s this?” she asked, holding it up for my inspection.

“It’s a walking foot,” I told her.

“Doesn’t the machine need two so it can walk?”

After I explained what a walking foot did (after I choked back my laugh), it still made no sense to Ellie.  That doesn’t bother me.  One day it will become apparent what the foot does and why it’s important, but it got me wondering just how many of us have a walking foot and are you aware of just how many things it can do?

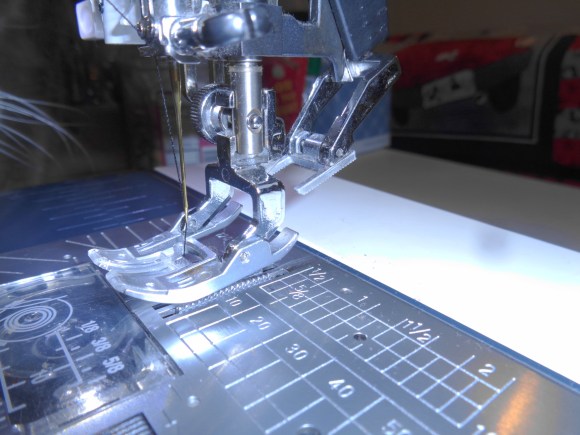
Most walking feet look a little like this:

Most walking foot attachments without dual feed look something like this.

You remove whatever foot you’re using on your machine and attach this foot.  Wikipedia defines a walking foot as this:  “A walking foot is a mechanism for feeding the workpiece through a sewing machine as it is being stitched. It is most useful for sewing heavy materials where needle feed is mechanically inadequate, for spongy or cushioned materials where lifting the foot out of contact with the material helps in the feeding action, and for sewing many layers together where a drop feed will cause the lower layers to shift out of position with the upper layers. A walking foot is also good for sewing materials with varying layers because it can climb up and down these layers easier than other feeding mechanisms.”

And if you think this definition makes the walking foot sound like a tool every quilter needs, you’d be correct.  But more on this a little further down in the blog.

With almost any sewing machine, the fabric is moved by the feed dogs.

Feed dogs are those bumpy ridges below the presser foot.

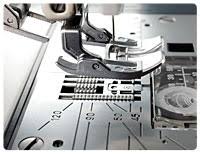
The presser foot holds the fabric down and as the feed dogs move, they take the fabric with it.  It is actually moving the lower fabric that is sitting on the feed teeth and the upper piece of fabric is just going along for the ride.  This is why, at the end of stitching with a “regular” presser foot (such as the ¼-inch quilting foot), the two fabric pieces maybe mismatched a little or a lot, depending on the type of fabric that’s sewed. 

At this point, it’s important to reference the difference between a walking foot and dual feed.  While it’s possible to find a walking foot/walking foot attachment for almost any make and model of machine, not all machines have dual feed.  However if your machine comes equipped with dual feed, it works in tandem with a walking foot.  So, what is dual feed?  Dual feed is the machine’s ability to feed the fabric through the top and bottom at the same time – both fabric layers are fed evenly over the feed dogs.  This keeps the fabric from crumpling or shifting. Why is this feature so awesome?  Well, if you like to incorporate plaids, checks, or ginghams in your sewing projects, this keeps everything lined up, so nothing gets off kilter.  Likewise, if you sew complicated quilts with lots of layers or work with machine applique, you quickly learn to appreciate dual feed.  If your machine comes with this feature, it will probably be listed as one of the selling points either by the salesperson or in the sales brochure.  If you’re still not sure, consult the all-knowing Google (put your machine’s make, model, and number in the search bar) or the machine’s manual.   Either one should be able to tell you if your machine is dual feed equipped.    

This is Big Red’s walking foot. My Janome has dual feed, so the walking foot works with the dual feed.
The two-prong mechanism behind the walking foot engages the foot with the dual feed. And yes that is Sam’s whiskers to the left of the picture. He was my photography assistant today.
When I insert the two-pronged lever into the back of my walking foot, the dual feed engages with the foot.

While the majority of my machine’s feet simply snap on, the walking feet work a little differently.  In order to engage the dual feed mechanism with the walking foot, I attach the foot by inserting the dual feed bar in the back of the foot. 

If you have both the walking foot and dual feed, it truly is a wonderful thing because:

  1.  The walking foot moves all fabric layers at the same time and pace according to the feed dogs.  The dual feed function affects the top layer of fabric and the feed dogs control the feed of the bottom layer of fabric.  If you have both working in tandem, then you’ve lowered the possibility of the fabric shifting any to pretty much zero.  If you quilt any of your tops on a domestic machine, you quickly learn to appreciate this feature.  The top, batting, and backing all stay together, move through the machine at the same time, and reduces the chances of any puckering. 
  2. The walking foot has no motor and the foot is dependent on the feed dogs’ movement.  This action moves all the layers at one time.  Once the walking foot gets to the back, it lifts and springs forward, and waits for the next feed dogs’ stroke.  The dual feed mechanism has a separate motor so the top fabric (that can get somewhat left behind with the walking foot), keeps up with the lower piece of fabric.  Anything in the middle (like batting), just hangs on for the ride and moves with the top and bottom fabric.

I purchased two alternate walking feet to go with Big Red.  There’s this one:

Quarter-inch walking foot

It looks very much like the standard walking foot, except for the black phalange on the right side.  This is the ¼-inch walking foot, which works just like the quilter’s foot:

Standard quarter-inch foot

I line the fabric up so that it’s touching the black phalange on either foot and I sew a perfect ¼-inch seam.  This is great for piecing blocks that have a lot of layers coming together at one point, so nothing shifts out of place.  I piece with this foot at least 90 percent of the time.  If I’m quilting a top on the machine, this phalange acts as a guide if I want to stitch close to the block seams, but not actually in the seam. 

Recently I purchased this walking foot:

Open-toe walking foot

It’s an open-toe walking foot that I can use with machine applique.  It works great with either a zig-zag stitch or the buttonhole stitch and prevents any lower layers from shifting. 

Regardless of whether or not your machine has dual feed, you should give your walking foot a lot of use.  I realize my blog primarily concerns quilting, however; if you make garments, a walking foot can save your sanity when sewing plaids or checks – it really keeps them lined up nicely.  Likewise, if you’re sewing lingerie, undergarments, swimsuits, or anything else with straps – it keeps everything in place.  I have also heard the walking foot works well with knits and other stretchy and slippery fabrics that easily shift. 

Both quilters and garment sewers make projects with lots of layers – like bags, totes, and wallets.  Those types of projects tend to take not only lots of layers of fabric, but also thick, sew-in interfacings.  A walking foot can help keep all those layers together and prevent any shifting. 

And as for quilters, I really recommend using a walking foot for sewing on the binding.  At this point in my quilting career, I can’t imagine using anything else. When sewing on the binding – especially if you’re using the traditional French Fold binding – you realize that your joining six layers of fabric together – the backing, the batting, the top, and two layers of binding.  That’s a lot of bulk and with a traditional foot, even with the dual feed, it’s easy for all of that to slip out from under the needle.  A walking foot, especially if it’s working in tandem with a dual feed, largely prevents this from happening. 

If you quilt any tops on a domestic machine, some quilting can be done with your walking foot instead of dropping those feed dogs and quilting that way.  If I’m working with a lot of straight-line quilting (such as cross hatching) I’ll mark my lines and go at it with a walking foot.  Quilting which incorporates gentle curves such as this:

Or this little table topper I made:

Can be made with a walking foot.  I draw my quilting lines out and then just follow them. 

A walking foot is a great attachment to have, and it can be used for lots of different types of sewing.  However, keep in mind that as great as this foot is, it can’t be used for everything.  The walking foot handles some zig-zag stitches pretty well.  Others not so much.  I’ve learned mine handles a “traditional” zig-zag (one swing left and one swing right) great.  If I’m incorporating a zig-zag which has multiples swings to the left and then the right, it doesn’t handle that much side-to-side action well at all.  I use a regular presser foot for that type of stitch.  Likewise, the decorative stitches that have a lot of right-to-left movement or forwards and backwards movement – most walking feet can’t make those stitches.  It was made to move in a forward direction. 

I hope this blog encourages you to get your walking foot out and use it more.  It’s a great little attachment to have.  If your machine doesn’t have one, jump on the internet machine and Google your make, model, and machine number to find out if it’s a high shank or low shank.  Then Google walking feet.  You should be able to find a generic one that will work on your machine.  And they’re not super-expensive.

Until next week, Level Up Your Quilting!

Love and Stitches,

Sherri and Sam

Categories
Uncategorized

Show and Tell…

Okay, this week is really wellness check week.  How is everyone doing out there?  As I’m writing this blog it’s actually August 13, 2020.  In North Carolina, we’re still wearing masks, social distancing, and washing hands.  Our schools and most of our university systems will open their academic year with remote learning.  There is no college or high school football until February.  Where I live the temperatures are in the mid-90’s now and the humidity matches the thermometer. 

In short, it’s hot, sticky, and uncomfortable with or without a mask on.  Don’t even ask what my power bill was last month.  The AC never cut off.  Like a lot of my friends, I’m sick and tired of 24/7 COVID and political news.  I’m weary of staying home so much, totally over working from home, and I miss seeing my friends in person.  While I’m grateful for the technology that keeps us in touch, I can’t wait until the time when my guild and bees can be back together.  My Tuesday night sit and sew is now Zoom and Sew.  The High Point Quilt Guild hasn’t met since March.  The Applique Society’s annual meeting was Zoomed.  Quilt shows and their classes have gone virtual.  Technology has been my savior during 2020, but I miss the in-person-hug-your-neck meet ups. For me, one of the saving graces has been the Virtual Quilt Shows.  Quilt shows which normally I would never get to visit have gone the virtual route not only with their quilts and vendors, but also with their classes.  I’ve had the outstandingly wonderful opportunity to take classes with nationally known quilt artists in the comfort of my own studio.  This week I’ve had two long-arm classes with Bethanne  Nemesh.  She was awesome.

I’ve depended on my quilting to help get me through this year.  I’ve mentioned before that during the stressful times in my life, quilting and quilters have been a constant.  The encouragement and support I get from other quilters have kept me sane.  The ability to sit down and create something beautiful and useful during the times when my life has been complete chaos has kept me going when I really just wanted to stop and stay in bed. 

However, the bright side to all of the time spent at home is how much I’ve completed this year!  Unfortunately, several of these quilts are intended to be under the Christmas tree, so I can’t show them just yet.  But I did finish a few things that aren’t destined for bows and wrapping paper and I wanted to share them with you. 

In the past I’ve written about my journey with the Language of Flowers quilt pattern by Kathy McNeil.  I’ve completed this block:

This isn’t an easy pattern, but it was one of those which bit me hard as soon as I saw it.  I loved the colors and I’m a sucker for floral applique.  Generally, when I’m working with an applique quilt, I finish one block completely – from start to finish – to get a feel for how I want to proceed.  Do I want to do all the applique and then the framing or do I want to complete each block before I move to the next?  For this quilt, I think it will work better to complete the applique before moving to the scroll work that frames each block.  I’ve also finished the second block, altering some of Kathy’s flowers to better suit me. 

I’m this far:

Into the third block. 

I am seriously loving this quilt.  It is so much fun, and I find hand applique exceedingly relaxing. 

In a move to keep our guild members in touch with each other, Susan proposed a quick mystery quilt.  We found a weekly clue in our email either Sundays or Mondays. The end result was this:

Which is perfect as a fall table topper.  I’m still working on the guild’s Block-of-the-Month.  Despite the fact we’re not meeting, we’re still able to pick up our blocks from Susan.  We let her know we’re dropping by her house to pick the blocks up and she leaves them on her porch.  Everything is socially distanced.  I chose the batik color way:

Since my grand darlings don’t read my blog, I can show you their quilts I’ve made for part of their Christmas:

I will bag these with night gowns and robes, a mug, cocoa mix, and a book for each. 

Then there’s this pile of block units…

Which will grow up to be a quilt pretty soon.

And lastly, remember this stack of blocks for my Grandmother’s Flower Garden?  I finally finished all my blocks.  Funny story about the blocks…three times I sincerely thought I was finished with all the blocks.  I counted and re-counted but every time I laid the blocks out, I was missing a few (just because I can do math doesn’t mean I can count).  I finally did get all of them made as well as the six half-squares.  I’m adding the green diamonds which join the blocks and am really close to sewing my first two rows together.  This is taking a bit of time, since the entire quilt is hand pieced.

While I have really, truly disliked this virus and the way it’s disrupted everything in our lives, I am thankful for a couple of truisms.  First, we do live in a wonderous time.  A hundred years ago when the Spanish Flu ran rampant through our cities, little more could be done than wear a mask and social distance (although they didn’t call it that).  However today, we have so much technology on our side.  I know there are disagreements about what works and what doesn’t, but on the whole, we are really blessed.  We not only have some of the best minds in the world working on treatments, therapies, and vaccines, but we’re also able to share that information with a point and click of a mouse.  When you think about how far we’ve come and in such a short amount of time, I can’t help but feel we’re going to lick this thing before long.

The second truth I’ve realized is quilting is still my constant – just as it always has been.  Prayer and quilting have gotten me through some rougher patches in my life and they’ve both kept me sane through COVID.  I do love my quilting groups, but the thing about quilting is it’s really a pretty solitary hobby.  Quilting may provide the stitches that keep us together in guilds and bees, but it also is that still, quiet place where we can go to re-center ourselves and set our lives in order.  And in 2020, I am so very thankful for that.

Until next week, stay safe, stay healthy, stay sane … And quilt on.

Love and Stitches,

Sherri and Sam

Categories
Uncategorized

One Quilt…So Many Different Sizes of Blocks

Way back in January, I announced this year’s blog theme was “Level Up Your Quilting.”  We’re well past the half-way mark for 2020 and I wanted to refresh your memory about not only what the theme is but also what it means.

For 2020, I wanted to take what you knew and what we had discussed in the 2018 and 2019 blogs and build on those topics.  I was upfront when I told you a lot of this year’s blogs would not be for the beginning quilter, but would assume you knew the basics – such as how to sew ¼-inch seam on each of your sewing machines, how to accurately rotary cut fabric, etc.  And while I know 2020 has been a trial all unto itself, I really want to challenge everyone to push their quilting to the next level.  Take what you know and try something newer, harder, and more different than anything else you’ve ever done.  I wanted us to get out of our comfort quilting zones and take some risks.  This is why many times the topics may have seemed so different than what I usually write about.  In fact, I’m thinking some of you have thought them irrelevant – such as the blogs on graphing out your blocks.  However, remember I’m coming from the place as a former science teacher.  When you teach any subject, there has to be a foundation laid with each new discipline of study, so the student can build on the foundation and understand how new ideas and principles are built on the base knowledge of that subject. 

In other words, how hard would it be for you to make a quilt block if you didn’t know how to accurately cut out your units or sew a ¼-inch seam?  The ¼-inch quilt seam is one of the first concepts you’re taught when you learn to quilt.  If you don’t remember that, then your quilt blocks will turn out all kinds of wonky.

This week I want to talk about one of my very favorite advanced quilting techniques – how to make a quilt top out of all different sizes of blocks.  Now I’m not talking about blocks that may be slightly different in size.  We’ve all had those – no matter how carefully we cut and piece there always will be a block here and there that’s 1/8-inch to ½-inch off.  We know how to deal with those – check the seam allowances, press the seams open, or simply redo the entire block if we’ve cut the units the wrong size.  That’s not what I’m talking about.

This is the scenario:  Somehow or another you’ve got your hands on a pile of quilt blocks that range from 20-inches square to 7 ½-inches square.  Maybe you purchased them at an auction, estate sale, or antique shop.  Maybe they’re orphan blocks someone donated to your guild or bee. All the fabrics harmonize and everything in you wants to make a quilt top out of them. 

Or maybe this is the scenario:  You’ve got a fabric panel and want to make that into a quilt, but don’t want to simply throw plain borders around it until it’s as big as you need it to be. 

In either situation you’re faced with the quandary of a lot of fabric with no directions.  It’s all up to you and what you know.  So how do you ever start? 

Let’s start with one-picture panels.  Remember this panel?

I know I’ve shown it several times, but I loved it from the moment I saw it and I knew my Disney-loving grand darlings would love it as well.    Off-the-bolt, most solid panels are around 44 to 45 inches in length – which is the width of all fabric except quilt backing (most panels are printed vertically, so what we normally consider the width of fabric is the panel’s length). 

The width can vary, but the panels generally are rectangular.  The Mickey and Minnie panel was roughly 35-inches wide x 40-inches long, unfinished.  I was definitely working with a rectangular, one-picture panel.  And for me, the first step in working with a rectangular panel is to make is square.  Why square?  It makes the math so much easier for adding pieced borders because all four sides are the same length.  And if you can keep the measurements in easy, divisible increments of two, three, four, or five inches, it will go together quickly.  For the first round, I needed to add enough borders to make the width equal the length – five inches.  So, I added a 3-inch finished pieced border and then a 2-inch finished floater.  From that point on, all I had to do was add borders in various widths and styles until the quilt was a large as I wanted it to be.  Of course, there is always the option of adding plain fabric borders or no borders at all, but where’s the fun in that?

Now we’ll move to the second scenario.  Let’s say we have the following stack of quilt blocks with the finished measurements:

Sixteen 9-inch squares

Four rectangular blocks oriented horizontally: 18-inches wide x 9-inches high

Two rectangular blocks oriented vertically:  9-inches wide x 18 inches high

Two 18-inch squares

At first glance, it would be easy to think, “Hey, I can get three quilts from this if I buy additional fabric – one from the 9-inch squares, one from the rectangular blocks, and one from the two 18-inch squares.”  And you’d be right.  You could produce three small-ish quilts from this one set of blocks.  But what if you don’t want to?  What if all the blocks harmonize and you don’t want to separate them?  Or what if they’re antiques and you can’t bear to split the blocks up?  Or what if you simply don’t want to go through piecing and quilting three quilts?  Let’s walk through the process. 

Step One:  The first question to ask is “Are the finished blocks divisible by one common number?”  In this case we’re dealing with blocks which are all multiples of the number nine, so the answer is yes.  Why is this important?  It means the blocks can be sewn together into larger sections and then the sections can be put together into a quilt top.  If the blocks don’t have a common number, don’t worry.  We’ll deal with this scenario at the end of the blog. 

Step Two:  Next, I see if I can’t join a strip of the smaller sized blocks to one of the larger ones, either on the sides or the top or bottom.  In our case, I can.  I can join two of the 9-inch blocks to either the 18-inch square blocks or 18-inch x 9-inch rectangles.  I can join one of the 9-inch blocks to the 9-inch x 18-inch rectangle.  In the second step of this process we’re determining if we can join several blocks together to form a large block unit for the quilt.  These larger block units are easier to work with as we continue making our quilt top.  Instead of working with several blocks at a time, we will treat the large unit as one block in the construction process.

We also may want to make another design decision with our quilt.  We have lots of 9-inch blocks.  We may want to join several of those together before sewing them to one of the horizontally oriented rectangles or one of the 18-inch squares. 

I can’t stress how important it is to have an area you can lay out your blocks.  Whether it’s a design wall, a spare bed, or the floor, any surface that’s large enough to hold all your blocks is pretty crucial to your layout process.  It’s much easier to move your blocks around before they’re sewn together than having to spend hours of quality time with your seam ripper to unsew them.  I lay out my blocks several ways and use my cameral phone to take pictures of each lay out.  Then I set everything aside for a day or two and go back to the pictures.  A few days of “not stressing over the layout” allows me to return to the pictures and really see which layout works best.  Once I’m happily settled with one of the designs, I sew my blocks together into units and then join the units together to make the quilt top.  Afterwards, I make the decision about floaters, borders, and binding.

After moving some blocks around, EQ 8 and I came up with this layout.  As your eye travels over the sketch, you can see where I grouped blocks together and formed larger units and then put the units together to make the quilt top. 

As promised, let’s go back and look at a little more complicated scenario.  Let’s keep the 9-inch blocks, but let’s shrink the two large squares to 15-inches and change up the rectangles to four 6-inches high by 18-inches wide oriented horizontally and two 18-inches high and 6-inches wide oriented vertically.  As we begin to work our way through the math, we find that there is initially no common number in the blocks.  We know that 18 is divisible by 9 and 6, but none of these numbers play well with 15.  Likewise, 9 and 6 seem to have nothing in common. 

When I’m faced with situation, my first step is to determine if there is another number these block sizes share. And in this scenario, there is – 9, 6, and 18 are all multiples of 3.  Returning to our original layout:

We will need to add 3-inches of fabric in some form to make the blocks come together to form units.  This added 3-inches can be in 1-inch, 1 ½-inch, and even ½-inch increments if needed in order for the blocks to match up evenly.  These extra pieces of fabric were called coping strips years ago. Now we usually just say sashing, Whatever you want to call them, the strips can be used in lots of ways.  You could join the smaller blocks together like this and then put the coping strips around the unit, or you could divide the coping strips evenly between the blocks.

 The design is entirely up to the quilt maker and what he or she likes.  When I work with a quit top that has coping strips, I tend to pick a neutral color (usually gray works best for me – that’s my preference, though) which will tie all the blocks together.  If the blocks are primarily constructed of solid colored fabric, I will choose a print fabric I’ll use as part of the border for the strips.  And if the blocks are varied and use lots of different colors, my go-to color is white.  Why white?  Because when you add enough white to any scrap quilt, it serves as a great buffer and eventually all the blocks will play nicely together. 

Now let’s take another look at fabric panels. This same process works if you purchase a panel that has different sized prints on it, like this one:

Remember I ran into this situation with the Fish Almighty quilt I made Bill for Christmas.  I had four small fish pictures and one large one.  And in the case with this quilt, the size needed was really dictating the layout.  It basically became big enough to put on a bed.  The great thing about panels like this is your coping strips are borders and they can be pieced ones or simply floaters.  The goal is to get the panel pieces large enough to fit in with the blocks you’ve constructed to go with them.  In the case of a panel with several different sized prints, I design my layout first, then begin to make the borders.    

We’re really accustomed to quilts which have blocks marching across the top in rows or columns, whether or not the quilt is straight-set or on-point.  We’re used to seeing this kind of uniformity.  However, the seemingly random (but not really random) use of different-sized blocks visually shakes up a quilt.  It’s unique and really not that difficult to pull off.  It does take a bit more pre-planning than the “standard” quilt, you need somewhere to lay it out, and you gotta use a bit of math; but the payoff is a quilt which is visually stimulating and just plain fun to look at.   I’d like to encourage you to give it a try.  Grab some of your orphan blocks or plan a layout and make blocks of all sizes.  You have the tools to do this.  Push yourself out of your comfort zone.

Until next week, Level Up Your Quilting!

Love and Stitches,

Sherri and Sam

Categories
Uncategorized

Your Machine Needs a Spa Day

With everyone in “hunker down” mode due to COVID, a lot more sewing has been happening.

That means more time spent on your sewing machine.

Which means that thing has probably been humming away for hours/days/weeks at a time.  The quilters I’ve talked to have either been whittling away at their UFOs or making masks out the yin-yang. 

If this is the case, then right about now, you need to give your sewing machine a spa day.  Clean it, oil it if necessary, and maybe even give it a hug.  It probably has kept you very productive and on the right side of the thin line between sanity and insanity.  Since this is the case with my Big Red, I thought it may be the same for you and your machine.  So, today we’re talking about sewing machine maintenance.  But first, let me issue a word of warning:  Before undertaking any of my suggestions, READ YOUR SEWING MACHINE MANUAL.  Some of these points are universal (such as changing your machine needle) and others are brand-specific (such as oiling).  And even if you have two different machines that are the same brand, the procedures may be slightly different for each.  My little Juki requires less oiling than my Juke 2010Q. 

Under normal circumstances, I recommend cleaning your machine regularly and taking it to a tech every 12 – 18 months for servicing.  A sewing machine is an investment, whether you’ve paid $200 or $2,000 for it.  If it’s taken care of, it should last you for years.  I have a loose schedule for keeping up with these two tasks.  I clean my machine the first weekend of every month and take it to have it serviced before I leave to go on my fall quilt retreat.  Knowing when to change my needle is a little trickier, but we’ll get into that later.

Since there is a difference between maintenance and cleaning, this blog is broken into two parts.  In the first part we will deal with maintenance – those activities which should be done regularly to keep your machine in good working order.  The second half of the blog will discuss cleaning your machine.

One thing you want to do is keep your machine covered if you’re not using it every day.  Most quilters use at least one of their machines almost daily.  If that’s the case, you don’t necessarily have to keep that machine covered.  However, according to the last quilting statistics I received from the Craft Industry Alliance, the average quilter has six sewing machines (this does not include long arm machines).  Chances are the average quilter is not using all six sewing machines at the same time.  The ones which aren’t in use really need to be covered.  This keeps dust out of the machine.  Big Red is rarely covered unless she’s going somewhere.  But my Baby Lock Embroidery Machine, my Featherweight, and both Juki’s stay covered because I don’t use those every day.  Most of today’s machines come with at least one soft cover or a hard one.  Some older machines – such as my Featherweight – come with a carrying case but no cover.  Since I don’t use Marilyn the Featherweight regularly, I made her a cover.

Another maintenance issue doesn’t have to do with the machine itself, but does take into account what type of thread you use.  While your stitches may not show the difference between short-staple thread and long-staple thread, the inside of your machine will.  Short-staple thread is linty and can make a mess on the inside of your machine, especially around the bobbin casing.  Long-staple thread isn’t as linty.  If you use the short-staple thread, be prepared to clean your machine more often.  If you want to know more about thread, you may want to take a look at my blog: https://sherriquiltsalot.com/2019/04/17/a-love-affair-with-thread/ .

The type of needle used in your machine is just as important as the thread.  As quilters, we know it’s important to have the right size needle for the job.  Quilting cottons don’t use the same size needle as denim.  A top-stitch needle is great for machine quilting.  However, it’s equally necessary to have the right brand of needle in your machine, and it’s necessary to consult your sewing machine manual to make sure you have the right one.  Some machines, such as Big Red, work best with Schmetz or Organ needles.  Same with my Jukis.  My Baby Lock likes Schmetz.  My feather weight uses Organ.  I’ve learned the hard way that “universal” brands don’t work well in my machines (those generic needles that claim they can be used in multitudes of machines). Some sewing machines, such as most Singers, use only Singer needles.  When you use the wrong size needle the results will render skipped stitches.  If you use the wrong brand of needle, you can damage your machine. 

Changing the needle regularly is just as essential as using the right one.  Even if the needle looks perfectly straight to your eyes, after it’s been used awhile, it can be slightly bowed, even if you can’t see it.  The tip of the needle also will blunt after hours of use.  The general rule is to change the sewing machine needle after eight hours of sewing.  If a titanium needle (my favorite!) is used, you can double the amount of time to 16 hours.  However, I’ll admit it’s difficult to keep up with all the hours you’ve used a needle.  Years ago, when I first started quilting and was only working on one project at a time, I simply changed the needle after every project.  This seemed to work well for my machine and for me.  But now I work on multiple projects at once and more on one machine than another.  Due to this, I’ve developed some general rules I follow:

  1.  If I’m using titanium needles, I change those every three weeks.  If I’m sewing with regular sewing needles, I change those every two weeks.  I do this for the machine which is being used the most.  The other machines will go longer between needle changes, and for those I generally change the needle after I have to refill my bobbin twice.
  2. If I’m performing what I call a “high density stitch project” such as machine quilting or paper piecing, I change the needle (no matter what kind I use) as soon as I complete that quilt.

If you’re a stickler for getting every second out the needle you can, just keep a notebook near your sewing machine and log your time.  And I’ll throw this out right here – I swear, the longer you sew on a machine, the more in tune you become to it’s sounds.  When I hear Big Red make a distinct “thunk” as the needle moves through the fabric, I know it’s time for a needle change.  And if you find yourself replacing needles frequently, do what I do and purchase them in bulk.

The last thought I want to throw in under general maintenance is clean the outside of your machine regularly.  Even if it’s covered, every couple of weeks take a clean cloth and wipe down the outside of your machine.  Dust can do a number on your machine, and it doesn’t take much time to wipe down the outside.  If you don’t cover the machine your using for a project, wipe it down every couple of days or so. 

Now let’s talk about actually cleaning the inside of the machine.  Big disclaimer here:  Every sewing machine brand is a little different and it’s vitally important that you read your manual before cleaning and oiling your machine.  If you’ve misplaced your manual or purchased a used machine which didn’t come with one, Google your brand, make, and model number of machine.  Chances are it’s on-line and you can download it.  Most manuals are available for free downloads.  I even found the one to my Featherweight 222 on the internet.  I am covering generalizations for cleaning and oiling.  Be sure to confer with your machine’s manual before proceeding.

These are my tools for cleaning my machines:

Q-Tips, make-up brush, soft toothbrush, and toothpicks.  Know what’s not in this picture?  Canned air.

While canned air may seem like a great way to blow out lint and dust, it can actually harm a machine in two ways.  First, instead of blowing out the grime, it can force it down into tiny crevices and make it super-difficult for even a sewing machine tech to remove.  Second, canned air contains moisture, which is bad for all machines, but especially computerized ones. 

This is the inside of my Janone 7700. It has a top loading bobbin, which in my opinion, is the easiest bobbin set-up to work with. I remove the needle plate and clean the entire inside.

The bobbin area is the first place I start my cleaning process.  I remove the needle plate on Big Red, my Baby Lock Spirit, and my little Juki because they have drop-in bobbins.  My other machines have separate bobbin cases and they load under my needle plate, but I can get to those without removing the plate. 

Side-loading Bobbin Mechanism

I use a small make-up brush and a Q-Tip to clean the bobbin area out.  Next, I move to the feed dogs and use the soft toothbrush to clean the teeth on those.  If there are large clumps of lint visible, often a toothpick can get those out.  The universal rule for cleaning all machines is don’t force anything into any of the mechanisms to clean them.  Clean only the areas you can see with your eyes.  With Big Red I can remove the entire bobbin case mechanism, so I can clean her pretty thoroughly. 

After you clean the machine, go ahead and oil it if your manual tells you oiling is necessary, and then oil only the areas it tells you to.  With Big Red, I have one spot and one spot only that I oil. 

The only place I oil Big Red.

My Juki 2010Q has several areas, as well as my Featherweight.  Some machines are self-lubricating and don’t require you to oil them at all – the tech has to.  In any case, be sure to read your manual before oiling and use only sewing machine oil.  Most machines come with a small bottle of oil.  When that runs out, I recommend Nifty Notions Zoom Spout Oil.

This is why I like Zoom Spout. You can get into the small spaces on machines that have lots of spots to oil.

During the normal piecing process, I clean my machine after I’ve used up two bobbins or the first of every month, which ever comes first.  If I’m paper piecing, using flannel fabric, or quilting, I do it as soon as I’m through with the project, no matter how small that project is.  All of those processes are notoriously linty.  Also, if you’re using short-staple thread, remember you will need to clean the machine more frequently. 

The last issue I want you to think about is your sewing technician.  I’ve always thought   every woman needs her own village – every woman needs a BFF who will tell her the brutal, honest truth; a good auto mechanic who she trusts and won’t price gouge her; an equally good and honest appliance repair person; and a great general physician she trusts.  If you sew, you need to add one more person to your village: a good sewing machine technician.  In the past, I’ve always encouraged those who are in the market for a good sewing machine to buy local.  Purchase the machine at the locally owned fabric or quilt shop.  This is a good idea for two reasons.  First, it supports your LQS.  Second, if you purchase at a LQS, most of the time the first year cleaning and tuning is free.  When you take the machine in, you meet the technician, who most of the time, is also a local person and wants to make sure your machine runs like new.  With more and more LQS’s shuttering completely or closing their brick-and-mortar stores, this is getting more difficult.  Often there is no local shop to purchase a machine from and on-line ordering is the only way to get a good machine.  If this is your situation, ask around for a good, local sewing machine technician (take it from my personal experience – you don’t want to ship your machine off for servicing – remember what happened to Loretta, my first long arm?).  If you’re not sure who to ask, see if there is a quilt guild in your area and post the question on their Facebook page or send them an email through their website.  Ask other folks who sew or quilt.  Find out from several people who they use and if you see the same tech popping up with glowing reviews, this is who you need to call and add to your village. 

How often should you take your sewing machine to the tech?  Of course, if it’s skipping stitches, the tension is wonky, or some other issue pops up and you’ve done everything the manual has said to correct it, call the tech.  Chances are it’s just a minor issue, but it may be something only the tech knows how to do.  Otherwise, if you have several weekly sewing sessions, take it in once a year to have it thoroughly cleaned, serviced, and oiled in areas you’re not supposed to.  If you’re a less-frequent sewer, you can go up to 18 months between servicing.  But I wouldn’t go any longer. 

Let me throw this in here, too.  If you’re thinking about purchasing a new machine, call your tech.  They will know the best brands for the dollar, those which give the least amount of trouble, and those that still need some time to get the bugs worked out of their computerized systems. 

Take care of your machine(s) and it will give you years of enjoyment and service.  And after all the COVID quilt making, I know Big Red needs a couple of days off and the spa treatment.

Until next week, Level Up Your Quilting!

Love and Stitches,

Sherri and Sam

Categories
Uncategorized

The Last Word

I know it feels like I’ve beat the topic of drafting quilt blocks to death, but trust me, I do have a purpose in mind.  Bear with me as we give this topic one more week and then I promise we will move on.  It’s simply important to me that I give you every tool I can so you can change any quilt block you want.

By now we know that drafting frees you as quilter.  Armed with a pencils, graph paper, erasers, a calculator, and a basic knowledge of how to grid out a quilt block, the sky is literally the creative limit for most quilt blocks.  This same knowledge can be transferred over to a quilting software program (such as EQ), if you decide to draft your blocks with this method.  Some of this information will be review for those of you who ready my blog on a regular basis.  Some of this information will be new.  Just bear with me to the end.

The process can be problematic when you’re working with blocks from heirloom or antique quilts. With older quilts, it can be difficult identifying the block and the grid, especially if the quilt top is complex. If this is the case, the first step is to figure out the base grid.  The base grid is a grid we’re really familiar with, such as the Nine-Patch. 

Traditional Nine-Patch

In this block

Double Nine-Patch

the Nine-Patch is doubled (and it’s called the Double Nine-Patch).  When we look at this block, we can see the 3 x 3 Nine-Patch grid.  This one isn’t too difficult to grid out, and you’ll find this block used in some Double Irish Chain quilts.

Double Irish Chain Quilt

But if we look at this block:

Card Trick

This is also a Double Nine-Patch, but some of the patches are divided into even smaller units 

To determine the patches needed to reproduce a quilt block, simply follow these four steps:

  1.  If you’re working from a quilt top, isolate the block on the quilt you want to reproduce.
  2. Visualize the grid used.  Look for a repeating pattern across the block and then count how many times the pattern is repeated.
  3. Measure the block to get its finished size.
  4. Draw the block out on the graph paper.  As you’re drawing each patch, remember to add seam allowances. 

However….by now you have (I hope) a lot of knowledge about graphing and gridding in your quilting tool box.  So….what if you want to draw an original block?  The steps involved are similar to the ones used in drafting a block from an antique quilt top, but there are a few additional ones.  But before we get into the actual process involved in  drafting an original block, let me throw out a few tips:

One, get several sheets of graph paper.  A few weeks ago I told you about printablepaper.net.  Go to this site and print off several sheets of the type of graph paper you use.  Normally I use the eight squares to the inch graph paper, but when I’m designing a block, I use the four squares to the inch.  I use this kind in designing because the squares are bigger and I can get a better idea of how each unit in the block will look. 

Two, think about the base units first – such as half-square triangles, four-patches, flying geese, etc.  Draw these in the grid squares first.  Be easy on yourself.  If you’re using pencil and paper instead of a computer program, be aware you may have to erase and redraw several times before you get the block exactly the way you want it.  Also, be aware the size of the finished block is often determined by what pattern is used.  When designing an original quilt or modifying an existing pattern, adjustments can be made for a specific size.  However,  the grid for the block used may determine the finished size – for instance, it’s easier to make a finished 9-inch nine-patch than a finished 10-inch nine-patch.  The pieces are simply easier to cut.

Keep in mind computer programs make this a lot easier.  Quilting software allows you to explore multiple block options quickly and without re-drafting.  They’re a huge time-saver if you find yourself doing a great deal of original design work.  Fabrics and colors can be added and then taken out.  Block units can be re-drawn or eliminated.  Even applique blocks can be drafted out with the software. 

Three, remember not all quilt blocks can be gridded out.  If it’s a block with tight curves or odd shapes, it may not work on a grid system.  These blocks may need to be appliqued or paper pieced.  And some  blocks may require more than one technique.

Four, always test your fabric choices.  Always, always, always.  After you’ve graphed out the block to your satisfaction, select your fabrics and then make a test block.  There are a couple of ways to do this—you can cut the block units out (unfinished size) and sew them together or you can cut the block units out finished size and lay the units on the grid.  If you chose the second way, glue the fabric to the paper graph.  After you’ve made the mock-up block by either method, place the block several feet away (a design wall is perfect for this) and look at it critically. At this point, if I’m still not sure about fabric/color placement, I make several copies of the block on my copier, trim the paper away from the block image, and lay those out to try to get a better feel for the way the quilt top will actually look.  These are easy to move around and see if secondary patterns will emerge. 

Five, if you plan to use your copier to make photocopies of the pattern, check it for accuracy.  Be aware that copiers can distort images.  Before using any photocopies as templates for piecing, make a test copy of the block at 100%.  Measure the original and the photocopy to ensure they’re the same size.  And try not to change copiers when making additional copies.  Keeping the same copier will assure you of consistency in the quality of the copies. 

Using the Grid Method for Your Own Blocks

Many, many quilt blocks are based on a grid or can be broken down into one.  By now you know a grid organizes a design and makes cutting and piecing sequences easier to understand and perform.  As you begin to draft your own block, there are several commonly used grids to keep in mind.

Two x Two Grid – A grid of four undivided or divided squares such as a Four Patch or 2 x 2 squares offers almost unlimited design options.  Take a look at this Windmill Block.

Windmill Block
Broken Dishes

Four three-triangle units on a grid of 2 x 2 squares form this block.  Half-Square Triangle units placed on a subdivided grid form a Broken Dishes Block.

Squares and half-square triangle units on a subdivided grid form the Northumberland Star.

Northumberland Star


Three x Three Grid – A common block/block unit in quilt making is the Nine-Patch, which is on the 3 x 3 grid.  This grid, just like the Four-Patch, can vary in the number of squares it uses, but that number always needs to be divisible by three.  The Friendship Star

Friendship Star

Is a good example of a block on the 3×3 grid.  Jacob’s Ladder

Jacob’s Ladder

Is also on the 3 x 3 grid, even though it incorporates Four-Patch units.

Five x Five Grid – This grid is one of the most versatile. The five squares across and five down setting gives not only great options, but a center focal point.  Examples of this block are:

Cake Stand

Checkered Star

New Mexico  — which is a variation of the Checkered Star, but is formed with four Nine-Patch units and four three-bar units that replace the square in the center.

Seven x Seven Grid—If you want to draft an intricate block, this is the grid to play with. Bear’s Paw (or if you live in an area that was settled heavily by Quakers, this may be known as Hand of Friendship in your quilt circles) is a great example of a 7 x 7 grid.

Bear’s Paw

You have sashing and half-square triangles and squares to form Bear’s Paw.

Tree of Paradise is also a 7 x 7 grid which consists of squares and half-square triangles radiating from a rectangle in the center.

Tree of Paradise

After you determine the grid you’re using to draft your own block, now you need to think about the center point.  This isn’t difficult, but it is important to keep this fact in mind:  Even-numbered grids allow for symmetrical designs.  Odd number grids can be oriented around a center unit.  For example, in a Four-Patch grid, the corners of the units meet at the block’s center and is its center point.  An example of this type of block is the Sawtooth Star.

Sawtooth Star

On the other hand, a Nine-Patch grid has a block unit as its center point.  The Ohio Star is based on a 3 x 3 (Nine-Patch) grid.  The center of this block

Ohio Star

Is a square.  This square could be gridded out into another Nine-Patch unit, a Four-Patch unit, or serve as a great spot to showcase a focus fabric or a little applique. 

You have a lot of gridding knowledge in your quilting toolbox now.  Don’t be afraid to pull it out and use it to your benefit.  And the more you grid, the easier it becomes.  It won’t be long until you will be able to look at a quilt block and know what kind of grid it falls into.  And with some determination and practice, you will be altering blocks to suit your needs or designing your own blocks before you know it.

Until next week, Level Up Your Quilting!

Love and Stitches,

Sherri and Sam