Categories
Uncategorized

How Does This Thing Work?

So…I’ve been writing this blog for a long time now.  At first, I was on Blogspot.  I published my weekly blog there for probably five or six years before moving to WordPress a couple of years ago.  That’s at least seven years’ worth of writing and during this time, I’ve received quite a few private messages, emails, and comments.  I’ve replied back to most of those individually.  But since there are a few questions I receive repeatedly, I thought that this week’s blog would clear up those questions as well as let you get to know me a little better—which is one of my goals this year. 

Sam diligently supervising me in my quilt studio.

 How long have you had Sam and where did you get him? 

By far, the most questions I receive are about Sam.  I’ve had Sam (whose full name is Samuel L. Clemmons Fields) for about 15 years.  Sam is actually the fourth cat I’ve had in my lifetime.  The others were Angel, Scooter, and Garfield, all who lived to be old kitties, but not as old as Sam.  Sam is a full-time indoor, neutered  kitty, which contributes a lot to his old age.  He is fed quality cat food and filtered water, which also contributes a great deal to his health.  He also has all his teeth, which according to my vet, is a good thing for cats.

Sam, as well as the other cats in my life, is a rescue cat.  They’re the best.  He’s also my schedule secretary.  If I’m not up by 6:30, he’s meowing at my bedroom door to wake me up.  He will also hunt me down if I’m not in the kitchen doling out his treats by 4 p.m.  He waits at the front door for me on Tuesday nights – the night I have Sit and Sew.  At 9:30 p.m. he comes into my quilt studio (if he’s not already in there supervising me) and meows until I get up, turn off the lights, and join him on the couch to watch TV and cuddle before bed.  However, he doesn’t sleep with me, unlike my other cats who did.  He prefers to have the couch to himself until morning.

 Have you had a dog, and do you like them? 

Of course, I like dogs!  I have four grand dogs and one doggie niece.  We’ve had black labs at several points in our lives and a boxer.  All of the dogs were great, but I’m a cat person. 

 You talk a lot about the importance of local quilt shops.  What is your favorite LQS?

Local quilt shops are extremely important, and I still feel very strongly about their survival.  Since Dragonfly shuttered its brick and mortar store a few years ago, my favorite LQS is now Pineapple Fabrics.  The folks that run that fabric warehouse are simply the best.    Pineapple didn’t start out to be an LQS.  Initially they cut and packaged the precuts for Missouri Star – which they still do.  But every three months they open their warehouse for four-day sales that are simply to die for.  The fabric prices just simply can’t be beat and it’s worth the drive if you live anywhere in the vicinity. 

If you can’t get to Archdale, North Carolina for the open warehouse sale, these folks have an awesome website that you can order from.  Sign up for their email blasts.  They run daily specials that are great. 

And Pineapple recently purchased Keepsake Quilting, too.

 What is your favorite fabric designer and pattern designer?

If I could only use one fabric for the rest of my life it would be Fig Tree.  I love the colors.  They make me happy.  And all of them seem to pair up easily with any neutral – white, gray, or ecru.  Fig Tree is closely followed by

Henry Glass Fabrics.  I love their lines just as much as I do Fig Tree’s.  Both houses produce quality fabrics in beautiful colors. 

Let me also throw this in here:  I’ve really never met a batik I didn’t like, either.  Those fabrics are just so versatile. 

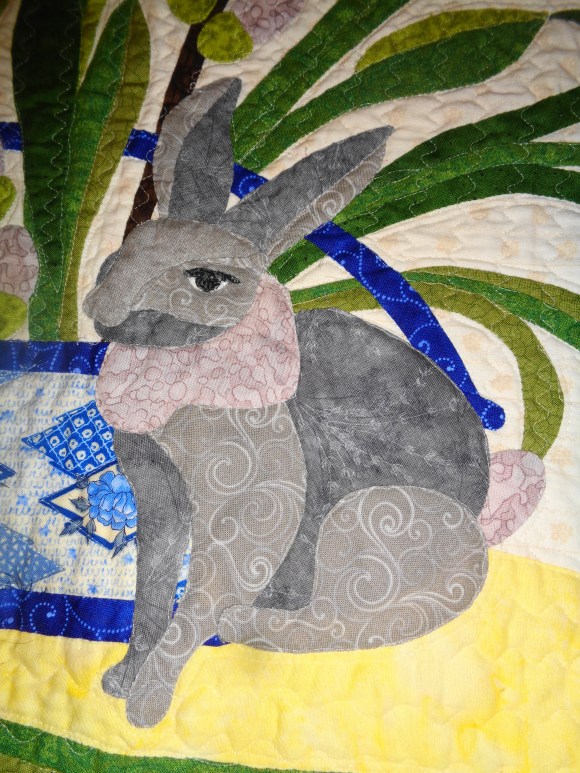
As far as designers go, I’m much more apt to choose an applique quilt pattern over just about any other.  I love McKenna Ryan’s patterns and just about any of the Mountain Mist applique patterns from the 1930’s.  If I’m paper piecing, it’s a toss up.  I do tend to gravitate towards Judy Neimyer (although I can only do one of her patterns every couple of years), Sue Garman, and Laurie Aaron Hird.  I know that Laurie’s patterns aren’t strictly paper piecing, but they can be converted into that technique.  I just love her spin on the blocks.

 Have you sewed all of your life?

No.  As a matter of fact, I about bombed out of that home economic class in high school, but I blame the sewing machines.  I know that sounds like a cop-out, but I do.  The school I attended purchased cheap sewing machines and we were constantly having tension and bobbin case issues.  Towards the end, I just wanted to get through with my projects and call it a year.  It also put a real dislike in my soul for sewing.

Fast forward a few years until I had my own children and wanted to learn to sew – starting in 1986.  I’ve seldom been away from the art since then.

 Do you think you’ll ever write a book or do a video?

I would really like to, but you have to remember at this point, I still work full time in my husband’s business.  Books and videos are huge commitments.  And while I do think I could handle a book on my own, I would have to have help with videos and right now I don’t have those resources in my sights.  Ideally, I would love to have some video tutorials on my web page in the future.

 Is there a quilt pattern you would make over and over?

As far as piecing goes, I love both of the Farmer’s Wife Sampler patterns by Laurie Aaron Hird.  I also love the patterns in The Big Book of Nickel Quilts by Pat Speth with Charlene Thode and Miss Rosie’s Farm House Favorites by Carrie Nelson.  While all of these quilts are inherently scrappy, you can fine tune them to look less scrappy if desired. 

As far as applique goes, I could literally have a list as long as my arm of designers that I would use again and again:  Kim Diehl.  Mimi Dietrich.  Sue Garman.  Jeanne Sullivan.  McKenna Ryan.  Those are just a few.  Honestly, since applique is my favorite quilting technique, the list goes on for miles and miles.

I also am an Electronic Quilt fan.  I use EQ8 at least once or twice a week to change a pattern up. 

 You talk quite a bit about your great-grandmother’s quilt and how that inspired you to learn how to quilt.  Does anyone else in your family quilt?

Actively quilt, no.  I’m the only one I know of that quilts regularly.  My mom has made a few quilts, but she’s still teaching stained glass art classes, and that’s where her passion lies.  From what I understand, my maternal grandmother quilted.

Lois Moore, my paternal grandmother…also known as Granny and Little Nana

However, let me say at this point, I come from a long line of women that handled needles.  My paternal grandmother could sew like nobody’s business.  And my mother sewed all of my clothes as I was growing up.  As a matter of fact, Mom sewed for the public for many years.  Little Nana (my paternal grandmother), did most of Mom’s hand-set hems.  And when my dad’s mom went to South Carolina to visit her sisters, she helped her older sister, my great-aunt Aunt Em — who also sewed for the public.

One of my fondest memories from my childhood is remembering the hum of the sewing machine in the background of everything.

 Do you teach quilting?

On occasion.  I taught more classes in the past than I do right now.  For many, many years, I taught quilting at Hancock Fabric’s in Greensboro. As I’ve said before, with so many LQS’s shuttering, and classrooms disappearing, it’s really hard to find anywhere to have a quilting class anymore. 

And before I taught quilting, I taught French Heirloom Sewing and smocking.

 Is there any quilting technique or quilt that you want to learn how to do that you haven’t had a chance to yet?

I want to learn to make a stained-glass quilt, partly because of my mother’s influence and partly because I think they’re simply beautiful.  I understand the technique but haven’t executed it yet. 

As far as quilts go, Through the Year with Sunbonnet Sue is at the top of my list.  It’s one of those quilts I’ve steadily purchased fabric for and saved special scraps for the little dresses.  I hope to start it after the first of the year.

 How do you handle your blog? 

As I stated earlier, I’ve had a weekly blog for years.  In the past, I’d write about whatever quilting I was working on that week.  For the last three years I’ve worked hard to fine tune it a little more.  I write daily, at least 500 to 1,000 words, Mondays through Fridays.  I write in the mornings before I go to work, as that seems to be the most creative time for me for anything.  I (usually) publish on Wednesdays.  I try to have at least three blogs in draft form ready to be published (complete with graphics and pictures), so if something happens and I can’t write for a week, I still can keep to my publishing schedule. 

After I write three blogs, then I work on the graphics or take the photographs for those blogs. And despite the fact that my husband is a wonderful photographer, I take my own pictures, as his schedule is hectic. 

A few years ago, I discovered that a yearly theme really helped me hone my writing.  I have themes planned for the next couple of years.  Currently I have enough blogs in draft form to carry me through the end of July. 

There.  Those are the top questions I get asked quite a bit.  I figured some of you may have wondered the same thing, but just didn’t get around to asking.  Always feel free to comment or send me a PM.  I answer them all.

Until Next Week, Quilt with Passion!

Love and Stitches,

Sherri and Sam

Categories
Uncategorized

Dollar Store Quilting

It’s no secret I love to go to quilt shops.  Most quilters do.  We love the fabric, the notions, talking to other quilters, looking at new patterns, and embracing the inspiration.  It’s a wonderful time and unfortunately, there may be less and less of the opportunity as more and more LQS shutter.

However, there are four other types of stores I like to shop at that offer great purchasing opportunities for quilters.  The establishments are probably not aware that they are great spots for quilters…even quilters may unaware of the possibilities in these stores.  And those types of stores are office supply stores, hardware stores, sporting goods stores, and dollar stores.  We’re discussing dollar stores today.

In case you aren’t aware of what a dollar store is, it’s kind of today’s version of yesteryear’s five and dime.  In some of these establishments, nothing is priced over a dollar.  In other stores, everything is one dollar, and at others, most (but not all) products are a dollar.  Some are more.  I am very fortunate that there is a Dollar Tree in the same plaza that I purchase my weekly groceries.  Nothing in this store is over one dollar. 

Which means I can go in and spend $10 to $15 and come out with some great quilting room finds.  I did just that last weekend and wanted to share with you what I found and how I use them – which is generally not in the way they are advertised to be used.

This is a clear shower curtain liner.  While it’s a great thing to be able to buy a shower curtain liner for a buck (and saves you the chore of washing your old one – just toss that sucker and hang up the new one with no guilt involved since it was only a dollar), I’m not using this clear liner in my bathroom.  I am using this in my applique process.  Sometimes, (especially if I’m using a dark applique background that’s difficult to see the pattern with, even if I’m using a light box) I trace the complete applique pattern onto a clear vinyl surface and lay that over my background piece to help me place any embroidery and the applique pieces. 

Clear Applique Overlay Made from the Shower Curtain

A clear shower curtain liner works wonderfully for this technique and is way less expensive than purchasing vinyl. 

And this is a pill box.  I have one of these I use for my vitamins, but I use this one to store my sewing machine feet.  I have one of these large pill boxes for each of my machines.  Since the partitions in the pill box are over sized, that means most of my feet will fit in there just fine.  This helps keep my sewing machine feet organized and the lids snap firmly closed, so they won’t fall out.  This is a great thing to have if you’re taking extra feet with you on a retreat.  They stay in together and don’t get lost. 

These little containers are my very favorite Dollar Tree purchase.  When I carry a salad for lunch, I put my dressing in one of these.  But in the sewing room they are great for storing buttons, beads, pins, tiny pieces of applique, or for holding Best Press or starch if you’re using one of those in your applique process.  They’re also great to squirrel away small portions of M&Ms – just in case you need a chocolate refuel on retreat or those late-night sessions in your quilt studio not that I know anything about that. 

I talk a lot about “project boxes” in my blogs.  It’s no secret that when I have a quilt cut out, I throw it in a project box and label that box.  I can get these great boxes from Dollar Tree and they’re perfect for larger quilts. 

There are also other options for these boxes.  There is a closet organizing section at my Dollar Tree and they have these great boxes with lids, and then they also have these tinier boxes.  The tinier boxes fit neatly into the larger ones and allow me to keep notions, applique pieces, thread., etc., super organized and together. 

If you’re like me and tend to use a fair amount of paper clips and binder clips to keep like quilt pieces together, the dollar store is a great place to stock up on these items.  I have also found these:

Aren’t they cute?  They also do a wonderful job keeping small quilt patches together. 

I have also found these:

This package contains small wooden dowels.  These were found in the craft section (which is also where I found my tiny, wooden clothes pins).  While I am sure there are lots of things that can be done with the dowels, I use them to keep my large spools of thread and their matching bobbins together. 

This comes in handy with Loretta the Long Arm.  Instead of keeping the bobbins all together in a box, I can keep the bobbin with the spool of thread it belongs with, so there is no second guessing. 

I have also found retractable card holders. 

These are a wonderful way to keep up with your scissors.  Attach a small pair of scissors to the plastic loop on one end and then clip the colored circle to your collar or neckline.  You will never be scrambling for your scissors again.  And before Command Hooks were produced, I had one of these attached with Velcro to my sewing machine and hung my small sewing scissors from it.  That way I always knew where my scissors were while I was sewing. 

It goes without saying that there are a couple of things almost any dollar store has that quilters need.  Masking tape.  Ziploc bags.  Snacks.  But lately my Dollar Tree store has started stocking these fairly regularly:

That’s right.  A tabletop light.  And it’s really bright, too.  For a buck!  It has three LED brightness settings and is lightweight.  For a dollar, I could afford to keep one of these in my portable sewing bag, and a couple on each sewing table.  I’ve purchased two for the hubster (who ties his own flies for fly fishing).  I’ve given a couple to each of my kids.  And for the price, even if you can’t find a replacement bulb or it fizzles out on you, it isn’t a waste of money.  The ladies I quilt with are so enthused about the find we now send each other text alerts to let each other know if the Dollar Tree has them in stock. 

It really pays to keep your eyes and mind open when you’re shopping non-quilty shops.  With a little imagination, all sorts of stuff can be commandeered for your sewing area.  And when you approach a dollar store with that attitude, you can save yourself lots of money – that can be used for fabric!

Until next week, Quilt with Passion!

Love and Stitches,

Sherri and Sam

Categories
Uncategorized

When Your Quilting Mojo Has Left the Building

Mojo – (Noun)  Magic charm, talisman, or spell.

That word is used a lot, and I wasn’t sure if everyone knew the definition of mojo or not, so I put it at the top of this blog.  And I did that for a reason.  I want to discuss your Quilting Mojo this week.

There are times in our quilting life when we feel that artistically we are on fire.  The colors we’ve chosen go together wonderfully.  Our points meet.  Our applique stitches are fine.  The blocks square up and the quilt is square.  The quilting is beautiful and appropriate.  Yes – there are times when our Quilting Mojo is fully present and raring to go. 

And then there are other times…when either that mojo is half-present, or worse yet, not present at all.  And it’s the later scenario I want to talk about.  What do you do when your quilting mojo has left the studio?  What do you do when you don’t feel like making another stitch, cutting out another square, or petting one more piece of fabric?  What do you do when there is no desire to quilt at all?

This is a tough place to be in as quilter.  When there is no desire to work your craft, you can’t help but think about all you have invested in fabric and machines and patterns and other quilting stuff.  Then you feel even worse about not wanting to quilt.  However, this blog is not written to make you feel guilty, it’s to help you realize that we’ve all been at that place during some part of our quilting lives.  And I also want to clue you in on some ways of how to jump-start yourself and get back into your quilting groove.

  1.  Sleep

This sounds really simple, but it’s not, especially as you get older.  I can honestly tell you that I have a harder time calming down and going to sleep now than I did when I was in my twenties and thirties.  I think most of us do.  So, let me get a little personal here (as I promised this year I would).  Several years ago, I was diagnosed with Fibromyalgia.  I won’t go into all the details of the diagnosis, but one of the symptoms I had was insomnia.  And at the time, I didn’t look at insomnia as a curse, but blessing.  I had a lot going on (small kids, a husband that worked out of town 90% of the time, my job, grad school) and for me, the ability to be able to “function” on four hours of sleep a night was simply wonderful. 

Then the doctor explained to me the harm my lack of sleep was doing to my body.  While I could go to sleep, I didn’t sleep well, and I didn’t sleep enough.  I needed that deep REM sleep.  The REM sleep is the deepest state of sleep and you go through REM several times a night if you’re getting enough good sleep.  REM (short for Rapid Eye Movement because your eyes move rapidly back and forth under your lids during this state) clears your brain of toxins and helps the brain “file away” everything it’s encountered during the day.  You not only wake up more refreshed after REM sleep, you also have better clarity of mind and are calmer.

It goes to reason if you’re not sleeping enough, and that’s perhaps coupled with the fact that the sleep may not be deep enough, you’re going to feel a bit fuzzy, disoriented, and overwhelmed the next day.  And that can translate into no desire at all to quilt. 

If lack of sleep is an issue with you, then address it.  There are some foods that can help you sleep better (almonds, bananas, milk, honey, whole grains) you may want to snack on before bed.  A sleep mask may be helpful.  Aromatherapy may work for some.  Yoga works for others.  Experiment with a few and see if you can’t tell a difference in your sleep and your sleep patterns.  If you’ve exhausted the list, you may want to try a natural alternative such as melatonin.  And if push comes to shove, have a talk with your doctor.

  •  Clear the Chaos

Some people work fine surrounded by clutter.  I am not one of them.  It makes me anxious and jumpy.  On top of that, I don’t know what I have or don’t have because I can’t find anything.  I’ve learned I need to have at least some semblance of organization around me in order to function well.  And not surprisingly my quilt studio was actually more organized when it was smaller.  The reason for this is simple:  I had less room to have more stuff.  Now I basically have two rooms designated for quilting (a studio and a storage area), and there is more room for quilt paraphernalia and thus, more room for potential chaos.

Early on in my sewing life – back when I didn’t quilt but made most of my clothes and all of my children’s – I developed a system.  As soon as I was through with a project, I cleaned my sewing area, including my machine.  This is a bit harder nowadays, as I have multiple quilts on multiple machines, sometimes all going at once.  So, I developed a schedule. When I am through with a quilt – any quilt on any machine – I clean that area.  I have a long arm, an embroidery machine on a table, my featherweight on a sewing cabinet, and Big Red on a table.  When I complete whatever project I’m working on in one of those areas, that area is neatened up. 

If I’m really pushing projects (like making Christmas gifts), at the end of the week, I apply the 15/30 rule.  I straighten up and organize for 15 minutes and then spend 30 minutes sewing or quilting.  I repeat the cycle until my quilt studio is more organized.  This at least keeps me cued in on what I have for my projects and if I need anything else.  Every two weeks I sweep, mop, and vacuum to make sure all needles and pins are picked up and walkways are clear and safe.  And finally, twice a year, I refold my stash.  This is for organizational purposes for sure, but it also reminds me of what I have so I don’t over buy.

I know what some of you are saying now:  This is taking away valuable sewing time.  But it’s really not, at least for people like me that don’t work well with chaos and clutter.  Organizing our sewing area actually makes us more productive because we’re not distracted by mountains of stuff.

  •  Keep a Simple Project Waiting in the Wings

It’s no secret I like quilts that are considered difficult.  I enjoy the challenge (no matter how much I may fuss about it) of an advanced pattern or even just a line drawing of a quilt.  The artistic side of my brain jumps right on board and says, “Challenge accepted.  Let’s roll.” 

However….

After finishing that difficult quilt, or even mid-way through the construction, I need a break.  That’s when a simple project helps clear the brain and encourages the soul.  Sometimes just chain sewing pieces together is all I need to feel productive.  A challenging quilt takes longer and often just figuring the thing out takes so much out of you, it’s hard to see any real progress.  But if I’m churning out some block units en mass, I feel so much better about myself.

If my machine is tied up, I turn to hand sewing.  I cannot tell you how much I love Cindy Blackberg’s piecing stamps.  While she has quit selling them (and to the best of my knowledge the stamps are no longer manufactured), you may want to do an eBay search and see if any are available on that marketplace.  I simply stamp out hexies, parallelograms, squares, or rectangles on some scrap fabric, cut them out, and hand stitch along the sewing lines.  It’s easy work but oh so rewarding.  Ditto with hand applique.  Most of the time I have some hand applique project waiting in the wings.    The steady rhythm of hand sewing calms me and clears my head enough that I can return to that challenging quilt refreshed and renewed. 

  •  Avoid Hours and Hours of Solitary Sewing

Sewing of any type is a very solitary hobby.  Most of the time we generally don’t have other people quilting along with us.  And while Facebook groups and internet forums are all very important aspects of today’s sewing world, they don’t take the place of real human contact. 

Let me encourage you to find a someone to sew with, even if it’s just one other person.  Meet one Saturday out of the month.  One weekday evening a month.  Join a guild.  Find a quilt shop or other fabric store that has a Sit and Sew (FYI, if you live in an area that has a Hobby Lobby, several of these stores are now hosting Sit and Sews, God bless them!).  I can’t express how important this contact is with other fiber artists.  We encourage each other, help each other, and just make each other better quilters and people.  Quilters have a long history of quilt bees and guilds for a reason:  We need each other.  We need the encouragement, the constructive criticism, and the social connection.

If somehow you’re completely isolated from other quilters or fiber artists, don’t despair.  Still get away from your machine.  Go for a walk in the park.  Go window shopping.  Grab some friends and go to lunch, dinner, or a movie.  Go get a cup of coffee together. 

My point is this – we need social contact with other people.  This helps our brains to function better.  And better functioning brains makes us better artists and  better people.

  •  Do the Hard Things First

Most quilters are accustomed to breaking projects into steps.  Most of the time the process goes something like this:  Read the pattern, cut the fabric, make the block units, sew the units into blocks, sew the blocks into rows, and then sew the rows into the quilt center.  I know that there are some variations to this process, depending on if you’re making an applique quilt, or adding sashing, or if your quilt has borders.  But no matter what kind of quilt you’re making, there are steps in the process.

We’re used to moving from step one to step two.  That’s easy.  But if you find yourself losing momentum from the time you’ve chosen your fabric until the time you’re creating the quilt, you may want to change up the steps a bit.  In other words, if at all possible, whatever is the hardest part of the quilt for you, do that thing first or as soon as possible.  Get it out of the way and move on.  For me, this is cutting the quilt out, and if it’s an applique quilt, prepping the pieces.  It’s not that these are particularly hard tasks, but I dislike these steps the most.  Get the steps that are most difficult or most disliked done, over with and behind you.   Then it will be smooth sailing (hopefully) for the rest of the project.  The dread you may be feeling about a project is gone and you’ll have no hesitation about finishing the quilt up. 

Making a quilt is a little like eating an elephant.  It won’t seem so overwhelming if you take it one bite at a time. 

  •  Take a Break

If you’ve tried steps 1-5 of this blog and your quilting mojo hasn’t kicked into even first gear, then maybe you need to take a break from quilting.  It pains me to say this, but sometimes you need a break from the things that you love in order to gain some perspective.  I’ve had to do this myself.  Allow me to explain.

I’ve written several blogs about how quilting and quilters helped me survive That Awful Year 2018.  Both sustained me through my daughter’s health crisis, my mother’s ongoing low iron and hemoglobin issues, and my brother’s diagnosis with MGUS.  However, there was a time in my life when nothing quilting or quilter-related interested me at all.  The year was 2005 and that is the year my wonderful, precious father was diagnosed with pancreatic cancer and died in three short months.  If 2018 was awful, 2005 was brutal.  The loss was incalculable.  The pain – enormous.

Afterwards I found that I had lost interest in everything – even quilting.  The more I kept pushing myself to get into my then tiny, tiny sewing space and be productive, the more I rebelled.  So, finally I just gave up.  I would go to my block-of-the-month clubs, pick up my kit, come home, and throw it in a box.  For a solid six months this was as close as I got to quilting.  I didn’t sew a stitch.  Whether it was simply being overwhelmed with grief or depression or a coupling of the two, I’m not sure.  All I know is that from September through March, I didn’t sew a thing.

Then the season passed, as all do, and as spring melted into summer and as the school year wound down (I was a high school principal at that point in my life), I found myself back in front of my sewing machine.  The desire to quilt had returned.  So, I sewed up all those blocks I had been tossing in a box in one Saturday.  And haven’t quit again since.

My point is this, unless you make your livelihood quilting, taking a break – even an extended one – is okay.  After a few weeks, a month, or even two months, pick up your quilting.  If the mojo returns – whether it’s in a trickle or a flood – that is awesome.  If not, then give yourself more time. 

  •  What to Do If the Mojo Doesn’t Return at All

This is a hard one.  Let’s examine it a few topics at a time.

Could it be the project you’re working on?  If the quilt is way above your skill level or if at some point it utterly and completely fails to interest you, get rid of it.  It’s no secret I’ve done this a time or two myself.  Post it on eBay.  Put it on Facebook marketplace.  Ask if anyone else wants it.  Put it on your guild’s Free Table.  Most guild’s will have a “Free Table” at their meetings – a place where quilters put the projects, fabric, books, or patterns and other guild members can have them free of charge.  There is no shame in this game.  Sometimes freeing yourself from a quilting albatross is exactly what you need to jump start yourself again.

Could you need an extended break – like a year or longer?  It’s no secret that as we get older, our lives get more complicated.  There are serious illnesses, our own health issues, employment complications and the such that crowd our horizons and need our full attention.  Examine your current situation and if an extended break from quilting is needed because you’re too busy and mentally exhausted, give yourself the time you need.

But what if, after you do all of that, you still have no desire to quilt?  At this point, it’s important to ask yourself if another hobby has taken your passion.  If it has, that’s great!  Your still being creative, still using both halves of your brain, and most likely you’re still crafting with at least a few other people with the same passion.  You may decide to sell off some of your quilting stuff and keep a machine and a few things.  There is absolutely nothing wrong with this and it’s happened to a few quilting buddies of mine.  We’re still friends and still do things together, but we just don’t quilt together.

However… if you’ve lost interest in quilting and lots of other things, coupled with the fact that perhaps you struggle to leave your home and really don’t want to see friends…if you don’t want to eat or overeat…if you find yourself drinking more than normal or chemically sedating yourself, let me be the first to encourage you to seek help immediately.  There could be a clinical depression involved and a doctor should be brought into this situation.  Everyone’s mental health is just as important as their physical health.  The world needs all the quilters we can get – take care of yourself and then take care of your quilting.

I hope this blog has helped someone that may be struggling with their quilting mojo.  As much as I love quilting, I’ve struggled with this a time or two myself and have had to go through this list to see what could possibly be the strangle hold on my creativity.  I’m fortunate that my mojo has always returned – sometimes slowly, sometimes in a rush.  If you read this and need to message me, I want you to feel free to do so. 

Until next week, Quilt with Passion!

Love and Stitches,

Sherri and Sam

Categories
Uncategorized

Necessity is a Mother…or How to Make Do When Your Long Arm Malfunctions

Loretta the Long Arm

I know you all remember who Loretta is.  For newer readers to my blog, Loretta is my long arm. She joined my family of machines about two years ago.  And while she has been a welcome addition, she has thrown me a learning curve or two.  She doesn’t like certain threads.  She takes a different kind of needle.  Her rollers and track need to be cleaned, just like the area around her bobbin case.  And she takes a bobbin case! My other machines have build-in cases and all I do is drop the bobbin in it.

Couple all of that with the fact that I was just a little afraid of her.  Sure, a long arm is just a straight-stitch sewing machine, but she is a big straight-stitch sewing machine.  After about six months of trial and error (mostly error), she and I began to develop a good working relationship.  After the first year passed, I wondered how I ever lived without her.  I was actually finishing my quilt tops as I got them made and was making a fairly serious dent in my backlog of tops.  Go me!  Go Loretta!

And then something terrible happened.  Not life-threatening terrible, but it put a screeching halt to my productivity level. 

Loretta’s tablet went out. 

This is Loretta’s bright and shiny new tablet. Bonus…it’s bigger than the old one.

For those of you who may not know, every long arm runs via a tablet, whether it is a “computerized” long arm or not. Loretta’s long arm tablet was a wonderful little android and the android held all the soft ware that was used to make Loretta function.  The Great Malfunction began when I purchased a digitized design from Willow Leaf Studios to use.  While Loretta is blue-tooth and wireless equipped, for whatever reason, I couldn’t download the pattern directly via the internet to her memory.  I had to download the digitized pattern to a thumb drive and then transfer it from the thumb drive to the long arm.  In the process of doing just that, the thumb-drive port in the tablet fell out. 

Annnnndddd …. I panicked. 

A quick call to Sewing Machines Plus (wonderful company, by the way), confirmed the inevitable:  the tablet would need to be replaced.  The good news was that the tablet was still under warranty.  The bad news was that it would take me a couple of weeks to get it delivered.

This really was bad, because I had just basted the edges down on this quilt:

My version of Esther Aliu’s Easter Blessings

I’ve been working on this little jewel for over a year.  I finished it at Janet’s lake house back in the fall and had it on my list of UFOs to complete as part of my guild’s challenge.  Two to three weeks without access to Loretta was going to put a serious kink in my timeline.  Then the thought occurred to me that I had quilted for years without a long arm. I had quilted all my mini-quilts from the 2018 guild challenge on my domestic machine.  Other than basting the quilt down, Loretta hadn’t put a stitch in this quilt top. There was absolutely no reason at all I couldn’t throw this wall hanging on Big Red and have at. 

However, there was a problem with me at this point.  It had been a long, long time since I dropped the feed dogs on Big Red and quilted.  I had used the walking foot and straight-lined stitched all of the mini-quilts I made last year.  But then the fact hit me that there were 250 stitches programmed into Big Red. 

All 250 of Big Red’s stitches

Surely, I could use some of these stitches to quilt my little wall hanging. 

I knew how I planned to quilt this top on Loretta.  The challenge was to get that plan transferred as closely as possible with my domestic machine. 

Echo Quilting around the Parrot Tulips

The first quilting I did was around all the tulips, basket, table, and bunny.  I did use a straight stitch and the walking foot for this, getting the stitches as closely as possible around the applique pieces.  I used Superior Thread Micro Quilter in an off-white color.  I absolutely love this thread.  It’s strong and so fine that the stitches melt into the background of the quilt, allowing the applique and piecing to shine, but giving a definite texture.  Then I echo-quilted around the designs again, leaving about ¼-inch space between the initial echo and the second one.  This is exactly what I would have done on Loretta, had the tablet not wonked out on me.

The next step was to consider what to do with the background and table.  If I had known the tablet would go down and that I would be quilting on Big Red, I would have quilted the background before I sewed on the applique.  My original plan was to use a tight crosshatch stitch in the background.  And while this is easier to do on a long arm when the top is completed, it’s harder to do on a domestic.  It’s not impossible, but there are just a lot of stops and starts.  If you’re planning on quilting a crosshatch for your applique piece and the quilting will be done on a domestic machine, you may want to consider pinning the background to a thin piece of batting and quilting that before you sew the applique pieces on, like I’m doing with my quilt, Language of Flowers, designed by Kathy McNeil.  This is the method she suggests with her pattern, and it really saves time in the long run, not to mention lots of starts and starts. 

This is what I call the pre-quilting. I am beginning Kathy McNeil’s Language of Flowers and sewed the 1/2-inch cross hatching on the background and a thin piece of black batting (Hobbs 80/20) before appliqueing anything down.

But it was too late to do that now, so I pondered all the decorative stitches on Big Red and chose this one:

It’s curvy and I thought it would be a nice contrast to the stripes in the background fabric.  The plus to this stitch was it was walking foot compatible, which meant I didn’t have to worry about my top, batting, and backing slipping, as the foot would help feed the quilt sandwich over the feed dogs.  Since I was using the Micro Quilting thread, I quilted over everything.  If Loretta had been up and running, I probably would have done a small meandering in the background and avoided the applique.  But since it had truly been awhile since I had worked with dropped feed dogs, I thought this was a good compromise.  The stitch was a good contrast and the super-thin thread wasn’t too obtrusive over the flowers.  I did not, however, stitch across the little bunny or basket.  I treated both of those differently.  I quilted the table with the same curvy stitch, only I turned it horizontal instead of vertical.

Background Work
Quilting on the Table

When the background and table were completed, I turned my attention to the rabbit and the basket.  I had outlined the basket handle when I stitched around the tulips and willow branches.  I finished outline stitching the basket and then went around the diamond-shaped designs in the fabric (Isn’t that basket fabric wonderful?  It reminds me of blue delft work.).

The bunny was so cute, and I had put in so much work on the thing, I decided to just let all that applique effort shine.  I simply outlined each applique piece with straight stitches. 

Isn’t this the cutest bunny?

Then it was time to work on the borders.  I have to admit, quilting borders on any machine, gives me a mental hiccup.  While I’ve grown much more comfortable quilting the center of a quilt top, the borders still give me grief.  I’m always second guessing myself with this part of the quilt.  My over-all quilting idea for this wall hanging, even with my initial plan for Loretta, was areas of very tight, close quilting juxtaposed next to areas of sparse quilting.  This method allows certain areas to appear to almost pop off the quilt top.  The close, tight quilting causes the spaces next to it to appear almost trapuntoed.

Quilting on the Parrot Tulips

The large, parrot tulips were easy.  I treated them the same way I did the tulips in the center – I merely outlined them, only this time I went around the applique just one time.  Then I decided to stay with my initial plan of tight meandering as closely as I could.  While I still wasn’t comfortable dropping Big Red’s feed dogs, I did have this stitch:

Bonus – I could keep my walking foot on my machine.

So, I used this stitch on all of the pink squares in my four-patches and used nothing in the blue ones.  Then I extended the idea of four-patches into the large, pink areas by stitching those with a straight stitch and then alternating the tight meander in those outlines.  I added a bit more of the stitch here and there and then decided that was all that part of the border needed.  Then returning to the curvy stitch I used in the background, I used that in the last border and decided this quilt was done.

I am happy with this little quilt.  While I was disappointed that Loretta’s tablet gave me issues, I really like the way the quilting turned out.  And I was very pleased that I lost no time in finishing this project up because I simply played the hand I was dealt:  When Option A doesn’t go as planned, Option B worked just as well.  It’s always good to have a Plan B with anything in life!

Until next week, Quilt with Passion!

Love and Stitches,

Sherri and Sam