Categories
Uncategorized

Binding — the Final Frontier

One of the last details  sewn onto a quilt is the binding.  Loosely defined, “binding a quilt” is any method the quilter uses to encase all three edges of the quilt top, batting, and backing.  In most circumstances, this refers to the narrow strips of fabric that are used as binding, but there are other ways to finish a quilt top.  In the next couple of blogs, we’re going to explore the difference between single-fold and double-fold binding, regular binding verses bias binding and when to use each, knife-edge finishes, and some alternate binding options.  I will show you my “mathless” way of finishing a binding and how I sew my binding onto my quilt top.

I will also be upfront and tell you what this blog is not about.  It is not about sewing the entire binding on by machine.  I will be completely honest and tell you, that yes, I do employ this method on charity quilts and children’s quilts.  Those quilts are destined to be washed quite a bit and binding sewn completely by machine tends to hold up better to this abuse.  However, I don’t think this binding is as pretty as what I call “half-and-half” binding (it’s sewn on by machine and then finished by hand) and frankly, I’m not as good at all-machine-sewn-binding as I need to be.  If you want to investigate that kind of binding, there are lots of YouTube videos by quilt artists that really can rock this method.


This blog also does not take into consideration Art Quilts.  Not that I don’t like and admire Art Quilts, because I do and have made a few.  But Art Quilts, by the nature of their genre, always do not employ what is considered “traditional quilt guidelines.”  Sometimes these quilts have a backing, batting, and top, sometimes they only have a backing and top.  Sometimes they employ what would be considered binding, and sometimes they don’t.  I’ve seen Art Quilts with the edges burned, glued with sequins and seashells, and sometimes the edges have been left to fray.  All of those methods (and numerous others) can be used in Art Quilts.  But this with blog, I’m taking into consideration mostly traditional quilts with most consistently used binding methods.


The object of binding (whichever method is employed), is to hold the edges of the quilt top, batting, and backing together to keep them from fraying or coming apart.  The most commonly used binding is the double-fold binding (also called French Fold Binding) and that’s the first kind of binding we’re taking a closer look at.  This method is so frequently utilized most quilters take for granted when you talk about “binding a quilt” that this is the technique used.

The binding strips are cut at 2 ¼-inches to 2 ½-inches in width either on the crosswise grain or lengthwise grain of fabric.  That’s several differentiations, so let’s talk about when I use what.


If the quilt sandwich (quilt top, batting, and backing) is thin, I may opt to use the 2 ¼ -inch width.  This situation can occur if I’m using flannel or a cotton sheet as batting (for a quilt that can be used in warm weather).  With this circumstance, a 2 ¼-inch binding is perfect.  If a traditional batting is used (all cotton, 80/20, wool, or silk), I use the 2 ½-inch binding, as that additional ¼-inch is a little easier to work with.  Sometimes (especially when I’m quilting an applique quilt), I use two batts, which makes the quilt sandwich even thicker.  In these circumstances, I may cut the binding 2 ¾- inches wide.  But 99 percent of the time, the 2 ½-inch wide binding will work just fine.


The use of the length-wise or cross-wise grain is the next consideration.  There are times when you cut the binding on the bias, but those situations are rare and will be discussed later.  Most quilt patterns will instruct you to cut the binding on the cross-wise grain, sew the strips together at a 45-degree angle, and bind your quilt with those.  That method works well with most quilts.  However, there are circumstances when you may want to consider cutting the binding on the length-wise grain – such as if the borders are heavily pieced or if the quilt is show-bound.  A binding cut on the length-wise grain is not as “stretchy” as binding cut on the cross-wise grain and can give more stability to a heavily pieced border.  Binding strips cut on the length-wise grain are longer and have fewer seams, which can give you some advantage with a show-bound quilt – most quilt judges are going to examine bindings closely to make sure that they are full, and the seams are smooth – the fewer the seams, the fewer the chances of getting dinged on your binding.  Regardless of whether it’s a length-wise or cross-wise cut binding, you want the binding strip about 25 inches longer than the perimeter of the quilt sandwich.  That extra length will allow for mitering the corners and sewing the binding tails together at the end.

Sewing Binding Strips together

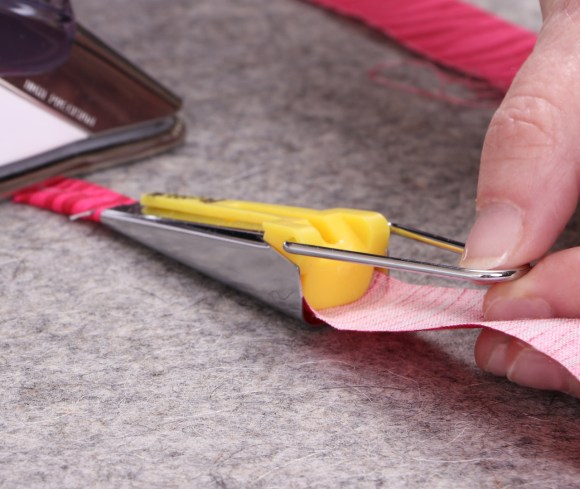
To make either type of binding, cut your strips, and join them at 45-degree angles.

Trim to ¼-inch seam allowance and press open (this reduces bulk in the binding).

Fold in half, wrong sides together, and press.

Now I am going to share my method of binding.  This method works for me…it’s neither right or wrong.   It’s a method I discovered a few years ago and it’s called the binding pocket.   It’s easy, requires no math, it’s fast, and I really like it.  Take your quilt sandwich and your binding to the sewing machine.  If you have a walking foot, this is a great time to use it as well as your needle down feature.  And at this point, I am assuming you’ve squared up your quilt top and trimmed off the excess batting.

Binding Pocket


  1. Open up one end of your binding and fold it on the diagonal.
  1. Give it a quick press to secure the fold, and then trim the excess fabric below the fold to about ¼-inch (no less than this, and maybe a thread or two more).
  1. Starting about one-third of the distance between two corners (I typically start on the right side), align the right edge of the opened binding along the side of the quilt and pin.
  1. Fold the strip length-wise again and pin-mark it 1-inch or so beyond the point where it becomes two layers again.   Sew (using a ¼-inch seam allowance) to the quilt beginning at the right-angled tip and sewing through only one layer of the strip.  Stop at the pin-mark, take a few back stitches or use the automatic tie-off feature and cut the threads.
  1. Lift the presser foot and refold the binding lengthwise again, aligning both edges of the strip evenly with the edges of the quilt. Check the initial seam to make sure it extends well underneath the folded, angled binding edge that now rests on top.
  1. Start sewing where the first seam ended. Keep sewing until your reach ¼-inch from the corner of the quilt sandwich.  Back stitch or tie off.  Cut the threads.

Turning a binding corner

  1. Fold the unsewn tail of the quilt binding straight up, positioning it so that its right edge is parallel with the next side of the quilt to be bound. Coax the lower edge of the strip to form a 45-degree angle.
  1. Fold the binding down, leaving the top of the fold flush with the edge of the quilt top behind it and its raw edge aligned with the next side of the quilt. The 45-degree angle should be intact under the fold.
  1. Pin the quilt binding to the side of the quilt or align it as you sew (I’m a pinner…). Begin sewing at the top of the edge and sew the length of the side of the quilt.  Continue sewing until you come to the next corner, stopping ¼-inch from the edge, as you did prior.  Treat all the corners the same way.
  1. When you’ve worked your way around the quilt and are nearing the starting point, stop the sewing machine with the needle in the down position. Trim away the excess ending tail, leaving enough length to tuck into the opening created by the starting tail.
  1. Realign the quilt binding with the quilt and sew through all layers to finish attaching it, ending with the seam just past the beginning of the first seam.
  1. Use a blind stitch and matching thread to secure the angled fold to the tucked-in strip.

This method produces a little bulk where the binding strips are joined, but the bulk is not excessive, and I find it lays down pretty well with a shot of steam and a hot iron.  This method is quick, easy, and there are no worries about cutting the binding tails too short or at the wrong angle.

At this point, let me talk about the thread used to sew on the binding.  Most quilters, when they’re piecing, use white, beige, gray, or black thread in this process – which ever color thread blends in well with the fabric being sewn.  This allows us to keep sewing and not stop every little bit to change out the top thread and bobbin.  However, when you’re sewing on the binding, make sure your top thread matches your binding.  And most of the time I use a different colored thread in the bobbin than I do in the top of the machine.  I’ll explain why I do this a little later.

Take your quilt top to your ironing surface.  Working from the front of the quilt, press the binding out.  Fold to the back and slip stitch into place.

And that’s it.  This is how I bind at least 90 percent of my quilts.  It looks good, and I’m happy to say that I’ve never got dinged on my binding with any quilt I’ve entered in a show.  (Not to say that this won’t happen in the future….)

More on binding treatments next week!


Until then, Quilt with Excellence!

Love and Stitches,

Sherri and Sam

IMG_0483


Categories
Uncategorized

More about Bias Tape than You’ve Ever Wanted to Know….

Still talking about bias tape this week.  However, I promise this is my last words on the subject.

Another bias tape tool that I really like is bias bars.  These come in varying sizes. Some are made of metal and some are made of heat resistant plastic.

All kinds of bias bars

The bars usually come in sizes 1/8 inches, 3/16 inches, 1/4 inches, 3/8 inches and 1/2 inches and are 12-inches long.  The bias bars work a little differently than bias tape makers.  With these, you’re actually making a small tube, verses making tape.  To do this, you take the width of the bias bar and multiply it by 5.  So, if you’re using the ¼-inch bias bar, you’d cut your fabric strip 1 ¼-inches wide (1/4 x 5 = 1 ¼)

After you’ve cut the strip, you’re going to sew it into a long tube.  With the wrong sides of the fabric together, sew the strip together with as narrow a seam as you can.  Park yourself at the ironing board again (notice a theme here…) and insert the bias bar into the tube.

bias made with bars

It’s important that the seam be on the flat side of the bar, not on either side.    Press the fabric while the bar is in the tube, moving the bar down the strip as necessary, pressing the seam open (if you can) or to the side.  If the seam allowance underneath the tube looks a bit bulky, you can trim it a bit before pressing.

Here’s where some specific traits of the bars come into play.  The plastic bars are thicker, so if you don’t want the bias strips to lay completely flat, these may be just what you need.  The metal bars are thinner, hold heat better, and produce a somewhat flatter bias strip.  Neither of the bias tape made with either type of bars will be as flat as the bias made with the makers.  But personally, I like the somewhat raised effect.  Very little applique is completely flat, and the stems make from bias bars seem to look better than the kind made from bias tape makers. However, if the curves are tight, the kind made from the bias tape makers may be easier to work with.

So two gadgets you may want to have in your sewing box…bias tape makers  and bias bars…but what if this happens…what if you’re at a Sit-and-Sew, or Quilt Bee, or Quilt Retreat, or Quilt Class and you need bias tape?  You look through your tools only to discover you left your bias tape maker or bias bars at home!  Now what do you do?

You could ask to borrow one from a friend.  You could wait until you get home and make it.  Or you can use your pressing surface and two straight pins to make the bias tape right there!  Sound impossible?  Nope. It is not.  You can do it pretty quickly, too.  This will be the double-fold bias like the bias tape makers produce.

Here’s how this works…

First, cut your fabric strips double the width of the bias tape you need, just like you do when you use a bias tape maker.

Next, insert pins in your ironing surface as pictured.  The ends of the pins need to go into the ironing surface.

pin made tape 1

Fold your fabric strip in half and then fold the edges inward toward the middle.  Press a few inches of the strip and then begin to feed under both pins.

pin made tape 2

The edges will begin to fold into the center as you gently pull the fabric through, beneath the pins.  As with the bias tape maker, press as you go.  While this method isn’t fool proof (sometimes the fold on one side will become bigger than the other), it does work well if you don’t have access to bias bars or a bias tape maker.

All of this works really well except for the scenario when the bias tape needed is less than an eighth of an inch.  Now I know what you’re thinking – that’s really small.  It is and there are some applique patterns that will call for stems and tendrils that narrow.  At this point, some quilters will make the 1/4- inch bias tape and fold it double.  That can work, but if the stem or tendril is really curvy, that method gets bulky and difficult to handle, much less needle.  This is how I handle that situation.

First, I take a fabric marker and draw out my tiny stem.  Then I cut a strip of fabric on the bias, that is twice the width of the needed strip.  So, if my stem is a scant 1/16-inch, I cut it 1/8-inch wide.

tiny stem 2

Place the stem fabric, right side down, along the drawn line on the background fabric.  At this time, you can choose to sew the stem down by machine or by hand.  Personally, I think that it’s easier to sew it down by hand.  That narrow strip of bias for the stem can be difficult to feed under a pressure foot.

After that is sewn down, fold it over and press.  Then applique the other side using the needle turn technique.


There you go… this hasn’t been a “flashy” blog with lots of bells and whistles, but it’s some great basic information about a technique you’re going to run into if you applique a lot.  If you know several different ways to make bias, you have different methods to choose from depending on the look you want and the difficulty of the curves you have to make.

Throughout my years of quilting, I have found it extremely helpful to know more than one way to execute any technique.  The more “tools” you have in your quilting tool box, the better your quilts will look.  Bias tape may  be perfect for one quilt, but totally unsuited for another.  Instead of tiny stems driving you up a wall, you know how  to sew those things correctly the first time around.

Next week, we are beginning a two-part blog on binding — the last thing that’s sewn on before the quilt is done.  And like bias tape, there is more than one way to bind a quilt. Thanks for hanging with me this year as we’ve diligently reviewed the basics.  All of this will make a lot more sense next year, I promise.


Until next week, Quilt with Excellence!

Love and Stitches, Sherri and SamIMG_0483


Categories
Uncategorized

Bias Tape…Part One

At some point in your quilting experience, you may have to deal with bias tape — especially if you like to applique.  Stems and vines are generally constructed out of some type of bias tape.  For those that like to make Baltimore Album quilts, I’ve seen tiny, tiny bias tape used as rigging on boats.  So, bias tape has a place in the quilting world, just as it has in the garment making end of sewing.

At this point, do not want you to confuse bias tape with bias binding.  Bias binding has its own job to perform and that is to cover the edges of the quilt once the quilting is completed.  Binding is just one of the many ways to finish the edges of a quilt and I plan on writing a couple of blogs about different ways to finish your quilt before the year is out.

Bias tape is a different animal.  It’s versatile and can easily be made without a lot of fancy gadgets.  It can be single-fold or double-fold – although most quilters use the single-fold (the exception to this is bias tape made with bias bars … and we’ll get into that later).

bias-tape-line-drawings

Let’s start with what bias tape is, since we know it isn’t bias binding.  This is single-fold bias tape.

Bias Tape Front and Back

One side is flat and the other has two folds on the sides, but no fold in the middle– hence the name singe-fold bias tape.  There is such an animal as double-fold bias tape, (see illustration near the beginning of this blog) but that’s primarily used in garment construction, not quilting.  You can make your own bias tape, or it can be purchased in packages.

Packaged Bias Tape

The packaged bias tape comes in a rainbow of colors, but I will be honest with you…while plunking down a few dollars for something that’s already made can seem like a great time-saver, in the long run, it may not work.  Pre-made bias tape is generally used for garment sewing, so it’s not made with quilters in mind.  And in my opinion, the fabric used to make this tape is inferior to a lot of quilting fabric.  My strong suggestion is this:  pull from your stash and create your own bias tape.  If you’re making stems and leaves, the same shades of green used for the leaves can be used for the stems.  Scraps of black fabric can be used for tiny bias that can serve as rope on a block that has swing sets or boats.  Brown can be used for vines, tree trunks, and limbs.  And if you’re using the same fabric in the applique as you are in the pieced blocks, just purchase about an eighth of a yard more.  The colors will coordinate and give your quilt a great finished look.

So how do you make your own bias tape?  It’s not hard. There are gadgets out there to help and then there are ways you can make it without anything but a few basic quilting tools.  We’re going to start with bias tape makers.

Bias tape makers

These little tools are bias tape makers. They can make bias tape in widths ranging in size from a quarter of an inch to two-inches wide. These are very versatile pieces of equipment to have in your sewing box.

Making bias tape with these is really easy.  I use the ¼-inch tape maker the most, as it makes really wonderful vines and stems.  Directions come with the makers, but they’re written on tiny pieces of paper that’s easy to misplace, even if you’re super organized.  However, if you simply remember that you multiply the size of the maker by 2, that’s the width you cut your fabric strips.  So, if I’m using my ¼-inch maker, I cut my fabric strips ½-inch wide (1/4 x 2 = 1/2).

Before you cut your fabric strips, decide if you need to cut them on the straight-of-grain or on the bias.  Straight-of-grain strips will give you some curve, but if the applique pattern calls for really tight, small curlicues and curves, a bias cut will be better.  The bias handles tight spaces much more effectively.

After the decision is made to either to cut the strips on the straight-of-grain or bias, you can either sew the strips together as you do quilt binding — to have one really long piece of bias tape that you can cut off in the size you need as you go along — or you can make several smaller pieces of bias tape.  Personally, I think making the smaller pieces is easier.  Getting the seams to go through the bias tape maker has always been a bit tricky.  I’d just rather not deal with them.

With your rotary cutter or a pair of scissors, trim one end of your fabric to a point.

Pointy end through the btm

Turn your iron on, find your spray starch, and park yourself at the ironing board.  With the right side of the fabric facing the surface of your ironing board, feed the strip through the tape maker.  There is a slot on the bottom of most tape makers where you can see the fabric moving through the maker.  If the strip needs a little “encouragement” to move through the bias tape maker, I’ve used a pin or awl to help move the material forward.

Using an awl to push the tape through

Once it gets through the end, use the little handle on top of the maker to start sliding the tape maker backwards.  Before pulling the fabric through the maker,  I use a shot of spray starch on the material.  As the fabric is pulled through the maker, press it with a hot iron.

ironing bias tape as it feeds through maker

The starch will help the folds will stay pressed into place.  If the material “hiccups” a little, re-adjust the fabric in the bias taper maker and keep going.  Chances are any little blemish can be manipulated with needle and thread, covered with an applique piece, or will be cut off when you trim the bias tape down to the size you need.

When an applique pattern calls for a lot of bias tape – the pattern is loaded with stems or vines or such – I try to make all my bias tape at one time.  I do this for a couple of reasons.  First, making bias tape is not my favorite thing to do.  Making it all at once gets it all done at one time and over with.  Second, it does save time when I am appliqueing.  I don’t have to stop, cut more fabric, run it through the bias tape maker, and then sit back down to applique.   I can just keep stitching.  To store the bias tape, I simply wrap it around an empty paper towel cardboard center and pin or clip it into place…

Bias storage 3

Or use another storage method as shown.

Next week we’re going to move ahead with bias tape and I’ll show you a few other ways you can make this wonderful stuff.  Then it’s on to binding treatments, peek-a-boo blocks, and we’ll end the year with my annual “State of the Quilt” blog.

Until next week…continue to Quilt with Excellence!

Love and Stitches,

Sherri and Sam

DSC00736

Categories
Uncategorized

More than Just Dollars and Cents

question-marks-d610961900-171110

This week we’re continuing our discussion on fabric, and now I would like to discuss fabric value with you.  There are a couple of ways fabric value can be defined.

The first definition, and honestly this was probably the one that immediately popped into you head, is money – the value of your fabric.

dollar-signs

This type of value is important. For me fabric is a lot like shoes – you get what you pay for.  You buy cheap fabric, and your quilt may not look as well as you’d like it to.  While I do not ever promote breaking your budget when purchasing fabric, it is a good idea to purchase good fabric.  It doesn’t have to cost $20 a yard to be quality fabric.  However, there are few aspects of the material you may want to examine before it finds its way on the cutting table and your debit/credit card takes a hit.

The primary question you want answered is what is the thread count?  If you’re like me, most of the time when thread count is mentioned, you’re thinking sheets.  And for sheets, the higher the thread count, the better the sheets.  Sometimes the thread count advertised on sheets is 1,000 – meaning there’s a 1,000 threads per square inch.  Quality quilting fabric is not quite that extreme.  If you examine a square inch of quilting fabric, you will notice there are threads running vertically and horizontally.  The best quilting fabric will have approximately 70 threads per square inch.  This fabric will be easy to needle but will hold up to wear.  Anything lower than 60 threads per square inch may fray, fall apart as you’re constructing your quilt, and stretch off grain.

Here’s where the price difference comes into play.  Fabric that’s sold at Big Box Stores tends to have a lower thread count than fabric that is sold in the LQS or on quilting fabric websites.  That’s why the Big Box Fabric is the less expensive option.  I’m not saying all their fabric is lower quality, but I am saying be careful if you’re purchasing the fabric for a quilt that is show-bound or destined to be a family heirloom.  You may want to save your pennies and then splurge at a quilt shop, either brick-and-mortar or on-line.

On the other hand, sometimes that Big Box Fabric is perfect for a quilt.  If you’re making a quilt for child, and that quilt is destined to be literally played with until it’s in pieces, go for the less expensive fabric.  As a matter of fact, you may want to make two of these kinds of play quilts, so when one is loved-up, there will be another waiting in the wings to take its place.

Big Box Fabric is also perfect for beginner quilters.  Do you remember making your first quilt?  If yours was anything like mine, that first quilt top took some serious abuse.  First quilts have seams ripped out, blocks taken apart and resewn, tips of points cut off, and lots of mismatched corners. That first quilt is not a thing of beauty, but it is a critical learning tool.  It really doesn’t make a lot of sense to spend hundreds of dollars on that first quilt.

And there are some quilts I make that don’t merit expensive quilting fabric.  If it’s a lap quilt to wrap up in while I read or watch TV, you’re going to find fabric left over from Hancock’s mixed in with fabric from remaining bolts I purchased from Dragonfly before it closed. Those quilts are not heirlooms nor are they show-bound.  Those quilts are made to be used, cuddled with Sam in, and more often than not, they will be baptized with coffee and wine.  It would make no sense to construct them out of high-end fabric.

But there’s another aspect of value that comes into play with fabric, and that’s the color value.  Value in this aspect means how light or dark a fabric is in relation to the surrounding material. An understanding of contrast (color value) is an important quilt making skill that helps quilters decide how to arrange patches of fabric to either blend or create divisions with each other.

Color Value Chart

There’s an easy way to get started being comfortable with color value.  Grab some different color swatches – they can be charm squares, squares from your stash, or even paint chips (as long as they’re cut apart and separated from their color family).  Try to arrange these from the lightest to the darkest.  Step back and look at them.  Can you see the color value subtly shift from lightest to darkest?  If there are colors that stand out in this flow, re-arrange the swatches and try again.  This is harder that it sounds, and it takes a while to get the organization correct.  It’s easy to do this kind of sorting when you’re working with swatches from one color family.  Throw in multi-colored swatches and the process gets a lot more complex.  This is because another characteristic is thrown in the mix:  color warmth.  Color warmth changes the contrast or value.

color wheel with warmth

Let’s look at this a bit closer.  On most standard color wheels, there is a line that separates the colors.  Those on the right of the line are the cool colors (blues, greens, blue-greens etc.) and those on the left are the warm colors (red, yellows, oranges).  Cool colors tend to recede, and warm colors seem to “pop.”  To show you how this works, let’s take a look at the same quilt block in different colors.

Warm BlockMixed Block 2Mixed Block 1Cool Block

It’s easy to see that the block made of all cool colors tends to recede back into the white background.  Likewise, the block made from all warm colors tends to push forward from the background.  In the blocks made from warm and cool colors, the reds and yellows catch your eye before the blues and greens because while the cool colors are receding, the warm colors are “popping” off that background big time.

With solids, it’s easy to determine if the fabric falls into the cool category or the warm category.  However, if the fabric is a multi-color print, such as a focus fabric, things get a bit more dicey.  Certain places on the material may definitely read warm and others may tend to lean towards the cool palette.  So how can you determine if the fabric is warm or cool? There are a couple of ways, and we’ll get to those in a minute, but if the warm and cool colors are pretty evenly distributed, and you need the focus fabric to read cool, place it near blues, greens, or blue-greens.  If you want it to read warm, place it near reds, yellows, and oranges.

At this point let me also say something about a couple of colors on the color wheel that can be wonderful to work with but can cause some issues – purples and lime-greens.

purple and lime green

Purple is made from red and blue, both warm and cool colors.  Lime-green is comprised green and yellow, again both warm and cool colors.  If you place either near a warm color, they will read warm.  If you place either near a cool color, they’re going to tend to run cool.  If you’re using either color in the quilt, be careful about placement.  If you need them to be consistent as a warm or a cool, the immediately adjacent material is very important.

In most quilts, you want a balance between warm and cool colors.  There are exceptions to this, but most quilt designs are made with a mix of color values in mind – both warm and cool, and contrast values. Contrast values are lights, mediums, and darks.  Sometimes (and this is more often in older quilt patterns), you’re instructed to purchase so yards of dark, so many of mediums, and so many of lights.  The “light” yardage can be pretty easy to figure out – whites, beiges, ecrus, tans, and pastels.  However, the medium yardage and the dark yardage can get pretty murky.  And if you purchase too many mediums, thinking you’ve gotten darks, your quilt will look kind of muddy – too many fabrics of the same contrast value.

So, let’s discuss how to avoid a muddy mess and make our color selections pop.  First, there’s what I call the squint test.  Layout all your fabric and take several large steps backwards and squint at your choices.  Sometimes this is all it takes to see if you have too many fabrics of the same color value or which color doesn’t really go well with the other material.  Eliminate, add, step back, and squint again.  I have to admit this technique takes some time to get really good at, but keep practicing. It gets easier the more you do it.

Another idea you may want to entertain is taking a trip to your local hardware store and purchasing a peephole – the little magnifying glass that let’s you see who’s at your front door.  When the fabric is viewed through the peephole, it looks far away, so you may be able to pick the contrast up easier than squinting at it.  The plus side to this is that the peephole is small enough to throw in your sewing bag or purse, so when you’re fabric shopping, you can pull the peephole out and use it.

Another tool that is small enough to keep with you in your bag is this:

Color evaluator

This is a color evaluator.  When you look at your fabric through this red filter, all of the material will show up in tones of gray – light grays, medium grays, and dark grays.  This is helpful when you’re making sure you have enough medium and dark fabrics.  And this is a great tool to have, but there are two that I like even more, and both are probably already in your home.

The first tool works if you’re pulling from fabric that’s already in your sewing room – and that tool is your printer/copier.  Cut 2-inch squares from each of the fabrics you’re auditioning for your quilt.  Glue or tape these onto a piece of copy paper and make a black and white copy of your swatches.  The black and white copy will immediately let you know if the fabric you thought was a dark is really a dark or a medium.  I’ve used this method for years and it’s almost fool-proof.

The second tool is your mobile phone.  I cannot imagine there is a phone on the market now that does not take pictures.  And I bet your cell phone goes everywhere you do.  So, use this to your advantage.  Line up your fabrics either in your sewing room, on your computer screen (if shopping on line) or at your LQS.  If you’re shopping on your phone, screen shot the fabric and save it to your photos.  Go to your photo app, open the picture you want, and edit the picture to black and white (on the iPhone 8, this is the silvertone setting).  From there it will be easy to see the contrast value of the fabric.


This careful placement of color and contrast values can make a quilt soar far above normal.  The easiest quilt to see this in is Storm at Sea.  The placement of darks to lights to mediums make this quilt seem to move while it’s standing still.  Tumbling Blocks quilts also use color and contrast value to their advantage to give a 3-D effect.

The best advice I can give you when planning color and contrast values is this:  Study quilts.  Look at them carefully.  Notice that when you put a medium fabric next to a white, it’s going to appear as a dark.  If you put that same medium near a dark or another medium, it will appear as a medium.  The placement of fabrics on a quilt top is just as important as the fabrics you pick out for your quilt.  And the placement can radically change the appearance of your quilt.  Notice the three tops below:


These are the same quilt pattern, but I’ve changed the placement of the color and contrast values in each.  A different look is achieved in each placement.

It’s hard to believe it’s November already and we’re quickly winding down 2018.  In many, many ways, this year has tried my soul more than any year since 2005, when my father passed away.  I find myself mentally, spiritually, and emotionally exhausted.  Quilting – that pull of needle and thread – and quilters – my BFFs – have comforted my soul and spirit more than anything.  If you’re my quilting friend, thank you for your prayers and words of encouragement.


We’ve got a few blogs left that will cover bias tape, bindings, and a few other odds and ends before we say good-bye to the year of Quilting with Excellence.  I’m excited about 2019 and what I have planned for my blog and for us.


Until next week, Quilt with Excellence!


Love and Stitches,

Sherri and Sam

DSC01411