In a previous blog, I mentioned I have been receiving email from my readers at a pretty good pace this year. Most of the time I do try to respond to each person who takes the time to write me, or follow up on the comments left at the bottom of my blog. However, there are times when I get asked the same question several times, and then I decide it’s blog worthy. This is one of those times and today the topic is rulers.
Which on the surface, seems like a pretty … well… boring subject. But hear me out. There’s more to rulers than inches and centimeters. But before we get started, I want to throw out this disclaimer: I do not receive any type of sponsorship from any of the brands I’m discussing today. I’m not on their payroll. They don’t send me free merch for mentioning them in my blog. I pay for these products just like you do, so my endorsement for any particular brand comes from the fact I use the products and really do love them. It’s an honest appraisal. I also don’t spend an enormous amount of money on rulers, so their prices should be accommodating to the average quilter’s wallet. In addition to those disclaimers, let me also tell you for the most part, I don’t purchase specialty rulers. There are a couple of exceptions to this, and yes, those rulers are in the following list, as well as the reasons I feel they’re worth the money. But in all truthfulness, this:

Is the only single-task tool in my studio. Everything else is a multitasker. Especially rulers.
One the questions asked is what brand of ruler I use the most. My favorite brand of ruler is Creative Grids for five reasons. First, they’re manufactured from clear plastic, which makes them really easy to see through. And this plastic is durable and tough. If you’ve used a rotary cutter long enough, you know at some point in time, you’ll nick your ruler. Creative Grids rulers don’t scratch or nick easily. Second, they’re extremely accurate. I know you’ve seen this picture:

None of these rulers match the inch increments on the mat, and for the most part, each other – even if they’re the same brand. I’ve never found this to be the case with Creative Grids. They have always been consistently accurate.
The third reason I like them are these little dots:

These are fabric grippers built into the ruler. No need to apply Ruler Magic, sandpaper dots, or those clear, plastic disks.
Fourth, Creative Grid rulers are made in the USA, which is important to me. I’m supporting an American-made product. And lastly, the versatility of the company is wonderful. They were the first (and I think the only) company to come out with an acrylic mask template during COVID. And besides making rotary cutting rulers and templates, they also make long-arm rulers, which is pretty important to folks like myself who own a long arm.
I’ve broken this blog into two sections. The first section deals with the five rulers I think every quilter should have in his or her studio. The second section deals with rulers I use nearly every day, but aren’t necessarily…necessary.
The Rulers Every Quilter Needs

- The Square-Up Ruler(s)
Every quilter needs at least one really good square ruler. These rulers are used to trim your blocks to the accurate unfinished size. Ideally, in a perfect quilting world, I would have one in each size block I construct. But it’s not a perfect quilting world and purchasing a square ruler in every size block made would be outrageously expensive. What I suggest is that you buy a square-up ruler in the size block you make most often. If you make a lot of different sized blocks, a 9 ½-inch square ruler is a good one to keep on hand, as it lends itself to a lot of different sized blocks. Whatever brand you decide to buy, make sure it has the diagonal line that runs through the center of the ruler. This helps you accurately trim your block. And here’s a heads-up for those of you who see T-shirt quilts in your future – the 12- or 16-inch (or even larger) square up ruler is completely worth the cash. Trust me.
- A Long Ruler
This ruler should measure at least 18-24-inches long. And in my opinion, since this ruler is used to cut borders, narrow strips, and square-up quilt sandwiches before binding, the longer the ruler is the better.
My favorite long ruler is this one:

It has all the diagonal lines I need if I want to cut 60-degree triangles or 45-degree diamonds. But my favorite part about this ruler is the lip at one end. The lip allows me to lock the ruler against the edge of my cutting mat. This keeps the ruler from slipping as I make long cuts. It’s 4 ½-inches wide and one of the few non-Creative Grids rulers in my studio. I make a lot of 4 ½-inch fabric strips, so this ruler gets utilized a great deal – you can tell by the way the markings are finally wearing off. However, I also have a 24-inch ruler in a 2 ½-inch width which also gets used a lot. My advice is think about how wide you’re cutting most of your fabric strips and see if you can purchase a 18- 24-inch ruler in that width.
- A Really Wide Ruler for Cutting Really Wide Strips

Let me insert a point of clarification right here. The longer you quilt, the more you’ll be faced with fabric strips in different widths. The most common widths are 2 ½-inches, 4 ½-incshes, and 6 ½-inches. So, while this may be a ruler you can put off purchasing immediately, eventually you will want one to cut borders accurately. And if you’re like me and prefer to cut your borders on the lengthwise grain, a long 6 ½-inch ruler is perfect. However, I also have this short, wide Creative Grids ruler I use every day.

It’s perfect for working with Fat Quarters and making diamonds or 60-degree triangles.
- A Small Ruler
These come in different lengths, but my two favorites are these:

The longer ruler is 3-inches wide and the shorter ruler is 4-inches in width. I won the longer ruler and purchased the shorter ruler at a guild yard sale (it was $1.00 – and had the sandpaper dots on the wrong side!). They’re both the perfect size for trimming up the edge of a unit or block when a larger ruler would just be too bulky to deal with. Creative Grids has the Itty Bitty Eighths Ruler.

This ruler is great because the 1/8-inch markings are clearly printed. This may not sound like a major selling point if you’re a beginner quilter, but after you’ve made a few quilts, you begin to encounter directions such as “Make forty 3 5/8-inch squares.” Those eighth-of-an-inch markings suddenly become super-important for accuracy. The Itty Bitty rulers come in varying lengths (the one pictured is the long one), but the small one, coming in at 3 x 7-inches, is the perfect small ruler.
- A Half-Square/Quarter Ruler
I realize some folks may want to throw this into the specialty rulers section of this blog, but hear me out. Quilters make so many HST units, a ruler which aids in this construction is one of the basics IMHO. Creative Grids offers two HST rulers, but those are in my specialty rulers section, because they can perform other tasks than HSTs. The ruler I’m putting in this list of Rulers Every Quilter Needs is Eleanor Burns’ 9 ½-inch Square Up Ruler.

I use this tool every week. It’s clearly marked and made of heavy duty acrylic. What I absolutely love about this ruler is you square up the HST before you press it open, which is so much easier than the traditional method of trimming. I’ve also used it to square up 9 ½ blocks on occasion. I like the way they handled marking this ruler, too. The half-inch increments are on one side and the 1-inch increments are on the other, thus eliminating any point of confusion when trimming down HSTS. You simply make your HSTs by the Sew and Slice method or traditional method, and while they’re still like this:

You trim them down to the correct size. So easy!
Now on to the second part of this blog:
Rulers Quilters Will Probably Want at Some Point in Their Quilting Career
This list is comprised of six rulers and one ruler tool. The rulers I mentioned in the first part of this blog are ones I would encourage anyone to purchase as soon as they realize they really love to quilt. Those rulers are pretty essential and are definitely multi-taskers. The rulers in this list can also perform more than one job, but aren’t as essential as the ones in the first list. These are the rulers you use your coupons for, wait until they’re on sale, or ask for at Christmas or your birthday. Will you use them a lot? YES. Do you have to have them the minute you decide you’re a quilt enthusiast? No. These simply make your quilting life easier and your piecing more accurate.
- The Binding Tool Ruler

There are several different binding tools/rulers in the marketplace, but this by far is my favorite. It’s made by Creative Grids and comes with the wonderful grippers already built it. You will love those fabric grippers if you cut your binding strips across the width of fabric, and you will really love the grippers if bias binding is in your future. As an added bonus, the instructions for bias binding are printed on the ruler, so there’s no mad search for directions. It’s also marked for cutting 2 ½-inch strips and 2 ¼-inch strips. No matter what your binding width preference is, it’s here. And since it’s 20-inches long, it can easily double for a long 2 ½-inch ruler in the first list (it’s a multi-tasker). Another added plus: It has how many inches of each width of binding you can cut from different yardages. This specialty ruler is listed on the Creative Grids website at a suggested retail price of $21.49.
- One-half Inch Ruler(s)

My ½-inch rulers are Omnigrid and came from Amazon for a very reasonable price of $14.16 (I’m a Prime member, so I pay tax, but not shipping). I also chose the pack of three instead of the single ruler, which was a little over $8.00. In my pack there was one 12-inch ruler and two 6-inch rulers. The primary reason I purchased this narrow ruler was it made it super-easy to see if my ¼-seam allowances were consistent. Press the seam open, lay the ruler on it, and if the seam edges match up with the ruler, the seam has perfect ¼-inch seam allowances (1/4 + 1/4 = 1/2). Quick, easy, and accurate. I find these indispensable for making accurate 45-degree diamonds or 60-degree triangles. Consistent seam allowances are a must for those, and these little rulers are just the perfect tool to have. And while this is how I primarily use the ½-inch rulers, I’ve also used them for trimming small blocks, block units, and drafting quilt blocks on graph paper. The 6-inch size is perfect to keep with your hand sewing for drawing ¼-inch seam allowances or measuring the seam’s accuracy. These always stay in a container near my sewing machine – except for the one that’s in my hand sewing project box.
- Add-a-Quarter Ruler

This handy-dandy tool is by CM Designs and retails for roughly $11.00 – $12.00. It comes in three sizes: 6-inch, 12-inch, and 18-inch. I don’t have the 18-inch – as a matter of fact, I didn’t know one existed until I began writing this blog – but I do have the 6-inch and 12-inch. And I can tell you I reach for the 12-inch Add-a-Quarter far more often than I do the 6-inch one. It’s just the perfect size for just about any paper piecing you desire – both traditional and English paper-piecing. The ¼-inch lip is perfect for adding the margin to the fabric for EPP. I’ve used it for adding seam allowances to applique pieces, traditional paper piecing templates, and as a straight edge for cutting or drawing. It also has the inches marked along one side, so it doubles as a ruler. My Add-a-Quarter stays on my small cutting mat near my sewing machine. I use it that often.
- Fons and Porter Triangle Trimmers

I introduced these little tools a couple of blogs ago, and while technically they’re not rulers (no inches or centimeters are marked on either of them), I use them so often they’re never off my large cutting mat. These are essential for trimming the points off of triangles or diamonds before you sew them together or to another block unit. The blunted edges of the triangles allow you to join the patches together accurately and effortlessly. Bonus: You can use them as templates and the grain lines are printed on the triangles. I currently have Twinkling, Twinkling under my needle and it has thousands lots of tri-rec blocks. These trimmers have saved my sanity. So, not only can you use these to make 45-degree triangles and 60-degree triangles, you can trim the dog-ears off any triangle and make piecing them together much easier.
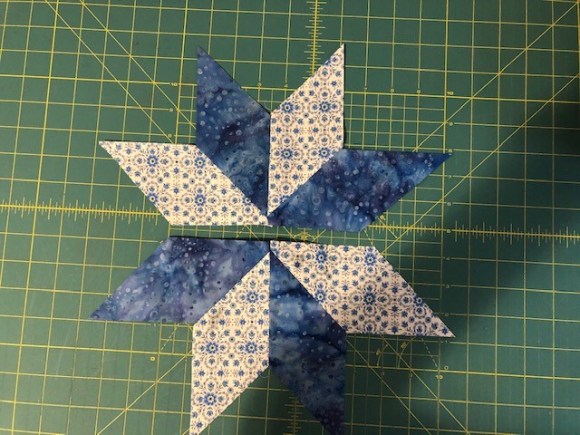
- Jinny Beyer Perfect Piecer

You may remember this ruler/tool from my blogs on 8-pointed stars. Since I found this little jewel some years ago, I have loved it and every time I use it, I find something else to can do. You can accurately mark the stopping and starting points of any angled diamond, triangle, square, or rectangle seam. You can mark ¼-inch seams for hand or machine piecing. You can use it to draw any angle you need to. I have two of these – one stays near my large cutting mat and the other in my hand sewing box. And while Jinny has closed her brick-and-mortar store, you can still purchase one of these in her on-line shop. It’s truly worth every red cent.
- The 45-degree and 90-degree Triangle Quilting Ruler

This wonderful ruler is by Creative Grids, and this is the half-square triangle ruler I told you earlier I am putting in the “Rulers Quilts Will Probably Want at Some Point in Their Quilting Career” category. As much as I love Creative Grids, I did not know this ruler existed until a couple of years ago when I read the book Jelly Roll Quilts by Pam and Nancy Lintott. This exemplary tool lets you make 45-degree half-square triangles and 90-degree quarter triangles out of jelly roll strips!!! Talk about opening a whole new box of quilting options! To test this ruler, I made a Seven Sisters Quilt out of a half a jelly roll and this ruler, and the thing went together like nobody’s business. The math required for this is built into the ruler, and of course it comes with directions. However…if you scan the QR code on the ruler, you get the video tutorial from Creative Grids. The suggested retail price is $25.99, which makes it on the pricier end of my ruler recommendations. But if you like jelly rolls and are a little frustrated at the current options, this ruler is what you need to get yourself out of the jelly doldrums. It can be used with non-jelly roll fabric, too. Like all Creative Grids rulers, it has the fabric grippers.
- Ruler Magic

Okay, this is not a ruler but it is something you can use on all your non-Creative Grid Rulers. While there’s always sandpaper dots or the clear, plastic disks you can put on your rulers to keep them from slipping, Ruler Magic does the same thing, but it’s not permanent. It is an adhesive, and you put a few drops of this on the wrong side of your ruler and wait until it dries clear. After that, you can use any ruler without fear of it slipping and sliding out of place. To clean, it rinses off with warm water and a bit of scrubbing. I have a bottle of this and it stays on my cutting table.
Okay, so I was given an inch and I’ve taken almost 3,000 words to tell you about my must-have rulers and the rulers I really like. Once the quilt bug has bitten you hard, I’d encourage you to get the basic rulers mentioned first, and then look into the others. Other than this:

I encourage you to never buy any quilt ruler or tool that can only do one task. Quilting notions aren’t cheap. They need to be well constructed and offer several options for use.
Until next week, measure twice, cut once, and Level Up Your Quilting!
Love and Stitches,
Sherri and Sam