Categories
Uncategorized

Getting Myself Organized

One of the most frequent questions I get asked concerns how I organize myself for projects.  There are several answers to this question.  A lot of it depends on the project.  Some of it depends on where I’m making it (a quilt retreat, a friend’s house, my mom’s home, or my studio).  A tad bit even depends on my mood.  The one concept which stays constant in all of this is that quilting isn’t my only job.  My husband and I own our own demolition and environmental company and I’m the CFO.  Some weeks I work 60 hours.  Some weeks I may only clock in 20.  This forces me to stay semi-organized, so if I can snatch just 15 minutes of sewing time, I can make the most of it.

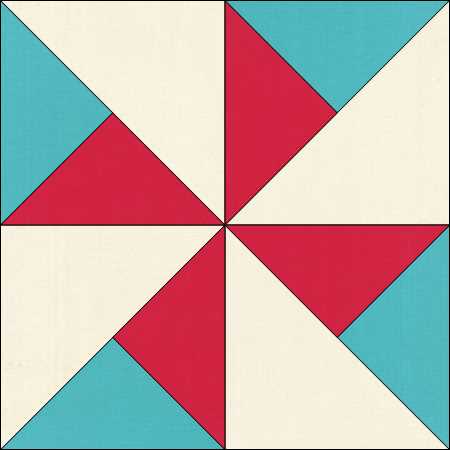
The first item to discuss is the fabric itself.  I’ve come a long way from the corner of my kitchen in the mid-1980’s where I was the Queen of Fat Quarters. I have more room, and thus more fabric.  In addition, during the Pandemic shutdown, I’ve done my part to help our quilt stores stay open.  I purchased fabric from LQSs across the nation in an effort to keep them up and running and help the owners keep their bills paid and food on the table.  I really, really need to sort and straighten again.  Let me also put this fact in right here:  There are literally hundreds of thousands of ways to store fabric. Google fabric organization and literally hundreds of blogs and pictures will appear with the click of a mouse.   In earlier blogs I’ve highlighted the way I purchase fabric and how I organize my vast textile collection.  In a nutshell, here’s a repeat:  I flat fold anything over a yard.  Fat quarters and single yard cuts are folded and wrapped around cardboard inserts used for comic book display (these are way cheaper on Amazon than the cardboard bolts for fabric).  And any scrappage 8-inches square or larger is sorted according to color and placed in bins.  I do occasionally purchase bolts of fabric and these few items are stored along a wall.  The way I store my fabric will differ from the way you store yours due to space.  You must make your storage area work for you – it has to be kept semi-organized and you have to be able to see what you have.  So, Google and Pinterest ideas until you find something which fits your space and your quilting style.  Let me also insert this thought:  The storage system which works well for you now, may not work in three years.  Be flexible and open to change.

As far as purchasing fabric, my rules of thumb still are the same.  If you’re purchasing for a pattern, be aware most or them already allow for the “oops” factor – in other words, they’re giving you several inches of extra in the fabric requirements in case you mess up.  There is generally no need to purchase an extra ¼-yard to guard against any cutting or sewing mistakes.  If you’re purchasing fabric which has no real clear purpose other than you like it, three yards will usually cover any quilting needs.  If you’re buying the material with applique in mind, one yard should do the trick.  But if you find a fabric which completely wins your heart over and you simply cannot live without, buy five yards.  Why so much?  First, five yards will cover its use in at least two quilts.  And if you love it enough to buy five yards, you will want to use it in more than one quilt.  Second, once a fabric is out-of-print, manufacturers will rarely ever reprint it.   Yes, Ebay and Etsy can save your quilting sanity, but why take the chance.  In my entire quilting career spanning 34 years, I’ve only known one textile manufacturer to reprint a fabric more than once.  And it was a panel, not a fabric line.  If you really, really love the material, purchase the entire bolt.  I’ve done this a couple of times – primarily it has been for backgrounds/neutrals.  I’ve purchased prints twice.  And except for the bits and pieces in my scrap bins, every inch has been used.

When I initially discussed my fabric purchases, one item I didn’t include was quilt backing material.  It was probably around during that time span, but it never registered with me because I didn’t have a long arm then.  I was quilting all my tops on Big Red, who manages pieced backings just fine thankyouverymuch.  Enter my long arm, and suddenly backing fabric became important because Leanne prefers it over a pieced back.  How do I manage backing fabrics?  Backing is wider than regular fabric.  Whereas a bolt of “the normal stuff” is 44-45-inches wide, backing fabric can run from 108-inches wide to even wider.  Therefore, it does take more shelf space.  Typically, I purchase backing fabric as needed, due to the space issue.  That, and we all know there may be months weeks of time between stitching that last seam on a top and putting the first quilting stitch in the sandwich.  When a quilt is prepped for Leanne, then a backing is purchased.  However, let me throw this out here – quite often you can find a lovely backing fabric for the front of your quilt.  With The Fish Almighty quilt I’ve made the DH for Christmas – the background fabric is a backing.  And I’m prepping an applique quilt right now and the background is a backing fabric from the Bella Suede line of P&B Textiles.  Both of these quilts required significant yardage, and once I crunched the numbers, the backing fabric actually saved me money. 

With any fabric which makes it way through my front door, it’s first stop is my washing machine.  I’m a pre-washer and if you wonder why, go here: https://sherriquiltsalot.com/2017/09/01/to-prewash-or-not-to-prewash-thats-the-question/.  It’s washed and draped over a drying rack.  Once dried, one of two things will happen.  If it’s fabric which has been purchased for a future use, it’s ironed and either put on a cardboard insert or flat folded.  However, if it’s been purchased with a specific quilt in mind, it’s starched and ironed before I cut it.  I don’t starch any fabric until I’m ready to use it.  The reason behind this is I use real fabric starch – not Best Press or other starch alternative.  And starch can attract bugs.  So, the fabric that hangs out with my stash gets a good pressing but no starch.  Fabric immediately destined for the cutting mat gets pressed and starched.  And then it’s rotary cut according the pattern directions, regardless of whether or not I’m starting the quilt immediately or in a week or three.  

 I often am asked why I do this – cut everything out when I’m really not sure when I’ll start making the quilt.  I do it for three reasons.  The first concerns the fabric itself.  If there’s a mistake in the fabric requirements or I make major cutting errors, then chances are that particular fabric is still available.  Six months from now, this may not be the case.  Secondly, cutting the fabric is my least favorite activity about quilting.  I’d much rather get it over with.  I even cut out the binding.  Plus, knowing  I have the quilt already cut out and waiting for me in a project box makes me feel all warm and eager to start.  The third reason is the project box itself.

I use project boxes.  Most of the time they’re either the plastic storage tubs from the dollar store or these (my favorites) from our local office supply place.  I have plenty of room in the boxes.  I have also come in possession of these: 

Also pretty darn perfect and free from a friend.

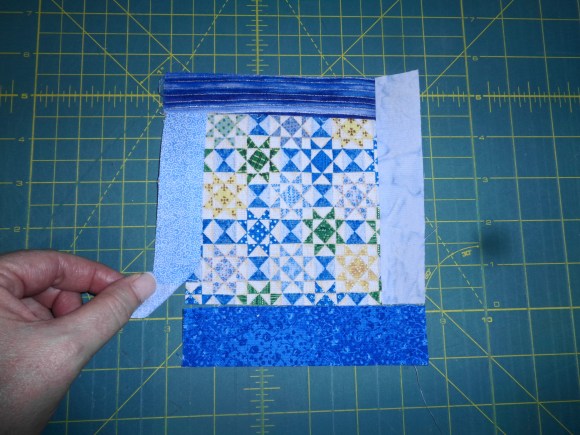
I’d like to park it here and explain what I put in the project box.  There’s the cut-out quilt, of course, and the pattern.  However, I also add in any special quilting notions, rulers, templates, etc., to the box.  If it’s an applique quilt, I toss in specialty threads, fusible webbing (if needed), and anything else required except my applique tools (which have their own box).  If I have the backing at this point, I don’t put it in the box because it takes up too much room.  This system makes it super-easy to grab the box and begin the quilt no matter where I’m constructing it – my studio, a friend’s house, my mom’s, or at a quilt retreat.  It just makes my quilting life a tad bit easier – I’m not running all over my studio hunting down everything – it’s all nicely packaged together.  I realize that bags can be used for this purpose, but for me, it’s easier to see I have everything if I put it in a box.

How I handle the basic supplies is a bit different.  I tend to purchase those in bulk.  Here’s why:  Hancock Fabrics is out of business.  There was a Hancock’s near my house and if I needed anything, it was literally 10 minutes to the store and 10 minutes home.  But now?  Totally different story.  Where I live, there are no longer any fabric stores near me (and I’m not counting Hobby Lobby – their line of sewing notions is limited).  If I run out of something, I’m doomed until I can get some delivered or make the 20 – 30 minute trek across town.  Thus, I purchase the basics – such as thread, needles, and bobbins – in bulk.

Big Red is my primary sewing machine, and I always have her threaded and ready to go.  One of the great things about quilting verses garment making is thread.  When you make clothes, the thread has to harmonize with the fabric.  With quilting, you’re primarily working with neutrals.  I always make sure I have a stash of black, dark gray, light gray, and beige-ish thread.  However, the one neutral missing in that list is white.  I don’t – as a rule – use white thread unless the entire quilt is white.  A beige or ecru thread will blend with the white and any other color put with it.  If the light gray thread is super-light, it will work just as well.  The fact that quilters can use these standard colors is great because we can take serious advantage of thread sales.  You all know I’m a thread snob and I like long-staple thread.  If I run across a great thread sale, I can use it to my full advantage and none of the thread will languish in my thread cabinet.  It will all be used. 

Another kind of thread-snobby thing I do is purchase pre-wound bobbins.  I know I can wind my own, but the pre-wounds have so much more thread on them than any bobbin you can wind on your sewing machine or a bobbin winder.  It saves me time and – in the long run – thread.  Like the spools of thread, I can purchase my pre-wounds in the basic quilting neutrals and take full advantage of the sales.  I purchase my pre-wounds from Superior Thread (go here https://www.superiorthreads.com/).  They have a great selection of both bobbin styles and colors and wonderful customer service.  They also tend to run sales pretty regularly, so at least go to their website and get yourself put on their email list, so you’ll know when these happen. 

While we’re talking about buying in bulk, you may also want to do the same with the sewing machine needles which are used in your primary sewing machine.  Big Red likes Schmetz or Organ.  Superior Threads has both brands of these needles in the size I use the most – microtext, quilting, and topstitch needles. 

I am prepping a future blog on setting up your sewing space, but I will share this bit of organizational wisdom right here:  Command Hooks are your bestest friend.  I use these in lots of areas in my studio, but the one which is the most useful is this:

It’s on the left side of Big Red and my small sewing scissors hang there.  I place them on the hook after each sewing session, so when I return to my studio, I know exactly where they are. 

Keeping your sewing space organized is important, and what works for me may not work for you.  No matter what storage system you use or how you set up your sewing machine area, it’s important to keep a few commonalities in mind:

  1.  As much as possible, have your fabric arranged so you can see it. With some studios, such as mine, my fabric is out in the open.  But once upon a time, it was in a cabinet.  Wherever it is, just make sure you can eyeball it and know what you have.  I have mine arranged by color (except for holiday fabrics).  This works for me.  But I also know quilters who have their fabric arranged by designer and/or family.  It’s whatever system works best for you.
  2. Find a way to keep your project(s) organized.  For me, boxes work best.  Some quilters use 1-inch deep trays.  The main concept behind this type of organization is to save yourself time.  If you can employ a project storage system which allows you to keep your quilt, the pattern, and any required notions such as specialty thread, templates, or particular rulers together, this will save you a lot of time in the long run.  Future you will thank the past you for keeping all this stuff together, so you don’t have to run it down when you’re ready to quilt. 
  3. Be consistent with your fabric.  If you’re a pre-washer, wash all your fabric before you store it.  This is a good idea for two reasons.  First, you’ll never wonder if it has been prewashed and second, when you’re ready to cut the quilt out, this step is already taken care of and you’ve saved some time.
  4. You’ll never regret having a good supply of quilting basics, such as rotary blades, machine needles, thread, and pre-wound bobbins.  I look at it this way – remember when COVID started and everyone was making grocery store runs for toilet paper?  For years my family poked fun at my tendency to purchase this commodity in bulk, especially after both Meg and Matt left home and it was just Bill and me.  They don’t any longer.  You’ll never regret having a stash of machine needles on a Friday night at midnight in the middle of a quilting session and your needle breaks.  If you have a stash tucked away somewhere in your sewing area, you can keep on stitching until the sun rises without waiting for the fabric store to open on Saturday or Amazon Prime to deliver them on Sunday.  The items I’ve listed are consumables.  Sooner or later they’ll all be used and used up.
  5. Keep you sewing area as organized as possible.  At least know where your pins, seam ripper, stiletto, and scissors are.  The Command Hooks work great for me, but you may want to use something else.  Bottom line is this – know where they’re at so you don’t lose time looking for them.  And put them back where you keep them after your sewing session is over. 

The simple steps I’ve written about in this blog has saved me time and sanity.  Quite often I only get a few minutes a day in my studio and I try to make every second count.  Knowing my fabric is ready and I have everything I need at my finger tips allows me to make the most of my time.

Until next week, Level Up Your Quilting,

Love and Stitches,

Sherri and Sam

PS — Standard disclaimer applies. I am not employed nor to I receive any free products from Command Hook, Superior Thread, Amazon, or any other companies listed in any of my blogs. I recommend and support suppliers and companies which I use on a regular basis that offer consistently wonderful products and stellar customer service.

Categories
Uncategorized

Log Cabins

When Log Cabin quilts are mentioned to anyone – quilter or non-quilter – most folks can conjure this image:

“Traditional” Log Cabin Block

Log Cabin blocks and quilts are easily one of the most recognizable quilting images.  Their appearance – strips of fabric sewn around a center square – is one of the most iconic quilting visuals.  Some quilt histories tell us the Log Cabin quilt came of age in the in the middle to late 19th century and they were designed to honor President Abraham Lincoln, who was born in a log cabin in Kentucky.  Quilt historians will inform you that the squares in the middle of the blocks were either red – representing the hearth of the home – or yellow – representing the light in a window.  Typically, one side of the block was made of darker fabrics and the other side was made of lighter fabrics, allowing for some stunning layouts known as Barn Raising, Sunshine and Shadows, and Streak O’ Lightening. Quilt historians also may add this interesting tidbit:  A true Log Cabin Quilt was always tied, never quilted.

And most of that is outright lies.  So, hang tight and let me blow some quilting gaskets.

First of all, let’s talk about the real history of the quilt and quilt blocks, because everything else – from the kind of fabric used to where most Log Cabin quilts originated from in the United States – depends on the quilty truth.  And the truth is, the Log Cabin block has been around for literally thousands of years – not just mere hundreds.  According to Barbara Brackman’s date base, America’s earliest signed and dated Log Cabin Quilt was made in 1869.  The British Quilt Heritage Project found Log Cabin Quilts dating from the late 1800’s to early 1900’s.  However, the National Museum of Scotland is in possession of a small box made for sewing tools which has the Courthouse Steps (a variation of the Log Cabin we’ll discuss a bit later in this blog) embroidered on it that dates to the mid 1700’s. 

However… if you boil down all the myths, fiction, and facts concerning Log Cabins, you will probably find Ancient Egypt at the bottom of the pot.  That’s right…

MUMMIES

This is theory, but it’s pretty plausible.  Think Valley of the Kings and 19th century British archaeology (I’m having flashbacks of the movie, The Mummy right now).  When these tombs were opened, archaeologists found hundreds of animal mummies.  Apparently, Egyptian royalty wanted their pets with them in the afterlife, so these critters were mummified along with their owners.  Some of these animal mummies found their way back to England and are now in the British Museum of History.  If you have a chance to look at the small mummies either on the internet or in person, you’ll find some of these have Log Cabin designs on them.  France was also caught up in the archaeology/mummy frenzy.  Some of their archaeologists accompanied Napoleon to Egypt in the early 19th Century and returned with the Log Cabin design shown clearly in their pictures and drawings.

Janet Rae from Edenburgh, posits another theory about Log Cabin design:  land cultivation.  This idea takes into consideration the type of land cultivation known as “run-rigs” from the Middle Ages in both Europe and the British Isles.  During this time the farmers had both wet and dry fields to farm, and these were called run-rigs.  Early maps and drawings of the run-rigs look very much like Log Cabin blocks.  It is possible that someone drew inspiration from the actual run-rigs or drawing of them and made the first Log Cabin blocks. 

Along with these two theories, we have to keep in mind that Log Cabin blocks have popped up in other locations, where there is no clear theory about just how they got there.  There are the Log Cabin blocks from the Isle of Man called The Roof Pattern.  Here the blocks are folded pieces of fabric hand sewn onto a fabric foundation.  The unusual issue about the Isle of Man is that is very isolated.  No one is exactly sure how the inhabitants came up with the idea of a Log Cabin quilt.   Canada also has its own version called Canadian Logwork.  If the pattern traveled across the sea from England and then Canadians made their own version or if the Canadians came up with the idea all by themselves is not known. 

Thus, the real origin of the Log Cabin block is a bit of a mystery.  Since needlework was traditionally a woman’s field of expertise, the male historians obviously felt it wasn’t worth mentioning.  We may never actually know when and where the Log Cabin block developed.   In this blog I want to look at the Log Cabin from strictly an American viewpoint.  So, let’s dive in and return to America in the mid-19th century when the Log Cabin block was in its heyday and blow a few more quilting gaskets. 

During the time of the Abraham Lincoln administration (1861-1865), we saw the pattern begin its rise in popularity, culminating several years after his assignation.  The myth around the block’s sudden fame in the quilting world embraces the idea the Log Cabin Quilt was designed as a type of  tribute to Lincoln’s Kentucky birth in a log cabin and the fact he spent a good many of his formative years growing up in one.  Since we already know that’s a myth – Log Cabin blocks and quilts had been around a lot earlier than even 1850 – let me also blow a gasket about most of the quilts originating in Kentucky.  From what some quilt historians can determine through quilt inventories and wills, most of the Log Cabin Quilts originated in Indiana.  That’s not to say Kentucky didn’t have quite a few Log Cabin quilts of their own, it’s just the majority of Log Cabin quilts listed in wills and household inventories are from Indiana.  And the earliest dated American Log Cabin quilt came from Kansas. 

 Now that this myth is put to bed, what about the theory which embraces “true” Log Cabin quilts are tied, not quilted?  To a degree, this is correct.  While we tend to construct our Log Cabin quilts out of 100 percent quilter’s cottons, batiks, or flannels, the early Log Cabin quilts were made out of just about anything – wool, flannel, velvets, cottons – whatever the maker had on hand, that’s what was used and often several types of these fabrics were combined in a single quilt.  Add to this fact many of the quilt blocks were pieced on fabric foundations and you have a quilt with a lot of bulk.  Hand quilting was out of the question.  The quilt was tied.  Sometimes the quilt top was so bulky and heavy, a batting wasn’t used.  It wasn’t needed.  The quilt top and backing would keep you plenty warm at night. 

How about the idea that in the early Log Cabin blocks, the center square was either red or yellow? This seems to be true both and untrue.  The earliest Log Cabin designs – those which pre-date our mid-19th century American Log Cabins — do not use a “standard” center square color.  It was only when quilters embraced the Log Cabin to symbolize Lincoln that we saw the use of red or yellow fabric for the center square.  There is another myth in quilting lore which states if a Log Cabin quilt was hung outside a house or cabin and the center squares in that quilt were black, then this was a stop on the Underground Railroad.  That is false. Despite what any historian says, a direct link between quilts and the Underground Railroad has never been factually substantiated.  And today, most of us don’t use either color in our centers.  As a matter of fact, my guild is using a Log Cabin design for our 2021 raffle quilt and the center block is raspberry-colored.  The last Log Cabin quilt I made used blue in the center. 

Finally, what about the block using dark fabrics on one side and lighter fabrics on the other?  This myth turns out to be mostly correct.  In order for the block to look like what we perceive a Log Cabin block to be, this has to hold true to some degree.  Even from the earliest Log Cabins – either on animal mummies or those inspired from run-rigs — there is a clear distinction between the two sides of the block. 

This may be more than you ever wanted to know about Log Cabin blocks and quilts.  I like to know the past behind quilty issues, as the this is what initially drew me to quilting in the first place.  Now a days we can choose to honor the traditions by incorporating them in our quilts, or we can decide to make these blocks our own by constructing them in ways that make us happy. 

As I begin to talk about constructing these blocks, let’s take a look at some traditional Log Cabin blocks:

We’ll talk about the block on top first.  The strips of fabric around the center square are called “logs” and you’ll notice the logs on this block are wide.  One of the great features about Log Cabins is their versatility.  You can make the blocks as large as you need simply by adding more strips around the center square.  And the “logs” can be just about any width you desire as long as you keep in mind the Golden Ratio.  Let’s look at an example.  Let’s say you have a stack of 2 ½-inch squares you want to use as the centers of your blocks and you want to know your log options – how wide can you make them and how narrow could you make them and the block still look balanced?  Remember from my past blogs, the Golden Ratio is the number 1.61803399.  When we’re using the GR to “math” out quit issues, we shorten this number to 1.618.  To see what is the widest possible strip we can use for our 2 ½-inch square, we multiply 2 ½ by 1.618.  This gives us 4.045 or 4-inches.  However, don’t stop at 4-inches.  That’s incredibly wide.  We divide that by the four sides of our block and get 1-inch.  The widest we could make our strips is 1-inch (finished) for our 2 ½-inch center square and the block still look balanced. 

To discover what’s the narrowest we could make our blocks, we divide 2 ½ by 1.618.  this gives us 1.5451117 or 1 ½-inches, which we divide by four again.  This answer is .386279 or 3/8-inch, finished. 

Both of those numbers tell us we can make our finished strip widths anywhere from 3/8-inch wide to 1-inch wide and those strips will look nicely balanced against our 2 ½-inch squares. 

Now that the math-y part is out of the way, there are a couple of other construction issues which need to be considered.  First, be sure to cut your fabric logs on the straight of grain.  This step will make your blocks lie nice and flat.  The second issue concerns the strips themselves.  It’s really, really tempting to just rotary cut a bunch of strips, sew them on, and then cut off the excess.  Although it’s super-tempting and this is a super-easy way to make your logs – don’t.    Here’s why…

Remember back in 2018 when I blogged about quilt borders ad nauseum?    How you cut the borders to match the length and width of your quilt center and sewed them on that way, because this helped keep your quilt square?  The same principle applies to  the center of your log cabin block – and the larger the block, the more this applies because there’s more to keep square.  Let’s look at an example –and for the sake of simplicity, I’m using all unfinished measurements:

This is the log cabin block we used earlier.  The center square of the block is 2 ½-inches.  If we’re making our fabric logs 1-inch wide, then this means our first log is a 1 x 2 ½-inch rectangle.  Our third log would be 1-inches x 3 ½ inches.  The fourth 1-inch x 4 ½ inches, etc.  We would need to cut each individual log out to the size needed in order to keep everything nice and square.

However, I don’t use this method on Log Cabin blocks with very narrow strips. The narrower the strip, the harder it is to cut it out accurately.  Take a look at the center of this little quilt top:

This is from a Round Robin I did with my guild a few years ago.  The center log cabin blocks have super-narrow logs.  I honestly would have had a bit of a struggle cutting these out to the correct width.  Couple that with the fact that the narrower the strip, the harder it is to cut the fabric straight.  Since I didn’t want to waste my time or my fabric, I opted to paper piece these blocks.  If my Log Cabin blocks are either very small (6-inches or less) or have narrow logs (less than 1-inch finished), I personally think it’s easier to paper piece them.  I also believe it’s more accurate.  As with all paper piecing, you’re trading fabric for precision, but for Log Cabin blocks with slim logs, I think this is the simplest way to construct them.  If you decide to go this route with any Log Cabin block, it’s still important to cut your fabric strips on-grain so the block will lay flat and hold its shape. 

I also must say, I really like Log Cabin blocks with the narrow logs.  I’m not sure why the appeal more to me than the “traditional” looking Log Cabins, but they do.  Those narrow strips just seem to completely change up the block’s appearance. 

The Log Cabin block is beautifully simplistic – and the great thing about simple blocks is they’re really easy to change-up.  The quilter can tweak it here and there and suddenly it looks entirely different with very little work involved.  To date, Pinterest has over 556 variations of this block.  My EQ8 has 50.  While it’s impossible for me to cover all the variations of the Log Cabin block, I want to highlight four construction changes and six block ideas.  These are the most common variations the kept popping up on my Google searches. 

Construction Changes

  1.  Use Partial Seams – We covered this technique in detail in my previous blog about partial seams (https://sherriquiltsalot.com/2020/10/07/partial-seams-way-easier-than-they-look/), so I won’t go into detail again with that.  But just to jog your memory, compare the traditional block against a Log Cabin block which used the partial seam construction:
Log Cabin Block with Partial Seams
  •  Move the Center of the Block – Instead of putting the center square in the middle of the block, move it to a corner.  This is easy to do.  Instead of surrounding the center on all four sides with logs, just add the logs on two sides, or use more fabric strips on two of the sides than the other two.  Either way you chose, you’ve altered the blocks appearance while not having to undergo any complicated construction techniques.
  •  Enlarge the Center Square – While typically the center square can be larger than the width of the fabric logs, look what happens when the center is made much bigger.  This is a great way to showcase fussy cuts, embroidery, or applique.  In the block below, the center has not only been enlarged, it’s been made into a signature block. 
  •  Make a Vertigo Block – I’m not really sure what these are called:

But I call them Vertigo Blocks because they kind of make me dizzy.  My EQ calls them Twisted Log Cabins.  These occur when you really play with the fabric logs, and in fact with these blocks, the logs aren’t even strips – they’re triangles.  While personally I would paper piece these, if you’re a really fastidious piecer, I’m sure they can be rotary cut and sewn together. 

While we’re still on the topic of Log Cabin construction, I’d like to share with you a few organizational tips.  Log Cabins require lots of fabric strips in lots of different sizes.  These strips are often very close in length – sometimes there’s a half-an-inch or less difference in how long they are.  It’s easy to pick up the wrong piece and sew it on the block, only to have to turn around and rip it right out.  Depending on how many strips I have to work with, here’s a few ways I keep myself from getting confused.

I’ve used these:

These neat little trays are found at most dollar stores.  I get mine from Dollar Tree, and they come three to a pack.  I line these up and stick a post-it-note in the bottom of each tray indicating the length (and width, if I’m varying both lengths and widths of my strips). 

I’ve also used a TV tray.  If I don’t have as many logs surrounding the center square this works nicely.  I simply lay them out on the TV tray, starting with the shortest and ending with the longest.  I can park the tray beside my sewing machine and chain piece while marathoning Hulu.

If I’m making a huge Log Cabin quilt which entails lots and lots of strips, I have used either this:

Or this:

I can sort my strips and then hang them.  Again, both of these can be located near my  sewing machine, so I can chain piece and binge watch my new favorite series.

Lastly, let’s talk about variations on the Log Cabin block.  This simple block and be tweaked and changed for literally hundreds of different looks, but I want to show case the six I like the most.

My very favorite Log Cabin variation is the Pineapple Block.

Some quilters will claim this is a Square-in-a-Square block, but I’ve always heard it was a type of Log Cabin.  Sure, the center is kind of a Square-in-a-Square, but the rest of the construction is pretty much standard Log Cabin.  I’ve always loved the way this block looked when made from batiks.

Another popular Log Cabin block is Courthouse Steps.  If you look closely at this block:

You’ll see the difference between it and the traditional Log Cabin block is the construction.  In the traditional block, we sew the logs around the square in a clockwise direction.  With the Courthouse Steps, we sew the fabric strips around the center in the same manner we sew borders around the quilt center – sew the right and left side strips on and then the top and bottom ones.

Sometimes with the Log Cabin blocks, we can isolate the technique (fabric strips around a center) and use it in other ways, such as this block:

Or this block. 

You can also use this method in other areas of a pieced block to give it a different look.  My personal favorite is this:

Hearts.

I love hearts.  If you look closely at most of my quilts, you’ll find hearts quilted into the design at some point.

And if you’re really up to a challenge, try using them as hexagons or 60-degree diamond blocks   It’s really not that difficult.  For the diamond blocks, simply cut the center squares as 60-degree diamonds (we learned how to do that here (https://sherriquiltsalot.com/2020/07/01/60-degrees-of-separation/) and then proceed to sew the fabric strips on as normal.  This will give you blocks that look like this: 

Which can be pieced into a quilt that looks like this:

If you’re feeling really ambitious, the Log Cabin hexagons are fun to make and look super-complicated, but in reality, all they need is a little more pre-planning. 

Simply cut the center square as a hexagon – but don’t get too small.  This block screams for a large center which can showcase a fussy cut fabric.  The logs are sewn on the same way as a traditional log cabin, but there are a couple of steps that should be altered.

  1.  Instead of cutting out the strips true-to-the-size of the edge of the hexagon, allow at least for an extra ½-inch of length.  When the strip  is sewn on the side of the center, you need at least ¼-inch to hang off each end. 
  2. After the strip is sewn on, press it outwards. Then line a ruler up with the adjacent side of the hexagon and trim the extra fabric off, so it will be angled correctly.  Do this for each fabric strip, until you get to the last strip.  That strip will need extra length because it will have to cover two raw edges – the last one and the first one.

When you piece these hexagons together, they will need connector pieces just like any standard hexagon quilt.

Lastly, let’s take a look at Log Cabin quilt layouts.  The unique construction of the block allows for two great aspects of the quilt tops – no sashing is needed, and the light/dark sides of each block makes layout possibilities nearly endless.  Just make sure your blocks are square and the same size. 

You can run the lights and darks on the diagonal.  You can set them as a zig-zag (also known as Streak o’ Lightning).

You can arrange them to look as if they’re set on-point.

This layout is called Barn Raising.  It’s a fairly traditional layout, as far as Log Cabins go. 

They can be laid out to look like pinwheels or flying geese.

Honestly, the possibilities are only limited to the space you have to layout your blocks and your imagination.  Pinterest has over 300 different Log Cabin layout designs, if you do find yourself needing inspiration.  Not to mention the blocks can be used as a border treatment or incorporated into other layout designs. 

As I’m coming to the end of this blog, I hope you’re inspired to try a Log Cabin quilt of some type.  They’re a really fun and endlessly versatile block to make.  Just keep in mind to cut your strips on the grain and check to make sure the blocks are all the same size (or pretty darn close).  If I get requests to highlight certain blocks (like I did for this one), I’ll write more of these types of blogs.

Until next week, Level Up Your Quilting!

Love and Stitches,

Sherri and Sam


Categories
Uncategorized

Partial Seams — Way Easier than They Look

Several weeks ago – way back when we were constructing the LeMoyne Star block – we dealt briefly with a technique called partial seams.  I kind of glossed over it, because I was much more interested in everyone getting good and comfortable with Y-seams.  The traditional LeMoyne Star requires both kinds of seams, as do many of the Feathered Star blocks.  And while getting those Y-seams accurate is important, it’s just as essential to know how to make a great partial seam, because those can be used for wonderful effects in lots of different blocks.  Bonus:  They’re easier to make than Y-seams.  As a matter of fact, if I’m constructing a quilt block with partial seams, I don’t look for an easier way out.  They’re really not that difficult.

Let’s start by defining what a partial seam is and where to use them.  A partial seam is just that – a part of a seam.  Instead of sewing down the entire length of the pieces of fabric, there comes a point where you stop and add another piece of fabric.  These seams are used when the fabric pieces attached to the center shape extend past the beginning shape.  You stitch the first part of the first seam, add pieces to the sides, and end by attaching the last piece of fabric and stitching the last part of the first seam.

I realize all of the above sounds confusing.  This is one of those techniques that’s much easier to show than tell.  So, I’m going to walk you through the process step by step.  And if you’d like to sew along with me, you will need the following:

One 4 ½-inch square

Four 1 ¼-inch x 5 ¼-inch strips.  For this exercise, it will help if all four strips are cut from different colored fabrics.  This will help you see how the partial seams work their magic. 

Step One:  Lay out your block.  Since the center of the block we’re constructing is large-ish, this is a great way to showcase a fussy-cut piece of fabric, an applique piece, or some embroidery,

Step Two:  You can start on any side of the block.  I start on the left side, because…well… I always start on the left side.  Then I work clockwise around the center.  Place a strip of fabric right sides together with the center block, aligning the top edges.  The strip will hang off the bottom side of the block and that’s okay.  It’s supposed to.

Step Three:  Sew the seam down the block, stopping and backstitching (or use a lockstitch if your machine has one) about 1-inch before the end of the square.  Your block should look like this:

Press your seams as desired.

Step Four:  Now we will lay a strip (right sides together) on the top of the block.  When we do this, you’ll notice that this strip is the exact length of the block.  Sew this seam as normal, down the entire side.  Press the seam as desired.

Step Five:  Repeat step four for the right side and the bottom strips.

Step Six:  Now we’re ready to finish the original seam.  Fold the unsewn part of the left strip back over the sewn block, aligning the unsewn edge and pin in place.  Starting where you backstitched (or locked stitched) in step two, finish sewing down the seam to complete it.  Press the seams. 

There…

Much easier than Y-Seams.

I like the effect that partial seams give a center square.  If the center square is small, the partial seam technique makes the block look like a type of log cabin square.  Per request by Laura, one of my regular readers, I want to pause and focus on log cabins and partial seams for a bit. 

I love log cabin blocks.  I want to devote an entire blog to them soon.  In my opinion, they’re one of the most perfect quilt blocks.  You can make them super-easy or change them up to be more challenging.  And depending on your color choices, the effects produced can be stunning.  They’re a great way to use of scraps or showcase your best fabric.  Let’s start out by looking at a “traditional” log cabin block:

As you can see, a “traditional” log cabin block is comprised of a small square in the center (historically, these squares have been either red or yellow, symbolizing the hearth in a home, but we don’t always choose these colors in our quilts today).  The small block is surrounded by strips of fabric, placed in such a way that one side of the block is made out of light fabrics and the other side is comprised of darker fabrics.  It’s this layout of the blocks that give log cabins quilts such striking effects:

Now, let’s take a look at a log cabin block in which we’ve replaced the normal seams with partial seams:

With every round of strips, we have one partial seam. And by changing out the traditional with a different technique, we’ve altered the look of the block just a bit.  This one minor construction adjustment makes the block look like we’ve taken the trouble to use set-in seams, when we haven’t.  Switching from traditional seams to the just-as-easy partial seams alters the look of a quilt enough to make folks pause as ask, “How did they do that?” 

Squares are not the only shape which can utilize the partial seam treatment.  Triangles can, too.  The method remains the same, but the appearance is stunning.

Partials seams can be substituted in nearly any block that has borders.  The block we worked through today used solid pieces of fabric as the strips.  But what if you pieced those strips like this:

This gives a new and exciting perspective to a center square. 

A partial seams is one of those quilting techniques that’s easy to do and generally doesn’t require extra fabric if you decide to switch out your pattern to use this method.  Once you’ve gotten the hang of it, it really doesn’t even take extra time.  But the effects it can give quilt blocks, and in return, a quilt top, is stunningly different.  Master it.  Tuck it away.  Pull it out and use it.

Until next week, Level Up Your Quilting!

Love and Stitches,

Sherri and Sam

Categories
Uncategorized

(Almost) Everything You Need to Know About a Walking Foot

Sewing machines … even the most basic ones … come with a lot of stuff you may not know what to do with.  I faced this situation today.  My daughter and son-in-law decided to homeschool the grand darlings this year.  Before I get a ton of questions and comments about homeschooling (all the good, the bad, and the ugly), let me inform you this decision was made after a great deal of thought.  Last year, they were enrolled in a wonderful charter school, but with COVID pushing back in-person instruction here for at least the first nine weeks, and the learning portals having good days and bad days (they were down three out of the first five days of school), it was decided homeschooling would give the girls more consistency.  And, as a retired educator, I agreed. 

I am delighted that my daughter and son-in-law let me part of their curriculum.  For one hour every week I get the girls for sewing.  My oldest granddaughter has a sewing machine, but I had to buy the youngest one.  We settled on a Juki.  It’s a very basic machine with a finger guard.  However, I was pleased to find it not only had several decorative stitches, it also came with a drawer of stuff – seam ripper, oil, needles, an extra spool holder, and two extra feet.  One is an open-toe foot and the other is a walking foot.

Which totally threw Ellie for a loop.  “What’s this?” she asked, holding it up for my inspection.

“It’s a walking foot,” I told her.

“Doesn’t the machine need two so it can walk?”

After I explained what a walking foot did (after I choked back my laugh), it still made no sense to Ellie.  That doesn’t bother me.  One day it will become apparent what the foot does and why it’s important, but it got me wondering just how many of us have a walking foot and are you aware of just how many things it can do?

Most walking feet look a little like this:

Most walking foot attachments without dual feed look something like this.

You remove whatever foot you’re using on your machine and attach this foot.  Wikipedia defines a walking foot as this:  “A walking foot is a mechanism for feeding the workpiece through a sewing machine as it is being stitched. It is most useful for sewing heavy materials where needle feed is mechanically inadequate, for spongy or cushioned materials where lifting the foot out of contact with the material helps in the feeding action, and for sewing many layers together where a drop feed will cause the lower layers to shift out of position with the upper layers. A walking foot is also good for sewing materials with varying layers because it can climb up and down these layers easier than other feeding mechanisms.”

And if you think this definition makes the walking foot sound like a tool every quilter needs, you’d be correct.  But more on this a little further down in the blog.

With almost any sewing machine, the fabric is moved by the feed dogs.

Feed dogs are those bumpy ridges below the presser foot.

The presser foot holds the fabric down and as the feed dogs move, they take the fabric with it.  It is actually moving the lower fabric that is sitting on the feed teeth and the upper piece of fabric is just going along for the ride.  This is why, at the end of stitching with a “regular” presser foot (such as the ¼-inch quilting foot), the two fabric pieces maybe mismatched a little or a lot, depending on the type of fabric that’s sewed. 

At this point, it’s important to reference the difference between a walking foot and dual feed.  While it’s possible to find a walking foot/walking foot attachment for almost any make and model of machine, not all machines have dual feed.  However if your machine comes equipped with dual feed, it works in tandem with a walking foot.  So, what is dual feed?  Dual feed is the machine’s ability to feed the fabric through the top and bottom at the same time – both fabric layers are fed evenly over the feed dogs.  This keeps the fabric from crumpling or shifting. Why is this feature so awesome?  Well, if you like to incorporate plaids, checks, or ginghams in your sewing projects, this keeps everything lined up, so nothing gets off kilter.  Likewise, if you sew complicated quilts with lots of layers or work with machine applique, you quickly learn to appreciate dual feed.  If your machine comes with this feature, it will probably be listed as one of the selling points either by the salesperson or in the sales brochure.  If you’re still not sure, consult the all-knowing Google (put your machine’s make, model, and number in the search bar) or the machine’s manual.   Either one should be able to tell you if your machine is dual feed equipped.    

This is Big Red’s walking foot. My Janome has dual feed, so the walking foot works with the dual feed.
The two-prong mechanism behind the walking foot engages the foot with the dual feed. And yes that is Sam’s whiskers to the left of the picture. He was my photography assistant today.
When I insert the two-pronged lever into the back of my walking foot, the dual feed engages with the foot.

While the majority of my machine’s feet simply snap on, the walking feet work a little differently.  In order to engage the dual feed mechanism with the walking foot, I attach the foot by inserting the dual feed bar in the back of the foot. 

If you have both the walking foot and dual feed, it truly is a wonderful thing because:

  1.  The walking foot moves all fabric layers at the same time and pace according to the feed dogs.  The dual feed function affects the top layer of fabric and the feed dogs control the feed of the bottom layer of fabric.  If you have both working in tandem, then you’ve lowered the possibility of the fabric shifting any to pretty much zero.  If you quilt any of your tops on a domestic machine, you quickly learn to appreciate this feature.  The top, batting, and backing all stay together, move through the machine at the same time, and reduces the chances of any puckering. 
  2. The walking foot has no motor and the foot is dependent on the feed dogs’ movement.  This action moves all the layers at one time.  Once the walking foot gets to the back, it lifts and springs forward, and waits for the next feed dogs’ stroke.  The dual feed mechanism has a separate motor so the top fabric (that can get somewhat left behind with the walking foot), keeps up with the lower piece of fabric.  Anything in the middle (like batting), just hangs on for the ride and moves with the top and bottom fabric.

I purchased two alternate walking feet to go with Big Red.  There’s this one:

Quarter-inch walking foot

It looks very much like the standard walking foot, except for the black phalange on the right side.  This is the ¼-inch walking foot, which works just like the quilter’s foot:

Standard quarter-inch foot

I line the fabric up so that it’s touching the black phalange on either foot and I sew a perfect ¼-inch seam.  This is great for piecing blocks that have a lot of layers coming together at one point, so nothing shifts out of place.  I piece with this foot at least 90 percent of the time.  If I’m quilting a top on the machine, this phalange acts as a guide if I want to stitch close to the block seams, but not actually in the seam. 

Recently I purchased this walking foot:

Open-toe walking foot

It’s an open-toe walking foot that I can use with machine applique.  It works great with either a zig-zag stitch or the buttonhole stitch and prevents any lower layers from shifting. 

Regardless of whether or not your machine has dual feed, you should give your walking foot a lot of use.  I realize my blog primarily concerns quilting, however; if you make garments, a walking foot can save your sanity when sewing plaids or checks – it really keeps them lined up nicely.  Likewise, if you’re sewing lingerie, undergarments, swimsuits, or anything else with straps – it keeps everything in place.  I have also heard the walking foot works well with knits and other stretchy and slippery fabrics that easily shift. 

Both quilters and garment sewers make projects with lots of layers – like bags, totes, and wallets.  Those types of projects tend to take not only lots of layers of fabric, but also thick, sew-in interfacings.  A walking foot can help keep all those layers together and prevent any shifting. 

And as for quilters, I really recommend using a walking foot for sewing on the binding.  At this point in my quilting career, I can’t imagine using anything else. When sewing on the binding – especially if you’re using the traditional French Fold binding – you realize that your joining six layers of fabric together – the backing, the batting, the top, and two layers of binding.  That’s a lot of bulk and with a traditional foot, even with the dual feed, it’s easy for all of that to slip out from under the needle.  A walking foot, especially if it’s working in tandem with a dual feed, largely prevents this from happening. 

If you quilt any tops on a domestic machine, some quilting can be done with your walking foot instead of dropping those feed dogs and quilting that way.  If I’m working with a lot of straight-line quilting (such as cross hatching) I’ll mark my lines and go at it with a walking foot.  Quilting which incorporates gentle curves such as this:

Or this little table topper I made:

Can be made with a walking foot.  I draw my quilting lines out and then just follow them. 

A walking foot is a great attachment to have, and it can be used for lots of different types of sewing.  However, keep in mind that as great as this foot is, it can’t be used for everything.  The walking foot handles some zig-zag stitches pretty well.  Others not so much.  I’ve learned mine handles a “traditional” zig-zag (one swing left and one swing right) great.  If I’m incorporating a zig-zag which has multiples swings to the left and then the right, it doesn’t handle that much side-to-side action well at all.  I use a regular presser foot for that type of stitch.  Likewise, the decorative stitches that have a lot of right-to-left movement or forwards and backwards movement – most walking feet can’t make those stitches.  It was made to move in a forward direction. 

I hope this blog encourages you to get your walking foot out and use it more.  It’s a great little attachment to have.  If your machine doesn’t have one, jump on the internet machine and Google your make, model, and machine number to find out if it’s a high shank or low shank.  Then Google walking feet.  You should be able to find a generic one that will work on your machine.  And they’re not super-expensive.

Until next week, Level Up Your Quilting!

Love and Stitches,

Sherri and Sam

Categories
Uncategorized

Show and Tell…

Okay, this week is really wellness check week.  How is everyone doing out there?  As I’m writing this blog it’s actually August 13, 2020.  In North Carolina, we’re still wearing masks, social distancing, and washing hands.  Our schools and most of our university systems will open their academic year with remote learning.  There is no college or high school football until February.  Where I live the temperatures are in the mid-90’s now and the humidity matches the thermometer. 

In short, it’s hot, sticky, and uncomfortable with or without a mask on.  Don’t even ask what my power bill was last month.  The AC never cut off.  Like a lot of my friends, I’m sick and tired of 24/7 COVID and political news.  I’m weary of staying home so much, totally over working from home, and I miss seeing my friends in person.  While I’m grateful for the technology that keeps us in touch, I can’t wait until the time when my guild and bees can be back together.  My Tuesday night sit and sew is now Zoom and Sew.  The High Point Quilt Guild hasn’t met since March.  The Applique Society’s annual meeting was Zoomed.  Quilt shows and their classes have gone virtual.  Technology has been my savior during 2020, but I miss the in-person-hug-your-neck meet ups. For me, one of the saving graces has been the Virtual Quilt Shows.  Quilt shows which normally I would never get to visit have gone the virtual route not only with their quilts and vendors, but also with their classes.  I’ve had the outstandingly wonderful opportunity to take classes with nationally known quilt artists in the comfort of my own studio.  This week I’ve had two long-arm classes with Bethanne  Nemesh.  She was awesome.

I’ve depended on my quilting to help get me through this year.  I’ve mentioned before that during the stressful times in my life, quilting and quilters have been a constant.  The encouragement and support I get from other quilters have kept me sane.  The ability to sit down and create something beautiful and useful during the times when my life has been complete chaos has kept me going when I really just wanted to stop and stay in bed. 

However, the bright side to all of the time spent at home is how much I’ve completed this year!  Unfortunately, several of these quilts are intended to be under the Christmas tree, so I can’t show them just yet.  But I did finish a few things that aren’t destined for bows and wrapping paper and I wanted to share them with you. 

In the past I’ve written about my journey with the Language of Flowers quilt pattern by Kathy McNeil.  I’ve completed this block:

This isn’t an easy pattern, but it was one of those which bit me hard as soon as I saw it.  I loved the colors and I’m a sucker for floral applique.  Generally, when I’m working with an applique quilt, I finish one block completely – from start to finish – to get a feel for how I want to proceed.  Do I want to do all the applique and then the framing or do I want to complete each block before I move to the next?  For this quilt, I think it will work better to complete the applique before moving to the scroll work that frames each block.  I’ve also finished the second block, altering some of Kathy’s flowers to better suit me. 

I’m this far:

Into the third block. 

I am seriously loving this quilt.  It is so much fun, and I find hand applique exceedingly relaxing. 

In a move to keep our guild members in touch with each other, Susan proposed a quick mystery quilt.  We found a weekly clue in our email either Sundays or Mondays. The end result was this:

Which is perfect as a fall table topper.  I’m still working on the guild’s Block-of-the-Month.  Despite the fact we’re not meeting, we’re still able to pick up our blocks from Susan.  We let her know we’re dropping by her house to pick the blocks up and she leaves them on her porch.  Everything is socially distanced.  I chose the batik color way:

Since my grand darlings don’t read my blog, I can show you their quilts I’ve made for part of their Christmas:

I will bag these with night gowns and robes, a mug, cocoa mix, and a book for each. 

Then there’s this pile of block units…

Which will grow up to be a quilt pretty soon.

And lastly, remember this stack of blocks for my Grandmother’s Flower Garden?  I finally finished all my blocks.  Funny story about the blocks…three times I sincerely thought I was finished with all the blocks.  I counted and re-counted but every time I laid the blocks out, I was missing a few (just because I can do math doesn’t mean I can count).  I finally did get all of them made as well as the six half-squares.  I’m adding the green diamonds which join the blocks and am really close to sewing my first two rows together.  This is taking a bit of time, since the entire quilt is hand pieced.

While I have really, truly disliked this virus and the way it’s disrupted everything in our lives, I am thankful for a couple of truisms.  First, we do live in a wonderous time.  A hundred years ago when the Spanish Flu ran rampant through our cities, little more could be done than wear a mask and social distance (although they didn’t call it that).  However today, we have so much technology on our side.  I know there are disagreements about what works and what doesn’t, but on the whole, we are really blessed.  We not only have some of the best minds in the world working on treatments, therapies, and vaccines, but we’re also able to share that information with a point and click of a mouse.  When you think about how far we’ve come and in such a short amount of time, I can’t help but feel we’re going to lick this thing before long.

The second truth I’ve realized is quilting is still my constant – just as it always has been.  Prayer and quilting have gotten me through some rougher patches in my life and they’ve both kept me sane through COVID.  I do love my quilting groups, but the thing about quilting is it’s really a pretty solitary hobby.  Quilting may provide the stitches that keep us together in guilds and bees, but it also is that still, quiet place where we can go to re-center ourselves and set our lives in order.  And in 2020, I am so very thankful for that.

Until next week, stay safe, stay healthy, stay sane … And quilt on.

Love and Stitches,

Sherri and Sam

Categories
Uncategorized

One Quilt…So Many Different Sizes of Blocks

Way back in January, I announced this year’s blog theme was “Level Up Your Quilting.”  We’re well past the half-way mark for 2020 and I wanted to refresh your memory about not only what the theme is but also what it means.

For 2020, I wanted to take what you knew and what we had discussed in the 2018 and 2019 blogs and build on those topics.  I was upfront when I told you a lot of this year’s blogs would not be for the beginning quilter, but would assume you knew the basics – such as how to sew ¼-inch seam on each of your sewing machines, how to accurately rotary cut fabric, etc.  And while I know 2020 has been a trial all unto itself, I really want to challenge everyone to push their quilting to the next level.  Take what you know and try something newer, harder, and more different than anything else you’ve ever done.  I wanted us to get out of our comfort quilting zones and take some risks.  This is why many times the topics may have seemed so different than what I usually write about.  In fact, I’m thinking some of you have thought them irrelevant – such as the blogs on graphing out your blocks.  However, remember I’m coming from the place as a former science teacher.  When you teach any subject, there has to be a foundation laid with each new discipline of study, so the student can build on the foundation and understand how new ideas and principles are built on the base knowledge of that subject. 

In other words, how hard would it be for you to make a quilt block if you didn’t know how to accurately cut out your units or sew a ¼-inch seam?  The ¼-inch quilt seam is one of the first concepts you’re taught when you learn to quilt.  If you don’t remember that, then your quilt blocks will turn out all kinds of wonky.

This week I want to talk about one of my very favorite advanced quilting techniques – how to make a quilt top out of all different sizes of blocks.  Now I’m not talking about blocks that may be slightly different in size.  We’ve all had those – no matter how carefully we cut and piece there always will be a block here and there that’s 1/8-inch to ½-inch off.  We know how to deal with those – check the seam allowances, press the seams open, or simply redo the entire block if we’ve cut the units the wrong size.  That’s not what I’m talking about.

This is the scenario:  Somehow or another you’ve got your hands on a pile of quilt blocks that range from 20-inches square to 7 ½-inches square.  Maybe you purchased them at an auction, estate sale, or antique shop.  Maybe they’re orphan blocks someone donated to your guild or bee. All the fabrics harmonize and everything in you wants to make a quilt top out of them. 

Or maybe this is the scenario:  You’ve got a fabric panel and want to make that into a quilt, but don’t want to simply throw plain borders around it until it’s as big as you need it to be. 

In either situation you’re faced with the quandary of a lot of fabric with no directions.  It’s all up to you and what you know.  So how do you ever start? 

Let’s start with one-picture panels.  Remember this panel?

I know I’ve shown it several times, but I loved it from the moment I saw it and I knew my Disney-loving grand darlings would love it as well.    Off-the-bolt, most solid panels are around 44 to 45 inches in length – which is the width of all fabric except quilt backing (most panels are printed vertically, so what we normally consider the width of fabric is the panel’s length). 

The width can vary, but the panels generally are rectangular.  The Mickey and Minnie panel was roughly 35-inches wide x 40-inches long, unfinished.  I was definitely working with a rectangular, one-picture panel.  And for me, the first step in working with a rectangular panel is to make is square.  Why square?  It makes the math so much easier for adding pieced borders because all four sides are the same length.  And if you can keep the measurements in easy, divisible increments of two, three, four, or five inches, it will go together quickly.  For the first round, I needed to add enough borders to make the width equal the length – five inches.  So, I added a 3-inch finished pieced border and then a 2-inch finished floater.  From that point on, all I had to do was add borders in various widths and styles until the quilt was a large as I wanted it to be.  Of course, there is always the option of adding plain fabric borders or no borders at all, but where’s the fun in that?

Now we’ll move to the second scenario.  Let’s say we have the following stack of quilt blocks with the finished measurements:

Sixteen 9-inch squares

Four rectangular blocks oriented horizontally: 18-inches wide x 9-inches high

Two rectangular blocks oriented vertically:  9-inches wide x 18 inches high

Two 18-inch squares

At first glance, it would be easy to think, “Hey, I can get three quilts from this if I buy additional fabric – one from the 9-inch squares, one from the rectangular blocks, and one from the two 18-inch squares.”  And you’d be right.  You could produce three small-ish quilts from this one set of blocks.  But what if you don’t want to?  What if all the blocks harmonize and you don’t want to separate them?  Or what if they’re antiques and you can’t bear to split the blocks up?  Or what if you simply don’t want to go through piecing and quilting three quilts?  Let’s walk through the process. 

Step One:  The first question to ask is “Are the finished blocks divisible by one common number?”  In this case we’re dealing with blocks which are all multiples of the number nine, so the answer is yes.  Why is this important?  It means the blocks can be sewn together into larger sections and then the sections can be put together into a quilt top.  If the blocks don’t have a common number, don’t worry.  We’ll deal with this scenario at the end of the blog. 

Step Two:  Next, I see if I can’t join a strip of the smaller sized blocks to one of the larger ones, either on the sides or the top or bottom.  In our case, I can.  I can join two of the 9-inch blocks to either the 18-inch square blocks or 18-inch x 9-inch rectangles.  I can join one of the 9-inch blocks to the 9-inch x 18-inch rectangle.  In the second step of this process we’re determining if we can join several blocks together to form a large block unit for the quilt.  These larger block units are easier to work with as we continue making our quilt top.  Instead of working with several blocks at a time, we will treat the large unit as one block in the construction process.

We also may want to make another design decision with our quilt.  We have lots of 9-inch blocks.  We may want to join several of those together before sewing them to one of the horizontally oriented rectangles or one of the 18-inch squares. 

I can’t stress how important it is to have an area you can lay out your blocks.  Whether it’s a design wall, a spare bed, or the floor, any surface that’s large enough to hold all your blocks is pretty crucial to your layout process.  It’s much easier to move your blocks around before they’re sewn together than having to spend hours of quality time with your seam ripper to unsew them.  I lay out my blocks several ways and use my cameral phone to take pictures of each lay out.  Then I set everything aside for a day or two and go back to the pictures.  A few days of “not stressing over the layout” allows me to return to the pictures and really see which layout works best.  Once I’m happily settled with one of the designs, I sew my blocks together into units and then join the units together to make the quilt top.  Afterwards, I make the decision about floaters, borders, and binding.

After moving some blocks around, EQ 8 and I came up with this layout.  As your eye travels over the sketch, you can see where I grouped blocks together and formed larger units and then put the units together to make the quilt top. 

As promised, let’s go back and look at a little more complicated scenario.  Let’s keep the 9-inch blocks, but let’s shrink the two large squares to 15-inches and change up the rectangles to four 6-inches high by 18-inches wide oriented horizontally and two 18-inches high and 6-inches wide oriented vertically.  As we begin to work our way through the math, we find that there is initially no common number in the blocks.  We know that 18 is divisible by 9 and 6, but none of these numbers play well with 15.  Likewise, 9 and 6 seem to have nothing in common. 

When I’m faced with situation, my first step is to determine if there is another number these block sizes share. And in this scenario, there is – 9, 6, and 18 are all multiples of 3.  Returning to our original layout:

We will need to add 3-inches of fabric in some form to make the blocks come together to form units.  This added 3-inches can be in 1-inch, 1 ½-inch, and even ½-inch increments if needed in order for the blocks to match up evenly.  These extra pieces of fabric were called coping strips years ago. Now we usually just say sashing, Whatever you want to call them, the strips can be used in lots of ways.  You could join the smaller blocks together like this and then put the coping strips around the unit, or you could divide the coping strips evenly between the blocks.

 The design is entirely up to the quilt maker and what he or she likes.  When I work with a quit top that has coping strips, I tend to pick a neutral color (usually gray works best for me – that’s my preference, though) which will tie all the blocks together.  If the blocks are primarily constructed of solid colored fabric, I will choose a print fabric I’ll use as part of the border for the strips.  And if the blocks are varied and use lots of different colors, my go-to color is white.  Why white?  Because when you add enough white to any scrap quilt, it serves as a great buffer and eventually all the blocks will play nicely together. 

Now let’s take another look at fabric panels. This same process works if you purchase a panel that has different sized prints on it, like this one:

Remember I ran into this situation with the Fish Almighty quilt I made Bill for Christmas.  I had four small fish pictures and one large one.  And in the case with this quilt, the size needed was really dictating the layout.  It basically became big enough to put on a bed.  The great thing about panels like this is your coping strips are borders and they can be pieced ones or simply floaters.  The goal is to get the panel pieces large enough to fit in with the blocks you’ve constructed to go with them.  In the case of a panel with several different sized prints, I design my layout first, then begin to make the borders.    

We’re really accustomed to quilts which have blocks marching across the top in rows or columns, whether or not the quilt is straight-set or on-point.  We’re used to seeing this kind of uniformity.  However, the seemingly random (but not really random) use of different-sized blocks visually shakes up a quilt.  It’s unique and really not that difficult to pull off.  It does take a bit more pre-planning than the “standard” quilt, you need somewhere to lay it out, and you gotta use a bit of math; but the payoff is a quilt which is visually stimulating and just plain fun to look at.   I’d like to encourage you to give it a try.  Grab some of your orphan blocks or plan a layout and make blocks of all sizes.  You have the tools to do this.  Push yourself out of your comfort zone.

Until next week, Level Up Your Quilting!

Love and Stitches,

Sherri and Sam

Categories
Uncategorized

Your Machine Needs a Spa Day

With everyone in “hunker down” mode due to COVID, a lot more sewing has been happening.

That means more time spent on your sewing machine.

Which means that thing has probably been humming away for hours/days/weeks at a time.  The quilters I’ve talked to have either been whittling away at their UFOs or making masks out the yin-yang. 

If this is the case, then right about now, you need to give your sewing machine a spa day.  Clean it, oil it if necessary, and maybe even give it a hug.  It probably has kept you very productive and on the right side of the thin line between sanity and insanity.  Since this is the case with my Big Red, I thought it may be the same for you and your machine.  So, today we’re talking about sewing machine maintenance.  But first, let me issue a word of warning:  Before undertaking any of my suggestions, READ YOUR SEWING MACHINE MANUAL.  Some of these points are universal (such as changing your machine needle) and others are brand-specific (such as oiling).  And even if you have two different machines that are the same brand, the procedures may be slightly different for each.  My little Juki requires less oiling than my Juke 2010Q. 

Under normal circumstances, I recommend cleaning your machine regularly and taking it to a tech every 12 – 18 months for servicing.  A sewing machine is an investment, whether you’ve paid $200 or $2,000 for it.  If it’s taken care of, it should last you for years.  I have a loose schedule for keeping up with these two tasks.  I clean my machine the first weekend of every month and take it to have it serviced before I leave to go on my fall quilt retreat.  Knowing when to change my needle is a little trickier, but we’ll get into that later.

Since there is a difference between maintenance and cleaning, this blog is broken into two parts.  In the first part we will deal with maintenance – those activities which should be done regularly to keep your machine in good working order.  The second half of the blog will discuss cleaning your machine.

One thing you want to do is keep your machine covered if you’re not using it every day.  Most quilters use at least one of their machines almost daily.  If that’s the case, you don’t necessarily have to keep that machine covered.  However, according to the last quilting statistics I received from the Craft Industry Alliance, the average quilter has six sewing machines (this does not include long arm machines).  Chances are the average quilter is not using all six sewing machines at the same time.  The ones which aren’t in use really need to be covered.  This keeps dust out of the machine.  Big Red is rarely covered unless she’s going somewhere.  But my Baby Lock Embroidery Machine, my Featherweight, and both Juki’s stay covered because I don’t use those every day.  Most of today’s machines come with at least one soft cover or a hard one.  Some older machines – such as my Featherweight – come with a carrying case but no cover.  Since I don’t use Marilyn the Featherweight regularly, I made her a cover.

Another maintenance issue doesn’t have to do with the machine itself, but does take into account what type of thread you use.  While your stitches may not show the difference between short-staple thread and long-staple thread, the inside of your machine will.  Short-staple thread is linty and can make a mess on the inside of your machine, especially around the bobbin casing.  Long-staple thread isn’t as linty.  If you use the short-staple thread, be prepared to clean your machine more often.  If you want to know more about thread, you may want to take a look at my blog: https://sherriquiltsalot.com/2019/04/17/a-love-affair-with-thread/ .

The type of needle used in your machine is just as important as the thread.  As quilters, we know it’s important to have the right size needle for the job.  Quilting cottons don’t use the same size needle as denim.  A top-stitch needle is great for machine quilting.  However, it’s equally necessary to have the right brand of needle in your machine, and it’s necessary to consult your sewing machine manual to make sure you have the right one.  Some machines, such as Big Red, work best with Schmetz or Organ needles.  Same with my Jukis.  My Baby Lock likes Schmetz.  My feather weight uses Organ.  I’ve learned the hard way that “universal” brands don’t work well in my machines (those generic needles that claim they can be used in multitudes of machines). Some sewing machines, such as most Singers, use only Singer needles.  When you use the wrong size needle the results will render skipped stitches.  If you use the wrong brand of needle, you can damage your machine. 

Changing the needle regularly is just as essential as using the right one.  Even if the needle looks perfectly straight to your eyes, after it’s been used awhile, it can be slightly bowed, even if you can’t see it.  The tip of the needle also will blunt after hours of use.  The general rule is to change the sewing machine needle after eight hours of sewing.  If a titanium needle (my favorite!) is used, you can double the amount of time to 16 hours.  However, I’ll admit it’s difficult to keep up with all the hours you’ve used a needle.  Years ago, when I first started quilting and was only working on one project at a time, I simply changed the needle after every project.  This seemed to work well for my machine and for me.  But now I work on multiple projects at once and more on one machine than another.  Due to this, I’ve developed some general rules I follow:

  1.  If I’m using titanium needles, I change those every three weeks.  If I’m sewing with regular sewing needles, I change those every two weeks.  I do this for the machine which is being used the most.  The other machines will go longer between needle changes, and for those I generally change the needle after I have to refill my bobbin twice.
  2. If I’m performing what I call a “high density stitch project” such as machine quilting or paper piecing, I change the needle (no matter what kind I use) as soon as I complete that quilt.

If you’re a stickler for getting every second out the needle you can, just keep a notebook near your sewing machine and log your time.  And I’ll throw this out right here – I swear, the longer you sew on a machine, the more in tune you become to it’s sounds.  When I hear Big Red make a distinct “thunk” as the needle moves through the fabric, I know it’s time for a needle change.  And if you find yourself replacing needles frequently, do what I do and purchase them in bulk.

The last thought I want to throw in under general maintenance is clean the outside of your machine regularly.  Even if it’s covered, every couple of weeks take a clean cloth and wipe down the outside of your machine.  Dust can do a number on your machine, and it doesn’t take much time to wipe down the outside.  If you don’t cover the machine your using for a project, wipe it down every couple of days or so. 

Now let’s talk about actually cleaning the inside of the machine.  Big disclaimer here:  Every sewing machine brand is a little different and it’s vitally important that you read your manual before cleaning and oiling your machine.  If you’ve misplaced your manual or purchased a used machine which didn’t come with one, Google your brand, make, and model number of machine.  Chances are it’s on-line and you can download it.  Most manuals are available for free downloads.  I even found the one to my Featherweight 222 on the internet.  I am covering generalizations for cleaning and oiling.  Be sure to confer with your machine’s manual before proceeding.

These are my tools for cleaning my machines:

Q-Tips, make-up brush, soft toothbrush, and toothpicks.  Know what’s not in this picture?  Canned air.

While canned air may seem like a great way to blow out lint and dust, it can actually harm a machine in two ways.  First, instead of blowing out the grime, it can force it down into tiny crevices and make it super-difficult for even a sewing machine tech to remove.  Second, canned air contains moisture, which is bad for all machines, but especially computerized ones. 

This is the inside of my Janone 7700. It has a top loading bobbin, which in my opinion, is the easiest bobbin set-up to work with. I remove the needle plate and clean the entire inside.

The bobbin area is the first place I start my cleaning process.  I remove the needle plate on Big Red, my Baby Lock Spirit, and my little Juki because they have drop-in bobbins.  My other machines have separate bobbin cases and they load under my needle plate, but I can get to those without removing the plate. 

Side-loading Bobbin Mechanism

I use a small make-up brush and a Q-Tip to clean the bobbin area out.  Next, I move to the feed dogs and use the soft toothbrush to clean the teeth on those.  If there are large clumps of lint visible, often a toothpick can get those out.  The universal rule for cleaning all machines is don’t force anything into any of the mechanisms to clean them.  Clean only the areas you can see with your eyes.  With Big Red I can remove the entire bobbin case mechanism, so I can clean her pretty thoroughly. 

After you clean the machine, go ahead and oil it if your manual tells you oiling is necessary, and then oil only the areas it tells you to.  With Big Red, I have one spot and one spot only that I oil. 

The only place I oil Big Red.

My Juki 2010Q has several areas, as well as my Featherweight.  Some machines are self-lubricating and don’t require you to oil them at all – the tech has to.  In any case, be sure to read your manual before oiling and use only sewing machine oil.  Most machines come with a small bottle of oil.  When that runs out, I recommend Nifty Notions Zoom Spout Oil.

This is why I like Zoom Spout. You can get into the small spaces on machines that have lots of spots to oil.

During the normal piecing process, I clean my machine after I’ve used up two bobbins or the first of every month, which ever comes first.  If I’m paper piecing, using flannel fabric, or quilting, I do it as soon as I’m through with the project, no matter how small that project is.  All of those processes are notoriously linty.  Also, if you’re using short-staple thread, remember you will need to clean the machine more frequently. 

The last issue I want you to think about is your sewing technician.  I’ve always thought   every woman needs her own village – every woman needs a BFF who will tell her the brutal, honest truth; a good auto mechanic who she trusts and won’t price gouge her; an equally good and honest appliance repair person; and a great general physician she trusts.  If you sew, you need to add one more person to your village: a good sewing machine technician.  In the past, I’ve always encouraged those who are in the market for a good sewing machine to buy local.  Purchase the machine at the locally owned fabric or quilt shop.  This is a good idea for two reasons.  First, it supports your LQS.  Second, if you purchase at a LQS, most of the time the first year cleaning and tuning is free.  When you take the machine in, you meet the technician, who most of the time, is also a local person and wants to make sure your machine runs like new.  With more and more LQS’s shuttering completely or closing their brick-and-mortar stores, this is getting more difficult.  Often there is no local shop to purchase a machine from and on-line ordering is the only way to get a good machine.  If this is your situation, ask around for a good, local sewing machine technician (take it from my personal experience – you don’t want to ship your machine off for servicing – remember what happened to Loretta, my first long arm?).  If you’re not sure who to ask, see if there is a quilt guild in your area and post the question on their Facebook page or send them an email through their website.  Ask other folks who sew or quilt.  Find out from several people who they use and if you see the same tech popping up with glowing reviews, this is who you need to call and add to your village. 

How often should you take your sewing machine to the tech?  Of course, if it’s skipping stitches, the tension is wonky, or some other issue pops up and you’ve done everything the manual has said to correct it, call the tech.  Chances are it’s just a minor issue, but it may be something only the tech knows how to do.  Otherwise, if you have several weekly sewing sessions, take it in once a year to have it thoroughly cleaned, serviced, and oiled in areas you’re not supposed to.  If you’re a less-frequent sewer, you can go up to 18 months between servicing.  But I wouldn’t go any longer. 

Let me throw this in here, too.  If you’re thinking about purchasing a new machine, call your tech.  They will know the best brands for the dollar, those which give the least amount of trouble, and those that still need some time to get the bugs worked out of their computerized systems. 

Take care of your machine(s) and it will give you years of enjoyment and service.  And after all the COVID quilt making, I know Big Red needs a couple of days off and the spa treatment.

Until next week, Level Up Your Quilting!

Love and Stitches,

Sherri and Sam

Categories
Uncategorized

The Last Word

I know it feels like I’ve beat the topic of drafting quilt blocks to death, but trust me, I do have a purpose in mind.  Bear with me as we give this topic one more week and then I promise we will move on.  It’s simply important to me that I give you every tool I can so you can change any quilt block you want.

By now we know that drafting frees you as quilter.  Armed with a pencils, graph paper, erasers, a calculator, and a basic knowledge of how to grid out a quilt block, the sky is literally the creative limit for most quilt blocks.  This same knowledge can be transferred over to a quilting software program (such as EQ), if you decide to draft your blocks with this method.  Some of this information will be review for those of you who ready my blog on a regular basis.  Some of this information will be new.  Just bear with me to the end.

The process can be problematic when you’re working with blocks from heirloom or antique quilts. With older quilts, it can be difficult identifying the block and the grid, especially if the quilt top is complex. If this is the case, the first step is to figure out the base grid.  The base grid is a grid we’re really familiar with, such as the Nine-Patch. 

Traditional Nine-Patch

In this block

Double Nine-Patch

the Nine-Patch is doubled (and it’s called the Double Nine-Patch).  When we look at this block, we can see the 3 x 3 Nine-Patch grid.  This one isn’t too difficult to grid out, and you’ll find this block used in some Double Irish Chain quilts.

Double Irish Chain Quilt

But if we look at this block:

Card Trick

This is also a Double Nine-Patch, but some of the patches are divided into even smaller units 

To determine the patches needed to reproduce a quilt block, simply follow these four steps:

  1.  If you’re working from a quilt top, isolate the block on the quilt you want to reproduce.
  2. Visualize the grid used.  Look for a repeating pattern across the block and then count how many times the pattern is repeated.
  3. Measure the block to get its finished size.
  4. Draw the block out on the graph paper.  As you’re drawing each patch, remember to add seam allowances. 

However….by now you have (I hope) a lot of knowledge about graphing and gridding in your quilting tool box.  So….what if you want to draw an original block?  The steps involved are similar to the ones used in drafting a block from an antique quilt top, but there are a few additional ones.  But before we get into the actual process involved in  drafting an original block, let me throw out a few tips:

One, get several sheets of graph paper.  A few weeks ago I told you about printablepaper.net.  Go to this site and print off several sheets of the type of graph paper you use.  Normally I use the eight squares to the inch graph paper, but when I’m designing a block, I use the four squares to the inch.  I use this kind in designing because the squares are bigger and I can get a better idea of how each unit in the block will look. 

Two, think about the base units first – such as half-square triangles, four-patches, flying geese, etc.  Draw these in the grid squares first.  Be easy on yourself.  If you’re using pencil and paper instead of a computer program, be aware you may have to erase and redraw several times before you get the block exactly the way you want it.  Also, be aware the size of the finished block is often determined by what pattern is used.  When designing an original quilt or modifying an existing pattern, adjustments can be made for a specific size.  However,  the grid for the block used may determine the finished size – for instance, it’s easier to make a finished 9-inch nine-patch than a finished 10-inch nine-patch.  The pieces are simply easier to cut.

Keep in mind computer programs make this a lot easier.  Quilting software allows you to explore multiple block options quickly and without re-drafting.  They’re a huge time-saver if you find yourself doing a great deal of original design work.  Fabrics and colors can be added and then taken out.  Block units can be re-drawn or eliminated.  Even applique blocks can be drafted out with the software. 

Three, remember not all quilt blocks can be gridded out.  If it’s a block with tight curves or odd shapes, it may not work on a grid system.  These blocks may need to be appliqued or paper pieced.  And some  blocks may require more than one technique.

Four, always test your fabric choices.  Always, always, always.  After you’ve graphed out the block to your satisfaction, select your fabrics and then make a test block.  There are a couple of ways to do this—you can cut the block units out (unfinished size) and sew them together or you can cut the block units out finished size and lay the units on the grid.  If you chose the second way, glue the fabric to the paper graph.  After you’ve made the mock-up block by either method, place the block several feet away (a design wall is perfect for this) and look at it critically. At this point, if I’m still not sure about fabric/color placement, I make several copies of the block on my copier, trim the paper away from the block image, and lay those out to try to get a better feel for the way the quilt top will actually look.  These are easy to move around and see if secondary patterns will emerge. 

Five, if you plan to use your copier to make photocopies of the pattern, check it for accuracy.  Be aware that copiers can distort images.  Before using any photocopies as templates for piecing, make a test copy of the block at 100%.  Measure the original and the photocopy to ensure they’re the same size.  And try not to change copiers when making additional copies.  Keeping the same copier will assure you of consistency in the quality of the copies. 

Using the Grid Method for Your Own Blocks

Many, many quilt blocks are based on a grid or can be broken down into one.  By now you know a grid organizes a design and makes cutting and piecing sequences easier to understand and perform.  As you begin to draft your own block, there are several commonly used grids to keep in mind.

Two x Two Grid – A grid of four undivided or divided squares such as a Four Patch or 2 x 2 squares offers almost unlimited design options.  Take a look at this Windmill Block.

Windmill Block
Broken Dishes

Four three-triangle units on a grid of 2 x 2 squares form this block.  Half-Square Triangle units placed on a subdivided grid form a Broken Dishes Block.

Squares and half-square triangle units on a subdivided grid form the Northumberland Star.

Northumberland Star


Three x Three Grid – A common block/block unit in quilt making is the Nine-Patch, which is on the 3 x 3 grid.  This grid, just like the Four-Patch, can vary in the number of squares it uses, but that number always needs to be divisible by three.  The Friendship Star

Friendship Star

Is a good example of a block on the 3×3 grid.  Jacob’s Ladder

Jacob’s Ladder

Is also on the 3 x 3 grid, even though it incorporates Four-Patch units.

Five x Five Grid – This grid is one of the most versatile. The five squares across and five down setting gives not only great options, but a center focal point.  Examples of this block are:

Cake Stand

Checkered Star

New Mexico  — which is a variation of the Checkered Star, but is formed with four Nine-Patch units and four three-bar units that replace the square in the center.

Seven x Seven Grid—If you want to draft an intricate block, this is the grid to play with. Bear’s Paw (or if you live in an area that was settled heavily by Quakers, this may be known as Hand of Friendship in your quilt circles) is a great example of a 7 x 7 grid.

Bear’s Paw

You have sashing and half-square triangles and squares to form Bear’s Paw.

Tree of Paradise is also a 7 x 7 grid which consists of squares and half-square triangles radiating from a rectangle in the center.

Tree of Paradise

After you determine the grid you’re using to draft your own block, now you need to think about the center point.  This isn’t difficult, but it is important to keep this fact in mind:  Even-numbered grids allow for symmetrical designs.  Odd number grids can be oriented around a center unit.  For example, in a Four-Patch grid, the corners of the units meet at the block’s center and is its center point.  An example of this type of block is the Sawtooth Star.

Sawtooth Star

On the other hand, a Nine-Patch grid has a block unit as its center point.  The Ohio Star is based on a 3 x 3 (Nine-Patch) grid.  The center of this block

Ohio Star

Is a square.  This square could be gridded out into another Nine-Patch unit, a Four-Patch unit, or serve as a great spot to showcase a focus fabric or a little applique. 

You have a lot of gridding knowledge in your quilting toolbox now.  Don’t be afraid to pull it out and use it to your benefit.  And the more you grid, the easier it becomes.  It won’t be long until you will be able to look at a quilt block and know what kind of grid it falls into.  And with some determination and practice, you will be altering blocks to suit your needs or designing your own blocks before you know it.

Until next week, Level Up Your Quilting!

Love and Stitches,

Sherri and Sam

Categories
Uncategorized

Simplifying Difficult Quilt Blocks

See this block?

Dear Jane H2

This is a block from the Dear Jane Quilt (if you don’t know what that is go here https://benningtonmuseum.org/library/walloomsack/volume-11/stickle-jane-the-stickle-quilt-in-war-time-1863.pdf).  Admittedly Dear Jane is not a beginner quilt.  While there are some pretty simple blocks in the quilt (thank goodness), most of the blocks are challenging.  And then there are few like the one above that are just plain hard.  In the traditional Dear Jane blocks, the unfinished size is 4 ½-inches, which complicates the construction process even more – small blocks, small seams, small workspace.

In short, this block was my nemesis.  There may have been a sizeable contribution to the family swear jar due to this block.  I worked and re-worked the block at least four times before I was satisfied with the results.  When I began Dear Jane, I wasn’t a novice quilter.  At this point, I had quilted almost 25 years.  And while I readily admit I didn’t quilt as much then as I do now, I had serious needle-and-thread experience under my belt. 

So, the entire process got me thinking…there are a lot of lovely quilts out there I want to make, but most of them are fairly challenging.  While I enjoy less complicated blocks, one of my quilting goals is to come away from a project having learned something new, and that’s what harder blocks offer.  But since I tend to do most of my quilting at night after a long day at work, I don’t want anything that completely taps out my mental resources by 9 p.m.  With these thoughts in mind, I began to come up with my strategies for simplifying the construction process of difficult quilt blocks. 

With any quilt – easy or hard, small or large – you need a plan of action.  And sometimes your plan of action may be different from the pattern’s directions.  This is why I always recommend everyone read the directions thoroughly before they cut one inch of fabric.  Take the directions, sit down with a cup or glass of your favorite beverage, and allow yourself to read through them completely and slowly.  Mark them up with a pencil and highlighter.  In particular, look for these items:

  1. Familiar Units

Look for readily identifiable block units such as Four-patches, Nine-patches, Half-Square Triangles, Flying Geese, and Quarter-Square Triangles.  This is an important step for a couple of reasons.  First, it makes a complicated quilt block less scary.  Seeing something familiar you know you can make and make well takes the intimidation out of the process.  Second, if this block unit is one you frequently make, chances are you know your favorite construction process – which may not be the one used in the pattern’s directions.  If the two are different, you could possibly need to re-estimate the yardage requirements.  This is another reason to read the pattern through before purchasing or cutting the fabric. 

  •  Clearness and Conciseness

As a former science teacher, I’m a stickler for clearness and conciseness because I taught chemistry.  And teaching chemistry meant having labs.  And having chemistry labs meant those lab directions had to be crystal clear – or else you could run into trouble.  As you read the pattern directions, underline or highlight the parts you don’t understand, but don’t dwell on them too much until you read all of the directions through.  As you move through the pattern, the parts which aren’t too clear may become more understandable as you read the rest of the directions.  I ran into this issue when I made my first Judy Niemeyer quilt.  Judy has very detailed cutting and “bagging” directions.  I understood the directions, but I pondered at the detail, until I began actual construction.  Suddenly all that preparation made perfect sense as I could grab a bag of fabric pieces and the papers and just sew to my heart’s content. 

However, if the directions still aren’t understandable, I strongly advise you to Google the pattern.  Quite often, especially if the designer has an active web page, they will post clarifications and corrections on the site.  You may also find other quilters who have made the pattern and written about their construction process (this is how I survived my first Dear Jane Quilt).  Or you may find out that other quilters have attempted this pattern and decided the time and effort wasn’t worth it – which is also good to know before you purchase fabric and cut it up. 

The next step is to see if there’s any way you can simplify the difficult parts of construction. Determine if there’s an easier way to make those tricky units.  If there are Y-seams involved and you dislike those, could you re-draw the block and make half-square triangles do that work?  If there are partial seams, can you do a quick block re-graph and eliminate those?  Remember the pattern directions aren’t the 10 Commandments of Quilting.  They’re suggestions.  Good suggestions, but just like a GPS, there’s more than one way to get from point A to point B. 

Once you’ve read the directions and determined what you can simplify, you still may question the feasibility of making a bed quilt out of the pattern.  You may wonder if the time, effort, and expense are worth it.  If you’ve reached this point, I strongly suggest you make one block out of scrap fabric, constructing it the way you’ve now planned out.  If your plan of action works, then dive in and make that quilt!  If it “sort of” works or doesn’t go as planned at all, it’s time to re-group.  Ask yourself the following questions:

  1.  Would construction be easier if I make the blocks larger?

If you’re one of my regular readers, you certainly know how to do enlarge blocks  by now, with or without quilting software.  If you’ve missed by blogs on graphing, look through my June and July 2020 posts for more information.  By making some difficult blocks bigger, sometimes the tricky construction process becomes easier.  For me, if I have to make Y-seams, the larger seam area makes it easier to be accurate.  Same thing with partial seams.  Even enlarging some smaller blocks by as little as an inch can ease construction headaches. 

  • Can I make my fabric choices do part of the work for me?

In some quilts, this is an obvious decision.  See this sweet little quilt? 

I’ve made two of these as Christmas gifts for my grand girls.  If you think I took the time to applique Minnie and Mickey and the Eiffel Tower, not to mention those pointy stars, you’re sadly mistaken.  The middle of the quilt is a panel. Panels can be great time savers and can work just as well, if not better, than a traditional quilting method.  And remember the Fish Quilt I’ve made for the hubs as part of his Christmas?  The fish are also from a panel.  Panels are a great way of working the focal point of the quilt without investing lots of time and fabric in teeny, tiny applique pieces.  Just make sure you don’t simply sew lots of plain border strips around the panel to make the quilt as large as you need it to be.  Throw in some great piecing to set that panel off and dazzle your viewers.

The ombre print family is another way to make the fabric take the brunt of the work.  For instance, take a look at this fabric:

Gray Ombre Fabric

It’s a nice print, but if used correctly, it becomes a stellar background choice and adds lots of character to a quilt without a lot of work:

Sometimes this idea can be so brilliantly executed that the viewer is none the wiser that you took this step.  The very best example of this is a Double-Wedding Ring quilt my friend Gail made.  She found a striped fabric that she used for all those curved ring pieces and it looked exactly as if she had taken tons of time to piece each ring.  Think outside the box with your material choice and see if you can make the fabric do at least part of the work in a complicated piecing or applique project.

  •  Would applique work better for part of the project instead of traditional piecing?  I will be upfront at this point and tell you that if you don’t like to applique, don’t even think about this suggestion.  It would only complicate matters even more.

But if you don’t mind applique (or are hopelessly addicted to it like I am), this may be an option.  With this suggestion, I’m thinking about blocks such as this:

And this:

These are blocks with lots of bias and lots of curves, which can be difficult to piece without stretching the bias totally out of shape.  Applique may be an easier and better way to handle the bias.

If you’ve read through the directions and exercised your construction options and still aren’t sure about committing to the project, make a few blocks out of scrap fabric.  In other words, take the pattern for a test drive before handing out the cash for a down payment (the fabric).  Be sure to use the construction methods you’ve decided on.  At this point, you will probably decide if the changes you’ve made will work for the entire quilt top.  And if you decide a bed-sized quilt would just be too much of a headache, but you still love the pattern, try a wall handing or throw quilt.  That would be the best of both worlds – you have the quilt pattern you love in a size that won’t drive you nuts.

And last but not least, count the expense the complexity may cost you.  If you’ve made construction changes and are happy with those outcomes, go for it.  But if you’re not, and you plan on making the quilt as the pattern directs you, be sure it’s worth your time, patience, and cash.  And sometimes the time and patience exact a higher cost than any fabric.  Be aware you may have to put the quilt in “time out” for a few days at a time just to clear your quilting mind.  Have something easy waiting in the wings you can work on while you’re taking a few days off from the harder quilt.  One of my favorite coping mechanisms is asking a quilting friend to make the same quilt with me.  It’s really good to have another quilter to bounce ideas off of, not to mention it’s a lot of fun.

Complex blocks and quilts are worth the time and effort.  Both can teach you a lot if you let them.  Just be aware there are coping mechanisms which can be used to make the progress easier.  Don’t be afraid to utilize them.

Until next week, Level Up Your Quilting!

Love and Stitches,

Sherri and Sam

Categories
Uncategorized

Drafting Complicated Blocks

Today I’d like to address a top which isn’t discussed among quilters much any longer.  It’s kind of like the blog on graphing I did a few weeks ago  —  it’s one not heard much today, but once you know how to do it, it can really free up your creativity on so many levels.  What is this ancient, almost-lost quilting art?

Drafting.

If push came to shove, could you draw out your own quilt block and determine how much fabric you need and how to cut out the blocks?  We did this once before with Road to Oklahoma, which was an easy block with four patches and triangles.

However, what about a more complicated block like the LeMoyne Star?  Could you take this block and make it smaller or larger to fit your needs?  Right off the bat, I know lots of us (including me), would quickly open our Iphone to a quilting app or boot up EQ and resize it.  Quilters have a lot of options today, which makes our quilting experience easier.  There are tools like this available:

Quick and Easy Block Tool

This handy-dandy little catalog of quilt blocks has nearly every popular block in it plus the fabric and cutting requirements for several different sizes for each block. 

If you have an Iphone, Ipad, Android, or Android device, there are apps which can help.  My current favorite one is Quiltler2 Lite.  It has most of the popular blocks and you can resize them on your phone, as well as play with color placement and preview what they would look like set on-point. 

And of course, my favorite tool is this:

I use EQ 8 at least two or three times a week.  You can resize blocks to be larger or smaller, in 1/8-inch increments if needed.  You can import fabric lines or scan in your own fabrics.  It’s versatile and Electric Quilt updates the software consistently.  Add-ons (additional software, such as Dear Jane), are reasonably priced and are a point-and-click-and download away.  Plus, their customer service is stellar. 

However, as wonderful as all of these are, they do have some drawbacks.  The Quick and Easy Block Tool has only 102 quilt blocks in five sizes each – three, six, nine, twelve, and fifteen inches square.  If you fully rely on this tool, you’re limited in both size and type of block.  I’ll also be the first to tell you phone apps can be difficult to use.  I don’t think many are designed by quilters, because they’re either extremely limited with what you can do with them or all the technical bugs haven’t been worked out of them yet.   They don’t update often, either.  And as much as I love EQ, it is CAD based, which means there’s a learning curve involved.  I will give EQ this – they have wonderful tutorials and it doesn’t take you long to get it up, running and working for you.  However, as of this blog, it doesn’t run on an Ipad or Android tablet, which means you’re tied to your laptop or desktop when you use it.   

Most disturbing about all of these is I’ve found errors. Not so much in EQ, but I have found erroneous data in other block tools – especially the phone apps.  If you’re relying on any of these tools for fabric requirements and cutting directions, you need to have the ability to check behind them if something doesn’t look right.  And that’s one of the tools this blog will give you – the know-how to check behind them if something doesn’t seem correct. 

While drafting blocks which have basic units in them is fairly easy, those with Y- or partial seams can be a little daunting.  Block units such as a four-patch, half-square and quarter-square triangles, log cabins, and flying geese can be drafted out quickly and without too much thought.  Other units, such as 45-degree diamonds, are more challenging.  Since the LeMoyne Star has those diamonds, plus some squares and triangles, coupled with the fact if I’ve used this block in previous blogs for construction purposes, I  decided this would be the block we’d play with to shrink it down and then enlarge it.  And unlike the tools listed in the first part of this blog, the items you need to do this manually should be ones you have around the house:  pencil, graph paper, ruler, and eraser. 

Let me be a little specific about the graph paper.  I use graph paper that has eight squares to an inch because it makes it easier for fabric cutting (you can get the needed measurements down to the nearest 1/8th of an inch, so it will match up with your rotary ruler and mat), as well as make it easy to allow for ¼-inch seam allowances.  This type of graph paper doesn’t require a trip to an office supply store.  You can jump on the internet and go to printablepaper.net.  This site has any type of graph paper you need, and it’s a download, point, click, and print away.  This particular site has almost any kind of quilting or craft graph you need. 

Let me show you how to do this.

Step One

Draw a square of the finished size block you need.  If the block you’re drafting is larger than 8 ½-inches you will have to tape a few sheets of graph paper together to accommodate the size of the square.  For this blog, I will draft a 7 ½-inch finished LeMoyne Star block.

Step Two

Draw diagonal lines from corner to corner in both directions.

Step Three

Find the measurement from the center point of the diagonal to one corner.  In my block, this measures 5 ¼-inches.  Now take this measurement and measure both vertically and horizontally from each corner.  Mark with dots or tick lines.

Step Four

Connect the dots as shown in the diagram. 

At this point, I erase the diagonal lines.  It makes things less confusing.

Step Five

Now connect the dots like this:

Step Six

And finally, connect the dots like this:

Believe it or not, in all those lines, lies my 7 ½-inch finished LeMoyne Star.    Look at this diagram where I’ve outlined it with a black Sharpie. 

Now I can measure the three block units used (45-degree diamond, triangle, and square), add the appropriate seam allowances and know that for each block I’ll need:

Four 2 ½-inch squares (the size of the square, plus ½-inch for seam allowances)

One 4 ¼-inch square cut twice on the diagonal for the triangles (the triangle would work best cut as a quarter-square triangle, so we add 1 ¼-inches to the longest diagonal side, cut a square this size, and then cut it twice on the diagonal – this allows the straight of grain to fall on the outside edges so the triangle won’t stretch). 

Eight 2 5/8-inch diamonds.  For this we cut a strip of fabric the width needed and add ½-inch for the seam allowance.  Then use the 45-degree markings on our ruler to cut the diamonds. 

You use this same process to enlarge or shrink an 8-pointed star. 

Okay, okay, I can hear the groans and the questions from here…with everything techie out there for quilters, why is this important?

Because math is important.  And the knowing how to do the math correctly may just save your quilting sanity.  Apps and software – as good as they are (especially the software) – can’t do everything.  If you’re putting together a quilt top from orphan blocks which are all different sizes, you may just need blocks that are say … 11 1/16-inches finished.  Know what kind of software can get that kind of exact measurements? 

None.

Not even EQ8.  It will  round it to the next 1/8th of an inch.  Which doesn’t sound a lot for one block – and it isn’t.  But if you have six  11 1/16-inch blocks in a row, that means that your row will end up being ¾-inch off when you go to attach it to the next row.  That’s nearly an entire inch.  It may take a little while to work out the math when you start, but by the time you get to the end, your row will be even and your sanity will be intact.

It’s also important to have the ability to check behind the software or app.  We’ve become so accustomed to accepting whatever a computer or phone app tells us is correct, we seldom check behind it to make sure it’s right.  The longer you quilt, the more you will cultivate an instinct…an ability to know when some pattern or measurement just isn’t going to work correctly.  I call it the “Hinky Instinct.”  You just know when something doesn’t seem as if it will work correctly – it’s “hinky”.  And the longer you quilt, the stronger this instinct grows.  So, if an app or software measurement doesn’t seem correct, it’s far better to check it at the beginning than to get 10 blocks made and then determine they’re the wrong size.  Knowing how to do the math just helps you keep your quilting sanity, as well as be good stewards of fabric, time, and stitches. 

That said, the formula and diagrams I’ve given you aren’t the only way to draft a block.  Back in the early 1980’s when I was taught how to draft a block, we used protractors and compasses.  Before I proceeded to teach you how to use those, I put in a text to my wonderful sister-in-love, Deanne, who happens to be a high school math teacher.  I asked her if those tools are still used in high school geometry.  I assumed that if they were, the protractor and compass would still be something you could pick up at Walmart or Office Depo.

The answer was no.  They are no longer used in high school geometry.  Not knowing if those were readily available, I opted not to show you how to draft with those tools. 

I also want to leave this with you:  If you’re either constantly re-sizing blocks or having to come up with filler blocks, then go ahead and plan to purchase EQ 8.  This isn’t a perfect software program by any means, but it’s a really, really good one and will save you a great deal of time.  That, coupled with the fact you can print templates, foundation piecing, or rotary cutting instructions, will make your quilting life so much easier.  Yes, it’s a bit expensive starting out, (it’s $239.95 on their website for the full EQ 8 version, however, there’s also an mini-EQ that’s $89.85), but it comes with automatic software upgrades.  And if they ever develop an EQ 9, you simply pay for the upgrade, not the entire software program.  Trust me – you won’t regret the purchase.

Standard disclaimer applies here:  I’m not in EQ’s payroll and I don’t get free merch for recommending them.  I’ve used the program for years and love it to death.

Until next week, Level Up Your Quilting!

Love and Stitches,

Sherri and Sam