Mention Y-seams to quilters and generally you get one of two responses – a shrug or a shudder. The shrug would indicate either a) the quilter has a solid knowledge of how to construct a successful Y-seam or b) has decided that he/she will never do a Y-seam when perfectly good half-square triangles can give you the same effect most of the time. The shudder comes from quilters who realize you can’t get through your quilting life without at least some Y-seams, have tried them, and now possess a vehement dislike for the entire process.
For those of you who aren’t aware of what a Y-seam, this is what one looks like:

It’s where three or more pieces come together at one point, and none of the seams are at a 90-degree (right) angle. I admit, the first time I attempted one of these, I decided I would opt not to have a lot of Y-seams in my future. And then I was introduced to blocks such as this:

And these:


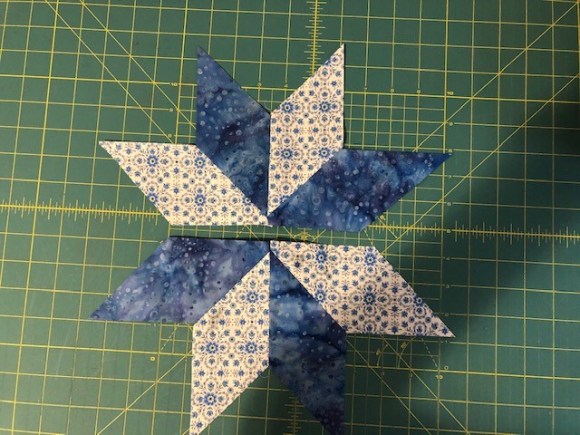
These blocks fall into the eight-pointed star category and they’re some of the prettiest quilt blocks out there. In addition, a few weeks ago I introduced you to feathered stars:

While a great deal of the feathered star block is comprised of HSTs, the diamonds at the top have Y-seams and the squares in the corners have to be inset (sew part of the seam and pivot to finish). In the long run, the more you quilt, the more you can be assured that Y-seams will loom somewhere in the future. You may as well learn to make them correctly and at least be at peace with the process, even if they’re not your favorite technique to pull out of your quilting toolbox.
The first place to start is with your fabric. If you’ve given a hard look at some of the eight-pointed star blocks above, and you’ve read my previous blogs about angles, there’s a chance by now you’ve thought to yourself, “I’m looking at a lot of bias.” And if that’s what you’re thinking, you’re absolutely right. However, by now we know how to deal with bias. What we need to keep in mind is that the units used in making eight-pointed stars are not half-square triangles, so we can’t use the Sew and Slice method to avoid exposing the bias until the last minute. When the star units are cut out (either by template or rotary method), the bias is immediately exposed. So, let’s refresh our memory on how to protect the bias for as long as we can to avoid it stretching. The first step we want to take is, once the units are cut out, give them a shot of spray starch and press them with a hot, dry iron. The starch will help keep the bias intact. We also want to store them flat and in an area where they will not be handled a lot until we’re ready to sew them. The less handling, the better for the bias. And finally, do try to get them sewn together as soon as you can. Once they’re joined to another piece of fabric, the bias edge is no longer exposed.
The next step to consider is how you want to mark your unit. Like the Sew and Slice method with HSTs, you’ll need to mark your star block units because unlike most other quilt block seams, you’ll stop and start sewing a lot. There is no real chain-piecing with these. The start and stop points will have to be parked precisely and clearly in order to make these Y-seams go together perfectly and easily. So, a couple of things to keep in mind at this point.
- Regardless of what marking tool is used, it will cause some friction along that bias edge. Make sure the star block unit is well-starched to reduce the friction as much as possible, so the bias won’t stretch. As a matter of fact, some quilters, such as Harriet and Carrie Hargrave, recommend starching the fabric or the block units to the point where they feel like paper. This is not a bad idea.
- You will want a marking tool that will produce as little friction as possible. I have several go-to tools I reach for. I have used the blue fabric markers that disappear with water. I have also used Frixion pens. My favorite is this:

That’s right. A mechanical pencil. Why this? A couple of valid reasons. First, depending on the marking method I chose, the mechanical pencil leaves a narrow line on my fabric, so my seams stand a better chance of being exactly ¼-inch. Second, if I chose to use the “dot” method of marking, the pencil lead will slip through any template hole quite easily or be more precise if I mark the star block unit with a ruler. This will become clearer when we get into the actual construction process of the block.
With those thoughts in mind, let’s move into how we make one of these beautiful blocks. Keep in mind that Y-seams aren’t really that hard to make correctly. However, they do require a bit more concentration and precision than chain piecing. So…you may want to turn off the Netflix and save the glass of wine until later.
As I mentioned before, with Y-seams, there are distinct points where you start and stop sewing. These points must be marked on your fabric for precision’s sake. There are only two different marking methods that I recommend – marking the seam or making dots. Let’s deal with marking the seam first. This method requires a marking tool and a quilting ruler that has a distinct quarter-inch mark down its side. Actually, my favorite ruler to use with this is the Add-A-Quarter ruler that I demonstrated in my paper piecing blogs. Here’s how this method works:

Take the star block unit and draw quarter-inch seam marks all the way around the edges.

Where the lines intersect to form an “X” is your starting and stopping point. There are some pros and cons to this method. The good part about this method is it’s super easy to see your stopping and starting points. The not-so-good points about this is you would need to make sure the quarter-inch line drawn on the fabric is exactly a quarter inch away from the fabric edge. There is little wiggle room with this. The other con to this method is your running a marking tool along a bias edge. If you’re not careful, you can stretch the bias with this process regardless of the care taken or the marking tool used.
The ”dot” method is literally just that – where the seams would intersect, you simply make a dot with your marking tool instead of a line, like this:

If you’ve rotary cut your pieces, you’ll need to use a ruler to measure in ¼-inch from the corner of the block unit and place the dot there. There’s also this tool from Jinny Beyer, called the Jinny Beyer Perfect Piecer.

This tool has lots angles and these angles have lots of holes in them. It’s easy to line these up with your block unit piece and mark your dot at the quarter-inch spot.

The Perfect Piecer is available on Jinny’s website www.jinnybeyer.com. I like this gadget so much I have two. I keep one near my sewing machine and one in my hand sewing basket.
Lots of these eight-pointed star blocks are used quite frequently in quilting. As a result of this popularity, companies that make quilting templates frequently have Y-seam sets available for you to purchase.

This is a really great option. These templates offer uniform accuracy and like the Perfect Piecer, have pre-drilled holes to mark your quarter-inch starting and stopping points. If you have a real love for blocks such as Hunter’s Star, check around the internet. Quilt supply sites such as Marti Michell, Missouri Star, and Nancy’s Notions have a good variety. If you use the Perfect Piecer or some of the other templates, it will quickly become apparent why a mechanical pencil is a good marking tool – their lead fits easily into the pre-drilled holes.
There is one more technique you can use to indicate the stopping and starting points that doesn’t involve actually marking your fabric – simply finger press the corners where the sides meet, raw edges together, like this.


I will offer a bit of clarity with this method. First, it’s not quite as accurate as the other two techniques, and you want to do this right before you sew. Otherwise the crease will relax. I have used this method with loosely-woven fabric or really small pieces that I don’t dare stretch the bias.
Like making HSTs, QSTs, or FGUs, you will want to try all three of these techniques and decide for yourself which one works best for you. I would suggest making three identical 12-inch eight-point star blocks and use a different marking method with each. This way you’ll see which one your most comfortable with, and the larger block units make the Y-seams easier. (Note here — If I am making super small Y-seams — such as in some of the 4-inch Dear Jane blocks — I hand piece them. You have more control over the stopping and starting points, hand piecing allows for the greatest accuracy, and the blocks will lie perfectly flat.).
As we begin assembling the units into a block, there are a few steps we can take to make the construction easier and more accurate. These are little things, but they go along way with Y-seams.
- Switch to a smaller sewing machine needle. I’ve found a 70 or 80 works best with Y-seams.
- Decrease your stitch length. This isn’t paper piecing, so I’m not talking about lowering the stitch length super low. Big Red’s default length is 2.2. For Y-seams I lower it to 2 or 1.8. The reason we want smaller stitches is so we won’t overshoot the stopping point.
- Decrease your speed. Y-seams aren’t something you can make fast. Accurate stopping and starting are the most important factors for ease of construction and nice, square, flat blocks.
- Learn to love your “needle down” button, if you’re machine has one. This will keep the fabric from “wiggling out of place” under the presser foot when you come to a stop.
- Since we’re not making a complete seam (sewing from one edge to another), we will need to either sew a few stitches as we start and then reverse stitch to lock them, or use the tie-off (knot) option if your machine has that. This should be done at the start point and the end point. When sewing regular seams, the stitches are locked as the seams intersect at the endpoints. Y-seams don’t intersect, so the endpoints need to be knotted off. This keeps the stitches from popping open as we joint the unit pieces together.
- Stop sewing about ½-inch away from the endpoint and either slow down even more or literally take it a stitch at a time. If the unit piece is small, I use the needle up-and-down button and make one stitch at a time until I get to the endpoint.
Now let’s get to the actual sewing process. We’re making a Lemoyne Star Block.
First you join two unit pieces, right sides together.

Place the pieces under your presser foot, making sure that the stitches begin at the marked starting point. Knot stitch or reverse stitch to lock.

Stitch until you get about ½-inch away from the endpoint.

Slow down even more, being careful to stop exactly at the endpoint and knot off.
Continue adding units in the same manner until there are four star points sewn together. Set this aside and repeat for the next four star points.


We need to press the seams and there a couple schools of thought on Y-seam pressage. Some quilters press the seams to one side, per normal. I don’t. I’ve found that puts all the bulk to one side and when you join the setting blocks and triangles to the star points, that bulk on one side make construction difficult. I personally find pressing the seams open to work best.
Now that we have the two parts of the eight-pointed Lemoyne Star completed and pressed, set those aside until next week.
I’ll show you how to add the corner squares and the large triangles as well as talk about 60-degree angles in the next blog.
Until Next Week, Level Up Your Quilting!
Love and Stitches,
Sherri and Sam

One reply on “Y-Seams … Shudders or Shrugs?”
[…] The traditional Lone Star Block uses Y-Seams. I won’t go into all the details on how to handle Y-Seams, but I have written a blog about them. To read that, go here: https://sherriquiltsalot.com/2020/06/17/y-seams-shudders-or-shrugs/ […]