Before we get into this week’s topic, I’d like to give you fellow quilters a quick public service announcement: Check your thread.
The reason for this PSA is a picture I saw on my Facebook feed over the weekend. A long arm artist was readying a quilt to put on her machine when the top literally began falling apart. She checked the top’s stitches and tension and both of those looked correct. She called her customer and found out that the quilter in question had used old thread. We’re talking thread-on-wooden-spools old thread. My guild had a similar situation a few years ago. A member who was downsizing had some tops she had constructed but had never quilted. Another member (who had a long arm) took these tops to quilt for our charity quilt program. Since the tops were several, several years old, the long armer threw the tops in her washing machine before putting them on her long arm. And the tops completely fell apart. The issue, once again, was the thread.
If you have thread in your stash wound on wooden spools, put them in a pretty jar to display in your sewing room. That’s literally all they’re good for at this point. Thread does have a shelf life, albeit a pretty long one. According to the Superior Thread website (if you ever have a question about thread, this should be a go-to resource), “A good quality thread produced today will last much longer than thread that was produced 15 or 20 years ago.” So, if you’re like me and still have those gold, plastic Dual Duty or Coats and Clark spools of thread – toss them. A high-quality cotton thread that is manufactured today will probably still be fine to use 40 or even 50 years from now. Why? The difference is due to the advancements in spinning, dyeing, and twisting as well as the evolution of genetic engineering in cotton plants. Since cotton is a natural fiber, it will degrade over time. If you have older thread in your thread stash, the best way to determine if it’s still usable is to take a 12-inch section of the thread and hold it between your two hands. Give the thread a sharp pull. If the thread snaps (a nice, crisp break), then it’s probably okay to use. If it separates and pulls apart easily (like pulling a cotton ball apart), throw it in the circular file and get another spool of thread.
However, polyester thread is different. With this thread, the color may fade over time, but there is no evidence that it deteriorates like cotton thread. Synthetic fibers last longer than cotton ones.
When we started 2020, I expressed a strong desire that by the end of the year, we all could take a pattern or design and make it our own. I want us to get really comfortable about changing a design element in a pattern or coming up with our own pattern if a quilt drifts into our imagination and won’t let us go. In keeping with this year’s theme about advancing our quilting skills and altering designs to fit how we want our quilts to look, I’d like to hit on the topic of connector blocks — also referred to as linking blocks. These are secondary blocks in a quilt that serve to pull the main blocks together for an unexpected secondary pattern. Often these blocks are what I consider the “backbone” of quilting – snowball blocks, square-in-a-square blocks, four-patch blocks, etc. Let me show you what I’m talking about. See this quilt?
This quilt has no sashing, because it has connector blocks and really doesn’t need any. This is the main block.
And this is the connector or linking block:
The block that is used most often as a linking block is the snowball block.
This block can transform a quilt top in many ways and gives a nice, open area to have some serious quilting stitches.
However, while the snowball block is the most often used connector block, it’s not the only one. There are some more complicated ones that also serve as great linking blocks.
If you want to play around using linking blocks instead of sashing or an on-point layout (personally, I’ve found the regular horizontal layout much easier to use when I’m working with linking blocks), you’ll need to do a little planning. Take your primary design block and draw it out on graph paper or throw it into EQ8. (Personally, I find the software the easiest to work with, because you can insert numerous blocks of the same design just by pointing and clicking.)
Primary Design Block. You could also deconstruct this block beautifully.
Then draw your connector blocks or insert them into your computer layout. Keep in mind the connector block more than likely will need to echo the corner of the design block. So, if the design block has a straight edge (such as a triangle, square, or rectangle) in the corner where it meets the connector block, the connector block will need to echo that straight edge. In other words, don’t have a curved unit meeting up with a square. Since there are few hard, fast rules in quilting, there are exceptions to this.
My pick for the linking or connector block.
If you don’t like what you have come up with, work with the linking blocks until you create something that makes your quilter’s heart sing with joy.
My Christmas Quilt with the chosen design and connector blocks. See what an important role the color choice and placement plays with this?
The really cool factor that can occur when you use a primary design block along with connector blocks is a secondary design can emerge. Of course, color placement is an important factor in this process, so you may have to play around with fabric positioning as well as block design to get this to happen – such as using the same colors in the corners of the design blocks and the connector blocks.
Jacob’s Ladder with a Nine Patch forms a nice secondary design
What I really, really want you to have this year is “Own Your Quilting Experience.” Quit depending on kits and patterns to dictate everything that comes out from under your needle. I really hope that at the end of 2020, you have the tools and the confidence to look at a pattern as only the starting point of your design. If you don’t like the way a pattern calls for making HSTs, you know the most effective way for you to make the HSTs and will use that method. If you don’t want a border constructed out of four patches, you know how to redesign that border to look the way you want it to look. And if you have a fabric panel in your possession, you have the know-how and the confidence to cut that sucker apart, put it in a layout that you like, and make that top sing in four part harmony.
This is not to say I’m anti-quilt kit. I’m not. The Alaska quilt that’s under my needle now is a kit. But I do think that a steady quilting diet of kits can really short-change your creative ability and stunt your growth as a quilter. Change your patterns up. Take one small thing at a time. Substitute HSTs for plain patches. Change the size of the blocks. Do something to make it uniquely yours. Garner confidence with each change you make and learn from the mistakes that happen (because they are going to happen, believe me). Then try it again.
We’re living in some fearful times. While the title of the blog, “Handle with Care,” concerns HSTs, I’d like to take minute to urge you to handle yourself with care during the COVID 19 pandemic. I’m not an alarmist, but I am a realist. We’ve all heard that we need to wash our hands. And we’ve heard a lot about Social Distancing (I’d wager that may be 2020 catch-phrase). However, this is where I’m coming from…
The average age of the average quilter is 62, according to the latest statistics. If that is true, then a lot of us now have parents that are in the “danger” zone of 80 and above. I’m in that group. I need to be conscious that everywhere I go, everyone I meet, everything I touch could have the virus on it and I could transfer that to my mom when I see her. In addition, my daughter, Meg, has a compromised lymphatic system, since her lower lymph nodes were removed in 2018 during her cervical cancer surgery. While she’s only 33, she could have a hard time recovering from COVID if she were to catch it.
We can’t live in a bubble, but there are things we can do to limit our exposure. My Tuesday night Sit and Sew has decided to halt our meetings for awhile. My guild cancelled its spring retreat. Area grocery stores are closing early to allow their staff time to sanitize the stores correctly each night. If I had five dollars for every email I’ve received this week from retail/on line establishments, explaining what they’re doing to keep us safe, I could afford to go to Paducah every year for the next five years.
And speaking of quilt shows, in my area, local ones have been cancelled. Word came out this week that several of the national shows have also cancelled. I live in Guilford County, North Carolina. The ACC was cancelled. Our International Home Furnishing Show has been postponed.
This results in a lot of area stores and restaurants hurting. The vast majority of these closings and cancellations affect the small business owner. Be conscious of that in the months ahead when we are able to get out and mingle freely. If you have to purchase fabric or quilt notions on line, see if you can order from a small quilt shop.
However, in the middle of all this fear, I’ve seen really good people step up to the bat. Local Door Dashers are offering free delivery to senior citizens. The food vendors from the ACC donated their meals to needy kids and families. Utility companies have agreed not to cut off services for non-payment during this time. We’re checking up on our older neighbors and fellow quilters. I hope we can hold onto this attitude after this passes — because COVID will pass.
Handle yourselves with care, my dear quilting friends.
Remember the blog I wrote a few weeks ago about triangles? I’ve gotten quite a bit of feedback on that blog. Most of it was in the form of questions about how to handle the triangles after they were cut but before they were sewn together. The blog kind of took for granted folks were sewing the triangles together immediately after they were cut out. We all know that’s often not the case. Life happens and sometimes it can be days (optimistically) between getting our fabric units cut out and then sewing them together. So, with this blog I want to posit that scenario and give you my thoughts about how to store and work with those triangles if there is going to be a bit of time between cutting them out and sewing them up.
If I thought there was going to be some time between cutting my triangles out and sewing them together (for instance, if I was prepping my fabric for a quilt retreat that was several weeks away), I would opt for the Sew and Slice Method. I would go through every step of this process, except for cutting the square in half to make the two triangles. A square can lie flat in a box for literally years and nothing will happen to stretch the bias. When I’m ready to work on the quilt again, I would cut the square apart and expose the bias. In any quilting situation where you’re dealing with bias, wait as long as you can to handle it.
In the situation where the bias is already exposed and you can’t immediately sew the triangles together, starch is your best friend. I know lots of quilters like Best Press, and if that’s your thing, use it. The point is use something to stabilize the bias edge. In my own personal opinion, nothing stabilizes better than this:
When you use starch and then press the fabric with a hot, dry iron, the fabric can take on a paper-like quality, which makes it very stable. The triangles will store nicely, and the bias side won’t stretch. The caveat to this is if you live in an area where you have issues with moths, be sure to store the triangles in a plastic container with a tight lid. Moths are attracted to starch and may make a run to munch on your fabric.
If I knew for whatever reason I had to set aside my triangles for a while, I would also plan not to handle them again unless absolutely necessary. The more the triangles are handled, the better the chances are the bias will become stretched. If you know you can’t sew the triangles together soon as they’re cut out, hit the fabric pieces with some starch and a hot iron, and then immediately store them flat. Handle them one time and then leave them alone until you’re ready to sew.
And speaking of sewing those triangles, there are few things I would like to add in here that I inadvertently left out of my HST post.
When sewing a bias edge to a straight-of-grain edge, sew with the bias on the bottom (next to the feed dogs). The reason for this is that the straight-of-grain stretches the least and will support the bias edge.
If you do have to sew two bias edges together, use a walking foot or dual feed foot and slow your sewing down. Speed is never your friend when dealing with two bias edges. If your walking foot or dual feed foot is not clearly marked for a ¼-inch, do some test seams to see exactly where you need to position your needle and your fabric. When you find this “sweet spot,” mark it with a dab of fingernail polish or use a black Sharpie to indicate the location.
Once the two triangles are sewn together or the square is cut apart in the Sew and Slice method, press the unit with a hot iron (no steam) to set the seam and allow it to cool before opening the HST unit and pressing to the dark fabric. This helps the unit to hold its shape better and be easier to work with. After the seam is pressed to the dark side, again allow the unit to completely cool before moving.
Don’t be afraid to pin. As a matter of fact, I think pins are my BFF when I have to sew bias edges. It keeps the bias from slipping out of place.
Eliminate all unnecessary handling. I’ve hit all around this one, but make those triangles, sew where you need to, press them, and then put them somewhere you don’t have to move them again until you’re ready to sew them together, or onto another unit. Store them flat – this takes the stress off the seam and the bias.
Whenever possible, start sewing at the 90-degree angle.
One last thought on HSTs – if you’re still antsy about that bias, paper piece your HSTs. Yes, you will use more fabric, but not by much. Keep the papers on until you’ve sewn your HSTs together or onto other fabric units. Then tear the paper off. Even if you’re not crazy about paper piecing, this is one method that will pretty much guarantee that the bias won’t be stretched, and your HSTs are the correct size. If you Google paper piecing half-square triangles, there are hundreds of free paper piecing patterns in every imaginable size that will pop up on your feed. I am currently making a quilt where I wanted to use a sawtooth border (which is nothing but HSTs), and the HSTs had to be 3-inches, finished. I had no 3-inch paper-piecing Thangles, but I did find the pattern that made eight HSTs at a time with a Google search. Use the free internet patterns to your advantage.
Since HSTs are one of the backbones of quilt blocks, it’s important to learn the best way for you to make the unit. What’s my favorite way may not be yours, and that’s okay. This is why we have so many ways to construct them. Give yourself permission to experiment and find what works best for you. And when they’re made, take care to keep them from stretching, whether it’s three minutes or three years until you get back to them.
Back in 2018, this blog’s annual theme was Quilt with Excellence. We undertook a series of topics that emphasized the basics and spent a great deal of time on them. From a former teacher’s viewpoint, I knew the more the basics were emphasized, the better the outcome of any project. During this time, I wrote a series of blogs about design and the Golden Ratio. I am happy (and excited) to say that these posts remain some of my most popular, averaging 165 hits a month. They’ve been read and re-read to the point there are some murmurings about a book.
The issue some quilters have with the Golden Ratio is the math. The GR is an irrational numeral – 1.618….. The dots mean this number literally goes on forever, never ending, and that can be a difficult concept to wrap your mind around. We shorten it to 1.618 to work with sashing and borders, or we can half it to .618 and work with it this way. In these blogs (and I will post the links at the end of this blog), I explained how these two numbers worked ensure that the borders and sashing are in perfect proportion to your blocks.
Math can be intimidating. It’s the language of computers and science. As a former chemistry and physics teacher, I’ve dealt with my fair share of arithmetic. I tell quilters what I used to tell my math phobic students — “Math is your friend, because numbers don’t lie.” However, even with calculators, a lot of quilters are just a little put off by trying to figure out how to “math” their own quilts. I want to talk about Intuitive Design with this post and how you can use it with your quilts. So set any math-y issues you have aside and hear me out. No math is involved beyond this point.
What comes to mind when you hear that phrase “Intuitive Design?” When I first heard it, I immediately thought about Art Quilts.
Not my art quilt — this is for illustration’s sake.
I’ve only made one Art Quilt, and truly had a blast making it. Art Quilts are great because a lot of what is considered standard quilting “rules” go out the window. These quilts may only have two layers. They may have no binding. They may be lop-sided. And while quilters as a whole would frown on this in any other quilt, it’s quite acceptable with an Art Quilt. In fact, as you gaze on this Art Quilt you may think that there is really no math or concrete design work involved at all.
And you would be dead wrong.
Let’s examine that quilt and the quilts we’re making and see what makes up design.
There are tons of tools on the market that help quilters design their own blocks and quilts. Some quilters use graph paper. Others use EQ (Electric Quilt). There are the Golden Calipers for sashing and borders. There are specialty rulers and color wheels. But that’s not what I want to look at. Shove all those tools back into the notions drawer (except maybe keep the graph paper out) and let’s examine Intuitive Design and how we engage it every time we make a quilt. When we realize what it is, we can tune into it and use it better.
First step: Look around you. Why are you wearing that pair of pants or skirt or top? What makes your favorite chair your favorite chair? Why did you choose that particular focus fabric for your favorite quilt? Better yet, what part of the quilt store do you gravitate towards first? If I asked these questions to 20 quilters and account for the law of averages, probably 15 of those asked would indicate color is the answer to these questions. And choosing your color palette is one of the first steps in design. Color in and of itself can evoke strong emotions or memories. For instance, this red:
Brings to mind this logo:
What makes your favorite color(s) your favorite color(s) is a personal thing. It’s no secret my favorite color is purple*, and I tend to gravitate towards that end of the color spectrum. But I also favor either deeply hued colors or clear, bright ones. It should be no surprise that Henry Glass and Fig Tree are my favorite fabric design houses. I would encourage you to take note of what colors you repeatedly gravitate towards. While I like purple, I do realize that I can’t paint every room in my house that color or make every quilt out of purple material. When I began this process for myself, I had to back off a bit and see what colors I chose to go with the purple in my quilts. For years I thought green was one of my least favorite colors. Nope. Green resonates throughout my home, my wardrobe, my office and my quilts. Then again, it’s no secret that green and purple play well together. Commit these choices to a written journal, pictures on your phone, or a Pinterest board – somewhere you’ll have easy access to them as you plan your next quilt. Side note here – I do collect paint chips from the hardware store in the colors I like the most. I don’t raid their collection, but do leave the store with about a half a dozen. They come in handy in planning the colors for a quilt.
Second Step: Look at what shapes you use again and again. This one is a bit harder and you have to really think about it. Let’s start with furniture. If we were furniture shopping for your living room right now, what kind of couch would immediately catch your attention? Would you be drawn to the type that are more square-ish or rectangular-ish with sharp, 90-degree angles? Or would your rather have something with soft corners and plump, round cushions? Like color, shape can either make us happy or turn us off. For instance, this shape:
Is not a popular one. It’s not going to pop up in a lot of furniture or quilt designs because it reminds us of a coffin. However, this shape:
Gets a lot of positive play. Dishes. Salt and pepper shakers. Glasses. Cups. Cars.
Art itself is the sum of shapes. A flower is broken down into ovals and circles. A sketch of a dog begins with circles, ovals, and rectangles. All art can be broken down into rough sketches of basic shapes. The challenge we face in quilting is taking a one-dimension element (fabric) and producing a block with three-dimensional characteristics. Applique is the easiest way to do this. However, when you’re working with a pieced block – one with absolutely no applique – a quilter must consider how the shapes relate to each other in size, volume, perspective, and balance.
Before you start worrying too much about that challenge, or pull out a calculator to use the Golden Ratio on every part of your block – relax. The great thing about Intuitive Design is that we do it naturally. Somehow, wired into our brain is that 1.618 figure. Visually, we tend to realize when a border is too narrow or that sashing is just a bit too wide. The term most quilters use is off-balance. Understanding and using that GR is important when designing your own quilts; however, in most other quilt-related issues, your instincts are right. Go with those.
The third step in Intuitive Design is texture. Frankly, in other art forms, this is more easily achieved. It’s a tad more difficult in quilting, because most of the time we use fabrics that are just that – flat fabric. There are times when we can alter this. I’ve always encouraged applique quilters to use whatever fabrics fits what they’re trying to convey – see-through fabrics for ice, wooly or furry fabric for animals, etc. And Art Quilts can use a myriad of mediums to contribute to the desired appearance. However, these are the exception. With most quilts, quilters are dealing with 100 percent cotton material that is absolutely smooth to the touch. This is where we rely on fabric manufacturers to supply us with material that gives the illusion of the texture we want. Remember my earlier blog on ugly fabric? How I encouraged you to look at fabric differently? Look for material that gives the illusion of what you need – leaves, pebbles, clouds – whatever your block needs, take the time to find the appropriate fabric that gives the appearance of the texture you’re trying to convey.
By using color, shape, and texture, a quilter can add both dimension and fun to a quilt. The best thing is most of us do in intuitively. Go with your intuition. Don’t doubt it. Sure, we’re going to make mistakes, but that’s how we learn. And how we make better quilts.
It’s here I really tried to insert the link for my blog on Sashing and the Golden Ratio, but for whatever reason, WordPress was being hard to get along with. If you’re interested, you can find it in the archives – it’s dated July 26, 2018.
Until next week, Level Up Your Quilting,
Love and Stitches,
Sherri and Sam.
*True story about me and the color purple. A few years ago, my husband was having our offices repainted. He asked me what color I wanted my office. Without hesitation, I said, “Purple.”
“That’s not a business-y color,” he replied.
“I like purple. It makes me happy.”
Without missing a beat, he told the painter to paint my office a light gray. The painter gave him a long look and left to purchase the paint. I left for the day too, determined to make a stop at Target to pick up purple office accessories.
The next day when I opened my office door, the walls were purple — a lovely shade of lavender.
Originally this blog was supposed to be about intuitive design. I know that sounds really fancy and maybe a bit intimidating, but I felt it was needed. The series of blogs I wrote back in 2018 dealing with the Golden Ratio are still getting lots of hits (YEA!!). I get PMs and emails with questions several times a month. So, my thought were that with this blog I would answer the most frequently asked questions to see if that would help fellow quilters out.
I had my outline.
I had my graphics.
I was ready to rock and roll.
Enter technical problems.
As a whole, technology and I get along pretty well. As soon as home computers became available, I had one (I think it was Radio Shack’s brand, back in the mid 1980’s). I’ve manipulated software. I was using Quickbooks for home bookkeeping back when it was in DOS. As a high school science teacher, I would upgrade my Texas Instruments science calculators every time a new one came out. Big Red is computerized. My Babylock Spirit is highly computerized, as is LeAnne the Long Arm. I have a new iPhone and Apple Watch. Each time I upgrade something, I have a little niggling fear in the back of my mind – what happens if some of this stops?
So besides just seriously aging myself – because let’s be real, who remembers Quickbooks when it was in DOS besides me and maybe a few accountants – here’s where my issue with technology comes into play this week. See this?
This is my present laptop screen. And no, I didn’t program it to look like a rainbow. It did that all by itself. A few days ago, I was working on EQ8 when it happened. I had left my desk to go get something to drink. When I returned, I wiggled my mouse to bring my laptop back to life. The screen went white, and then began to show these stripes. So, I did what most people my age do when they’re suffering technical dilemmas – I talked with one of my kids. In this case, it was Meg, because she can make computers not only talk, but sing in harmony — in vivid (and sometimes colorful) detail. “Could be the screen,” she told me. “It could be going bad.”
“What do I do?” I asked.
“Take it to your computer guy. He can replace your screen. It’s an easy fix.”
Which all makes good sense – except that means I have to surrender my laptop for a few days. And you never know how computer dependent you are until suddenly you’re without one. Yes, I have a great phone. And an iPad. And two android tablets (one is on LeAnne). But I write and edit my graphics on my laptop because the screen is bigger. I’m 58. My eyesight can only deal with smaller screens for so long. Thankfully my DH gave me an android with a keyboard for Christmas. The keyboard is tiny, but hey, it’s a keyboard and it’s not a permanent way of blogging. So, with those positive thoughts in mind, I packed up Larry the Laptop and drove him down to Archdale to my computer guy (You may notice at this point all my sewing machines have female names. The laptop is a male. I’m not sure what this says about me). Time will tell what the diagnosis is.
So, while I am struggling through my laptop-deprived existence, I thought I would do a virtual show and tell so you can see what I’ve gotten done.
I have finished this – as I reported earlier. This is the lap-sized Sunny Lanes. I also have finished what I thought was the queen-sized sister to this one in the same fabrics. However, it was an extra-large queen by the time it was complete and wouldn’t fit on my long arm frame. While I have the type of frame I can extend to 12 feet, my studio would only reasonably accommodate the 10-foot space. And this never worried me because I never anticipated I’d ever make anything larger than a queen-sized quilt. Anyway, the larger version of Sunny Lane is now winging her way to Missouri Star Quilt Company to be long-armed. As soon as she’s back, I’ll bind her and she’ll go on my bed.
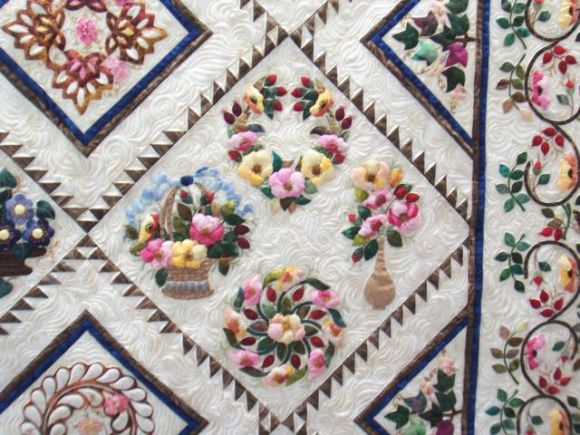
This is how far I’ve gotten on my second block of my Language of Flowers quilt. I’ve gotten lots of prep work done but haven’t seemed to be able to settle down and get the rest of the pieces glue-basted on to this one to continue the applique. Part of the reason is this:
That’s right. We took time out to take the family to Disney World after Christmas. We are a die-hard Disney family. The DH and I honeymooned there, as did Meg and her DH. My son and his DW have been there numerous times. The big draw for us (at least for Matt and me) was Galaxy’s Edge. We’re huge Star Wars fans. However, we didn’t let the grand darlings know we were going until we were literally pulling onto the on ramp in Orlando to go to Disney. Their reaction was priceless.
This will always be a highlight of my life. Since I’m a Mimi, I knew I could do one of two things. I could either plan and budget on spending a lot of money on souvenirs that would be broken and forgotten within six months, or I could give them an experience that they’d never forget. I chose the experience. We did the Bippity-Bopity Boutique.
Oh. My. God. I don’t know who had more fun, me or the girls, or their mom.
So, I was a bit distracted from my quilty projects while I was plotting Disney. However, I think I am back on track now.
See this pile of hexi blocks? I am happy to announce that I’ve completed all the blocks for my A Day in Grandmother’s Flower Garden. I’ve steadily worked on these blocks for a year. They’re pieced by hand using Cindy Blackberg’s hexie stamp. These were my constant project at my Tuesday night Sit and Sew. The girls have helped with the layout, so now I have to put on the connectors and get the whole thing together. When I began this quilt, I honest didn’t know if I would enjoy hand piecing. I had a plan B in place – if I struggled with it, I’d simply make a wall hanging or bed runner and be done. But I found that hand piecing was soothing, and I believe I’m really going to miss this project when it’s completed.
I’ve also completed my Halo Medallion top.
And I’ve set it aside. This quilt deserves stellar quilting and to be honest, I don’t have the long arm skill set for this quilt yet. It may be a couple of years before Halo is under my long arm needle.
I’ve also finished this quilt:
My BFF, Janet, introduced this quilt in 2019 as our guild’s mystery quilt. There were size options, so I settled on the table topper after seeing how many biased edges this little sucker had. However, there was another reason I settled on a smaller size. I’ve been introduced to embroidery machine programs by Amelie Scott that allow you to quilt on your embroidery machine. While I will never do a large quilt on my Baby Lock Spirit, I wanted to experiment with a small one. So those lovely feathered circles were done on Barbara the Baby Lock. The other quilting was done on Big Red. For me, it’s more trouble to load a small quilt onto LeAnne than a large one. By the time I go through all the hassle of loading it, I could throw it on Big Red and have it completed.
I’ve started this quilt:
When I saw the kit on Laundry Baskets web page, I fell in love with the muted colors. Normally I don’t purchase quilt kits – I like the freedom to purchase my own fabrics with my own color choices. However, this quilt kit was the exception, and since I had saved some birthday money, I purchased the kit that had the pieces already laser cut. And I don’t regret it at all. I am having so much fun making this quilt!
Then there’s this:
I know this looks like a pile of fishy confusion, but my DH asked for a fish quilt. I purchased a fabric panel with bass and trout and cut it apart. I have the basic layout, but the challenge will be putting the whole thing together so that it looks good. The great thing about the panels is they are really colorful, so I can pull everything from my stash. I hope to have it constructed and bound by Christmas…(notice I didn’t say which Christmas – because we all know how that goes).
And I’ve made this:
My good friend, Karen, made one of these quilt planners and showed it to me at one of the Tuesday night Sit and Sews. Since the page was a free download that could be customized, I asked her if she would email me her layout. She did and I sent it to Office Depot. They printed my copies and put it on a spiral. So now I have this great quilt planner and these:
Lots of pretty pens to keep track of my projects. I completely finished six quilts last year – pieced, bound, and labeled. I’d like to finish eight projects this year.
I’m afraid there’s not a whole lot of instruction with this blog. However, I hope I have inspired you to finish a few of your own. Meanwhile, my laptop is at Computer Guy’s shop. I get it back tomorrow with a new screen. Hopefully, it’s all fixed and I can resume my regularly scheduled blogs.
Let’s talk modern quilts. And let’s talk traditional blocks. While at first glance those two may seem like mixing oil and water (there’s a bit of agreement, but then graduation and distinct separation), quilters can marry them off (quite happily, may I add), with a few twists.
For years whenever anyone mentioned quilts and quilters, what came to mind was the traditional look: Baltimore Album-type quilts or quilts that had the historically traditionally looking pieced blocks, such as churn dash, nine-patch, and stars. And for years we quilters delivered on these preconceived images in our quilts. Once in a while there would be a pattern designer that would shake things up a bit, but overall, we tended to stick with what we knew best.
Enter the Modern Quilt Movement.
In my opinion, nothing else has shaken up the quilt world more than the modern quilt movement and the internet. I know that in the past there was some upheaval when we began quilting our tops on machines instead of by hand. And I realize that Art Quilts also caused a stir when they were introduced. But overall, I think the Modern Quilt Movement and the internet have done more to change the quilt arena than anything else in at least the last 50 years. This is a good thing. Modern quilting has introduced new colors, new designs, and a return to simplicity and negative space. The internet has opened to the doors to products, patterns, and classes that we may not ever been exposed to otherwise. But with this blog, I want to talk about Modern Quilting and how we all can embrace some, if not all, of its characteristics.
I’ll be the first to admit, I’m more of a traditional quilt gal. That’s the way I (along with everyone else) was taught in the early 1980’s. A lot of us weren’t even introduced to rotary cutters until the 1990’s. I still gravitate towards the traditional in both blocks and quilts. A lot of us old farts are like that. However, today I want to show you some ways we can take those traditional blocks and give them a modern twist.
Modern Quilt Fabric
The first (and the easiest way) we can take a block and change it up is with our fabric choices. The Modern Quilt movement has gifted us with some wonderful fabric. The colors are bright and clear. The prints are fanciful and current – while flowers still grace a lot of material, gone are the tiny, old fashioned renderings. You’ll find everything from bacon to butterflies on this fabric, all in a crisp modern palette. In addition, Pantone’s Color of the Year is predominate in a lot of it. Gray and white are the workingng neutrals. While designing the illustrations for this blog in EQ8, I surprised myself on just much using a modern color scheme could change the way the block looked. Take for instance this block, done in traditional fabrics.
Monkey Wrench in Traditional Colors
This is the monkey wrench block and one of my very favorites. Now let’s take this sweet, little block and use some of the new fabrics:
Monkey Wrench in Modern Fabrics
Very different. Set it on point, and it contrasts even more.
See how it can change the entire look of a quilt top?
Another way we can give our blocks a modern spin is to only use part of the block. I call this block deconstruction, and it’s really a lot of fun. For instance, take this block:
This is a great, traditional block used in the Double Wedding Ring Quilt.
An entire Double Wedding Ring Quilt looks like this:
However, Victoria Findlay Wolfe took this pattern and put a Modern Quilt twist on it, and designed this:
It’s still a Double Wedding Ring. But instead of using traditional fabrics, she went with a modern palette. And then she substituted solids and her neutral in the rings where normally one would be piecing them with all kinds of material. Instead, she pieced the rings’ inner centers and the outer “footballs.” This gives a traditional quilt a completely different look.
While deconstructing a block is not difficult to do, it does take some pre-planning. From what I can tell from just looking at Victoria Findlay Wolfe’s block, there still is a great deal of piecing going on, but neutrals are playing a larger role than normal in the piecing process. So, let’s try this on another block.
Let’s try this block:
This is one of the antique mosaic blocks found in EQ8. When you chose a block to deconstruct, you want to pick one that has several pieces of varying shapes – in other words a nine-patch or a four-patch will not make the same impression that a block like this would. At this point, it may be a good idea to either sketch this block out or access it with a software program such as EQ8. Either of these processes will allow you to play with color before cutting into your fabric. For this first attempt, I will take all the colors and reduce them into a two-color palate – a bright and a neutral. This immediately changes the look.
Now let’s pull out some more of the print fabric and substitute with a neutral.
This is even more of a dynamic change.
And just for fun, let’s add another color.
It’s still the same amount of piecing and the same traditional block, you’re just changing the number of fabrics used and the color placement.
Keeping with the traditional block theme, another way you may want to twist those traditional blocks is to either blow them up or shrink them down. Again, pictures are really telling the story with this blog, so let’s look at a Friendship Star Block:
I like Star Blocks. They tend to lend themselves nicely to either traditional piecing or paper piecing. They have a long history in quilting and there are numerous books and patterns written solely on Star Blocks. When I’m making a quilt that uses one of these, my blocks tend not to be any larger than 10 ½-inches unfinished. But look what happens if you enlarge one of these blocks to make up most (if not all) of your quilt top:
Completely different way of looking at a Star Block pattern. And while in my opinion enlarging these patterns too much (like a queen-sized quilt) does make them lose some of their beauty, for a wall hanging or cuddle quilt, this is a new way of looking at a traditional block.
Now let’s take this to the other extreme and shrink a traditional block. I love shrinking Star Blocks as much as I do enlarging them. When constructing a traditional quilt, I often use Star Blocks as cornerstones. This causes your sashing to do wonderful things like this:
Likewise, I also will use a small nine-patch block made from the top’s scraps as cornerstones. This helps pull all the colors in the quilt together. And to be completely honest, the Star Blocks and the nine-patch block are used by a lot of quilters in this manner.
However….let’s look at a block you may not of thought about shrinking – the log cabin block. Before you blow a gasket about how difficult this could be (lots of small pieces, etc)., remember this block lends itself beautifully to paper piecing. And with paper piecing, all small things are possible. The point I want to make is that this isn’t a block most traditional quilters would think about shrinking much smaller than a 6-inch x 6-inch block. But look what happens when you do:
These log cabin blocks are 4 1/2-inches square.
Talk about interesting cornerstones (for you traditionalists) or a way to spice up negative space (for you Modernists).
The point is, when you enlarge or shrink a traditional block, it gets a completely different look. And thanks mostly to the Modern Quilt movement, we’ve seen how great this works.
Another way you a give your traditional blocks a twist is to alter the layout. I make no bones that my favorite way to layout blocks is on-point. This is a personal preference, and it’s not that I don’t like regular horizontal and vertical rows, I just think an on-point layout is more interesting. But if you do some research on Google images or Pinterest, you’ll discover that Modern Quilters don’t necessarily do either type of layout – at least at first glance. Instead of blocks marching in rows or columns across the quilt top, there can be more breathing room between the blocks. And in many cases, there aren’t as many “blocks” in these quilts, either. There’s lots of “breathing” room between these blocks for the eye to rest. So, there is at least one of the “traditional” layouts used (rows or on-point), but the setting squares, triangles, borders, etc. are in the same neutral used in the blocks. This makes the blocks appear to float (an effect I absolutely love). One word of caution here. If you use the kind of layout, please note that your pieced blocks will need to shine. But since there are fewer of them in this layout, you’ll have the time to make sure all the points match and that they’re perfectly square.
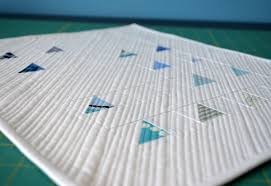
Since we’re talking about negative space at this point, let’s park it here and discuss another aspect we can borrow from Modern Quilting to put a twist on traditional looks –the actual quilting process. Most traditional quilts use one to three of these quilting components: feathers, stippling or meandering (including micro), echo quilting, and some kind of ruler work, along with what I call “connecting units” (swirls, swags, and lines – both straight and curly). Modern quilters use these, too, but they’ve changed them up a bit. You’ll see more “matchstick” quilting:
I love this look and it’s easy to do on either a domestic or long arm.
They’ll use simple quilting juxtaposed against geometric work.
There’s “pebbles” or “bubbles” and curved cross hatching.
And the technique I really love if I’m quilting on Big Red: Straight line.
Straight Line Quilting has more space between the quilting rows than Match Stick Quilting
How much easier can it get? Use some painter’s tape and just quilt.
The best thing about these “new” quilting motifs is that they play well with everything traditional quilters like to use. But they really do give a traditional quilt a unique, new look.
The last characteristic I want to discuss is throwing the center of the block off. Instead of placing it square and center as normal, make it off center. And don’t play it slightly off-center (because then it just looks like you were sloppy in your construction) – throw it really off center. This is different from what we discussed earlier – changing up the look of traditional blocks by replacing colored fabric elements with a neutral (see deconstructing a block as mentioned earlier in this blog). With this technique, you’re using all the elements in the way they were designed, but you’re playing with the block’s layout. Not all blocks lend themselves to this change – they must have a dominate distinct center like this one:
Now look what happens when we move that center off kilter.
Completely different look.
The easiest block to use for this technique is the Log Cabin. Since this block consists of strips of fabric that surround a center square, you can shift that center block to the right, left, up, or down and changes the block’s look
Now look how you can play with the layout!
This is an easy way to change up your quilt and unleashe the inner designer in you.
If you’re a traditional quilter like I am, let me challenge (and encourage) you to try some of these Modern Quilt techniques in your traditional blocks. Start small – one thing a time. Maybe begin with the fabric and then move to deconstructing the block. I think you’ll be surprised at how much this alters the look of your quilt and how much fun these techniques are to try.
We talked about half-square triangles a lot in last week’s blog. This week we’re taking a look at the other two units in a lot of blocks: Four-patches and nine patches. Unlike triangles, we don’t’ have to worry about bias with these. Strips are usually cut WOF and not sub-cut into any other unit that has an exposed bias. And even though there is a numerical difference between a four-patch and a nine-patch, their construction is more alike than different.
Single Irish Chain Four Patches Surrounding Four Patch Stars
Jacob’s Ladder Block — it’s all four patches
Four-patches are often the first block unit (or in some cases, entire block) that beginning quilters tackle. They’re easy to make and when set on point with setting triangles or in regular rows with sashing or plain blocks separating the two, they can be beautiful in their simplicity. If color choices are carefully made, the units can serve as unifying connecting blocks or look like a chain winding its way across the quilt top (think simple Irish Chain or Jacob’s Ladder). A four-patch looks just like it sounds:
Four Patch Unit
Four patches of fabric sewn together. At first glance, it seems as if a quilter would simply cut four squares of the chosen fabrics and sew them together.
In all honesty, that’s the most difficult and the most inaccurate way to make this block unit, unless you’re hand piecing it. To make these units by machine, both four- and nine-patch units use the strip piecing method. This technique lets you cut two strips of fabric, sew them together down the long side of the strip, slice the strip into the appropriate size, rotate one set of the blocks, and sew them together.
Easy-peasy, right?
Yes, it is. But since this year’s theme is “Level Up Your Quilting” I want to take the time to go over a few pointers that will make those four and nine-patches simply stellar, both in color choice and construction. Nothing makes me feel better than having my points match perfectly and my colors sing. So, let’s go over some basics and emphasize the steps that will help make your block unit come out as close to perfect as possible.
We’re looking at 2 ½-inch unfinished block units – that seems to be the size most widely used. Most four-patch instructions will tell you to cut two strips of fabric (usually one light and one dark). These strips are normally cut WOF and sewn together with an ¼-inch seam allowance. I’d like to throw in a few pointers that I’ve found particularly helpful at this point.
First, take the number of strips of each color needed and multiply that by the width of strip needed. For the sake if illustration, since we’re working with 2 ½-inch strips with this blog, we’re using that measurement. Let’s say we need to cut eight strips. Multiply 8 by 2 ½ and you get 20. Cut a 20-inch strip by WOF of each color needed. Then we will sub-cut that into eight 2 ½-inch WOF strips. Smaller chunks of fabric are easier to work with than the entire yardage. It’s easier to handle and makes your cutting more accurate.
Second, starch these chunks of fabric before sub-cutting. This is especially important if you’re a pre-washer. If you’re not a pre-washer, it’s still a good thing to add a little extra body to the material. Spray the starch on the wrong side of the fabric and press it in. This helps stabilize the fabric and makes it a little stiff, which makes the material easier to cut.
Third, cut the strips the appropriate width. Be careful to fold the fabric with the crosswise and lengthwise grains perpendicular to each other at 90-degree angles. After you cut a couple of strips, you may need to refold the fabric to keep those angles perfectly aligned – otherwise, your strips may have a hump in them.
Make sure the Crosswise Grain and the Lengthwise Grain are Perpendicular Before Cutting
And you may find those ruler grippers we talked about a few blogs ago come in super-handy to keep your ruler in place while you make those long crosswise cuts.
Fourth, after the strips are cut, then it’s time to sew them together. In many ways, this is typical piecing. You’ll sew the strips, right sides together, along the long side of the strips, using a ¼-inch seam allowance. However, you may find it more accurate to sew shorter lengths of strips together. I’ve found that when I sew two 45-inch strips together, for whatever reason, no matter how careful I am, my strips want to curve. I discovered that if I cut the 45-inch strips in the middle to make two shorter 22 ½-inch strips, my four patches and nine patches come out much more accurate.
When you’re through sewing the strips together, you’ll have a unit that looks like this:
Four Patch Strip Unit
Press the long strip unit towards the darker fabric and then even up one of the ends of the strip unit and begin to sub-cut into units. Since we’re using 2 ½-inches in this illustration, we would sub-cut the strip unit into 2 ½ units like this:
Four Patch Units
Now simply flip one of the units so the opposite colors are next to each other and sew into a four patch. Since you’ve pressed towards the darker fabric and then flipped one of the units, the seams should nest nicely together. To maintain accuracy, I do pin my units before sewing with a ¼-inch seam allowance.
At this point, we need to reduce bulk on the backside of the units. It would be really easy to break a needle when your quilting or have your machine stall out when it hits the point where all four seams come together. Twirl the seams as shown below:
Then press the four-patch unit again. I’ve found that a spray of this product:
Helps flatten those seam allowances up even more.
Trim the unit (if needed), and you’re done with the four patches.
Four patches are extremely versatile. If you’re making a block such as this
Using Regular Four Patch Units of HST Four Patch Units as the Center of a Star Block Can Pull All Your Colors Together AND Eliminate Scraps!
that has a large center square, you could always make that center into a four patch. Four patches also make great cornerstones for sashing. And if placed strategically in blocks, they can add real movement to a quilt, as they form a chain across the top.
Standard Nine Patch Unit
Nine patches are similar in the construction process, but instead of working with two strips of fabric, you’re working with three. Typically, one strip set will have two dark strips on the outside and a light in the middle and the other strip set will have a dark strip in the middle and two light strips on the outside.
Nine Patch Construction
There can be some variations on this pattern, so be sure to read the pattern’s directions carefully.
Construction of the three-strip set is similar to the four-patch set.
First, take the number of strips needed and multiply that by the width of the strip. So, if we need 12 strips of one color and the strips are 2 ½- inches, that’s 30 inches. Cut 30 inches from the yardage of that color. Again, smaller pieces of fabric are much easier to work with than lots of yardage.
Second, starch the chunk of fabric. Again, even if you’re not a pre-washer, that extra bit of body makes the material much easier to cut.
Third, cut the strips the appropriate width. Be careful to cut accurately and to keep the crosswise and lengthwise grains perpendicular to each other. Re-fold the fabric as necessary.
Fourth, after the strips are cut, it’s time to sew. Here’s where the construction of nine-patches really differs from four-patches. When I’m ready to sew my strips, the first thing I do is organize them. Some quilters look at this as an extra (and sometimes unnecessary) step, but I find it saves me time in the long run. My very favorite strip organizer is this:
Bamboo Clothes Drying Rack
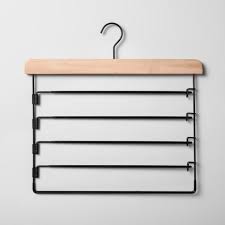
A clothes drying rack. You can pick up one of these (if you don’t already have one) at Target, Walmart, and many hardware stores. The rack gives you a lot of room to separate your darks and lights. I position this next to my sewing machine so I can grab what I need and keep piecing. I don’t necessarily do this with my four-patches – it depends on how many of those units I’m making and how many colors of fabric are involved. If you don’t have room for a clothes drying rack, try one of these:
Pants Hanger
Years ago, when I lived in a different house and my sewing room was a corner of my kitchen, I used a pants hanger. It worked wonderfully.
Once organized (or not), it’s time to sew. Again, we’re using a ¼-inch seam, and again, I cut my 45-inch strips in half in the middle to make them shorter in length. Just because we’re making nine-patches instead of four-patches doesn’t make the sewing process different. It’s easier and more accurate to sew shorter strips together. And here’s where the actual sewing process differs a bit – like with four-patches, you sew two strips together. After this, you add the third strip, but sew it in the opposite direction than you did the first seam. This will help keep things on-grain and keep your block from looking wonky.
At this point, let’s talk pressing. Like with the four-patch strips, it’s important to press towards the darker fabric. However, since we’re working with three strips of fabric instead of two, it’s up to each quilter to decide when pressing works best for them. Some folks prefer to press after each strip is sewn (I do – I find it’s easier for me) and some like to wait until all three strips are sewn together and then press. This is kind of an individual preference – neither way is inherently right or wrong.
Once the strip sets are sewn together, now it’s time to cut them into units that are – for the sake of this example – 2 ½-inches wide. Allow me to insert a personal observation at this point. I realize that cutting fabric is not the most exciting activity in the quilting process. As a matter of fact, I’ll be the first one to tell you, it’s the part I like the least. However, it’s really super important to be accurate in this part, since it’s the first step in making sure your blocks (and thus your quilt) comes out beautifully square. But since it’s not as interesting as sewing, it’s easy to want to rush through this process by stacking the strip units on top of each other and slicing your rotary cutter through all of them just to be done with the process.
Please. Don’t. Just don’t.
While you can stack a couple of layers of fabric on top of each other and accurately cut through those, you’re not dealing with seams. With both the two strip sets and the three strip sets, you’re stacking fabric units that have the bulk of seam allowances. These seams don’t allow the units to lie completely flat on top of each other. This means they can wiggle out of place and your cutting wont’ be accurate. Take a deep breath, put on some good music, and cut each strip set individually. You may hate me now, but when your blocks come out perfectly accurate…you’ll thank me later.
After all the cutting is complete, arrange your units as follows according to directions. One block will have more darks and the other block will have more lights. Now it’s time to begin sewing. Use an accurate ¼-inch seam allowance and chain piece them. Since you’ve pressed towards the dark fabric, the seams should nest nicely – however, I still use pins for complete accuracy.
Once complete, press the seams in one direction (these won’t twirl) and trim if necessary. Then you’re done.
Couple of added items at this point. Again, like four-patches, nine-patches can add some serious movement to your quilt. If used strategically, they can also form a chain across the quilt top or serve as attractive cornerstones. As a matter of fact, nine-patches are one of my favorite cornerstones. I make them from left-over fabric from my blocks and they serve to pull all the colors of my quilt together. They can take the place of large squares of fabric in blocks, too.
Quilt Block with Nine Patch as the Star’s Center
And they make wonderful quilt borders.
Nine Patch Set on Point for the Quilt Border — One of My Favorites!
Last item for consideration: always make a few extra four- and nine-patches. No matter how accurately you cut and sew, there always seem to be a few that come out wonky. Instead of fussing with them, toss them in the circular file and move on.
Yes, four- and nine-patches are easy units – often the first block units beginner quilters are taught. But just because they’re simple, doesn’t mean they’re not beautiful and doesn’t mean they can’t be dynamic. Accurate cutting, sewing, and careful color placement make them one of the most versatile block units we can use.
There is no doubt that half-square triangles (HST), four-patches, and nine-patches are the basis for hundreds of quilt blocks. Just a brief look through quilt patterns or Barabra Brackman’s Block Base proves just how many blocks use these elements. However, constructing any of these three can be tricky. Last week I urged everyone to learn one new skill this year and get better at three you already know. From beginner quilters to the most experienced ones, we all deal with HSTs, nine-patches and four-patches most of the time. You may want to push yourself to make these better. I don’t think you’ll regret it. I want to take each of these and talk about the different ways to construct them and how we can work from the first cut onwards to make sure these elements are as perfect as we can get them.
First let’s talk about HSTs. Half-square triangles can be a little difficult because we’re dealing with bias, and bias is inherently the stretchiest of all cuts. Cross grain is a bit stretchy, and length of grain is the most stable, but with HSTs, no matter how you cut them, one side of the triangle will be cut on the bias and if you’re not careful, you can stretch that side out of shape. If that happens, then the HST won’t work well when you sew them into your block. This can cause your block to be off as much as a ½-inch sometimes. The first action I take to begin to avoid this situation is to starch the fabric I’m using to cut my triangles from. And I mean starch, not Best Press or sizing. Depending on how firm of a weave my fabric has, I may even starch it twice. The starch helps to stabilize the warp and weft, and this can help avoid stretching the bias. I say help because it’s still possible to stretch the bias if the triangles are not handled carefully.
The next thing I do is slow down my sewing. When you’ve quilted for a while, it’s easy to fly through the basics. If we’re sewing squares or rectangles together, this is fine. But there’s that bias issue again with triangles. The faster you sew, the easier it is to stretch that bias. It’s also easier to make mistakes and not keep a consistent ¼-inch seam allowance. Which means you will have to rip out your stitches – an action which can wreck even more havoc on your bias. So slow down and be accurate.
Leader used to begin stitiching
You may also find that your sewing machine may not want to cooperate as you feed that tiny triangle tip over your feed dogs to start stitching. To get the sewing process started, they need something that will cover their entire area to get the feed dogs fully engaged. The tips of most triangles are not big enough to do this. I use a leader (I’ve also heard them called a mouse) to do this. A leader is simply a piece of fabric big enough to fully cover the feed dog area. I begin sewing on this and then chain stitch my triangles. The leader engages the feed dogs so that they’re already moving and will grip the triangle fabric and feed it cleanly through the machine. This will keep your triangle tips sharp and make the HSTs square.
I also use a stiletto to help guide my HSTs across the feed dogs. When I lift the presser foot to guide my HST onto the feed dog deck, the sharp stiletto point helps keep everything lined up. I also slightly overlap my triangle points. This seems to keep the sewing going smoothly without fabric getting lodged down in the feed dogs and causing a complete mess. And as I’m feeding my triangles through, I stop about one inch from the end of the triangle I’m presently sewing and line up my next one. Again, this action seems to keep the chain sewing moving right along.
Half-square triangles are wonderful quilt block elements for several reasons. The first reason is they can be used for literally hundreds of shapes and effects. The second reason is there are multiple ways of making them. We’re hitting most of these processes with this blog, but whichever way you decide you like to make HSTs there are two additional ideas bear in mind. First, as you cut your fabric out, control your ruler. Except for paper piecing, most of the HST processes begin by cutting WOF strips. When cutting the long strips, it’s easy for your ruler to wiggle out of place a bit or slide just slightly off to one side. These little things:
Ruler Grippers
Are worth the money. These are ruler grips. They are tiny circles or squares of a rubber or sandpaper material that help your long ruler stay in place as you run your rotary cutter against it. Some of these grips stay flush with back of the ruler and some stick out a little, adding a bit of height to the ruler. The choice is personal. Or you could simply purchase my favorite brand of rule, Creative Grids.
Creative Grids Ruler.
These rulers have the grips already build into their rulers. The great thing about HSTs is they really require no specialty rules. Sure, there are some out there, but you don’t have to purchase them unless you really want to. You simply need a long, WOF ruler and a square ruler – which you will use to true-up your HSTs (more on this later).
The second concept to remember is use caution when pressing HSTs. Remember HSTs have major bias issues, and care must be given not to stretch the long edges. So, ironing (sliding the iron back and forth over the HSTs, like you were ironing a shirt) should be avoided at all cost. Pressing (using the iron in an up and down motion) is what should be done, and that should be done sparingly. I finger press my HST first, and then just barely hit them with an iron. As mentioned above, starch is your friend here. Starch your fabric before you begin cutting (especially if you’re a pre-washer) and add another spray of starch with the final press. The starch stabilizes the bias edges and prevents stretching.
Now let’s talk construction. I realize some of you may have quilted for years and making HSTs is like second nature to you. But paying attention to the little details in cutting and sewing raises them to the next level – and that’s what we want to do. The first method we’re looking at is Straight of Grain Triangles.
Straight of Grain Triangles
This method makes us cut individual triangles and sew them together. If you try this method and really like it, you may decide you want to make all your HSTs this way, no matter how the pattern directs you to make them. It’s easy to figure out just how wide to cut the WOF strip. Take the finished size of the HST and add 7/8-inch to it. For instance, if the finished size of the HST is 3 inches, simply add 7/8 to that. 3 + 7/8 = 3 7/8 inches. If the finished size of the HST is 2 ½, simply add 2 ½ + 7/8 = 3 3/8-inches. Once the strips have been prepped, cut the strip into squares, and then cut the squares in half on the diagonal. It’s just that easy. However, remember you’ve exposed the bias, so handle the triangles carefully.
However….let me throw this in right here. The formula I just gave you – adding the 7/8-inch to the finished size of the HST to get your measurement – is exact. There is no wiggle room. If your ¼-inch seam is off any or the seam bobbles at the end or the beginning, you’ve just lost some of the precise measurement. I have found it better to make the HSTs a little larger and then cut them down to the correct size. Yes, you use a little more fabric, but like paper piecing, you’re trading fabric for accuracy. If the HSTs are a little big and they’re cut down to the correct size, you’ve just increased your odds that all of the HSTs will come out just perfectly. Here’s how you do this – it’s super easy – instead of adding 7/8-inch to the finished size, add a whole inch. So, if the finished size is 3-inches, add an inch to it and make the strips 4-inches wide and cut 4-inch squares. If the finished size is 2 ½, add an inch and make the WOF strips 3 ½ inches side and cut the squares 3 ½ inches. It not only is more accurate, the math is a lot easier, too.
From this point, proceed just as we did above. Match the pieces (right sides together) that need to be sewn into the HST, taking care to avoid stretching the long bias diagonal. Using a leader and a stiletto, and chain feed them over the feed dogs, overlapping the ends slightly. Cut the chain apart into individual units, finger press the seam to the dark fabric, and then lightly press with a hot, dry iron and a shot of stray starch. Some people like to press the HSTs while their still held together in the chain. I don’t do this because it’s too easy to pull the triangle by the thread-chain and stretch them out of shape.
Trimming HSTs to required sized
Once pressed, it’s now time to cut them down to the correct size. Here’s where a square ruler with a diagonal line comes in handy. You simply line up the diagonal on the ruler with the diagonal seam on the HST, and with the correct block size on the side and bottom of the ruler. Since the block has been made bigger than needed, you’ll split the difference in the extra that needs to be trimmed off all four sides. It is vital that the ruler be held firmly in place so that the diagonal line on the ruler stays exactly on top of the diagonal seam in the HST. Some quilters find it helpful to place a finger as close to the edge of the ruler in the corner as they can comfortably do. Fabric grippers on the bottom of the ruler are also very helpful. A little trick I learned a while back that helps me keep my diagonals lined up involves painter’s tape.
Painter’s Tape is great for marking quilting rulers!
On the side of the ruler that touches the fabric, place a piece of painter’s tape along the diagonal line. Then add several more pieces of tape on top of that to form a slight ridge. The ridge will not only help you line up the diagonals, it also will kind of fit into the groove the diagonal seam makes and helps keep the ruler in place while you’re trimming. A sharp rotary blade is also important. A dull blade can literally drag your HST out of position and make trimming inaccurate. Trim two sides then turn the HST unit around 180 degrees and trim the other two sides. When you rotate the HST, make sure to keep matching the diagonals so the trimming is as close to perfect as possible. Check each HST to make sure that the seam runs exactly to the cut corner. If the seam is even a thread or two off the corner, you won’t get sharp 90 degree corners and that will make the HSTs difficult to piece as you’re assembling your blocks.
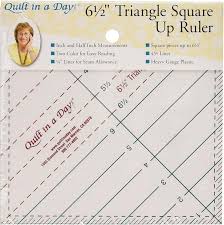
If this kind of trimming makes you slightly antsy, then you may want to invest in this ruler:
OMG, I LOVE this ruler!!!!
I don’t normally endorse one-use rulers. If I purchase a ruler, I like to use it for several techniques – not just one. But this ruler by Eleanor Burns is the exception. I was introduced to the ruler when I made this quilt:
My twin-sized Sunny Lanes. I also made a queen-sized.
This is Sunny Lanes by Pat Speth/Charlene Thode. I made two quilts by this pattern – a twin-size and a queen-size. I cut hundreds of HSTs for these – literally hundreds and had enough left over to make this:
My Charity Quilt
A chemo quilt for someone at High Point’s Hayworth Caner Center for my guild’s charity quilt program.
I took the workshop for Sunny Lanes with Augusta Cole and she recommended Eleanor’s ruler. With this ruler, you cut the HSTs slightly bigger than required by the pattern, but you trim them before you press them open, which means you only make two trim cuts instead of four. I found it’s highly accurate, easy, and quick – which means a great deal if you have a lot of HSTs to trim. It doesn’t stretch the bias and keeps the corners sharp. In other words – it’s worth every red cent.
The next technique we’re looking at is the Sew and Slice method. This is actually my favorite way to make medium-sized and large HSTs. It’s similar to the Straight of Grain method in many ways, but it’s different in that you sew the triangles while they’re still squares and then cut them apart and trim. I like because you don’t have to sew a bias edge, therefore, you’ve significantly reduced your odds of stretching the long side of the triangle. If it sounds confusing, it really isn’t.
Step 1 — draw the diagonal line
First cut your strips the required width. Then take one of the light-colored strips and put it right sides together with one of the other colored strips of fabric. It’s a good thing to give these matched strips a quick press while their right sides together – this seems to help them stay together better. Then cut the matched strips into squares.
Step 2 – Sew 1/4 inch away from either side of the drawn line
Take the square pairs of fabric and on the light-colored fabric, draw a diagonal line from one corner to the other. This is your cutting line – but don’t cut the squares apart now. Take the squares to your sewing machine and sew a seam exactly ¼-inch away from the drawn line. Do this on both the right and left side of the line, so you’ll have two sewn seams on either side of the drawn diagonal. In order for this technique to work correctly, you need to be sure your presser foot is a true ¼-quilter’s foot. Some quilter’s feet are true ¼-inch feet and others are a scant ¼-inch foot. If you chose to use this technique, it is a good idea to make a couple of test samples to be sure that your HST comes out accurately.
Step 3 — Cut the square on the drawn diagonal line
Once the seams are sewn, you can cut the square apart on the drawn diagonal line. You’ll have two HSTs. Finger-press the seam and then hit it with a hot iron and a shot of starch.
If you’re unsure about your ¼-inch foot, there is this tool:
Quick Quarter
This is called a Quick Quarter and it comes in two lengths. It’s an easy tool to use. You line the slotted part of the ruler up with the corners of the square. Using a sharp pencil (pencils seem to work best with this tool), draw a line in each of the slotted areas. Then run your pencil down either side of the Quick Quarter to make a solid line. You will stitch on the solid lines and cut on the dashed line. The same recommendations for sewing Straight of Grain triangles apply here: Use a leader and stiletto and overlap the corners slightly. Even though you’re not sewing triangles per say, you’re engaging the feed dogs with only the corners of the square and those won’t cover the entire feed dog deck.
Since the bias isn’t exposed until nearly the last minute, the chances of stretching it is lowered significantly with this technique. However, care still must be taken. These can be chain pieced, but cut the chain apart before pressing, and then finger press, followed by spray starch and a hot, dry iron. And if you’re wondering if the Quick Quarter is a uni-tasker, it’s not. I constantly grab mine for cutting small pieces of fabric that I need a straight edge for my rotary cutter. Some of the Quick Quarters also come with inch-measurements marked on them, so it can double as a small ruler.
If you try this technique and really like it, you’ll want to use it all the time (I do as much as possible). You’ll find that a lot of quilt pattern designers like this method and may include it in their directions. But what if they don’t and you want to use the Stitch and Slice technique? The formula is pretty simple. Take the finished size of the HST and add 7/8-inch (sound familiar?). Of course, this formula will give you the precise unfinished size of the HST. If you want to cut them down for complete accuracy, you’ll want to add a full inch to the finished size to allow for trimming. Square rulers and the Eleanor Burn’s Half-Square Triangle Tool work great with this method.
Marti Michell’s Perfect Patchwork Templates
The last two HST techniques we’re looking at are the Template Method and the Angle Ruler methods. The Template Method is just that – templates are used to cut the triangles out and then the triangles are sewn into HSTs. The great thing about triangle templates is that there are several different sets of acrylic templates in different sizes and different angles. My favorite template-maker of all time is Marti Michell. She not only has just about any template imaginable, her templates are also shaped so that you don’t have dog-ears to trim off. Her templates are high-quality, last for years, and her customer service is stellar. This method is similar to the other ways to make HSTs. Cut two WOF strips the needed width. Take the light strip of fabric and the dark strip of fabric, and iron them right sides together. Place the template on the strips and cut them out. There are two ways to do this. You can use a small rotary cutter (the smaller size allows for more control) and cut them out, or you can take a pencil and draw around the templates and cut them triangles out with a pair of scissors. I have found that a scant ¼-inch seam allowance works best with Marti Michell’s Perfect Patchwork Templates, but that is with my sewing machine. Always make a test HST no matter what method you use to be sure the finished unit is the correct size. Do this first, before cutting into the fabric you’re using for your quilt. This may seem tedious, but it could save you serious time in the long run, not to mention having to purchase extra fabric because the HST units came out the wrong size. The only downside to the Perfect Patchwork Templates is it’s difficult to make the units larger and then trim them down. But then again, the PPTs are perfectly precise, so a seam allowance adjustment may be the only action needed to make the HSTs work perfectly in your block.
Easy Angle Ruler
The Angle Ruler Method requires some type of specialty ruler to cut out your triangles. There should be no need to trim any of the units down when using one of these rulers. Simply cut two WOF strips – one of the light fabric and one of the dark – and place them right sides together and press. Usually the ruler will give instructions on how wide to cut the strips in order to make the correct size triangles, as well as how to line up the angle tool. Once the angle is lined up correctly, cut along side it with a rotary cutter – again, I find the smaller rotary cutter allows for more control with this method. Once the first cut is made, rotate the tool 180 degrees and make the second cut. Then rotate again and cut. Continue with this method until all of the triangles are cut. With both the Perfect Patchwork Templates and the angle tool, I’ve found that some kind of fabric gripper placed on the wrong side helps to keep them from sliding out of place. Like the templates, the angle tools generally leave a blunt tip on the corners, thus eliminating dog-ears. My favorite angle ruler is this:
Creative Grids Triangle Ruler
This is a ruler by Creative Grids that allow you to make two kinds of triangles – the 90 degree kind needed for HSTs and the wide, fat kind needed for units like Flying Geese. This tool is super-great because it allows you to make HSTs out of Jelly Roll strips and it already has the fabric grippers built in.
I will be completely honest here and tell you that if I’m making HSTs that are less than 3-inches, I don’t use any of these methods. Nope. I paper piece those suckers. I personally have found that the smaller the HSTs and their triangles, the more difficult they are to sew without stretching the bias (no matter how much I starch them). The bias is easier to control with paper piecing, and you can make more than two HSTs at a time. The paper piecing templates often come in sheets like this:
Paper Piecing HSTs
You cut out a piece of the light fabric and a piece of the dark fabric to fit the sheet, shorten the needle stitch on your sewing machine and follow the arrows in the direction they tell you to stitch. Cut them apart according to the directions and you have a nice pile of HSTs that aren’t stretched and are the perfect size with no trimming involved. There is a method you can use without the paper, but by the time you grid it out on your fabric, you can download the free paper piecing pattern from a number of websites and be done.
Diagram of bias strip HST construction
There are a couple of more obscure methods to make HSTs. With both of these you cut bias strips, sew those together, and then cut out the HSTs. To me, these techniques just increase the chances of stretching the bias since so much of it is exposed during the entire construction process – the bias is literally sewn twice and handled at least four times. I don’t care how much starch you use on the bias, I’m not crazy about the odds of the HSTs coming out perfectly. I’d rather stick to the methods above.
We will look at four-patches and nine-patches in the next blog. This is enough information this week – probably more than you needed!
I belong to several quilt groups, and one of these bees meets every Tuesday night, nearly without fail. This group is the continuation of the Tuesday night Sit and Sew which met at Dragonfly Quilt Shop when it was open. I love this group of women. They can be brutally honest when you need them to be and unfailingly supportive when you need that. This is also a great discussion group about everything from soup to nuts and of course, quilts. The topic was raised a few weeks ago about “What Makes a True Quilter.” One member of the group stated that she had heard you couldn’t call yourself a “True Quilter” unless you had made a Dear Jane quilt, Grandmother’s Flower Garden quilt, and a Cathedral Windows quilt.
Dear Jane
Cathedral Windows Quilt
Grandmother’s Flower Garden
This hit me kind of hard – I’ve made a Dear Jane (and am now gathering fabrics for my second one) and am in the middle of a Grandmother’s Flower Garden (by hand, may I add). A Cathedral Windows Quilt is nowhere on my horizon. But I consider myself a true quilter. So, after much thought, to borrow a phrase from MASH’s Colonel Sherman Potter:
Making one, two, or all three of these quilts has nothing to do with me or anyone else titling themselves a “True Quilter.” What does this even mean? Does it mean you quilt eight hours a day? Does it mean you only make challenging quilts? Does it mean you quilt most of your quilts by hand? Could someone….anyone… out there give a definitive answer on what it means to be a “True Quilter?”
I’ll wait….
Chances are there, if I waited long enough, I’d get as many different answers as there are quilters. I do understand the reasoning behind the statement that any quilter who makes these three particular quilts has reached a certain level of proficiency that should be admired. Those quilts – the Dear Jane, Grandmother’s Flower Garden, and Cathedral Window – require a fairly advanced set of sewing skills. Yes, there are patterns out there that have certainly “dumbed down” these quilts, but if sewn from the original designs, these quilts are on the difficult end of quilt construction. To reach this proficiency level, you either A) Are extremely talented or (more than likely) B) You’ve quilted a long time and have acquired a certain skill set. There is also significant handwork involved with these quilts. Dear Jane can be machine sewn, but there is applique and embroidery involved that should be done by hand. Grandmother’s Flower Garden is hexagon after hexagon and was originally designed to be hand-sewn. I’m hand-piecing mine. I’ve seen GFG’s done by machine, but they’re not nearly as lovely or accurate as the ones done by hand. Cathedral Windows is a toss-up. I’ve seen lovely ones done completely by hand and equally beautiful ones done on machine. And if you want to get really down and dirty, Cathedral Windows isn’t a “true quilt” anymore than it makes a quilter a “true quilter” – it has no middle layer. That’s right. Not one scrap of middle filler is involved and a quilt – by definition – has a top, middle, and back.
Besides the skill level and handwork involved, the other reason construction of a Dear Jane, Cathedral Window, and a Grandmother’s Flower Garden seems particularly important is the amount of patience each of them requires.
None of these quilts are weekend projects that could be started on a Friday night and be completed by Sunday bedtime. These are project that need months – if not years – of steady commitment. If a quilter can start and finish at least one of these quilts, it is a great achievement.
So, when we consider the skill level, handwork, and patience involved with these three quilts, it’s easy to see why some quilters believe those are the ticket to True Quilterhood. However….let’s back off from these and reconsider that thought. There are other quilt patterns that involve the same level of skill sets these quilts have. What about Sue Garman’s Halo Medallion? Or the Caswell Quilt? Or Patchwork of the Crosses? Would anyone out there call these quilts particularly easy? I don’t think so. These quilts involve time, advanced skills, and patience.
I don’t think anyone can absolutely define what a True Quilter is. I think it varies from quilter to quilter. I do think that there are certain characteristics that “True Quilters” (whatever that is) have.
We know it’s not just a hobby
Yes, it relieves stress and help us relax. But it’s more than that. Our sewing area is our happy place, filled with colorful chaos and creativity. If we choose to make quilts for different organizations that need them, it’s a hobby that helps us give back to our community. It’s a way for us to give a tangible gift to someone we love — a gift that is imbued with our prayers and thoughts. It’s a place where we feel okay by ourselves or with a community of like-minded crafters. It’s somewhere we know we can have a few minutes of fun at the end of a trying day. Sometimes knowing I can go home and quilt is the only thing that gets me through my day.
We always strive to do our best work
I have mixed feelings about the word “strive.” It sounds almost like a battle front – that the work is difficult and we’re exhausting ourselves just trying to get it done. But it’s the best word for this characteristic. Quilting certainly isn’t a battlefield at all. It’s something we enjoy. However, most quilters I know put their best effort into every quilt they make. Our quilts are never perfect, but we work hard to get them as close to it as we can. Many times this propensity carries over into other areas of our lives, and this cannot be a bad thing.
We want to learn new skills
The quilters I hang around with love learning new things. Whether it’s a different way to use a ruler or a new quilting method or a class that teaches different skills – we’re all in. And this is a good thing in so many, many ways. The American Medical Association has told us that as we age, it’s just as important to keep our brains active as it is our body. Learning new quilting skills not only keeps our brains churning, it also works both halves of our brain – the mathematical, logical side and the creative, word-driven side. And this can ward off dementia and Alzheimer’s.
We want to learn how to make our acquired skills even better
Most of the time quilters won’t settle for mediocrity. Whether it’s color choice or technique, we want to do it better. We’re always looking for ways to make a better four-patch or pinwheel. We want to make our hand quilting stitches smaller and our applique stitches invisible. True quilters, in my opinion, won’t settle for the status quo. We want to take what we know and push it one step closer to perfection.
In closing, let me add that part of this year’s theme of “Level Up” will take some of the basic concepts and push them just a little closer to perfect. And some blogs will introduce techniques that you may not have heard of before or have heard of, but never tried. I hope this series will encourage you to hone your skills and enthusiasm just a bit more. However, let me also caution all quilters, everywhere:
Don’t judge yourself or other quilters. This is so easy to do. I quilt with some outstanding quilters. It’s so easy for me to compare my work to theirs and condemn myself for coming up short. And it’s just as easy to look at another quilter’s work and think about what you would have done differently or how you could have done better. Don’t. Go. There. Just don’t. As I said in the first blog of this series, this is about your quilt journey – not anyone else’s. Celebrate the variety in quilts and quilters. Celebrate another quilter’s journey, but embrace your own. You may never make any of the three quilts we’ve talked about in this blog, but you know what? That’s okay. They may never be part of your quilting journey. And the fact that they’re not does not in any way take away anything from the quilts you’re making.
If you’re learning more, and working to make each quilt better, then you’re a true quilter. Those three quilts – Grandmother’s Flower Garden, Cathedral Windows, and Dear Jane are just quilt patterns. Yes, they are difficult, but so are a lot of other quilt patterns out there. If you’re striving (there’s that word again) to make your quilts better and eagerly learn new concepts and techniques, don’t worry about what another quilter says. You’re in the True Quilter Fellowship.
If you love to share with other quilters, you’re an awesome person and an awesome quilter. The one quality that strongly impressed me when I began to quilt was the willingness of other quilters to share with me anything they had – time, knowledge, fabric, tools, books (because I started quilting before the Internet Age). Quilters are some of the most selfless folks I know. They open their homes, their hearts, and their sewing space to others. They listen and share and pray for you. And I’ve seen this over the entire spectrum – from the very impressive quilt judges and designers to the newest member of a bee or guild. Quilters are simply the best people.
In 2020, let’s push ourselves to learn one new skill and to become better with at least three we already do. I’d like to ask you to share those with me along the way and if I have enough, at the end of the year, we can make a list. Above all else, I want you to embrace your quilting journey. Enjoy it. Spread the love. And just quilt.
Once upon a time, when my quilt top was finished, the next item on my list was the backing. I’d either piece it or pull a whole quilt back from my stash. Since this was BLM (Before Long Arm Machine) you know what I didn’t think about at this point?
The batting.
In many ways, the batting is always an afterthought with a lot of quilters. What’s on sale? What do I have? What does my long arm artist have in stock? Does the Joanne’s 40% off purchase coupon on my app cover batting this week?
Before I had a long arm, I was right there with you. I honestly didn’t give it much thought or effort. Most long arm artists seemed to like the 80/20 and had plenty of it in stock. Unless I was making an applique quilt that was show bound, I really didn’t care too much about what was in the middle of my quilt sandwich. But like I said, that was BLM. Once I started quilting 99% of my own stuff, suddenly batting became as important as pattern and color choice.
Let’s take today’s blog and look at batting a little more closely, starting with its history. In England and Australia, it’s commonly called wadding. In America, it became known as batting. Before commercial batts were available, it was up to quilters to make their own. Cotton was grown, picked, and laid out in front of the fireplace to warm. The warmth was important, as it made picking the seeds from the cotton bolls easier. In 1793, Eli Whitney invented a little machine called the cotton gin (short for engine), that separated the cotton seeds from the cotton fiber. Once seedless (by either method), the cotton fibers were combed with combing cards like this:
The combs separated the fibers. Once the quilter had enough combed cotton fibers for a quilt, they were spread out on the backing of a quilt, and the quilt sandwich was made as normal. These early batts were not one piece like we have today, but literally handfuls of cotton fibers spread as evenly as possible over the quilt back. For this reason, the quilting stitches had to be close together to keep the batt from migrating and clumping up.
Now that you’re thanking the good Lord for Eli Whitney, the cotton gin, and commercial batts, let’s discuss what to look for in a suitable batt for your quilt. The first decision that must be made is what size should be purchased. Fortunately, pre-packaged batts come in crib, twin, double, queen, king, and California king sizes. This is handy if you don’t quilt many of your own quilts by either domestic or long arm machine. If you do a great deal of your own quilting, I’ve found it much more economical to purchase batting by the yard, or better yet, batting by the roll. Storage space does become an issue, especially if you purchase more than one roll at a time.
My dream batting storage…..
But no matter what the form the purchased batting is in, you need to spread it out and let the folds relax for a day or two before making the quilt sandwich. If I have some stubborn folds that just won’t go away, I will steam those out with an iron. And always remember the batting should be three-to-six inches larger than the top (as should the backing). Sometimes there is a little shrinkage in the quilting process. A quilt that will be long armed will need the larger margin. A quilt quilted on a domestic machine can make do with the smaller margin.
The next item up for consideration is fiber content. Most battings are made of cotton or a cotton/polyester blend. However, today’s batts may also contain wool, silk, or bamboo fibers. Some batting is all organic and some is made from recycled fibers. There is no right or wrong decision here – what matters is personal choice, what the quilt will be used for, and how you want the quilt to look. The batt you chose for the quilt that goes on your bed may be entirely different from the batt you may chose for a crib quilt. With fiber content, loft also must be given some consideration. Loft is a fancy-schmancy way of saying thickness. If you chose a thicker batt (higher loft), the quilting stitches will be very visible. If a flatter batt is used, the piecing will show more predominantly, rather than the quilting. While we are talking about loft, let me also throw this in here: low loft works generally works best for quilting done on a domestic machine or an embroidery machine. A high-loft batting can be difficult to maneuver through those machines. Most long arms can handle just about any loft without major problems.
Always read the batting label carefully. It not only gives fiber content, it also includes important information about care and how far apart the quilting lines can be.
Now that we’ve covered size, loft, and fiber content, there still are a few batting terms I want to define for you before we move into brands and appearance. We see these terms on the batting labels and it’s important to know what they mean, because these characteristics affect the quilting plan and the quilt’s appearance.
Quilting Distance – Some batting will specify an optimal quilting distance between rows of stitches. Take a look at your quilting pattern and use this information to your advantage.
The batting has been pulled back to show the scrim.
Scrim – This is a light layer or grid of woven fibers added to some cotton battings. It acts as a stabilizer and helps to hold the batting together while quilting. This can be a good safeguard if you’re a beginner quilter or prefer a design with wider spacing between the quilting lines. If you use a cotton batting without scrim, you’ll need to plan to make your quilting lines close together, so the fibers won’t separate in the wash.
Bonded – Some battings contain a type of glue or bonding adhesive, which means the batting fibers may get looser once the quilt is washed and the glue or adhesive is rinsed away. This usually requires close quilting lines to make sure the quilt holds together over time. However, if a batting is bonded, it generally won’t beard.
Bearding on a quilt back
Bearding – This term refers to wispy fibers that eventually seep out of the quilt top. I can’t begin to explain how annoying this is – and disheartening. You spend months on a quilt and then more time (and perhaps more money) for the quilting, only to have batting wisps make you quilt look as if it needs a good shave. The way to avoid this is to use quality batting. Trust me, you’ll regret using the cheaply made stuff.
Fusible Batting – This is great for small projects! It can be ironed temporarily to secure it into the middle of a quilt, which saves time because that means no pinning or basting. However, personally, I’ve never been able to successfully use it in large quilt projects without it wrinkling on me
Needle-punched Batting – Needle-punch batting is mechanically felled together by punching the batting with a lot of needles. Because of this process, it’s a firm batt and it is denser than other batting. Needle-punch batting is a great choice for quilts that will endure a lot of harsh abuse (such as a play quilt or a chemo quilt). It’s also great for quilted apparel.
Moving on, now it’s time to address brands and desired appearance.
Quilters, as whole, are a pretty loyal bunch. Once we find a designer, tool maker, or any particular brand we really like, we tend to stick with that product and go into deep mourning if the manufacturer goes out of business. Batting is no different. There are several stellar batting manufacturers out there (Hobbs, Warm and Natural, Mountain Mist, and Pellon to name a few). I base my choice on customer service and consistent value for the dollar – just as I do any quilting-related purchase. And my very favorite batting brand is Hobbs.
I love Hobbs batting. I love wool batting, too.
They have just about any kind of batt you could want, in any size you want, with just about all the fiber content available. I’ve never had an issue with bearding and their customer service is wonderful. Warm and Natural and Quilter’s Dream come in close seconds. And I will use Mountain Mist polyester batting for hand quilting. But what works for me may not work best for you. Try different brands out to determine which one works for you. That’s what is really important.
Let’s look at each type of batting and what kind of look it gives your quilts.
Cotton Batting – This is made from 100% cotton fibers and is about 1/8-inch thick. When quilting on a regular sewing machine or an embroidery machine, this is probably the kind of batting you want, as it doesn’t create a lot of bulk you have to deal with when maneuvering the quilt through the machine throat. This batting gives great drapeability and is the kind you want to use when you want the attention to be on the piecing and not the quilting. It is not the best batting to use for hand quilting, though. Cotton batting comes in two colors, white and natural. Care must be given when using the natural color. It’s kind of an ecru shade and if you’re using light colors or white as the background or neutral, it can make those colors appear dull. Overall, white is generally the best choice for almost any quilt that you plan to use a cotton batting. One more word of caution, before putting the quilt top on the quilt sandwich, peruse the batting for any cotton seeds that somehow slipped through the manufacturing process. These can be oily and eventually leave a small stain on your quilt top or back.
Polyester Batting – Like polyester thread, polyester batting has come a long, long way over the years. Polyester batts used to have incredibly high loft and have thin patches here and there in the batt. No more. Today’s polyester batts hold its shape and thickness better than almost any other batting, but is very light. It has nice drapeability, and if the quilt you’re making is one that may spend significant time in the washing machine, (such as a crib quilt or child’s play quilt) this is probably the kind of batting you want. It stands up well to such treatment. The loft is a bit higher on polyester batting (it can run from 3/8-inch to 1-inch thick), which means your quilting stitches will show up more than with a thinner batt and it adds warmth without weight. Another plus is that polyester batting is mold and mildew resistant. Polyester batting is my go-to batt for hand quilting. It needles beautifully.
Wool Batting — I love wool batting. It has a higher loft, running about ½-inch thick. This is my go-to batting for applique quilts. The higher loft emphasizes the quilting stitches, which in turn defines the applique better. And despite the thickness, it’s incredibly light weight. It is also very warm. This batting is excellent for hand quilting or the long arm. It is a bit bulky for domestic machine quilting. It also ties beautifully. Because of the ½-inch thickness, it doesn’t drape as pretty as a polyester or cotton batt, but you’re trading that off for definition of quilting stitches – your quilting with be front and center with a wool batting.
Cotton/Poly Batting – Like the name denotes, this batting is a blend of cotton and polyester fibers. It’s commonly called 80/20 (80 percent are cotton fibers and 20 percent are polyester), and this is generally the staple of all long arm quilters. It’s a great all-around batting. This batt has all the characteristics of a cotton batting, with the loft of a polyester one. It quilts well and washes great, too. The drapability is good. While I will always prefer a wool batt for my applique quilt, this is my go-to batting for cuddle quilts, throws, and play quilts.
Bamboo Batting
Bamboo Batting – This batting is still fairly new to the quilt market. It’s comprised of 50 percent bamboo and 50 percent organic cotton. In order to make this batting, the bamboo is processed into fiber using pollution-free methods with little waste — so it’s a “green” quilting supply. The pros to this batting are it is very breathable and holds up well to machine quilting of any kind. It’s machine washable, with a 2 percent to 3 percent shrinkage. The cons to this batting are I have always found it a bit stiff. It doesn’t drape as well as the other batts. And there isn’t enough history behind this batting to determine how well it holds up to time, use, and the elements.
Silk Batting
Silk Batting – If I had to name a favorite kind of batt, this would be it. It’s great for hand or machine quilting – needles slips through this like a hot knife through butter. It’s appearance in either pieced or applique quilts is spectacular. It has a bit of a higher loft than cotton batting, but it is so light that the extra bulk isn’t a problem. Like bamboo batting, silk batts are a recent addition into the batting market, so it doesn’t have a great deal of history, either. To stabilize the silk fiber, it’s blended with polyester. The silk batting you purchase is really 90 percent silk and 10 percent polyester. It’s also important to buy a bonded silk batt to prevent any bearding. Silk batting maintains its loft, it’s light as a feather, and it’s warm in the winter and cool in the summer. It can be machine washed, but any quilt made with silk batting should be laid flat to dry. This quilt batt shows off your quilting stitches like no other batt and has the best drapability of them all. It is simply the best. The only drawbacks to this batting are the price and availability. It is more expensive than the other batting and is generally only available through web sites. I’ve never found it in a quilt store.
Black Batting
Black Batting – Besides white and ecru, black batting is available, generally in the 80/20 blend. If you use a lot of black in your quilt – say black is your background or neutral, you will probably want to use black batting. However, if your quilt is a pretty equal mix of black and a light, or there are large patches of a light (such as in setting triangles when the quilt is set on point), you will want to forgo the black and stick to a white. In this situation, the black would “gray-down” your light and probably not give the quilt the appearance you really want. However….if you’re using a lot of bright, saturated colors (especially with batiks), you may want to go with a black batt even if you’re not using a lot of black in the quilt. Black batting beneath these bright colors makes them look even brighter.
By now you should know your way around batting terms and types. The best advice I can give you is to try the different brands and see what works best for the type of quilting you do. If there is a brand I would personally always have in my stash, it’s the 80/20. Of all the batts, this is the most versatile. However, no matter what kind of batting is used, two situations will arise – scraps and shortage. Every quilter has run into the situations where he or she has large, left-over batting pieces they don’t know what to do with (and they’re too big to justify throwing away), or you’ve finished piecing the quilt only to discover you’re a few inches short on batting. Here are a few ways to deal with both of those situations.
Let’s talk scrappage first. Quilters will always have leftover batting scraps, no matter how carefully it’s purchased. I can never bring myself to throw away the large pieces of remaining batting scraps, no matter how hard I try. I’ve discussed how to tame your fabric scraps, now I want to tell you how I manage my batting scraps.
The most important thing to remember is don’t mix your batting scraps. With our fabric scraps, we know that all the material is 100% cotton and it’s all either prewashed or not. However, with the exception of cotton batting (it has its own very distinct look), it can be difficult to tell the 80/20 from the 100% polyester. Keep the different kinds of batting in different tubs and label the tubs. The reason behind this will become apparent in a few more paragraphs.
The large scraps – say 12 x 12-inches or larger – can always be used for projects such as mini-quilts, placemats, table toppers, or pillows. Wider and narrow pieces of batting are good for wall hangings and table runners. Smaller pieces can be used for coasters, Christmas ornaments, or mug rugs. It’s always great to have these scrap options on hand for such projects so you don’t have to cut into a whole batt to get the size you need. It’s a wise use of resources and money. Those are the most obvious scrap-use options. But what about the smaller pieces? There are some organizations that will take certain sized smaller batting scraps. These organizations use these scraps to make washable sanitary napkins for women. You can google these groups and research what size they need and send your smaller batting leftovers to them. There are also a few “unorthodox” uses for these scraps. I have found they work wonderful on my Swiffer Sweeper — they pick up tons more than the regular dust mop cloths. They also do a beautiful job polishing furniture.
Now let’s look at a fairly common scenario. You’ve pieced your top. You’ve got your backing pressed and ready to go. You rummage through your batting to find what you think is a large enough piece, only to discover is just a bit too short or too narrow. Before you head to the store to buy another batt, let’s look at your batting scraps. You may have enough to add to the large piece of batt you have so you won’t need to purchase any extra. However, you don’t want to add two different types of batting together. For instance, you wouldn’t want to add a cotton batt to an 80/20 or a 100% polyester batt. Not only would the lofts be different, it would also give different appearances in the quilting stitches. And if you wash the quilt, the cotton batt would shrink more than either of the other two, thus altering the quilt’s appearance even more. This is why it’s important not to mix your batting scraps.
Piecing batting is not difficult. Place two pieces of batting together, with an overlap of about ½-inch on your cutting mat.
Lapped Batting
Once the batting edges are lined up and overlapped, they will need to be cut. Place a ruler over the overlapped area and cut down the center. When you remove the little scraps, you’ll have two straight edges that will butt up together perfectly.
When piecing batting, you don’t want a seam, so you don’t piece right sides together. The batting pieces will butt up against each other and you will sew along the edges of the batt.
The sewing does not have to be super-secure. Basically, you’re simply basting it together until the actual quilting is done, which will hold it permanently into place. I use a wide zig-zag stitch and a thread color (both in the bobbin and on top) that matches my batting. Be sure not to let the batting pucker. Some sewing machines seem to struggle moving the batting over the feed dogs. If you’re machine seems to have this issue, try using a piece of tissue (the kind you use in gift bags) beneath the batting. This will easily tear away from the batt when you’re finished. If you have scraps of wash away stabilizer, those work great, too.
There is this quilting product:
Fusible Batting Tape
With this fusible tape, you cut your batting as described above, cut a piece of tape the length you need, and fuse it onto the butted edges. I have used this product and it works great. The only problem I have is that my iron doesn’t like to press directly on the batting. I use a press cloth over top and have no issues. I have also heard (but I have never tried) lightweight fusible webbing (such as Heat-n-Bond light or SewKnit) also does a wonderful job in this process. The directions state to cut a piece of the webbing ½-inch wide by the desired length and press according to directions and in the same matter as you would the fusible tape.
It’s always a great thing to save money, and by sorting and storing your battings scraps, we can do both. It also keeps a great deal of batting out of landfills. So, this is really a win-win for everyone. And just in case you’re wondering, I have found no difference in the quilting process with either a pieced batting or a whole one, on either Big Red, my mid-arm, or my long arm.
I certainly do. I bet if I were to check out your sewing space, you have them, too.
You know what I’m talking about….ugly fabrics.
I know, I know, beauty is in the eye of the beholder, but honestly, some fabric seems to be beyond help. You know…the kind of fabric you look at and wonder what in the world was the designer thinking when they came up with that?
In my quilting world, I have one way I get rid of most of my ugly fabric – I put it on the free table at guild meeting and walk away quickly. At this point, one of two things happen. Either someone decides (for whatever reason) they just have to have that fabric and takes it home with them, or I manage to sneak out of guild meeting before someone waves me down and returns it to me because literally no one at the meeting wants it. If the second option happens, either the fabric goes to Good Will or our charity quilt stash, or it’s thrown in the circular file. I can’t bring myself to throw chunks of any perfectly good fabric away because it bothers my conscience; however, I have no qualms about someone else throwing my fabric away. It can bother their conscience.
Nevertheless, ugly fabric is the topic I want to address this week – ugly fabric and what to do with it. I do realize that what is ugly to me may be perfectly appealing to another quilter. So, to give that fabric to a new home (see free table at guild reference above) is a completely acceptable alternative to allowing it to take up room in your stash. Because we all know how that works. It’s shifted around so much it finally ends up at the bottom of the heap, hopelessly wrinkled and still just as ugly.
However, if you can’t bring yourself to give it away (maybe dear Aunt Sue left it to you in her will or something), there are some things that can be done to minimize the unattractiveness and emphasize the use. After these suggestions, maybe you can breathe new life into that homely fabric.
Use it for quilting practice – If you have a long arm and it’s a nice, big piece of fabric, you can always use it to hone your long arming skills with. If it’s too small for that, use it to practice quilting on your domestic machine. Make some quilt sandwiches and stitch away. If you have enough to make a stack of small sandwiches, you can set those beside your sewing machine and have them ready for several practice sessions a week. This is a double bonus – you use that ugly fabric up and you get better at machine quilting.
Use it for leaders – Sometimes as you’re starting a seam out, your machine wants to “chew” your fabric. It gets lodged in your feed dogs and when you finally dig it out, there’s a hole in your good quilting fabric. Cut your unattractive fabric up in 2-inch squares, fold it double, and begin your stitching on this piece of material. This allows your feed dogs to go ahead and engage before your good quilting fabric goes over them, thus eliminating any “chewing” of the good stuff. You can reuse each leader several times before you need a new one.
Cut it up into small pieces – Sometimes a little of the ugly stuff works better than a lot of the ugly stuff. Most of the time, small pieces of the homely fabric will work in a quilt much more effectively than large chunks of it. I think it was Bonnie Hunter that said if the fabric is ugly, cut it up into small pieces. If it’s still ugly, you haven’t cut it small enough.
Calm it down with a neutral – And this neutral will usually be either a white, black, or gray solid or a tone-on-tone print that reads as solid. Ecru may work equally as well, but I’m not an ecru fan (so seriously, this could be a personal preference thing). The neutral will work surprising magic on making that ugly fabric appear not quilt so unattractive.
Find a quilt pattern that can take advantage of its ugliness – There are a few quilt patterns that work well with fabric we have no idea what to do with.
I Spy Quilt calmed down with a bit of neutral fabric.
The first one is an “I Spy” quilt. I Spy Quilts are quilts (generally made for children) created with pictorial or novelty quilting fabrics —fabrics printed with objects that might not be obvious from a distance but can be identified during a closer look at the quilt. If your fabric has printed objects on it that are easily identifiable, it may be perfect for this kind of quilt.
Kaleidoscope Block
If it is a large print that has regular repeats, it may be perfect for a Stack and Whack or Kaleidoscope quilt. These quilts amaze me for a couple of reasons. First, you can take the fabric, align it, cut it, and make your quilt. Then one of your quilting friends could take the same fabric, go through the same process, and neither quilt would have more than one or two of the same blocks. The other reason these quilts astound me is that they revel in ugly fabric. The uglier the fabric, the better the quilt looks. If you have a homely fabric with fairly large, regular repeats, try a Stack and Whack. You’ll be amazed.
Turning Twenty Quilt
Turning Twenty is another quilt pattern that can use almost any type of material, even ugly ones. The pattern is designed to fit a fat quarter. Each quilt block is made of only three pieces, so this is an easy quilt for even a beginner, particularly since there are no curves or points to sew. The completed quilt takes 20 quilt blocks made by mixing the fabrics. If you mix your unattractive fabric with some better-looking ones and throw in a neutral here and there, you’ve used up the material and made a nice quilt. This is a great pattern to use with stellar fat quarter packs…and those fat quarter packs where only a few of the materials are stellar.
Now let’s kick it up a notch. Let’s really look hard at that fabric you don’t find so appealing. I gave you some easy solutions about what to do with ugly material at the beginning of this blog. Let’s level this process up a bit. There are applique possibilities in those fabrics. You’ve just got to know what to look for and how to picture it. I can tell you my process – how everything works for me – and then it’s up to you to work it out in your own quilt studio.
For me, the process begins with my stash. We’re starting with what we have before we fabric shop. It’s always better to use up what you’ve already bought – it’s good stewardship and saves you money. With my stash (and I’m referring to fat quarters and everything three yards or less), those are arranged by color. Any fabric that is smaller than a fat quarter (and isn’t a precut) I consider a scrap and those are sorted by color and stored in bins. When I am designing my applique, I go to these sources first. Some parts of an applique pattern are easy to figure out – like leaves and stems. If’ I’m prepping these, I pull out the greens and make some decisions. (And let me throw in here, I only keep scraps that are approximately 8-inches square, so I don’t become overwhelmed with my scrappage).
But some other items require a little more imagination, and this is where pushing yourself to think outside the fabric box works in your favor. For the sake of illustration, let’s think about baskets and birds. In traditional and modern applique, both of these items get some serious play time. Now I want you to think about how often you see a variety of material with either a basket weave or feathers. I’ll wait a minute or two while you mull this one over….
(Cue music from Final Jeopardy….)
Times up. The answer is, “Not often.” It’s easier to find landscape fabric (material printed with bricks or stones or grass, etc.) than it is to find a piece of material that is printed with a basket weave or feathers. I truly “lucked out” with this small quilt:
I had a scrap of basket weave material I saved from back in the 1990’s. That’s nearly 30 years ago. Situations such as this – when you need something to give the impression of an object but don’t have the exact fabric to do this – is when you have to use a lot of imagination and a good pinch of creativity. This is where the ugly fabric can come into play. Sometimes that ugly fabric is exactly what you need to give the impression of baskets or feathers or rocks, or even flower petals. Let’s look at some examples.
For example, take this fabric:
Ugliest Blue Fabric Known to Man (and Woman)
This is kind of a bold print, and I’ve had it in my stash for a while. I’ve hung on to it for applique because you know what this would work well with? Birds. When I’m making an applique quilt that has critters on it or floral work, there are two ways these patterns are generally presented. The first is a stylized way (the kind of applique I’m using on my Language of the Flowers quilt) where the applique pieces are imaginative but not true to life. The second approach is a very realistic way in which the applique artist works to make the berries, birds, baskets, etc., look as accurate as possible.
My first Language of Flowers Block. The applique is highly stylized.Detail of applique form Little Brown Bird by Margaret Docherty. The applique on this quilt is extremely beautiful and realistic.
Let’s say I wanted the birds in my block to appear as blue birds or blue jays and I wanted them to look as lifelike as I could get them. This material would be perfect. We all know that blue birds or jays aren’t solid blue or even only blue. They are created with different colors.
Next, let’s go back to leaves. A long time ago I urged everyone to try to always think creatively and if you find yourself stuck in the creative process, go for a walk. Look around at all the greens and browns that nature has provided. Leaves aren’t solid green. Stems aren’t solid greens, either. Neither is grass. These fabrics:
Would work perfectly for them, if you’re approaching your applique from the realistic point of view.
You’ll notice that none of this material is particularly attractive. In fact, if you saw it in a fabric store or quilt shop, you may not even give it a second glance unless it was on the clearance table, because we’re all going to check out the clearance table…This is the point where we, as quilt artists, have to start thinking out of our box. Leaves are more than just green. Birds are more than just red or blue. I can tell you in all honesty this process takes time and practice. I began training myself to do this anytime I had to purchase material for applique or was rummaging through my scrappage/stash to begin the quilt. If my quilt was leaning toward the very realistic end of things, I pulled everything that could possibly be used and spread it out on my cutting table. If I was looking for fabric to make leaves out of, I’d cut a reverse template:
Bottom row illustrates reverse template
Then I would lay that template down on the material to see how it would play as a leaf. I would do the same for flower petals, stems, birds, bunnies, berries…whatever applique pattern played a dominant role in my block, I’d make a reverse template and try it out on all the fabric that could be used in that quilt. Over a period of time – several years, actually – I could look at a piece of material and begin to see the possibilities it had in it.
One purchase I would encourage every applique quilter to make is ombre fabrics. I’ve touched on these before. These are so versatile and can run the spectrum of one color or several colors that undulate throughout the material. They hold endless possibilities for flowers, leaves, flower centers … just about anything you need. Another purchase I have found helpful is fabric depicting the item you’re appliqueing – such a material printed with leaves on it for appliqueing leaves. Make a reverse template and use it to help fussy cut your leaves. The veins in the leaves are already there most of the time, so it certainly helps make your applique look realistic.
Let me offer this word of caution here. Don’t mix stylistic applique and realistic applique together in the same block or the same quilt. Mixing those two styles makes the quilt look off-balance. While you can certainly mix applique techniques, don’t mix the two styles.
I hope this blog has given you a new appreciation of your ugly fabric, and maybe has even moved it from the realms of hideous to the area of endless possibilities. The more your practice thinking outside the box with those unattractive fabrics, the easier it gets. And this makes you a smart consumer of quilt fabric.