There is no doubt that half-square triangles (HST), four-patches, and nine-patches are the basis for hundreds of quilt blocks. Just a brief look through quilt patterns or Barabra Brackman’s Block Base proves just how many blocks use these elements. However, constructing any of these three can be tricky. Last week I urged everyone to learn one new skill this year and get better at three you already know. From beginner quilters to the most experienced ones, we all deal with HSTs, nine-patches and four-patches most of the time. You may want to push yourself to make these better. I don’t think you’ll regret it. I want to take each of these and talk about the different ways to construct them and how we can work from the first cut onwards to make sure these elements are as perfect as we can get them.
First let’s talk about HSTs. Half-square triangles can be a little difficult because we’re dealing with bias, and bias is inherently the stretchiest of all cuts. Cross grain is a bit stretchy, and length of grain is the most stable, but with HSTs, no matter how you cut them, one side of the triangle will be cut on the bias and if you’re not careful, you can stretch that side out of shape. If that happens, then the HST won’t work well when you sew them into your block. This can cause your block to be off as much as a ½-inch sometimes. The first action I take to begin to avoid this situation is to starch the fabric I’m using to cut my triangles from. And I mean starch, not Best Press or sizing. Depending on how firm of a weave my fabric has, I may even starch it twice. The starch helps to stabilize the warp and weft, and this can help avoid stretching the bias. I say help because it’s still possible to stretch the bias if the triangles are not handled carefully.
The next thing I do is slow down my sewing. When you’ve quilted for a while, it’s easy to fly through the basics. If we’re sewing squares or rectangles together, this is fine. But there’s that bias issue again with triangles. The faster you sew, the easier it is to stretch that bias. It’s also easier to make mistakes and not keep a consistent ¼-inch seam allowance. Which means you will have to rip out your stitches – an action which can wreck even more havoc on your bias. So slow down and be accurate.

You may also find that your sewing machine may not want to cooperate as you feed that tiny triangle tip over your feed dogs to start stitching. To get the sewing process started, they need something that will cover their entire area to get the feed dogs fully engaged. The tips of most triangles are not big enough to do this. I use a leader (I’ve also heard them called a mouse) to do this. A leader is simply a piece of fabric big enough to fully cover the feed dog area. I begin sewing on this and then chain stitch my triangles. The leader engages the feed dogs so that they’re already moving and will grip the triangle fabric and feed it cleanly through the machine. This will keep your triangle tips sharp and make the HSTs square.

I also use a stiletto to help guide my HSTs across the feed dogs. When I lift the presser foot to guide my HST onto the feed dog deck, the sharp stiletto point helps keep everything lined up. I also slightly overlap my triangle points. This seems to keep the sewing going smoothly without fabric getting lodged down in the feed dogs and causing a complete mess. And as I’m feeding my triangles through, I stop about one inch from the end of the triangle I’m presently sewing and line up my next one. Again, this action seems to keep the chain sewing moving right along.
Half-square triangles are wonderful quilt block elements for several reasons. The first reason is they can be used for literally hundreds of shapes and effects. The second reason is there are multiple ways of making them. We’re hitting most of these processes with this blog, but whichever way you decide you like to make HSTs there are two additional ideas bear in mind. First, as you cut your fabric out, control your ruler. Except for paper piecing, most of the HST processes begin by cutting WOF strips. When cutting the long strips, it’s easy for your ruler to wiggle out of place a bit or slide just slightly off to one side. These little things:


Are worth the money. These are ruler grips. They are tiny circles or squares of a rubber or sandpaper material that help your long ruler stay in place as you run your rotary cutter against it. Some of these grips stay flush with back of the ruler and some stick out a little, adding a bit of height to the ruler. The choice is personal. Or you could simply purchase my favorite brand of rule, Creative Grids.

These rulers have the grips already build into their rulers. The great thing about HSTs is they really require no specialty rules. Sure, there are some out there, but you don’t have to purchase them unless you really want to. You simply need a long, WOF ruler and a square ruler – which you will use to true-up your HSTs (more on this later).
The second concept to remember is use caution when pressing HSTs. Remember HSTs have major bias issues, and care must be given not to stretch the long edges. So, ironing (sliding the iron back and forth over the HSTs, like you were ironing a shirt) should be avoided at all cost. Pressing (using the iron in an up and down motion) is what should be done, and that should be done sparingly. I finger press my HST first, and then just barely hit them with an iron. As mentioned above, starch is your friend here. Starch your fabric before you begin cutting (especially if you’re a pre-washer) and add another spray of starch with the final press. The starch stabilizes the bias edges and prevents stretching.
Now let’s talk construction. I realize some of you may have quilted for years and making HSTs is like second nature to you. But paying attention to the little details in cutting and sewing raises them to the next level – and that’s what we want to do. The first method we’re looking at is Straight of Grain Triangles.

This method makes us cut individual triangles and sew them together. If you try this method and really like it, you may decide you want to make all your HSTs this way, no matter how the pattern directs you to make them. It’s easy to figure out just how wide to cut the WOF strip. Take the finished size of the HST and add 7/8-inch to it. For instance, if the finished size of the HST is 3 inches, simply add 7/8 to that. 3 + 7/8 = 3 7/8 inches. If the finished size of the HST is 2 ½, simply add 2 ½ + 7/8 = 3 3/8-inches. Once the strips have been prepped, cut the strip into squares, and then cut the squares in half on the diagonal. It’s just that easy. However, remember you’ve exposed the bias, so handle the triangles carefully.
However….let me throw this in right here. The formula I just gave you – adding the 7/8-inch to the finished size of the HST to get your measurement – is exact. There is no wiggle room. If your ¼-inch seam is off any or the seam bobbles at the end or the beginning, you’ve just lost some of the precise measurement. I have found it better to make the HSTs a little larger and then cut them down to the correct size. Yes, you use a little more fabric, but like paper piecing, you’re trading fabric for accuracy. If the HSTs are a little big and they’re cut down to the correct size, you’ve just increased your odds that all of the HSTs will come out just perfectly. Here’s how you do this – it’s super easy – instead of adding 7/8-inch to the finished size, add a whole inch. So, if the finished size is 3-inches, add an inch to it and make the strips 4-inches wide and cut 4-inch squares. If the finished size is 2 ½, add an inch and make the WOF strips 3 ½ inches side and cut the squares 3 ½ inches. It not only is more accurate, the math is a lot easier, too.
From this point, proceed just as we did above. Match the pieces (right sides together) that need to be sewn into the HST, taking care to avoid stretching the long bias diagonal. Using a leader and a stiletto, and chain feed them over the feed dogs, overlapping the ends slightly. Cut the chain apart into individual units, finger press the seam to the dark fabric, and then lightly press with a hot, dry iron and a shot of stray starch. Some people like to press the HSTs while their still held together in the chain. I don’t do this because it’s too easy to pull the triangle by the thread-chain and stretch them out of shape.

Once pressed, it’s now time to cut them down to the correct size. Here’s where a square ruler with a diagonal line comes in handy. You simply line up the diagonal on the ruler with the diagonal seam on the HST, and with the correct block size on the side and bottom of the ruler. Since the block has been made bigger than needed, you’ll split the difference in the extra that needs to be trimmed off all four sides. It is vital that the ruler be held firmly in place so that the diagonal line on the ruler stays exactly on top of the diagonal seam in the HST. Some quilters find it helpful to place a finger as close to the edge of the ruler in the corner as they can comfortably do. Fabric grippers on the bottom of the ruler are also very helpful. A little trick I learned a while back that helps me keep my diagonals lined up involves painter’s tape.

On the side of the ruler that touches the fabric, place a piece of painter’s tape along the diagonal line. Then add several more pieces of tape on top of that to form a slight ridge. The ridge will not only help you line up the diagonals, it also will kind of fit into the groove the diagonal seam makes and helps keep the ruler in place while you’re trimming. A sharp rotary blade is also important. A dull blade can literally drag your HST out of position and make trimming inaccurate. Trim two sides then turn the HST unit around 180 degrees and trim the other two sides. When you rotate the HST, make sure to keep matching the diagonals so the trimming is as close to perfect as possible. Check each HST to make sure that the seam runs exactly to the cut corner. If the seam is even a thread or two off the corner, you won’t get sharp 90 degree corners and that will make the HSTs difficult to piece as you’re assembling your blocks.
If this kind of trimming makes you slightly antsy, then you may want to invest in this ruler:
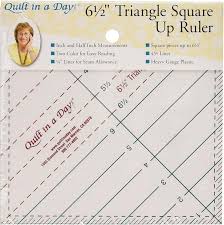
I don’t normally endorse one-use rulers. If I purchase a ruler, I like to use it for several techniques – not just one. But this ruler by Eleanor Burns is the exception. I was introduced to the ruler when I made this quilt:

This is Sunny Lanes by Pat Speth/Charlene Thode. I made two quilts by this pattern – a twin-size and a queen-size. I cut hundreds of HSTs for these – literally hundreds and had enough left over to make this:

A chemo quilt for someone at High Point’s Hayworth Caner Center for my guild’s charity quilt program.
I took the workshop for Sunny Lanes with Augusta Cole and she recommended Eleanor’s ruler. With this ruler, you cut the HSTs slightly bigger than required by the pattern, but you trim them before you press them open, which means you only make two trim cuts instead of four. I found it’s highly accurate, easy, and quick – which means a great deal if you have a lot of HSTs to trim. It doesn’t stretch the bias and keeps the corners sharp. In other words – it’s worth every red cent.
The next technique we’re looking at is the Sew and Slice method. This is actually my favorite way to make medium-sized and large HSTs. It’s similar to the Straight of Grain method in many ways, but it’s different in that you sew the triangles while they’re still squares and then cut them apart and trim. I like because you don’t have to sew a bias edge, therefore, you’ve significantly reduced your odds of stretching the long side of the triangle. If it sounds confusing, it really isn’t.

First cut your strips the required width. Then take one of the light-colored strips and put it right sides together with one of the other colored strips of fabric. It’s a good thing to give these matched strips a quick press while their right sides together – this seems to help them stay together better. Then cut the matched strips into squares.

Take the square pairs of fabric and on the light-colored fabric, draw a diagonal line from one corner to the other. This is your cutting line – but don’t cut the squares apart now. Take the squares to your sewing machine and sew a seam exactly ¼-inch away from the drawn line. Do this on both the right and left side of the line, so you’ll have two sewn seams on either side of the drawn diagonal. In order for this technique to work correctly, you need to be sure your presser foot is a true ¼-quilter’s foot. Some quilter’s feet are true ¼-inch feet and others are a scant ¼-inch foot. If you chose to use this technique, it is a good idea to make a couple of test samples to be sure that your HST comes out accurately.

Once the seams are sewn, you can cut the square apart on the drawn diagonal line. You’ll have two HSTs. Finger-press the seam and then hit it with a hot iron and a shot of starch.
If you’re unsure about your ¼-inch foot, there is this tool:

This is called a Quick Quarter and it comes in two lengths. It’s an easy tool to use. You line the slotted part of the ruler up with the corners of the square. Using a sharp pencil (pencils seem to work best with this tool), draw a line in each of the slotted areas. Then run your pencil down either side of the Quick Quarter to make a solid line. You will stitch on the solid lines and cut on the dashed line. The same recommendations for sewing Straight of Grain triangles apply here: Use a leader and stiletto and overlap the corners slightly. Even though you’re not sewing triangles per say, you’re engaging the feed dogs with only the corners of the square and those won’t cover the entire feed dog deck.
Since the bias isn’t exposed until nearly the last minute, the chances of stretching it is lowered significantly with this technique. However, care still must be taken. These can be chain pieced, but cut the chain apart before pressing, and then finger press, followed by spray starch and a hot, dry iron. And if you’re wondering if the Quick Quarter is a uni-tasker, it’s not. I constantly grab mine for cutting small pieces of fabric that I need a straight edge for my rotary cutter. Some of the Quick Quarters also come with inch-measurements marked on them, so it can double as a small ruler.
If you try this technique and really like it, you’ll want to use it all the time (I do as much as possible). You’ll find that a lot of quilt pattern designers like this method and may include it in their directions. But what if they don’t and you want to use the Stitch and Slice technique? The formula is pretty simple. Take the finished size of the HST and add 7/8-inch (sound familiar?). Of course, this formula will give you the precise unfinished size of the HST. If you want to cut them down for complete accuracy, you’ll want to add a full inch to the finished size to allow for trimming. Square rulers and the Eleanor Burn’s Half-Square Triangle Tool work great with this method.

The last two HST techniques we’re looking at are the Template Method and the Angle Ruler methods. The Template Method is just that – templates are used to cut the triangles out and then the triangles are sewn into HSTs. The great thing about triangle templates is that there are several different sets of acrylic templates in different sizes and different angles. My favorite template-maker of all time is Marti Michell. She not only has just about any template imaginable, her templates are also shaped so that you don’t have dog-ears to trim off. Her templates are high-quality, last for years, and her customer service is stellar. This method is similar to the other ways to make HSTs. Cut two WOF strips the needed width. Take the light strip of fabric and the dark strip of fabric, and iron them right sides together. Place the template on the strips and cut them out. There are two ways to do this. You can use a small rotary cutter (the smaller size allows for more control) and cut them out, or you can take a pencil and draw around the templates and cut them triangles out with a pair of scissors. I have found that a scant ¼-inch seam allowance works best with Marti Michell’s Perfect Patchwork Templates, but that is with my sewing machine. Always make a test HST no matter what method you use to be sure the finished unit is the correct size. Do this first, before cutting into the fabric you’re using for your quilt. This may seem tedious, but it could save you serious time in the long run, not to mention having to purchase extra fabric because the HST units came out the wrong size. The only downside to the Perfect Patchwork Templates is it’s difficult to make the units larger and then trim them down. But then again, the PPTs are perfectly precise, so a seam allowance adjustment may be the only action needed to make the HSTs work perfectly in your block.

The Angle Ruler Method requires some type of specialty ruler to cut out your triangles. There should be no need to trim any of the units down when using one of these rulers. Simply cut two WOF strips – one of the light fabric and one of the dark – and place them right sides together and press. Usually the ruler will give instructions on how wide to cut the strips in order to make the correct size triangles, as well as how to line up the angle tool. Once the angle is lined up correctly, cut along side it with a rotary cutter – again, I find the smaller rotary cutter allows for more control with this method. Once the first cut is made, rotate the tool 180 degrees and make the second cut. Then rotate again and cut. Continue with this method until all of the triangles are cut. With both the Perfect Patchwork Templates and the angle tool, I’ve found that some kind of fabric gripper placed on the wrong side helps to keep them from sliding out of place. Like the templates, the angle tools generally leave a blunt tip on the corners, thus eliminating dog-ears. My favorite angle ruler is this:

This is a ruler by Creative Grids that allow you to make two kinds of triangles – the 90 degree kind needed for HSTs and the wide, fat kind needed for units like Flying Geese. This tool is super-great because it allows you to make HSTs out of Jelly Roll strips and it already has the fabric grippers built in.
I will be completely honest here and tell you that if I’m making HSTs that are less than 3-inches, I don’t use any of these methods. Nope. I paper piece those suckers. I personally have found that the smaller the HSTs and their triangles, the more difficult they are to sew without stretching the bias (no matter how much I starch them). The bias is easier to control with paper piecing, and you can make more than two HSTs at a time. The paper piecing templates often come in sheets like this:

You cut out a piece of the light fabric and a piece of the dark fabric to fit the sheet, shorten the needle stitch on your sewing machine and follow the arrows in the direction they tell you to stitch. Cut them apart according to the directions and you have a nice pile of HSTs that aren’t stretched and are the perfect size with no trimming involved. There is a method you can use without the paper, but by the time you grid it out on your fabric, you can download the free paper piecing pattern from a number of websites and be done.

There are a couple of more obscure methods to make HSTs. With both of these you cut bias strips, sew those together, and then cut out the HSTs. To me, these techniques just increase the chances of stretching the bias since so much of it is exposed during the entire construction process – the bias is literally sewn twice and handled at least four times. I don’t care how much starch you use on the bias, I’m not crazy about the odds of the HSTs coming out perfectly. I’d rather stick to the methods above.
We will look at four-patches and nine-patches in the next blog. This is enough information this week – probably more than you needed!
Until next week, Level Up that Quilting!
Love and Stitches,
Sherri and Sam