Categories
Uncategorized

If You Need a New Sewing Machine….

About this time last year, I wrote a blog about quilting gadgets and notions you may want to either gift another quilter or buy for yourself.  Since 2020 has brought about unprecedented “stay-at-home-ness,” I realize two things:  Those of you who have picked at the fringes of quilting want to dive in, and those of you who have already taken the deep dive into the art may have worn your faithful sewing machine completely out.  If you fall in either group, a new machine may be on your Christmas list and this blog addresses what to look for in a machine.  I don’t recommend particular brands of machines, but want to highlight the features I feel are important.  As you’re shopping for machines, you’ll have to weigh your budget against the features which are absolutely necessary for you and those which would simply be nice to have.  I’ve listed the features in no particular order, but have ranked them in my opinion of importance.  Please note, this blog concerns the domestic, stationary sewing machine, not mid-arms or long-arms.  That’s another blog for another day.

The Harp

For those of you who don’t know what this is, here’s a picture:

It’s roughly the area between the needle and the right side of the machine.  If you plan on constructing bed-size quilts, you want the harp to at least be standard-sized – roughly 7- to 9- inches.  This area allows you to comfortably piece blocks, and then have plenty of room to join the blocks into rows and sew the rows together.  Anything smaller than the standard harp size may make things a bit too crowded.  For those of you who want to quilt your quilts on a domestic machine, a larger harp (those 11-inches and above) may be worth the investment, as the larger space allows for more bulk and makes it easier to turn the quilt.  The machines with larger harps not only have more room from left to right, but also in height, which is important if you’re quilting a queen-size or larger quilt.  In addition, the larger harp allows you to turn your machine sideways and use a portable quilt frame such as this one from John Flynn

As a sort of makeshift mid-arm.  This can also be done with machines which have standard harps, but the extra room sure makes it easier.  You will pay more for the extra harp space.

Rank:  If you only plan to piece tops, a standard harp will do great.  If quilting those large tops are in your future, it should have careful consideration.

Needle-Down Function

How this function works varies from machine to machine, but as a whole, it means when you stop sewing, the needle remains in the down position, holding your fabric in place.  This is important if you must raise your presser foot and pivot.  Without this feature, your material can shift, and throw your block unit or applique off – even with the judicious use of pins. 

Rank:  Must have.

LED Lighting

Believe it or not, not all sewing machines come with lights.  I know this from personal experience.  A few years ago, I purchased a sewing machine for my oldest grand darling (and yes, it was a “real” sewing machine, not a toy).  When I got it home, unpacked it, and plugged it in, I was astonished the machine had no light.  None.  Moral of this story: Buyer beware.  Read the outside of the box to see what comes with the machine.

Let me also add this is not normal.  Nearly all sewing machines have some kind of lighting.   Newer machines come with LED lighting.  Most of us are  familiar with this type of light.  It’s brighter and clearer than standard bulbs. And when you’re sewing late at night, the LED lights are extremely helpful – even more so as your eyes age.  However, if the machine you purchase doesn’t come with this feature, don’t despair.  There are other wonderful lighting options such as Ott lights or LED light strips which attach to the machine’s harp, etc. 

Rank:  This is a work-around.  If the machine you can afford doesn’t have LED lights, you can purchase an alternative LED light source that’s extremely affordable.  I do imagine in the future, LED lighting will become a machine standard.

Automatic Needle Threader – This is now pretty standard on nearly all machines except the very basic ones.  After you’ve worked your way through the threading process, during one of the last steps, you’re able to have the machine thread the sewing machine needle for you.  This takes the guess work and squinting out of pushing the thread through a tiny eye. 

Two of my machines have the automatic needle threader.  Three do not, and neither does my long arm.  I have found this feature is the one which gives me the most issues and the one that tends to breakdown first.  I also find myself avoiding this feature and threading all the machines manually. 

Rank:  For me, this isn’t a deal breaker, since I don’t typically use this feature.  However, if you have really bad eyesight, you may want this option.

Top-Loading Bobbin

I’ll admit, this one’s a deal breaker for me, and it’s probably due to traumatic experiences in high school home economics class.  When I was in middle school, this class was mandatory for eighth graders.  In high school, juniors and senior had to take it.  Typically, it consisted of one semester of cooking and one semester of sewing.  And I swear the school purchased the cheapest sewing machines they could find and they all had front-loading bobbins.  The bobbins and bobbin cases were constantly giving us problems.  In fact, it was so bad, once I was through with the classes, I pretty much had sworn off sewing.  Push the clock forward several years and I had a daughter and wanted to sew for her.  My husband decided to buy a machine for me, and my biggest caveat was it could not use a bobbin case.  With my limited history in all things textiles, those had been nothing but a HUGE pain. 

I will also admit that bobbins and bobbin cases have come a long way.  I use one with my long arm and it really gives me no issues at all.  But all my other machines?  Except for the Featherweight, they’re all top-loading.  To me this type of bobbin is easier to use, easier to trouble shoot, and easier to  load. 

Rank:  For me, this is a must have. In fact, it’s a deal breaker.  I avoid purchasing machines which use a bobbin case. However, this is entirely a personal preference. 

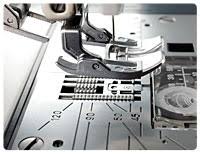
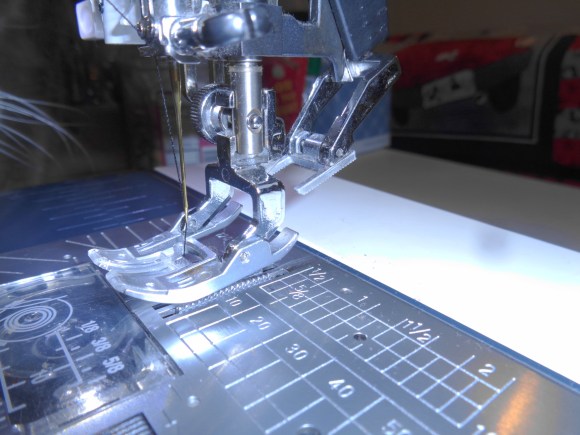
Open-Threading System

I feel I must explain this one.  This part of the machine:

Is called a take up lever.  Some of these have a slot which you thread, and others have a hole.  You really want a slot.  It speeds up the threading process.  I also like machines which allow you to access the inside next to the thread take up lever. My Janome swings open on the left side so I can access the bulb and the lever.  Why is this important?  If your machine is not working correctly, the first trouble shooting process you undertake is making sure the machine is threaded correctly.  Having the slotted take up lever and being able to look on the inside of the machine just makes your life easier.  You really don’t appreciate these features until one of two things happen: 

  1.  Your thread keeps breaking and you have to determine why, or
  2. You’re working with raw-edge applique and you have lots of thread changes (because most of the time your thread should match the fabric with this applique process). 

Rank:  This is a must have for me – an avid machine applique artist.

Easy Needle Access and the Ability to Move the Needle to the Right or Left

It’s an inevitable fact the machine needle will break – even if you change the needle religiously.  There are two factors which should be considered about the needle mount – ease of access and security. In other words, the machine should be structured so not only is it easy and quick to change the needle,  but when a new needle is inserted, the mount securely tightens around the needle so it doesn’t fall out.  Most machines have this feature, and when a new needle is inserted, the needle clamp screw is tightened with a screwdriver.  This is a pretty standard item, but when you purchase a machine, I would ask the dealer if changing the needle is an easy process.  If you purchase the machine in a shop (verses on-line), I would ask for a demonstration.

I also think it’s important the sewing machine has the ability to move the needle.  Remember the ¼-inch seam is not the Holy Grail of Quilting.  It’s more important the block come out the correct unfinished size.  Most often, the standard ¼-inch seam will take care of this.  However, there are times when you need to make your seam larger or smaller to achieve the right unfinished size.  The ability to move the needle makes this not only easier, but also keeps all the seams a consistent width.

Rank:  Must. Have.

Various Ways to Stop the Needle

My Janome 7700 (affectionately known as Big Red) has three different methods I can use to stop my needle.  There’s a stop-and-go button I press with my finger which is right above the needle, the standard pedal, and a knee-lift.  Most of the time, I use the button – because most of the time, I’m piecing.  However…if you are actually quilting the quilt, it’s important to have the ability to stop sewing on a dime, no matter whether you’re straight-line quilting with a walking foot or free-motion quilting.  When you use the button there is a second or two delay because you must remove your hand from the quilt and press the button.  A couple of seconds doesn’t sound like a great deal of time, but it can mean a half-an-inch or more of quilting you didn’t want.  In contrast, as soon as you stop pressing the petal or knee lift, the needle stops immediately (and hopefully with the needle down). 

Rank:  If you plan on quilting any quilts on your domestic machine, you at least want the machine to have either the knee-lift or pedal option.  If the machine will only be used for piecing, any or all of these ways to stop the needle will be fine —  I wouldn’t pay extra for another option.  One will be plenty. 

Stitches

Sewing machines – even the most basic ones – now come with an array of stitches.  I purchased two basic sewing machines for the grand darlings this year and they came with 32 stitch options.  And the more bucks you invest in a sewing machine, the more stitches it has.  I brought Big Red home in 2008, and she has over 250 stitches, plus can perform monogramming in four fonts. 

Now ask me if I’ve used all those stitches…go ahead…ask.

Nope.

I purchased her for her large harp – not the stitches.  Out of all those stitches, I probably use about 25 pretty regularly.  I’ve dabbled with about 100 of them.  I’ve never used the monogram function because I have an embroidery machine.

Truth be told, a quilter needs only one stitch if he or she is just piecing and quilting– a straight stitch.  If you plan on machine applique, you’ll need a zigzag stitch (for finished-edge applique) and a blanket stitch (for raw-edge applique).  Those three stitches are really all you need to get started. 

What should be taken into consideration is the machine’s ability to control stitch length/width and sewing speed.  No matter if you only see piecing in your quilting future, the ability to lengthen or shorten stitch length is important.  It’s a function quilters use regularly.  Likewise, the ability to control speed is equally important.  There will be instances where you will need to sew slowly – curves, tiny seams, complicated piecing – and if your machine has a speed control function this really aids in accuracy because the machine controls the speed, not you.  If you want to sew faster, you must manually change the stitch speed. 

Rank:  Minimally, the machine needs a straight stitch and a zigzag stitch. It must have speed control and the ability to change stitch width and length.

Feet

The more money you spend on a machine, the more feet comes with it.  The day I walked out of the quilt shop with Big Red, I had a total of 15 feet in the storage compartment, in addition to the zigzag foot which was already on her.   Some of these feet I have used so much I’ve had to replace them.  Others have never seen the light of day.  So, with all those feet, which ones do quilters really need?

  1. The Standard Foot — This is the foot which is typically used to sew a garment seam or a straight line of stitches.  Chances are this foot was on the machine when you purchased it.  I use this foot anytime my seam needs to be larger than ¼-inch – for instance on the rare occasion I make bags.
  2.  Quilter’s Foot – This is the ¼-inch foot.  Generally, it has a phalange on the right side to help you keep the edges of your block units lined up, so you sew a consistent ¼-inch seam.  Keep in mind this is a full ¼-inch.  If you’re purchasing a sewing machine which has been designed with quilters in mind, this foot usually comes with the machine.
  3. Zigzag Foot – With Big Red, the standard foot is also the zigzag foot.  But this may not be the case with yours.  If not, make sure it comes with a zigzag foot under the circumstances you need to finish seam edges or you decide you want to try finished edge applique.
  4. Open-toe Foot – This foot is used for the blanket stitch.  If you see raw-edge applique in your future, you will want this foot.  It’s also used with other decorative stitches.
  5. Walking Foot – You all know how much I love this foot.  I’ve written an entire blog on just this one foot (https://sherriquiltsalot.com/2020/09/30/almost-everything-you-need-to-know-about-a-walking-foot/).  If you want great straight-line quilting (without rulers), easy paper piecing, or the ability to sew on binding without a lot of hassle, you want this foot.   With some machines, it’s part of the purchase.  If you’re paying major bucks for a machine and a walking foot isn’t included, I would insist that the dealer throw it in for free – they’re not that expensive.  Otherwise, generic walking feet can be purchased from a machine dealer or on-line – you just have to know if your machine has a high shank or a low shank – which should be in your manual. 
  6. Darning Foot – This is typically used for mending clothing, but quilters know it’s also used for free-motion quilting.  Even if you can’t see yourself quilting your quilts right now, at least be sure a darning foot is available for your machine (if it doesn’t come with it).  You never know when you’ll catch a wild hair to drop those feed dogs and free motion quilt. 

Those are the six feet I would recommend for any quilter’s sewing machine.  There are some optional ones I would suggest. 

Scant ¼-inch Foot  — Like the Quilter’s Foot, this produces a quarter-inch seam, but a scant one.  Some quilt patterns call for a scant seam, which is a thread or two less than a full ¼-inch seam.  Also like a Quilter’s foot, the Scant Foot will keep your seams a consistent size. 

Ruler Foot  — This is a fairly new foot to the domestic machine arena.  Typically found on long arms and mid arms, these now have been designed for either high or low shank domestic machines.  Quilting with rulers and other acrylic templates once were the sole domain of long and mid arms.  With the ruler foot for the domestic sewing machine, all sorts of quilting possibilities have opened up.  This may not be the first additional foot purchase you make for your machine, but if the free-motion quilting bug bites you hard, this foot is worth the investment – which is way less than $100.

Zipper Foot – This foot may come standard with your machine.  If not, you may opt to add it to your wish list if making bags are in your plans.  It’s just too hard to sew in a zipper without a zipper foot. 

No matter what, make sure all the feet you bring home accommodates all the stitches on your machine.  If one of those stitches require a “special foot at an additional cost,” ask that it be thrown in as part of the purchase.  It’s not fair you have to pay extra in order to use one of the stitches on your newly purchased machine.

Rank:  Standard foot, quilter’s foot (1/4-inch foot), zigzag foot, and open-toe foot are the minimum number of feet you need.  I would push to have the walking foot and darning foot thrown into the purchase price.  The other feet are great to have, but can wait to be purchased at a later date.

Dual Feed

I touched on this feature in my blog about the walking foot.  Dual feed is the machine’s ability to feed the fabric through the top and bottom at the same time – both fabric layers are fed evenly over the feed dogs.  This keeps the top fabric from crumpling or shifting. We know it works in tandem with the walking foot, however, it also works independently of the foot.  This means more accuracy in piecing – the pieces of fabric will start and stop evenly – and it makes lining up the seams much easier.  Dual feed also is a great help when sewing on borders.  This feature doesn’t come with all machines and honestly, I can’t find a price variance that makes sense.  I’ll play on my home court with this one:  Janome.  Some of the less expensive Janome machines have it and some of the more expensive ones don’t. 

Rank:  Must have.  This is one feature I don’t think you’ll regret having. 

The Ability to Lower the Feed Dogs

All those quilters out there who are piecers and appliquers, and have no desire or simmering compulsion to quilt their own quilts on a domestic machine can breeze over this part.  But for those of you who think quilting is a certainty or even a probability, let’s talk feed dogs for a second. 

If you read my blog about cleaning your machine (https://sherriquiltsalot.com/2020/09/09/your-machine-needs-a-spa-day/) you know what feed dogs are.  They are the are metal teeth-like ridges which emerge from a hole in the throat plate of a sewing machine. Feed dogs move as you sew, gently gripping the bottom fabric to help it pass through the sewing machine and produce a high-quality stitch.  If you’re quilting with a walking foot, you leave the feed dogs up.  If you want to free motion quilt, then most of the time you’ll drop the feed dogs.  This means they stay  beneath the throat plate and don’t grip the fabric at all while your free motioning.

There are a couple of items you should consider if you think you’ll drop your feed dogs in the future.  The first is the machine’s ability to handle it.  Some of the machines produced with garment sewers in mind don’t handle dropping the feed dogs well.  Eventually it will throw the timing off if you’re dropping them a lot.  And by a lot, I mean your free motioning several large quilts a year.  Machines which are advertised as Quilters’ Machines (those made with quilters in mind – and everything quilters do to a machine), generally don’t even hiccup if you drop the feed dogs 365 days a year.  They’re built to withstand it. 

The second item to consider is the ease of dropping those feed dogs.  It should be a quick and easy process.  With Big Red, it’s a button on the side of the machine.  With my Juki 2010Q, the button is on the front.  My point is you shouldn’t have to dissemble anything to be able to drop the feed dogs.  It also shouldn’t be an additional up-charge.

Rank:  If quilting your own quilts on your domestic machine is a certainty, make sure it can handle dropping the feed dogs and make sure it’s an easy process.  With some of the more inexpensive machines, you want to make sure the machine actually will let you drop the feed dogs at all.  For me, this is a deal breaker.  My machine must let me drop those dogs.

Thread Cones and Thread Cutters

Quilters use thread – and lots of it.  Because of this, it’s usually more economical in the long run to buy it in bulk, and sometimes this means purchasing cones of thread instead of the standard spools.  So, it’s a great thing if your machine can handle cones of thread fed from a cone stand like this:

Most machines can, but it’s a good idea to check with the dealer to make sure.

Another wonderful feature on some machines is an automatic thread cutter.  I never had one until I bought my Janome 7700.  And I quickly became spoiled to it.  I find there’s always that moment of aggravation when I’m sewing on a machine which doesn’t have an auto cutter and I actually have to pick up my own scissors and cut my own thread. 

Rank:   Both are must-haves.  Once you use an auto cutter, you’ll never go back to not wanting one.

Free Arm Capabilities

This means the sewing machine can do this:

And while this feature is primarily for garment making (think sleeves, cuffs, and other small, tight clothing areas), the free arm comes in handy if you want to make bags (which a lot of quilters like to do) or if you find yourself sewing tiny seams.  I use this feature when I make miniature quilts. 

Most, but not all, machines come with this feature.

Rank:  Not absolutely necessary if all you can see yourself making is quilts.  However, if you think you may dabble in clothing construction at all, you probably will want a free arm.  And  FYI, all of my machines have free arms – even my Featherweight 222.  Yes, I use this feature that much.

Bobbin Alarm

If you sewed for any length of time, you’ve played Bobbin Chicken.  It goes a little like this:  You’re nearly through with a seam and the thread in your bobbin is running dangerously low.  You try to finish the seam before the bobbin completely empties out.  On a good day, you win big – even if there’s less than an inch of thread left on the bobbin.

On a bad day, you think you’ve got a 5-foot border sewed on only to find your bobbin thread ran out four inches after you started the seam.

This is why, sewers of all types of projects, a bobbin alarm is important.  It lets you know when your bobbin thread is running low.  Some machines come with them. Big Red does not have one.  My next machine will.

Rank:  Must. Have.  And it needs to sound like an airhorn.

Extension Table

This is literally a tabletop which attaches to your machine and expands your sewing area:

If you’re sewing a large quilt or something equally as bulky, an extension table helps steady that extra bulk.  Many of the newer machines come with these tables, especially those made with quilters in mind – the table supports the quilt as you join the rows together to make the top.  If you’re quilting your quilt on your domestic, the extension table is invaluable, as it holds the bulk of the quilt sandwich and supports it. 

Rank:  I feel it’s a must have.  If you think only small quilts are in your future, you can get by without one, but even with those, an extension table is a big help.  How firm am I in this belief?  Every one of my machines have an extension table – even if I had to pay extra to get it.  If your sewing machine brand doesn’t have an extension table, sometimes you can find a generic one that works or if there’s someone in your life who’s good with tools, one can be made to fit your machine.  Google “make your own sewing machine extension table” and lots of sites will pop up.

I know this is a long blog, but there’s one more item I want to discuss and that’s where should you buy your machine.  If at all possible, purchase your machine from a local dealer.   This idea has more to it than simply supporting your local quilt shop or machine dealer.  It has to do with support, service, and education.  When you buy local, there’s a better chance if you have a question about the machine, you can pick the phone, call the shop, and get an answer pretty quickly (or send them an email or text). The usual scenario when you go into a shop to purchase a machine, no matter how much or how little you’re spending, they’ll let you test drive that machine and compare it to others.  If you’re trading an old machine in, they generally will give you at least what the trade-in is selling for on Ebay.  If it’s a complicated machine, they’ll walk you through the basic steps of threading, changing the needle, and programming the stitches before you take the machine home.    When you need your machine cleaned or it has other problems, you return the machine to the shop because the shop will have a tech who can perform cleaning and repairs.  And many times, the shop will offer free classes with your machine so you can really learn how to use all its features.  This type of purchase is a win-win.  It’s good for you and the shop owner.

I am also realistic enough to know we’ve lost a lot of quilt and machine shops even before this pandemic hit.  I stopped counting the ones which have closed for good because of COVID.  Buying a machine from a local store may not even be an option for you.  So let me offer this advice – no matter if you had to drive miles to purchase your machine, or you bought it on-line or from a big box store — find a good sewing machine technician in your area.  Ask local guilds or other quilting groups for recommendations. If the same name keeps popping up again and again with great reviews, add that person’s name to the contact list in your cell phone. 

Another option facing the sewing machine consumer is dual machines – machines which can sew and embroider.  Most of these machines are stellar – they do both equally well.  What has to be considered is the machine can’t do both at the same time.  An embroidery machine with a single needle can take quite a while to stitch out a pattern (I did a llama for my daughter that took five hours and 30 thread changes).  Time-wise, if you can make it work for you not to have access to the regular part of the sewing machine, and you have the budget for a dual machine, you may want to invest in one.  If you don’t want to tie up your primary sewing machine for a long time with an embroidery project, you may eventually want to invest in a separate machine which only embroiders – which is what I did. 

Hopefully, all of this information isn’t too overwhelming.  Everyone purchasing a sewing machine must weigh their budget against what features they absolutely must have and those they simply want.  Don’t buy the first machine that crosses your path.  Do some research.  Read some reviews.  Talk to some other quilters (in person or online).  Find the one which is the best fit for you.


Now for a little administrative change. As a blogger, I’m constantly looking for platforms to increase my readership. My blog is announced on Twitter, Instagram, and Facebook at this time. And many of you are my beloved friends on Facebook. However, in the past several months leading up to and through the political upheaval in the United States, Facebook has become a very unhappy, ugly place.

This makes me very sad, because Facebook is one way I keep up with my friends from all over the world and stay connected to relatives who live far away. However, for my own mental well-being, I have decided to limit my Facebook activity on my page to this blog only. Sherriquiltsalot will continue to be linked to my Facebook page, but for at least the immediate future, that will be the ONLY item showing up on my page. If you want to continue to see pictures of my quilts, please follow me on Instagram @sherrifields61. Yes, I know Instagram is owned by Facebook, but at least it’s a happier, more politically neutral space.

I’m also on MeWe as Sherri Fields. And as always, you can leave comments on my blog and I do respond.

Until next week, Level Up That Quilting,

Love and Stitches,

Sherri and Sam

Categories
Uncategorized

What Kind of Quilter Are You?

We’ve dealt a lot with piecing and quilting techniques this year.  And in these blogs, I frequently mention quilt patterns and how you can change them up to suit your favorite quilting methods and sizes.  However, there is one factor I haven’t written about which needs to be taken into consideration when choosing a pattern:  your quilting skill level.

On the face of it, your quilting skill level seems kind of cut and dried.  If you just started quilting, then you’re a beginner.  If you’ve quilted for a few years, then you’re an intermediate.  And if you got lots of years under your belt, then you’re advanced, right?  Not exactly.  I sewed garments for years before I started quilting.  I had at least five solid years of sewing history and yet, I started my quilting career on the beginner’s level.  Why?  Well, piecing is different than garment sewing – the seam width is smaller, there rarely was pattern templates to use, rotary cutters and mats were employed instead of scissors – the list went on and on.  While I was more than comfortable using my sewing machine, I wasn’t as much at ease with quilting techniques. 

And also, to be truthful, there are some shades of gray between the different skill levels.  For instance, applique is usually considered to be an advanced technique, yet my first quilting instructor taught her beginners quilt class this skill in our first sampler quilt.  It was a simple applique design, but the concept was introduced.  What I’ve listed below are general quilt skill levels and what they entail.  If you’re a beginner quilter, but you’re pretty proficient with your sewing skills and pattern reading, then you’ll be able to advance much faster than someone who is new to both sewing and quilting.  However, l also want to add this – if you desire to learn and find out in the process you love quilting, you’ll also advance pretty quickly.  When someone is eager to learn and has passion for a particular field of study, concepts are grasped pretty quickly.  Conversely, if you took a beginner’s quilt class a hundred years ago and have only sporadically used the skill, I would still consider you a beginner.  This is due to the fact you haven’t consistently pushed your skill set to the next level. 

This kind of information is important to know when browsing through patterns and quilt magazines.  Most of the patterns indicate somewhere what skill level is involved.  Trying out an advanced pattern when you’re still hovering between the beginner and intermediate levels can suck the joy out of the process because it may be too hard.  And staying in the beginner’s territory when an intermediate quilt would be a fun challenge is just … well … boring.  So, let’s define the levels. 

Beginner Quilters – A beginner quilter has basic sewing skills and can sew together two pieces of fabric.  They can:

  1.  Sew two pieces of fabric together in a straight line (more or less…there are days when I can’t sew a straight line).
  2. Can follow a basic pattern and know what basic quilting terms are, such binding, blocks, borders, backing, wrong side of fabric, right side of fabric, wrong sides together, right sides together, pressing, and rotary cutter.
  3. Should be familiar with some of the quilting jargon, such as:  squaring up a block, bias, fat quarter, fabric grain, and raw edge.
  4. Can measure and cut fabric in straight lines with a mat, ruler, and rotary cutter.
  5. Not only knows how to use an iron, but also knows the difference between pressing and ironing.
  6. Is familiar with all the basic functions of his or her sewing machine:  how to thread it, how to wind a bobbin, vary stitch length and width, move the needle, sew both a straight stitch and a zig-zag stitch, and how to clean and oil the machine.

Intermediate Quilters – An intermediate quilter has completed some projects and is proficient in multiple quilting techniques, has taken classes (in person or on-line), and has been quilting for a few years.  These quilters have put in some serious time behind their machine and can move their skill level up quickly.  They can:

  1.  Sew amazingly straight lines.
  2. They either want to learn or already know how to sew other techniques such as curves, paper piecing, and applique.
  3. Are very familiar with quilting terms and jargon. 
  4. Have learned industry tips on how to measure and cut in the most efficient way, such as correctly cutting multiple layers of fabric at a time (for me the jury is still out on this one – I think cutting no more than two layers at a time yields much more accurate cutting).
  5. Have a repertoire of tips and tricks on such topics as how to sew straighter lines, press complicated seams, and how to efficiently piece their quilts so all the seams nest and line up.
  6. Have taken classes at their LQS, on-line, or at quilt shows to improve their skill set.
  7. Are becoming more comfortable combining color palettes and prints for their quilt and have ceased relying solely on kits or having someone else chose their fabrics.
  8. Are skillful at balancing different print scales within a quilt design.
  9. Knows a great deal about threads and needles.
  10. Have sewn different types of fabric – such as cotton, minky, denim, and corduroy.

Advanced Quilters – These folks have many years of sewing experience, have mastered many quilting techniques, may be designing their own patterns, and have taken classes from expert level instructors.  They can handle just about every quilt design thrown at them.  Advanced quilters:

  1.  Have sewn many, many years (probably more than they’ll admit to – or can remember!) and have tried every type of quilt block out there.
  2. Can now sew just about any quilting technique with precision, expertise, and near-perfection.
  3. Knows all the quilting jargon and terms.
  4. Discovers new tips and tricks and then shares them with the rest of their quilting community.
  5. Now takes only advanced classes with expert teachers (sometimes…sometimes I just take a class to be with other quilters or I really like the teacher).
  6. Has had years of experience combining color palettes and print scales.
  7. Knows how to work with all types of fabric.  Some even design patterns and quilt fabric for the industry.
  8. Completes at least some of his or her tops from start to finish – including the quilting.
  9. Is fluent in all characteristics of needles and threads. 

Now that we’ve defined the levels of quilters, how does this feed into choosing the correct pattern for your skill set?  Do the categories of patterns coincide with the categories of quilters?  The answer, for the most part, is yes.

Beginner patterns usually have very detailed, step-by-step instructions.  If the pattern is labeled “Beginner,” you can expect lots of pictures, graphics, and illustrations, too.  Most of the designs are very basic – uncomplicated blocks or strips.  They’re pretty much straight-line sewing, so you’re not going to find curves or other fancy techniques.  These patterns can vary on a theme, such as square-in-a-square, triangles, hexagons, chevrons, x’s, pinwheels, and basic log cabin blocks.  Even rag quilts, hearts, and spools are in this category. 

Intermediate patterns are written with the assumption the quilter has general quilting skills and has all the basics down pat.  So, intermediate patterns may not have lots of illustrations or detailed descriptions.  For instance, an intermediate pattern that requires you to make several sets of four-patches, may simply state “Make 48 four-patches from Color A and Color B.”  It won’t tell you how to make the four-patches, but assumes you know the best technique for you.  The designs get more complex and usually include smaller pieces, curves, and paper or foundation piecing for more complex shapes.  Many quilts will incorporate multiple techniques (such as piecing and applique). 

Many intermediate patterns require a more complex color palette.  Typically, they include designs like basket blocks, flying geese, Celtic squares or crosses, drunkard’s path, hundreds of star blocks, circles, more intricate paper piecing, English paper piecing, and applique.  Often, they will take a beginner’s quilt block and twist it to make it more complex and detailed.

The advanced patterns skip all the basics and jump right into the super-complex skill sets.  They may incorporate skills like applique to create a landscape, farm, or Santa’s sleigh.  The paper piecing in this level becomes really intricate and realistic.  Miniature quilts also fall into the advanced category – the scaled-down version of intermediate or beginning quilt techniques or any combination of them.  These patterns will also take basic units and break those down into intricate blocks within themselves.  For instance, you may be asked to make 24 large triangles for a quilt, and each triangle be comprised of 24 small triangles.  These quilts may include those with optical illusions, layered applique, collages, and mitered sashing or borders.  Advanced patterns are extremely detailed and time-consuming, but oh-so rewarding.  And beautiful.  The sky is the limit and it’s creativity at its best.

There are also patterns marked with the phrase “For All Skill Levels.”  These patterns are very similar to beginner quilt patterns – they’re the most basic quilt top to sew.  It assumes someone who has never quilted before can follow the pattern.  All Skill Level patterns usually use precut collections such as jelly rolls or charm packs.  Sometimes they’re as simple as putting two of these fabric pieces wrong sides together and sewing down one side.  I have mixed emotions about precut/preassembled fabric selections and will discuss them in an upcoming blog.  On one hand they’re great for beginners because all the fabric choices are made for you and they all harmonize.  Fabric manufacturers have usually gone to great lengths to make sure there are darks, lights, mediums, and a variety of print scales in the bundles.  A quilter can simply pick a preassembled pack which appeals to them and get busy – no fuss, no cutting, no hassle.  These quilts can be assembled in a few hours and for the beginning beginner, this is a good place to start. 

However…

The longer you quilt, the more comfortable you need to become choosing your own fabrics.  This takes time and practice (and some miserable failures), but it truly widens your quilting world and allows you to cultivate a stash which works for you.  Do I use precuts?  Yes.  All the time? No. But when I need a quick quilt, this is one place I start. 

Now let’s talk about prices.  From past blogs, my readers know I’m anti-copy-the-pattern-and-share-it.  When you do that, you’re literally stealing money from pattern designers.  Quilt patterns – good quilt patterns – aren’t extremely expensive, with the caveat to paper piecing patterns that include everything printed out for you in the quantities needed (such as Judy Niemeyer’s).  Many of the precut bundles include a variety of free quilt patterns.  Most fabric manufacturers have free patterns on their website.  It only costs your time to browse and find one you like.  E-patterns, as a whole, are less expensive than printed one.  These require you to download the pattern and print it out using your own ink and paper.  It’s instant quilt pattern gratification – no waiting on snail-mail, as they’re usually available for immediate download.  Printed quilt patterns can vary from $5 to over $100, depending on the type of pattern and the designer.  Most printed quilt patterns fall within the $5-$25 range. 

As I’m finding my way to the end of this blog, there’s some miscellaneous pattern information I want to leave with you.  First of all, let’s address those patterns which are out of print.  I am definitely one of the quilters who believe if the pattern is available for purchase, you should do so in order to support the designer.  And from their website, if they have one.  Purchasing from third-party dealers (such as Amazon), cuts into their profit.  If we don’t support our designers, they may disappear, and I don’t want that to happen.  But…if you’ve searched and the pattern is out of print, not available directly from the designer, or the designer is deceased, I have no problem in asking a friend for a copy of the pattern.  However, exhaust all avenues before you get copier-happy.  I also have no qualms about borrowing the book or pattern from a friend (no copying involved – actually borrow the physical pattern).

Second, if you don’t take away anything else from this blog, take this:  Google the pattern before purchase.  Let me explain this one.  There are certain pattern designers I really, truly love.  I’ve used their patterns repeatedly and have been more than happy with the process.  My favorite designers are those who give you the unfinished size of each block unit as it’s made. This means that you’re able to check each unit to make sure its measurement is correct before you begin sewing the block together.  If the units’ sizes are correct, then the block should come out not only the correct size, but also square.  There are some pattern designers that consistently update the patterns on their website to alert you if a mistake has been made in the directions, or they’ve discovered an alternate way of constructing the quilt.  And if you take the time to Google the pattern and the designer, this information will appear, along with perhaps images of quilts which have been made by the pattern, and maybe even blogs like this one where quilters are recording tips and tricks as they make the quilt. 

However, if you Google the pattern and nothing comes up but pictures of the quilt made by the designer and the designer’s website or Facebook page, take a deep breath and allow yourself to have second thoughts about making that quilt.  This comes from a place of personal experience.  If you take the time the Google the quilt pattern, and nothing comes up but information from the designer, there’s probably a good reason for this – either the directions are poorly written, or the quilt is exceedingly complicated.  Or both. And as a result, few to no quilters have made this quilt other than the designer.

Last, no matter what stage quilter you are – beginner, intermediate, or advanced – it’s always good to have a few easy patterns tucked back somewhere you want to make.  You never know when you’re going to need a quick quilt for a baby shower, birthday, or holiday.  A sudden need for charity quilts may come up.  And personally, while making a complicated quilt, I need a “palate cleanser” – something I can work on which requires little to no thought.  It just allows me to have a mental break for a while before returning to that hand applique block with 3,000 tiny pieces….

Use this blog to take a good look at your skills and decide what kind of quilter you are.  If you’re halfway serious about your quilting, look for opportunities to keep growing until you reach the next level.  If you’re a beginning quilter, but you’ve been quilting for a year or so, try an intermediate pattern.  If it’s too hard, you can tuck it away for a few months until you’re ready for it.  If you’re an intermediate, try an advanced pattern. 

And above all…GOOGLE THE PATTERN BEFORE YOU BUY IT!

Love and Stitches,

Sherri and Sam

Categories
Uncategorized

Hand-Sewing Needles — More than Meets the Eye

There are three kinds of quilters:

  1.  Those who embrace hand sewing.
  2. Those who hate hand sewing and avoid it at all costs.
  3. And those who vacillate between the two.

I quilt with a couple of die-hard hand piecers and quilters.  I also quilt with quite a few folks who are hard-core second category machine quilters.  Me – I’m in the third category.  I love to machine piece and machine quilt.  However, a part of me also loves the process of hand piecing and hand quilting.  Handwork – whether it’s piecing, quilting, or applique – slows me down, allows me to take a deep breath, and find peace.  It’s the steady pull of the needle and thread which allows me to sort through the trouble of my day and put things (mentally) in order.

That said, I want to talk about hand sewing needles today.  No matter how much of a die-hard machine quilter and piecer you are, there will come a point where you must put a stitch or two by hand into something.  The job is easier and more enjoyable when you have the right needle.  There’s a lot of information in this blog, so sit back, get a cup of something warm and caffeinated, and make some notes.

Let me also put this disclaimer in right here:  Much of this blog is my opinion about hand sewing needles I’ve used.  What works for me may not work for you.

The popular opinion among die-hard sewing machine enthusiasts who would rather do anything other than hand stitch is this — the needles don’t really matter if you’re only occasionally sewing a corner closed or stitching on a label.  I beg to differ.  The right kind of hand sewing needle is just as important as the right kind of machine needle.  It makes your job easier and it vastly improves the quality of your work.  I’ve employed some kind of hand sewing for 35 years – both in garment making and quilting.  Just as there are different sizes and types of needles for machine work, there are different sizes and types of hand sewing needles.  We’re discussing this, but first some general information about all hand sewing needles.  And for future reference with this blog, when the term “needle” is used, it refers to hand sewing needles only.

Needles are packaged in cardboard envelopes or these really cool clear containers.

With either type of packaging, somewhere on it there’s information about the needles  and it’s important to know what the information means.  First, there’s usually the type of needle – sharps, tweens, milliners, etc.  If you know exactly what type of needle you need, this is where you start.  However, after the name, there’s usually a number (or several numbers), and this is where it can get confusing if you don’t know how to interpret the numbers.  The larger the number, the smaller the needle.  The smaller the number, the larger the needle.    I know that sounds completely counter intuitive, but this is the way hand sewing needles work.  For example, a size 12 needle will be finer and shorter than an 8 – which will be thicker and longer.  It’s the eye and tip sizes of these needles which determine what kind of thread can be used and what fabric they work best with.  Eyes can be small and rounded or long and open.  Points can be sharp, blunt, or be classed as “ballpoint.”  All of these facts should be taken into consideration when pairing a needle with both thread and fabric.

Below are some general categories of needles, what they’re used for, and their characteristics.  If you Google hand sewing needles, you can get a lot more information.  I painted this blog with kind of broad strokes.

Sharps

These are general purpose, medium-length needles.  They’re used for garment making and other types of general sewing.  These come in all different sizes and it’s a good idea to have a pack which has several sizes in it for all your sewing needs.  If you focus in on a size you consistently use, you can also purchase a pack of sharps in just one size.  These are medium-length, have a sharp tip, and a small eye. 

Sizes:  2 – 12

Ballpoints

Ballpoints have a slightly rounded tip, which makes them ideal to use with knits – the needle will pass through the fibers rather than pierce them. 

Sizes:  5 – 10

Chenille

Chenilles are used for embroidery and thicker yarns.  They have a sharp point and an elongated eye.  Most commonly used for cross stitch and needle point, they can be used on any tightly woven fabric due to their sharp tip.  These are used a great deal with wool applique.

Sizes: 13 -26

Tapestry

These are also used for embroidery, but unlike the chenille needle, they have a blunt point.  Tapestry needles are used on loosely woven fabrics so the needle will pass cleanly through the fibers.  Some cross-stitch fans and needlepoint aficionados prefer this needle over a chenille.  They have an elongated eye. 

Sizes:  13 – 28

Crewels

These are also called embroidery needles and have a medium eye and a sharp tip. 

Sizes:  1 – 16

Upholstery

Unlike most other needles, these can be curved, which make them idea for upholstery and furniture work, as well as some doll making.  They’re perfect for sewing areas where you can only access the outside of the object.  They have a very sharp tip.

Sizes: 3-inches – 18-inches

Betweens, Tweens, or Quilting

I’ve heard this particular needle called all three names.  These are for sewing through thick quilts and have very sharp points.  They are short and fine and have a round eye.  The shorter length is designed to produce nice, small, even stitches on quilts.  They can also be used for fine and precise stitches in tailoring.  These are thin, short, and have a sharp tip.

Sizes: 1 – 12

Beading

Beading needles are used for the obvious – sewing on beads.  I’ve also used them to sew on sequins.  They generally are very fine and thin, as they have to go through the eye of small beads (like seed beads).  They are longer than most other types of needles and have a sharp tip. 

Sizes:  10 – 15

Bodkins

These “needles” are large and blunt.  And I put needles in quotations marks because these can be made of plastic.  I’ve never really thought of them as needles, although I suppose  those made of metal could be.  They are large, flat needles used to thread elastic through casings.  When my daughter was young and I made all of her clothes, I would use a safety pin to do this.  Then I found Bodkins and they worked one hundred percent better than a safety pin.  I also used them to run ribbons through the smocked dresses I made her.  These have a very rounded point, so the tip does not pierce the fabric, which makes it super-efficient threading anything.  However, if you’re making baby or doll clothes with tiny casings, a small safety pin will work better.  Most Bodkins are too long to work efficiently in small areas.  They are on the long-ish end of the needle family. 

No sizes

Darners

Darning needles are used for mending.  They have an elongated eye for thicker thread and a semi-blunt point.  If you knit, you probably use one of these needles for sewing seams together. 

Sizes: 1 – 9, 5/0 – 9, and 14 – 18

There are also what I call “specialty” needles which don’t fit into these categories:

Leather – Sizes 3/0 – 10 used for leather and faux leather.

Milliners  — Sizes 5/0 – 10 used for hat making and crafts.

Milliners

Sailmakers – Various sizes and used for canvas.

Self-Threading – Sizes 4 – 8.  These needles typically thread from the top of the eye instead of from the side.  Instead of inserting the thread through the eye, you simply push it through the top of the needle.  I like to use these needles when I’m tying a quilt or using really thick thread or yarn. 

Self-Threading Needles

It’s worth mentioning  some hand applique enthusiasts like using Milliners for needle turn.  They just always seemed too big for my hand – I have trouble controlling them.  However, I have small hands and fingers, so that may be the issue. 

Now let’s get down to the nitty-gritty.  Let’s talk about needle brands.  I’ve listed my favorite brands below in the order I prefer them:

  1.  Tulip
  2. Roxanne
  3. Primitive Gatherings
  4. John James (those only made in England)
  5. Clover Black Gold
Tulip Needles

We’re going to begin with Tulip and why I like them so much.  It all has to do with the way they’re manufactured.  Most needles are made in small, circular motions, with the steel either rotating clockwise or counterclockwise. 

Tulip needles are made like this:

They roll off with the rotation spun lengthwise, the length of the needle.  While this seems like a minor manufacturing change, it actually allows the needle’s length-wise grain to work with the motion of hand sewing.  The clockwise or counterclockwise manufacturing works against the motion of hand sewing.  So, Tulip needles makes the hand sewing process less of a strain on your wrist and fingers.  If you’re only putting in a few stitches here and there, this isn’t a huge issue.  However, if you’re pushing a needle through fabric for hours at a time, this one manufacturing change takes so much pressure off of your hands.  And if you’re like me and have a bit of carpal tunnel, it’s a huge benefit. 

Roxanne needles are a little longer and a little finer than standard needles.  The eye is also a bit bigger.  So, if you struggle to thread your needles, this brand may be just what you’re looking for.  They are also evenly tapered and has great plating – making them stronger than a lot of needles.

Many of you may be acquainted with Primitive Gatherings for their wool, fabric, and patterns.  And they’ve always carried needles.  But in the last several years they have come up with their own line of needles.  I have not used their chenille or embellishing needles, but I have used their binding needles and I love them – and not just for binding.  They are long, thin, strong, and have a large eye.  I love them for binding, but they are a great all-around, general sewing needle. 

Even if you haven’t quilted but a short while, you’ve probably heard of the John James brand of needles.  This is one of the standard needle brands requested by sewing teachers everywhere.  It’s one of the oldest needle manufacturers, formed in the United Kingdom in 1840.  Any needle size, any specific needle you needed, John James has it.  And up until most of the needles started being made in China, these were an excellent needle choice.

Clover is a familiar brand name among most sewing and crafting enthusiasts.  This company produces many, many great sewing notions, including a range of needles.  However, a few years ago they came out with the Clover Black Gold Needles.  I came across them entirely by accident.  I arrived for a hand applique class at my LQS and realized I had left my needles at home on my sewing table.  When I asked the store owner if she had any John James (since this is the brand most quilt stores have in stock), she told me “No – try these.  They’re way better.”  And she sold me pack of Clover Black Gold Applique Sharps.

It was love at first stitch. 

These needles are ultra-fine, extremely sharp, and produce 30 percent less friction than other needles (with the exception of perhaps the Tulip brand).  They’re coated with a black plating to resist rust, and it’s a good idea to wipe the needle with a fabric scrap before using just to make sure there is no black residue.  The only drawback to this needle is the eye is extremely small – but then again, it has to be because the needle is very fine.  There are ways to deal with a small eye, and we’ll discuss them later.  However, it’s the fineness that makes this needle a stellar one to use in applique.  It’s so thin, it easily slips between fabric and freezer paper.  It’s also one of the best needles (in my opinion) to use with silk thread. 

However, as much as I love the Clover Black Gold Applique Sharps, I’m not crazy about their hand quilting needles.  The needles are very thin and seem to break easily when passing through the bulk of a quilt sandwich. 

Now that you know what my favorite needle brands are, let me ask a question – do you know what they all have in common?  I’ll wait while you ponder this question (cue Jeopardy music).

If you guessed they’re manufactured in either Japan or England, you’re correct.  The exception to this maybe Primitive Gatherings needles – I couldn’t find where they were made.  So, let’s talk about why this is important.  The simple fact is these countries have produced needles for a long, long time and they know what they’re doing.  They don’t cut corners, rush production, or use poor quality steel.  My beef with John James is that they have shipped most of their manufacturing to China.  If you’re a John James fan, make sure the pack states “Made in England.” Yes, labor and goods are cheaper in China, but it shows in the product.  Take a look at this:

If you look closely at the eyes of some of these needles, you can see they’re incorrectly manufactured.  Look at the crud in the eyes.  This would certainly make threading the needle difficult.  And more than likely, these burrs would cut your thread, making the entire hand sewing experience a nightmare.  When purchasing any hand sewing needle, you want to make sure the eye is clear, and the shank of the needle is smooth.  Tips should be sharp (unless they’re ballpoint, bodkin, or tapestry).  And generally, cheaply produced needles don’t hold up to these standards.  As a matter of fact, in my opinion, if you have needles that come in these types of packages:

Toss them.  Overall, they’re poor quality.  Most of these are found in the “Begin to Sew” or “Begin to Quilt” kind of packaging. 

I can hear some of my all-machine-quilting-all-the-time folks from here – “But we’re only taking a stitch or two.  The type of needle we use doesn’t matter that much.”  And in all honesty, if you’re that solid of a machine piecer and quilter, it doesn’t.  However, needles – even the top-of-the-line ones – aren’t expensive.  Treat yourself.

Finally, let’s talk about some needle notions which make your hand piecing life easier.  The first one is this timeless little gadget:

A thimble.  I’m ashamed to admit it, but I quilted over 30 years before I learned to use a thimble.  I blamed it A) I was never taught how and B) I now had fake nails and I couldn’t get any thimble to fit correctly.  And my dilemma wasn’t for lack of trying.  I had a handful of thimbles I had purchased and just couldn’t seem to work with any of them.  It wasn’t until I had my finger fitted and purchase the right size of thimble with an open top (to accommodate my nail), that I learned the joy of using a thimble.  It helps you get and maintain a rhythm as well as protects your fingers.  I promise a blog is coming on this soon.

The next is this notion:

A table-top needle threader.  I know there are lots of needle threaders which look like this:

However, I’ve found that they break easily and  I had trouble maneuvering the wire through a small, round eye.  The table-top needle threader accommodates all types of needles and all sizes of eyes (even the very small ones).  Plus, this is an inexpensive gadget.  If the eye of the needle is so small it still is difficult to thread even with a threader, first make sure the eye is free of any burrs.  After that, if you’re still struggling, check your thread.  If it’s a three-lobe thread, it may be too thick for the eye.  Try switching to a two-lobe thread – it will be just as strong as the three-lobed, but it will be finer. 

Some quilters like these:

Needlebooks.  They allow you to keep all your needles in one place, arranged by size.  And they are handy.  I don’t use one – I simply keep my needles in the package they come in.  I’ve sewn long enough that I even prefer one brand over another for specific tasks.  If I put all my needles in a book, I wouldn’t be able to tell the brands apart.  However, I do use this little jewel a lot:

It’s a Quilter’s Dome and it allows you to keep threaded needles in one spot.  I find this really handy with applique.  Most of the time, I used fine cotton thread in a color which matches my fabric with my hand applique.  I may have as many as a half-a-dozen needles threaded at one time for a project.  I can keep them all in here.  The needles remain threaded and the threads (for the most part), don’t get tangled. 

There are also these two thread conditioners:

When you run your thread through either of these, they leave a residue on your thread which keeps it from tangling and knotting as you hand stitch.  My preference is the beeswax.  I’ve used beeswax since I began sewing and to me, it just seems to work better. 

Lastly, when do you know it’s time to throw a hand sewing needle away?  With sewing machine needles, we know those have about an 8-hour shelf life.  Are hand sewing needles any different? 

Sort of.

The amount of time they can be used before tossing them varies with the brand and how much you’re using them.  If you only take a stitch or two now and then, the needles could last you a pretty long time.  If you’re using them consistently for hand sewing or hand applique, their lifespan is shorter. Rule of thumb for me is this:  When the needle becomes difficult to push through the fabric, it’s time for a new one.

What about a bent needle?  Should you toss it immediately?  That depends entirely on you.  One of the best hand quilting needles I ever had was slightly bent.  I almost cried when it did finally break.  If a bent needle is still sharp and you like it, the quilt police aren’t going to force you to toss it.  However, if it slows you down or makes the process difficult, don’t be afraid to throw it in the circular file. 

This is probably information than you ever wanted to know about needles.  In summary, here’s probably what you need to remember:

  1.  Needles made in Japan and England are the best.
  2. Use the right needle for the right job.
  3. Inspect your needle to make sure the eye is clear, the shank doesn’t have burrs, and the tip is sharp (for those needles that need a sharp tip).
  4. Needles aren’t expensive – even the best ones.  They’re an affordable quilting luxury.  Treat yourself.  Replace as needed.

Until next week, Level Up Your Quilting!

Love and Stitches,

Sherri and Sam

PS – Standard disclaimer:  I don’t work for any of the companies listed in today’s blog, nor do I receive any free merchandise for recommending them.  I mention them because I use them, love them, and recommend them to my friends.

Categories
Uncategorized

Getting Myself Organized

One of the most frequent questions I get asked concerns how I organize myself for projects.  There are several answers to this question.  A lot of it depends on the project.  Some of it depends on where I’m making it (a quilt retreat, a friend’s house, my mom’s home, or my studio).  A tad bit even depends on my mood.  The one concept which stays constant in all of this is that quilting isn’t my only job.  My husband and I own our own demolition and environmental company and I’m the CFO.  Some weeks I work 60 hours.  Some weeks I may only clock in 20.  This forces me to stay semi-organized, so if I can snatch just 15 minutes of sewing time, I can make the most of it.

The first item to discuss is the fabric itself.  I’ve come a long way from the corner of my kitchen in the mid-1980’s where I was the Queen of Fat Quarters. I have more room, and thus more fabric.  In addition, during the Pandemic shutdown, I’ve done my part to help our quilt stores stay open.  I purchased fabric from LQSs across the nation in an effort to keep them up and running and help the owners keep their bills paid and food on the table.  I really, really need to sort and straighten again.  Let me also put this fact in right here:  There are literally hundreds of thousands of ways to store fabric. Google fabric organization and literally hundreds of blogs and pictures will appear with the click of a mouse.   In earlier blogs I’ve highlighted the way I purchase fabric and how I organize my vast textile collection.  In a nutshell, here’s a repeat:  I flat fold anything over a yard.  Fat quarters and single yard cuts are folded and wrapped around cardboard inserts used for comic book display (these are way cheaper on Amazon than the cardboard bolts for fabric).  And any scrappage 8-inches square or larger is sorted according to color and placed in bins.  I do occasionally purchase bolts of fabric and these few items are stored along a wall.  The way I store my fabric will differ from the way you store yours due to space.  You must make your storage area work for you – it has to be kept semi-organized and you have to be able to see what you have.  So, Google and Pinterest ideas until you find something which fits your space and your quilting style.  Let me also insert this thought:  The storage system which works well for you now, may not work in three years.  Be flexible and open to change.

As far as purchasing fabric, my rules of thumb still are the same.  If you’re purchasing for a pattern, be aware most or them already allow for the “oops” factor – in other words, they’re giving you several inches of extra in the fabric requirements in case you mess up.  There is generally no need to purchase an extra ¼-yard to guard against any cutting or sewing mistakes.  If you’re purchasing fabric which has no real clear purpose other than you like it, three yards will usually cover any quilting needs.  If you’re buying the material with applique in mind, one yard should do the trick.  But if you find a fabric which completely wins your heart over and you simply cannot live without, buy five yards.  Why so much?  First, five yards will cover its use in at least two quilts.  And if you love it enough to buy five yards, you will want to use it in more than one quilt.  Second, once a fabric is out-of-print, manufacturers will rarely ever reprint it.   Yes, Ebay and Etsy can save your quilting sanity, but why take the chance.  In my entire quilting career spanning 34 years, I’ve only known one textile manufacturer to reprint a fabric more than once.  And it was a panel, not a fabric line.  If you really, really love the material, purchase the entire bolt.  I’ve done this a couple of times – primarily it has been for backgrounds/neutrals.  I’ve purchased prints twice.  And except for the bits and pieces in my scrap bins, every inch has been used.

When I initially discussed my fabric purchases, one item I didn’t include was quilt backing material.  It was probably around during that time span, but it never registered with me because I didn’t have a long arm then.  I was quilting all my tops on Big Red, who manages pieced backings just fine thankyouverymuch.  Enter my long arm, and suddenly backing fabric became important because Leanne prefers it over a pieced back.  How do I manage backing fabrics?  Backing is wider than regular fabric.  Whereas a bolt of “the normal stuff” is 44-45-inches wide, backing fabric can run from 108-inches wide to even wider.  Therefore, it does take more shelf space.  Typically, I purchase backing fabric as needed, due to the space issue.  That, and we all know there may be months weeks of time between stitching that last seam on a top and putting the first quilting stitch in the sandwich.  When a quilt is prepped for Leanne, then a backing is purchased.  However, let me throw this out here – quite often you can find a lovely backing fabric for the front of your quilt.  With The Fish Almighty quilt I’ve made the DH for Christmas – the background fabric is a backing.  And I’m prepping an applique quilt right now and the background is a backing fabric from the Bella Suede line of P&B Textiles.  Both of these quilts required significant yardage, and once I crunched the numbers, the backing fabric actually saved me money. 

With any fabric which makes it way through my front door, it’s first stop is my washing machine.  I’m a pre-washer and if you wonder why, go here: https://sherriquiltsalot.com/2017/09/01/to-prewash-or-not-to-prewash-thats-the-question/.  It’s washed and draped over a drying rack.  Once dried, one of two things will happen.  If it’s fabric which has been purchased for a future use, it’s ironed and either put on a cardboard insert or flat folded.  However, if it’s been purchased with a specific quilt in mind, it’s starched and ironed before I cut it.  I don’t starch any fabric until I’m ready to use it.  The reason behind this is I use real fabric starch – not Best Press or other starch alternative.  And starch can attract bugs.  So, the fabric that hangs out with my stash gets a good pressing but no starch.  Fabric immediately destined for the cutting mat gets pressed and starched.  And then it’s rotary cut according the pattern directions, regardless of whether or not I’m starting the quilt immediately or in a week or three.  

 I often am asked why I do this – cut everything out when I’m really not sure when I’ll start making the quilt.  I do it for three reasons.  The first concerns the fabric itself.  If there’s a mistake in the fabric requirements or I make major cutting errors, then chances are that particular fabric is still available.  Six months from now, this may not be the case.  Secondly, cutting the fabric is my least favorite activity about quilting.  I’d much rather get it over with.  I even cut out the binding.  Plus, knowing  I have the quilt already cut out and waiting for me in a project box makes me feel all warm and eager to start.  The third reason is the project box itself.

I use project boxes.  Most of the time they’re either the plastic storage tubs from the dollar store or these (my favorites) from our local office supply place.  I have plenty of room in the boxes.  I have also come in possession of these: 

Also pretty darn perfect and free from a friend.

I’d like to park it here and explain what I put in the project box.  There’s the cut-out quilt, of course, and the pattern.  However, I also add in any special quilting notions, rulers, templates, etc., to the box.  If it’s an applique quilt, I toss in specialty threads, fusible webbing (if needed), and anything else required except my applique tools (which have their own box).  If I have the backing at this point, I don’t put it in the box because it takes up too much room.  This system makes it super-easy to grab the box and begin the quilt no matter where I’m constructing it – my studio, a friend’s house, my mom’s, or at a quilt retreat.  It just makes my quilting life a tad bit easier – I’m not running all over my studio hunting down everything – it’s all nicely packaged together.  I realize that bags can be used for this purpose, but for me, it’s easier to see I have everything if I put it in a box.

How I handle the basic supplies is a bit different.  I tend to purchase those in bulk.  Here’s why:  Hancock Fabrics is out of business.  There was a Hancock’s near my house and if I needed anything, it was literally 10 minutes to the store and 10 minutes home.  But now?  Totally different story.  Where I live, there are no longer any fabric stores near me (and I’m not counting Hobby Lobby – their line of sewing notions is limited).  If I run out of something, I’m doomed until I can get some delivered or make the 20 – 30 minute trek across town.  Thus, I purchase the basics – such as thread, needles, and bobbins – in bulk.

Big Red is my primary sewing machine, and I always have her threaded and ready to go.  One of the great things about quilting verses garment making is thread.  When you make clothes, the thread has to harmonize with the fabric.  With quilting, you’re primarily working with neutrals.  I always make sure I have a stash of black, dark gray, light gray, and beige-ish thread.  However, the one neutral missing in that list is white.  I don’t – as a rule – use white thread unless the entire quilt is white.  A beige or ecru thread will blend with the white and any other color put with it.  If the light gray thread is super-light, it will work just as well.  The fact that quilters can use these standard colors is great because we can take serious advantage of thread sales.  You all know I’m a thread snob and I like long-staple thread.  If I run across a great thread sale, I can use it to my full advantage and none of the thread will languish in my thread cabinet.  It will all be used. 

Another kind of thread-snobby thing I do is purchase pre-wound bobbins.  I know I can wind my own, but the pre-wounds have so much more thread on them than any bobbin you can wind on your sewing machine or a bobbin winder.  It saves me time and – in the long run – thread.  Like the spools of thread, I can purchase my pre-wounds in the basic quilting neutrals and take full advantage of the sales.  I purchase my pre-wounds from Superior Thread (go here https://www.superiorthreads.com/).  They have a great selection of both bobbin styles and colors and wonderful customer service.  They also tend to run sales pretty regularly, so at least go to their website and get yourself put on their email list, so you’ll know when these happen. 

While we’re talking about buying in bulk, you may also want to do the same with the sewing machine needles which are used in your primary sewing machine.  Big Red likes Schmetz or Organ.  Superior Threads has both brands of these needles in the size I use the most – microtext, quilting, and topstitch needles. 

I am prepping a future blog on setting up your sewing space, but I will share this bit of organizational wisdom right here:  Command Hooks are your bestest friend.  I use these in lots of areas in my studio, but the one which is the most useful is this:

It’s on the left side of Big Red and my small sewing scissors hang there.  I place them on the hook after each sewing session, so when I return to my studio, I know exactly where they are. 

Keeping your sewing space organized is important, and what works for me may not work for you.  No matter what storage system you use or how you set up your sewing machine area, it’s important to keep a few commonalities in mind:

  1.  As much as possible, have your fabric arranged so you can see it. With some studios, such as mine, my fabric is out in the open.  But once upon a time, it was in a cabinet.  Wherever it is, just make sure you can eyeball it and know what you have.  I have mine arranged by color (except for holiday fabrics).  This works for me.  But I also know quilters who have their fabric arranged by designer and/or family.  It’s whatever system works best for you.
  2. Find a way to keep your project(s) organized.  For me, boxes work best.  Some quilters use 1-inch deep trays.  The main concept behind this type of organization is to save yourself time.  If you can employ a project storage system which allows you to keep your quilt, the pattern, and any required notions such as specialty thread, templates, or particular rulers together, this will save you a lot of time in the long run.  Future you will thank the past you for keeping all this stuff together, so you don’t have to run it down when you’re ready to quilt. 
  3. Be consistent with your fabric.  If you’re a pre-washer, wash all your fabric before you store it.  This is a good idea for two reasons.  First, you’ll never wonder if it has been prewashed and second, when you’re ready to cut the quilt out, this step is already taken care of and you’ve saved some time.
  4. You’ll never regret having a good supply of quilting basics, such as rotary blades, machine needles, thread, and pre-wound bobbins.  I look at it this way – remember when COVID started and everyone was making grocery store runs for toilet paper?  For years my family poked fun at my tendency to purchase this commodity in bulk, especially after both Meg and Matt left home and it was just Bill and me.  They don’t any longer.  You’ll never regret having a stash of machine needles on a Friday night at midnight in the middle of a quilting session and your needle breaks.  If you have a stash tucked away somewhere in your sewing area, you can keep on stitching until the sun rises without waiting for the fabric store to open on Saturday or Amazon Prime to deliver them on Sunday.  The items I’ve listed are consumables.  Sooner or later they’ll all be used and used up.
  5. Keep you sewing area as organized as possible.  At least know where your pins, seam ripper, stiletto, and scissors are.  The Command Hooks work great for me, but you may want to use something else.  Bottom line is this – know where they’re at so you don’t lose time looking for them.  And put them back where you keep them after your sewing session is over. 

The simple steps I’ve written about in this blog has saved me time and sanity.  Quite often I only get a few minutes a day in my studio and I try to make every second count.  Knowing my fabric is ready and I have everything I need at my finger tips allows me to make the most of my time.

Until next week, Level Up Your Quilting,

Love and Stitches,

Sherri and Sam

PS — Standard disclaimer applies. I am not employed nor to I receive any free products from Command Hook, Superior Thread, Amazon, or any other companies listed in any of my blogs. I recommend and support suppliers and companies which I use on a regular basis that offer consistently wonderful products and stellar customer service.

Categories
Uncategorized

Log Cabins

When Log Cabin quilts are mentioned to anyone – quilter or non-quilter – most folks can conjure this image:

“Traditional” Log Cabin Block

Log Cabin blocks and quilts are easily one of the most recognizable quilting images.  Their appearance – strips of fabric sewn around a center square – is one of the most iconic quilting visuals.  Some quilt histories tell us the Log Cabin quilt came of age in the in the middle to late 19th century and they were designed to honor President Abraham Lincoln, who was born in a log cabin in Kentucky.  Quilt historians will inform you that the squares in the middle of the blocks were either red – representing the hearth of the home – or yellow – representing the light in a window.  Typically, one side of the block was made of darker fabrics and the other side was made of lighter fabrics, allowing for some stunning layouts known as Barn Raising, Sunshine and Shadows, and Streak O’ Lightening. Quilt historians also may add this interesting tidbit:  A true Log Cabin Quilt was always tied, never quilted.

And most of that is outright lies.  So, hang tight and let me blow some quilting gaskets.

First of all, let’s talk about the real history of the quilt and quilt blocks, because everything else – from the kind of fabric used to where most Log Cabin quilts originated from in the United States – depends on the quilty truth.  And the truth is, the Log Cabin block has been around for literally thousands of years – not just mere hundreds.  According to Barbara Brackman’s date base, America’s earliest signed and dated Log Cabin Quilt was made in 1869.  The British Quilt Heritage Project found Log Cabin Quilts dating from the late 1800’s to early 1900’s.  However, the National Museum of Scotland is in possession of a small box made for sewing tools which has the Courthouse Steps (a variation of the Log Cabin we’ll discuss a bit later in this blog) embroidered on it that dates to the mid 1700’s. 

However… if you boil down all the myths, fiction, and facts concerning Log Cabins, you will probably find Ancient Egypt at the bottom of the pot.  That’s right…

MUMMIES

This is theory, but it’s pretty plausible.  Think Valley of the Kings and 19th century British archaeology (I’m having flashbacks of the movie, The Mummy right now).  When these tombs were opened, archaeologists found hundreds of animal mummies.  Apparently, Egyptian royalty wanted their pets with them in the afterlife, so these critters were mummified along with their owners.  Some of these animal mummies found their way back to England and are now in the British Museum of History.  If you have a chance to look at the small mummies either on the internet or in person, you’ll find some of these have Log Cabin designs on them.  France was also caught up in the archaeology/mummy frenzy.  Some of their archaeologists accompanied Napoleon to Egypt in the early 19th Century and returned with the Log Cabin design shown clearly in their pictures and drawings.

Janet Rae from Edenburgh, posits another theory about Log Cabin design:  land cultivation.  This idea takes into consideration the type of land cultivation known as “run-rigs” from the Middle Ages in both Europe and the British Isles.  During this time the farmers had both wet and dry fields to farm, and these were called run-rigs.  Early maps and drawings of the run-rigs look very much like Log Cabin blocks.  It is possible that someone drew inspiration from the actual run-rigs or drawing of them and made the first Log Cabin blocks. 

Along with these two theories, we have to keep in mind that Log Cabin blocks have popped up in other locations, where there is no clear theory about just how they got there.  There are the Log Cabin blocks from the Isle of Man called The Roof Pattern.  Here the blocks are folded pieces of fabric hand sewn onto a fabric foundation.  The unusual issue about the Isle of Man is that is very isolated.  No one is exactly sure how the inhabitants came up with the idea of a Log Cabin quilt.   Canada also has its own version called Canadian Logwork.  If the pattern traveled across the sea from England and then Canadians made their own version or if the Canadians came up with the idea all by themselves is not known. 

Thus, the real origin of the Log Cabin block is a bit of a mystery.  Since needlework was traditionally a woman’s field of expertise, the male historians obviously felt it wasn’t worth mentioning.  We may never actually know when and where the Log Cabin block developed.   In this blog I want to look at the Log Cabin from strictly an American viewpoint.  So, let’s dive in and return to America in the mid-19th century when the Log Cabin block was in its heyday and blow a few more quilting gaskets. 

During the time of the Abraham Lincoln administration (1861-1865), we saw the pattern begin its rise in popularity, culminating several years after his assignation.  The myth around the block’s sudden fame in the quilting world embraces the idea the Log Cabin Quilt was designed as a type of  tribute to Lincoln’s Kentucky birth in a log cabin and the fact he spent a good many of his formative years growing up in one.  Since we already know that’s a myth – Log Cabin blocks and quilts had been around a lot earlier than even 1850 – let me also blow a gasket about most of the quilts originating in Kentucky.  From what some quilt historians can determine through quilt inventories and wills, most of the Log Cabin Quilts originated in Indiana.  That’s not to say Kentucky didn’t have quite a few Log Cabin quilts of their own, it’s just the majority of Log Cabin quilts listed in wills and household inventories are from Indiana.  And the earliest dated American Log Cabin quilt came from Kansas. 

 Now that this myth is put to bed, what about the theory which embraces “true” Log Cabin quilts are tied, not quilted?  To a degree, this is correct.  While we tend to construct our Log Cabin quilts out of 100 percent quilter’s cottons, batiks, or flannels, the early Log Cabin quilts were made out of just about anything – wool, flannel, velvets, cottons – whatever the maker had on hand, that’s what was used and often several types of these fabrics were combined in a single quilt.  Add to this fact many of the quilt blocks were pieced on fabric foundations and you have a quilt with a lot of bulk.  Hand quilting was out of the question.  The quilt was tied.  Sometimes the quilt top was so bulky and heavy, a batting wasn’t used.  It wasn’t needed.  The quilt top and backing would keep you plenty warm at night. 

How about the idea that in the early Log Cabin blocks, the center square was either red or yellow? This seems to be true both and untrue.  The earliest Log Cabin designs – those which pre-date our mid-19th century American Log Cabins — do not use a “standard” center square color.  It was only when quilters embraced the Log Cabin to symbolize Lincoln that we saw the use of red or yellow fabric for the center square.  There is another myth in quilting lore which states if a Log Cabin quilt was hung outside a house or cabin and the center squares in that quilt were black, then this was a stop on the Underground Railroad.  That is false. Despite what any historian says, a direct link between quilts and the Underground Railroad has never been factually substantiated.  And today, most of us don’t use either color in our centers.  As a matter of fact, my guild is using a Log Cabin design for our 2021 raffle quilt and the center block is raspberry-colored.  The last Log Cabin quilt I made used blue in the center. 

Finally, what about the block using dark fabrics on one side and lighter fabrics on the other?  This myth turns out to be mostly correct.  In order for the block to look like what we perceive a Log Cabin block to be, this has to hold true to some degree.  Even from the earliest Log Cabins – either on animal mummies or those inspired from run-rigs — there is a clear distinction between the two sides of the block. 

This may be more than you ever wanted to know about Log Cabin blocks and quilts.  I like to know the past behind quilty issues, as the this is what initially drew me to quilting in the first place.  Now a days we can choose to honor the traditions by incorporating them in our quilts, or we can decide to make these blocks our own by constructing them in ways that make us happy. 

As I begin to talk about constructing these blocks, let’s take a look at some traditional Log Cabin blocks:

We’ll talk about the block on top first.  The strips of fabric around the center square are called “logs” and you’ll notice the logs on this block are wide.  One of the great features about Log Cabins is their versatility.  You can make the blocks as large as you need simply by adding more strips around the center square.  And the “logs” can be just about any width you desire as long as you keep in mind the Golden Ratio.  Let’s look at an example.  Let’s say you have a stack of 2 ½-inch squares you want to use as the centers of your blocks and you want to know your log options – how wide can you make them and how narrow could you make them and the block still look balanced?  Remember from my past blogs, the Golden Ratio is the number 1.61803399.  When we’re using the GR to “math” out quit issues, we shorten this number to 1.618.  To see what is the widest possible strip we can use for our 2 ½-inch square, we multiply 2 ½ by 1.618.  This gives us 4.045 or 4-inches.  However, don’t stop at 4-inches.  That’s incredibly wide.  We divide that by the four sides of our block and get 1-inch.  The widest we could make our strips is 1-inch (finished) for our 2 ½-inch center square and the block still look balanced. 

To discover what’s the narrowest we could make our blocks, we divide 2 ½ by 1.618.  this gives us 1.5451117 or 1 ½-inches, which we divide by four again.  This answer is .386279 or 3/8-inch, finished. 

Both of those numbers tell us we can make our finished strip widths anywhere from 3/8-inch wide to 1-inch wide and those strips will look nicely balanced against our 2 ½-inch squares. 

Now that the math-y part is out of the way, there are a couple of other construction issues which need to be considered.  First, be sure to cut your fabric logs on the straight of grain.  This step will make your blocks lie nice and flat.  The second issue concerns the strips themselves.  It’s really, really tempting to just rotary cut a bunch of strips, sew them on, and then cut off the excess.  Although it’s super-tempting and this is a super-easy way to make your logs – don’t.    Here’s why…

Remember back in 2018 when I blogged about quilt borders ad nauseum?    How you cut the borders to match the length and width of your quilt center and sewed them on that way, because this helped keep your quilt square?  The same principle applies to  the center of your log cabin block – and the larger the block, the more this applies because there’s more to keep square.  Let’s look at an example –and for the sake of simplicity, I’m using all unfinished measurements:

This is the log cabin block we used earlier.  The center square of the block is 2 ½-inches.  If we’re making our fabric logs 1-inch wide, then this means our first log is a 1 x 2 ½-inch rectangle.  Our third log would be 1-inches x 3 ½ inches.  The fourth 1-inch x 4 ½ inches, etc.  We would need to cut each individual log out to the size needed in order to keep everything nice and square.

However, I don’t use this method on Log Cabin blocks with very narrow strips. The narrower the strip, the harder it is to cut it out accurately.  Take a look at the center of this little quilt top:

This is from a Round Robin I did with my guild a few years ago.  The center log cabin blocks have super-narrow logs.  I honestly would have had a bit of a struggle cutting these out to the correct width.  Couple that with the fact that the narrower the strip, the harder it is to cut the fabric straight.  Since I didn’t want to waste my time or my fabric, I opted to paper piece these blocks.  If my Log Cabin blocks are either very small (6-inches or less) or have narrow logs (less than 1-inch finished), I personally think it’s easier to paper piece them.  I also believe it’s more accurate.  As with all paper piecing, you’re trading fabric for precision, but for Log Cabin blocks with slim logs, I think this is the simplest way to construct them.  If you decide to go this route with any Log Cabin block, it’s still important to cut your fabric strips on-grain so the block will lay flat and hold its shape. 

I also must say, I really like Log Cabin blocks with the narrow logs.  I’m not sure why the appeal more to me than the “traditional” looking Log Cabins, but they do.  Those narrow strips just seem to completely change up the block’s appearance. 

The Log Cabin block is beautifully simplistic – and the great thing about simple blocks is they’re really easy to change-up.  The quilter can tweak it here and there and suddenly it looks entirely different with very little work involved.  To date, Pinterest has over 556 variations of this block.  My EQ8 has 50.  While it’s impossible for me to cover all the variations of the Log Cabin block, I want to highlight four construction changes and six block ideas.  These are the most common variations the kept popping up on my Google searches. 

Construction Changes

  1.  Use Partial Seams – We covered this technique in detail in my previous blog about partial seams (https://sherriquiltsalot.com/2020/10/07/partial-seams-way-easier-than-they-look/), so I won’t go into detail again with that.  But just to jog your memory, compare the traditional block against a Log Cabin block which used the partial seam construction:
Log Cabin Block with Partial Seams
  •  Move the Center of the Block – Instead of putting the center square in the middle of the block, move it to a corner.  This is easy to do.  Instead of surrounding the center on all four sides with logs, just add the logs on two sides, or use more fabric strips on two of the sides than the other two.  Either way you chose, you’ve altered the blocks appearance while not having to undergo any complicated construction techniques.
  •  Enlarge the Center Square – While typically the center square can be larger than the width of the fabric logs, look what happens when the center is made much bigger.  This is a great way to showcase fussy cuts, embroidery, or applique.  In the block below, the center has not only been enlarged, it’s been made into a signature block. 
  •  Make a Vertigo Block – I’m not really sure what these are called:

But I call them Vertigo Blocks because they kind of make me dizzy.  My EQ calls them Twisted Log Cabins.  These occur when you really play with the fabric logs, and in fact with these blocks, the logs aren’t even strips – they’re triangles.  While personally I would paper piece these, if you’re a really fastidious piecer, I’m sure they can be rotary cut and sewn together. 

While we’re still on the topic of Log Cabin construction, I’d like to share with you a few organizational tips.  Log Cabins require lots of fabric strips in lots of different sizes.  These strips are often very close in length – sometimes there’s a half-an-inch or less difference in how long they are.  It’s easy to pick up the wrong piece and sew it on the block, only to have to turn around and rip it right out.  Depending on how many strips I have to work with, here’s a few ways I keep myself from getting confused.

I’ve used these:

These neat little trays are found at most dollar stores.  I get mine from Dollar Tree, and they come three to a pack.  I line these up and stick a post-it-note in the bottom of each tray indicating the length (and width, if I’m varying both lengths and widths of my strips). 

I’ve also used a TV tray.  If I don’t have as many logs surrounding the center square this works nicely.  I simply lay them out on the TV tray, starting with the shortest and ending with the longest.  I can park the tray beside my sewing machine and chain piece while marathoning Hulu.

If I’m making a huge Log Cabin quilt which entails lots and lots of strips, I have used either this:

Or this:

I can sort my strips and then hang them.  Again, both of these can be located near my  sewing machine, so I can chain piece and binge watch my new favorite series.

Lastly, let’s talk about variations on the Log Cabin block.  This simple block and be tweaked and changed for literally hundreds of different looks, but I want to show case the six I like the most.

My very favorite Log Cabin variation is the Pineapple Block.

Some quilters will claim this is a Square-in-a-Square block, but I’ve always heard it was a type of Log Cabin.  Sure, the center is kind of a Square-in-a-Square, but the rest of the construction is pretty much standard Log Cabin.  I’ve always loved the way this block looked when made from batiks.

Another popular Log Cabin block is Courthouse Steps.  If you look closely at this block:

You’ll see the difference between it and the traditional Log Cabin block is the construction.  In the traditional block, we sew the logs around the square in a clockwise direction.  With the Courthouse Steps, we sew the fabric strips around the center in the same manner we sew borders around the quilt center – sew the right and left side strips on and then the top and bottom ones.

Sometimes with the Log Cabin blocks, we can isolate the technique (fabric strips around a center) and use it in other ways, such as this block:

Or this block. 

You can also use this method in other areas of a pieced block to give it a different look.  My personal favorite is this:

Hearts.

I love hearts.  If you look closely at most of my quilts, you’ll find hearts quilted into the design at some point.

And if you’re really up to a challenge, try using them as hexagons or 60-degree diamond blocks   It’s really not that difficult.  For the diamond blocks, simply cut the center squares as 60-degree diamonds (we learned how to do that here (https://sherriquiltsalot.com/2020/07/01/60-degrees-of-separation/) and then proceed to sew the fabric strips on as normal.  This will give you blocks that look like this: 

Which can be pieced into a quilt that looks like this:

If you’re feeling really ambitious, the Log Cabin hexagons are fun to make and look super-complicated, but in reality, all they need is a little more pre-planning. 

Simply cut the center square as a hexagon – but don’t get too small.  This block screams for a large center which can showcase a fussy cut fabric.  The logs are sewn on the same way as a traditional log cabin, but there are a couple of steps that should be altered.

  1.  Instead of cutting out the strips true-to-the-size of the edge of the hexagon, allow at least for an extra ½-inch of length.  When the strip  is sewn on the side of the center, you need at least ¼-inch to hang off each end. 
  2. After the strip is sewn on, press it outwards. Then line a ruler up with the adjacent side of the hexagon and trim the extra fabric off, so it will be angled correctly.  Do this for each fabric strip, until you get to the last strip.  That strip will need extra length because it will have to cover two raw edges – the last one and the first one.

When you piece these hexagons together, they will need connector pieces just like any standard hexagon quilt.

Lastly, let’s take a look at Log Cabin quilt layouts.  The unique construction of the block allows for two great aspects of the quilt tops – no sashing is needed, and the light/dark sides of each block makes layout possibilities nearly endless.  Just make sure your blocks are square and the same size. 

You can run the lights and darks on the diagonal.  You can set them as a zig-zag (also known as Streak o’ Lightning).

You can arrange them to look as if they’re set on-point.

This layout is called Barn Raising.  It’s a fairly traditional layout, as far as Log Cabins go. 

They can be laid out to look like pinwheels or flying geese.

Honestly, the possibilities are only limited to the space you have to layout your blocks and your imagination.  Pinterest has over 300 different Log Cabin layout designs, if you do find yourself needing inspiration.  Not to mention the blocks can be used as a border treatment or incorporated into other layout designs. 

As I’m coming to the end of this blog, I hope you’re inspired to try a Log Cabin quilt of some type.  They’re a really fun and endlessly versatile block to make.  Just keep in mind to cut your strips on the grain and check to make sure the blocks are all the same size (or pretty darn close).  If I get requests to highlight certain blocks (like I did for this one), I’ll write more of these types of blogs.

Until next week, Level Up Your Quilting!

Love and Stitches,

Sherri and Sam


Categories
Uncategorized

Partial Seams — Way Easier than They Look

Several weeks ago – way back when we were constructing the LeMoyne Star block – we dealt briefly with a technique called partial seams.  I kind of glossed over it, because I was much more interested in everyone getting good and comfortable with Y-seams.  The traditional LeMoyne Star requires both kinds of seams, as do many of the Feathered Star blocks.  And while getting those Y-seams accurate is important, it’s just as essential to know how to make a great partial seam, because those can be used for wonderful effects in lots of different blocks.  Bonus:  They’re easier to make than Y-seams.  As a matter of fact, if I’m constructing a quilt block with partial seams, I don’t look for an easier way out.  They’re really not that difficult.

Let’s start by defining what a partial seam is and where to use them.  A partial seam is just that – a part of a seam.  Instead of sewing down the entire length of the pieces of fabric, there comes a point where you stop and add another piece of fabric.  These seams are used when the fabric pieces attached to the center shape extend past the beginning shape.  You stitch the first part of the first seam, add pieces to the sides, and end by attaching the last piece of fabric and stitching the last part of the first seam.

I realize all of the above sounds confusing.  This is one of those techniques that’s much easier to show than tell.  So, I’m going to walk you through the process step by step.  And if you’d like to sew along with me, you will need the following:

One 4 ½-inch square

Four 1 ¼-inch x 5 ¼-inch strips.  For this exercise, it will help if all four strips are cut from different colored fabrics.  This will help you see how the partial seams work their magic. 

Step One:  Lay out your block.  Since the center of the block we’re constructing is large-ish, this is a great way to showcase a fussy-cut piece of fabric, an applique piece, or some embroidery,

Step Two:  You can start on any side of the block.  I start on the left side, because…well… I always start on the left side.  Then I work clockwise around the center.  Place a strip of fabric right sides together with the center block, aligning the top edges.  The strip will hang off the bottom side of the block and that’s okay.  It’s supposed to.

Step Three:  Sew the seam down the block, stopping and backstitching (or use a lockstitch if your machine has one) about 1-inch before the end of the square.  Your block should look like this:

Press your seams as desired.

Step Four:  Now we will lay a strip (right sides together) on the top of the block.  When we do this, you’ll notice that this strip is the exact length of the block.  Sew this seam as normal, down the entire side.  Press the seam as desired.

Step Five:  Repeat step four for the right side and the bottom strips.

Step Six:  Now we’re ready to finish the original seam.  Fold the unsewn part of the left strip back over the sewn block, aligning the unsewn edge and pin in place.  Starting where you backstitched (or locked stitched) in step two, finish sewing down the seam to complete it.  Press the seams. 

There…

Much easier than Y-Seams.

I like the effect that partial seams give a center square.  If the center square is small, the partial seam technique makes the block look like a type of log cabin square.  Per request by Laura, one of my regular readers, I want to pause and focus on log cabins and partial seams for a bit. 

I love log cabin blocks.  I want to devote an entire blog to them soon.  In my opinion, they’re one of the most perfect quilt blocks.  You can make them super-easy or change them up to be more challenging.  And depending on your color choices, the effects produced can be stunning.  They’re a great way to use of scraps or showcase your best fabric.  Let’s start out by looking at a “traditional” log cabin block:

As you can see, a “traditional” log cabin block is comprised of a small square in the center (historically, these squares have been either red or yellow, symbolizing the hearth in a home, but we don’t always choose these colors in our quilts today).  The small block is surrounded by strips of fabric, placed in such a way that one side of the block is made out of light fabrics and the other side is comprised of darker fabrics.  It’s this layout of the blocks that give log cabins quilts such striking effects:

Now, let’s take a look at a log cabin block in which we’ve replaced the normal seams with partial seams:

With every round of strips, we have one partial seam. And by changing out the traditional with a different technique, we’ve altered the look of the block just a bit.  This one minor construction adjustment makes the block look like we’ve taken the trouble to use set-in seams, when we haven’t.  Switching from traditional seams to the just-as-easy partial seams alters the look of a quilt enough to make folks pause as ask, “How did they do that?” 

Squares are not the only shape which can utilize the partial seam treatment.  Triangles can, too.  The method remains the same, but the appearance is stunning.

Partials seams can be substituted in nearly any block that has borders.  The block we worked through today used solid pieces of fabric as the strips.  But what if you pieced those strips like this:

This gives a new and exciting perspective to a center square. 

A partial seams is one of those quilting techniques that’s easy to do and generally doesn’t require extra fabric if you decide to switch out your pattern to use this method.  Once you’ve gotten the hang of it, it really doesn’t even take extra time.  But the effects it can give quilt blocks, and in return, a quilt top, is stunningly different.  Master it.  Tuck it away.  Pull it out and use it.

Until next week, Level Up Your Quilting!

Love and Stitches,

Sherri and Sam

Categories
Uncategorized

(Almost) Everything You Need to Know About a Walking Foot

Sewing machines … even the most basic ones … come with a lot of stuff you may not know what to do with.  I faced this situation today.  My daughter and son-in-law decided to homeschool the grand darlings this year.  Before I get a ton of questions and comments about homeschooling (all the good, the bad, and the ugly), let me inform you this decision was made after a great deal of thought.  Last year, they were enrolled in a wonderful charter school, but with COVID pushing back in-person instruction here for at least the first nine weeks, and the learning portals having good days and bad days (they were down three out of the first five days of school), it was decided homeschooling would give the girls more consistency.  And, as a retired educator, I agreed. 

I am delighted that my daughter and son-in-law let me part of their curriculum.  For one hour every week I get the girls for sewing.  My oldest granddaughter has a sewing machine, but I had to buy the youngest one.  We settled on a Juki.  It’s a very basic machine with a finger guard.  However, I was pleased to find it not only had several decorative stitches, it also came with a drawer of stuff – seam ripper, oil, needles, an extra spool holder, and two extra feet.  One is an open-toe foot and the other is a walking foot.

Which totally threw Ellie for a loop.  “What’s this?” she asked, holding it up for my inspection.

“It’s a walking foot,” I told her.

“Doesn’t the machine need two so it can walk?”

After I explained what a walking foot did (after I choked back my laugh), it still made no sense to Ellie.  That doesn’t bother me.  One day it will become apparent what the foot does and why it’s important, but it got me wondering just how many of us have a walking foot and are you aware of just how many things it can do?

Most walking feet look a little like this:

Most walking foot attachments without dual feed look something like this.

You remove whatever foot you’re using on your machine and attach this foot.  Wikipedia defines a walking foot as this:  “A walking foot is a mechanism for feeding the workpiece through a sewing machine as it is being stitched. It is most useful for sewing heavy materials where needle feed is mechanically inadequate, for spongy or cushioned materials where lifting the foot out of contact with the material helps in the feeding action, and for sewing many layers together where a drop feed will cause the lower layers to shift out of position with the upper layers. A walking foot is also good for sewing materials with varying layers because it can climb up and down these layers easier than other feeding mechanisms.”

And if you think this definition makes the walking foot sound like a tool every quilter needs, you’d be correct.  But more on this a little further down in the blog.

With almost any sewing machine, the fabric is moved by the feed dogs.

Feed dogs are those bumpy ridges below the presser foot.

The presser foot holds the fabric down and as the feed dogs move, they take the fabric with it.  It is actually moving the lower fabric that is sitting on the feed teeth and the upper piece of fabric is just going along for the ride.  This is why, at the end of stitching with a “regular” presser foot (such as the ¼-inch quilting foot), the two fabric pieces maybe mismatched a little or a lot, depending on the type of fabric that’s sewed. 

At this point, it’s important to reference the difference between a walking foot and dual feed.  While it’s possible to find a walking foot/walking foot attachment for almost any make and model of machine, not all machines have dual feed.  However if your machine comes equipped with dual feed, it works in tandem with a walking foot.  So, what is dual feed?  Dual feed is the machine’s ability to feed the fabric through the top and bottom at the same time – both fabric layers are fed evenly over the feed dogs.  This keeps the fabric from crumpling or shifting. Why is this feature so awesome?  Well, if you like to incorporate plaids, checks, or ginghams in your sewing projects, this keeps everything lined up, so nothing gets off kilter.  Likewise, if you sew complicated quilts with lots of layers or work with machine applique, you quickly learn to appreciate dual feed.  If your machine comes with this feature, it will probably be listed as one of the selling points either by the salesperson or in the sales brochure.  If you’re still not sure, consult the all-knowing Google (put your machine’s make, model, and number in the search bar) or the machine’s manual.   Either one should be able to tell you if your machine is dual feed equipped.    

This is Big Red’s walking foot. My Janome has dual feed, so the walking foot works with the dual feed.
The two-prong mechanism behind the walking foot engages the foot with the dual feed. And yes that is Sam’s whiskers to the left of the picture. He was my photography assistant today.
When I insert the two-pronged lever into the back of my walking foot, the dual feed engages with the foot.

While the majority of my machine’s feet simply snap on, the walking feet work a little differently.  In order to engage the dual feed mechanism with the walking foot, I attach the foot by inserting the dual feed bar in the back of the foot. 

If you have both the walking foot and dual feed, it truly is a wonderful thing because:

  1.  The walking foot moves all fabric layers at the same time and pace according to the feed dogs.  The dual feed function affects the top layer of fabric and the feed dogs control the feed of the bottom layer of fabric.  If you have both working in tandem, then you’ve lowered the possibility of the fabric shifting any to pretty much zero.  If you quilt any of your tops on a domestic machine, you quickly learn to appreciate this feature.  The top, batting, and backing all stay together, move through the machine at the same time, and reduces the chances of any puckering. 
  2. The walking foot has no motor and the foot is dependent on the feed dogs’ movement.  This action moves all the layers at one time.  Once the walking foot gets to the back, it lifts and springs forward, and waits for the next feed dogs’ stroke.  The dual feed mechanism has a separate motor so the top fabric (that can get somewhat left behind with the walking foot), keeps up with the lower piece of fabric.  Anything in the middle (like batting), just hangs on for the ride and moves with the top and bottom fabric.

I purchased two alternate walking feet to go with Big Red.  There’s this one:

Quarter-inch walking foot

It looks very much like the standard walking foot, except for the black phalange on the right side.  This is the ¼-inch walking foot, which works just like the quilter’s foot:

Standard quarter-inch foot

I line the fabric up so that it’s touching the black phalange on either foot and I sew a perfect ¼-inch seam.  This is great for piecing blocks that have a lot of layers coming together at one point, so nothing shifts out of place.  I piece with this foot at least 90 percent of the time.  If I’m quilting a top on the machine, this phalange acts as a guide if I want to stitch close to the block seams, but not actually in the seam. 

Recently I purchased this walking foot:

Open-toe walking foot

It’s an open-toe walking foot that I can use with machine applique.  It works great with either a zig-zag stitch or the buttonhole stitch and prevents any lower layers from shifting. 

Regardless of whether or not your machine has dual feed, you should give your walking foot a lot of use.  I realize my blog primarily concerns quilting, however; if you make garments, a walking foot can save your sanity when sewing plaids or checks – it really keeps them lined up nicely.  Likewise, if you’re sewing lingerie, undergarments, swimsuits, or anything else with straps – it keeps everything in place.  I have also heard the walking foot works well with knits and other stretchy and slippery fabrics that easily shift. 

Both quilters and garment sewers make projects with lots of layers – like bags, totes, and wallets.  Those types of projects tend to take not only lots of layers of fabric, but also thick, sew-in interfacings.  A walking foot can help keep all those layers together and prevent any shifting. 

And as for quilters, I really recommend using a walking foot for sewing on the binding.  At this point in my quilting career, I can’t imagine using anything else. When sewing on the binding – especially if you’re using the traditional French Fold binding – you realize that your joining six layers of fabric together – the backing, the batting, the top, and two layers of binding.  That’s a lot of bulk and with a traditional foot, even with the dual feed, it’s easy for all of that to slip out from under the needle.  A walking foot, especially if it’s working in tandem with a dual feed, largely prevents this from happening. 

If you quilt any tops on a domestic machine, some quilting can be done with your walking foot instead of dropping those feed dogs and quilting that way.  If I’m working with a lot of straight-line quilting (such as cross hatching) I’ll mark my lines and go at it with a walking foot.  Quilting which incorporates gentle curves such as this:

Or this little table topper I made:

Can be made with a walking foot.  I draw my quilting lines out and then just follow them. 

A walking foot is a great attachment to have, and it can be used for lots of different types of sewing.  However, keep in mind that as great as this foot is, it can’t be used for everything.  The walking foot handles some zig-zag stitches pretty well.  Others not so much.  I’ve learned mine handles a “traditional” zig-zag (one swing left and one swing right) great.  If I’m incorporating a zig-zag which has multiples swings to the left and then the right, it doesn’t handle that much side-to-side action well at all.  I use a regular presser foot for that type of stitch.  Likewise, the decorative stitches that have a lot of right-to-left movement or forwards and backwards movement – most walking feet can’t make those stitches.  It was made to move in a forward direction. 

I hope this blog encourages you to get your walking foot out and use it more.  It’s a great little attachment to have.  If your machine doesn’t have one, jump on the internet machine and Google your make, model, and machine number to find out if it’s a high shank or low shank.  Then Google walking feet.  You should be able to find a generic one that will work on your machine.  And they’re not super-expensive.

Until next week, Level Up Your Quilting!

Love and Stitches,

Sherri and Sam

Categories
Uncategorized

Show and Tell…

Okay, this week is really wellness check week.  How is everyone doing out there?  As I’m writing this blog it’s actually August 13, 2020.  In North Carolina, we’re still wearing masks, social distancing, and washing hands.  Our schools and most of our university systems will open their academic year with remote learning.  There is no college or high school football until February.  Where I live the temperatures are in the mid-90’s now and the humidity matches the thermometer. 

In short, it’s hot, sticky, and uncomfortable with or without a mask on.  Don’t even ask what my power bill was last month.  The AC never cut off.  Like a lot of my friends, I’m sick and tired of 24/7 COVID and political news.  I’m weary of staying home so much, totally over working from home, and I miss seeing my friends in person.  While I’m grateful for the technology that keeps us in touch, I can’t wait until the time when my guild and bees can be back together.  My Tuesday night sit and sew is now Zoom and Sew.  The High Point Quilt Guild hasn’t met since March.  The Applique Society’s annual meeting was Zoomed.  Quilt shows and their classes have gone virtual.  Technology has been my savior during 2020, but I miss the in-person-hug-your-neck meet ups. For me, one of the saving graces has been the Virtual Quilt Shows.  Quilt shows which normally I would never get to visit have gone the virtual route not only with their quilts and vendors, but also with their classes.  I’ve had the outstandingly wonderful opportunity to take classes with nationally known quilt artists in the comfort of my own studio.  This week I’ve had two long-arm classes with Bethanne  Nemesh.  She was awesome.

I’ve depended on my quilting to help get me through this year.  I’ve mentioned before that during the stressful times in my life, quilting and quilters have been a constant.  The encouragement and support I get from other quilters have kept me sane.  The ability to sit down and create something beautiful and useful during the times when my life has been complete chaos has kept me going when I really just wanted to stop and stay in bed. 

However, the bright side to all of the time spent at home is how much I’ve completed this year!  Unfortunately, several of these quilts are intended to be under the Christmas tree, so I can’t show them just yet.  But I did finish a few things that aren’t destined for bows and wrapping paper and I wanted to share them with you. 

In the past I’ve written about my journey with the Language of Flowers quilt pattern by Kathy McNeil.  I’ve completed this block:

This isn’t an easy pattern, but it was one of those which bit me hard as soon as I saw it.  I loved the colors and I’m a sucker for floral applique.  Generally, when I’m working with an applique quilt, I finish one block completely – from start to finish – to get a feel for how I want to proceed.  Do I want to do all the applique and then the framing or do I want to complete each block before I move to the next?  For this quilt, I think it will work better to complete the applique before moving to the scroll work that frames each block.  I’ve also finished the second block, altering some of Kathy’s flowers to better suit me. 

I’m this far:

Into the third block. 

I am seriously loving this quilt.  It is so much fun, and I find hand applique exceedingly relaxing. 

In a move to keep our guild members in touch with each other, Susan proposed a quick mystery quilt.  We found a weekly clue in our email either Sundays or Mondays. The end result was this:

Which is perfect as a fall table topper.  I’m still working on the guild’s Block-of-the-Month.  Despite the fact we’re not meeting, we’re still able to pick up our blocks from Susan.  We let her know we’re dropping by her house to pick the blocks up and she leaves them on her porch.  Everything is socially distanced.  I chose the batik color way:

Since my grand darlings don’t read my blog, I can show you their quilts I’ve made for part of their Christmas:

I will bag these with night gowns and robes, a mug, cocoa mix, and a book for each. 

Then there’s this pile of block units…

Which will grow up to be a quilt pretty soon.

And lastly, remember this stack of blocks for my Grandmother’s Flower Garden?  I finally finished all my blocks.  Funny story about the blocks…three times I sincerely thought I was finished with all the blocks.  I counted and re-counted but every time I laid the blocks out, I was missing a few (just because I can do math doesn’t mean I can count).  I finally did get all of them made as well as the six half-squares.  I’m adding the green diamonds which join the blocks and am really close to sewing my first two rows together.  This is taking a bit of time, since the entire quilt is hand pieced.

While I have really, truly disliked this virus and the way it’s disrupted everything in our lives, I am thankful for a couple of truisms.  First, we do live in a wonderous time.  A hundred years ago when the Spanish Flu ran rampant through our cities, little more could be done than wear a mask and social distance (although they didn’t call it that).  However today, we have so much technology on our side.  I know there are disagreements about what works and what doesn’t, but on the whole, we are really blessed.  We not only have some of the best minds in the world working on treatments, therapies, and vaccines, but we’re also able to share that information with a point and click of a mouse.  When you think about how far we’ve come and in such a short amount of time, I can’t help but feel we’re going to lick this thing before long.

The second truth I’ve realized is quilting is still my constant – just as it always has been.  Prayer and quilting have gotten me through some rougher patches in my life and they’ve both kept me sane through COVID.  I do love my quilting groups, but the thing about quilting is it’s really a pretty solitary hobby.  Quilting may provide the stitches that keep us together in guilds and bees, but it also is that still, quiet place where we can go to re-center ourselves and set our lives in order.  And in 2020, I am so very thankful for that.

Until next week, stay safe, stay healthy, stay sane … And quilt on.

Love and Stitches,

Sherri and Sam

Categories
Uncategorized

One Quilt…So Many Different Sizes of Blocks

Way back in January, I announced this year’s blog theme was “Level Up Your Quilting.”  We’re well past the half-way mark for 2020 and I wanted to refresh your memory about not only what the theme is but also what it means.

For 2020, I wanted to take what you knew and what we had discussed in the 2018 and 2019 blogs and build on those topics.  I was upfront when I told you a lot of this year’s blogs would not be for the beginning quilter, but would assume you knew the basics – such as how to sew ¼-inch seam on each of your sewing machines, how to accurately rotary cut fabric, etc.  And while I know 2020 has been a trial all unto itself, I really want to challenge everyone to push their quilting to the next level.  Take what you know and try something newer, harder, and more different than anything else you’ve ever done.  I wanted us to get out of our comfort quilting zones and take some risks.  This is why many times the topics may have seemed so different than what I usually write about.  In fact, I’m thinking some of you have thought them irrelevant – such as the blogs on graphing out your blocks.  However, remember I’m coming from the place as a former science teacher.  When you teach any subject, there has to be a foundation laid with each new discipline of study, so the student can build on the foundation and understand how new ideas and principles are built on the base knowledge of that subject. 

In other words, how hard would it be for you to make a quilt block if you didn’t know how to accurately cut out your units or sew a ¼-inch seam?  The ¼-inch quilt seam is one of the first concepts you’re taught when you learn to quilt.  If you don’t remember that, then your quilt blocks will turn out all kinds of wonky.

This week I want to talk about one of my very favorite advanced quilting techniques – how to make a quilt top out of all different sizes of blocks.  Now I’m not talking about blocks that may be slightly different in size.  We’ve all had those – no matter how carefully we cut and piece there always will be a block here and there that’s 1/8-inch to ½-inch off.  We know how to deal with those – check the seam allowances, press the seams open, or simply redo the entire block if we’ve cut the units the wrong size.  That’s not what I’m talking about.

This is the scenario:  Somehow or another you’ve got your hands on a pile of quilt blocks that range from 20-inches square to 7 ½-inches square.  Maybe you purchased them at an auction, estate sale, or antique shop.  Maybe they’re orphan blocks someone donated to your guild or bee. All the fabrics harmonize and everything in you wants to make a quilt top out of them. 

Or maybe this is the scenario:  You’ve got a fabric panel and want to make that into a quilt, but don’t want to simply throw plain borders around it until it’s as big as you need it to be. 

In either situation you’re faced with the quandary of a lot of fabric with no directions.  It’s all up to you and what you know.  So how do you ever start? 

Let’s start with one-picture panels.  Remember this panel?

I know I’ve shown it several times, but I loved it from the moment I saw it and I knew my Disney-loving grand darlings would love it as well.    Off-the-bolt, most solid panels are around 44 to 45 inches in length – which is the width of all fabric except quilt backing (most panels are printed vertically, so what we normally consider the width of fabric is the panel’s length). 

The width can vary, but the panels generally are rectangular.  The Mickey and Minnie panel was roughly 35-inches wide x 40-inches long, unfinished.  I was definitely working with a rectangular, one-picture panel.  And for me, the first step in working with a rectangular panel is to make is square.  Why square?  It makes the math so much easier for adding pieced borders because all four sides are the same length.  And if you can keep the measurements in easy, divisible increments of two, three, four, or five inches, it will go together quickly.  For the first round, I needed to add enough borders to make the width equal the length – five inches.  So, I added a 3-inch finished pieced border and then a 2-inch finished floater.  From that point on, all I had to do was add borders in various widths and styles until the quilt was a large as I wanted it to be.  Of course, there is always the option of adding plain fabric borders or no borders at all, but where’s the fun in that?

Now we’ll move to the second scenario.  Let’s say we have the following stack of quilt blocks with the finished measurements:

Sixteen 9-inch squares

Four rectangular blocks oriented horizontally: 18-inches wide x 9-inches high

Two rectangular blocks oriented vertically:  9-inches wide x 18 inches high

Two 18-inch squares

At first glance, it would be easy to think, “Hey, I can get three quilts from this if I buy additional fabric – one from the 9-inch squares, one from the rectangular blocks, and one from the two 18-inch squares.”  And you’d be right.  You could produce three small-ish quilts from this one set of blocks.  But what if you don’t want to?  What if all the blocks harmonize and you don’t want to separate them?  Or what if they’re antiques and you can’t bear to split the blocks up?  Or what if you simply don’t want to go through piecing and quilting three quilts?  Let’s walk through the process. 

Step One:  The first question to ask is “Are the finished blocks divisible by one common number?”  In this case we’re dealing with blocks which are all multiples of the number nine, so the answer is yes.  Why is this important?  It means the blocks can be sewn together into larger sections and then the sections can be put together into a quilt top.  If the blocks don’t have a common number, don’t worry.  We’ll deal with this scenario at the end of the blog. 

Step Two:  Next, I see if I can’t join a strip of the smaller sized blocks to one of the larger ones, either on the sides or the top or bottom.  In our case, I can.  I can join two of the 9-inch blocks to either the 18-inch square blocks or 18-inch x 9-inch rectangles.  I can join one of the 9-inch blocks to the 9-inch x 18-inch rectangle.  In the second step of this process we’re determining if we can join several blocks together to form a large block unit for the quilt.  These larger block units are easier to work with as we continue making our quilt top.  Instead of working with several blocks at a time, we will treat the large unit as one block in the construction process.

We also may want to make another design decision with our quilt.  We have lots of 9-inch blocks.  We may want to join several of those together before sewing them to one of the horizontally oriented rectangles or one of the 18-inch squares. 

I can’t stress how important it is to have an area you can lay out your blocks.  Whether it’s a design wall, a spare bed, or the floor, any surface that’s large enough to hold all your blocks is pretty crucial to your layout process.  It’s much easier to move your blocks around before they’re sewn together than having to spend hours of quality time with your seam ripper to unsew them.  I lay out my blocks several ways and use my cameral phone to take pictures of each lay out.  Then I set everything aside for a day or two and go back to the pictures.  A few days of “not stressing over the layout” allows me to return to the pictures and really see which layout works best.  Once I’m happily settled with one of the designs, I sew my blocks together into units and then join the units together to make the quilt top.  Afterwards, I make the decision about floaters, borders, and binding.

After moving some blocks around, EQ 8 and I came up with this layout.  As your eye travels over the sketch, you can see where I grouped blocks together and formed larger units and then put the units together to make the quilt top. 

As promised, let’s go back and look at a little more complicated scenario.  Let’s keep the 9-inch blocks, but let’s shrink the two large squares to 15-inches and change up the rectangles to four 6-inches high by 18-inches wide oriented horizontally and two 18-inches high and 6-inches wide oriented vertically.  As we begin to work our way through the math, we find that there is initially no common number in the blocks.  We know that 18 is divisible by 9 and 6, but none of these numbers play well with 15.  Likewise, 9 and 6 seem to have nothing in common. 

When I’m faced with situation, my first step is to determine if there is another number these block sizes share. And in this scenario, there is – 9, 6, and 18 are all multiples of 3.  Returning to our original layout:

We will need to add 3-inches of fabric in some form to make the blocks come together to form units.  This added 3-inches can be in 1-inch, 1 ½-inch, and even ½-inch increments if needed in order for the blocks to match up evenly.  These extra pieces of fabric were called coping strips years ago. Now we usually just say sashing, Whatever you want to call them, the strips can be used in lots of ways.  You could join the smaller blocks together like this and then put the coping strips around the unit, or you could divide the coping strips evenly between the blocks.

 The design is entirely up to the quilt maker and what he or she likes.  When I work with a quit top that has coping strips, I tend to pick a neutral color (usually gray works best for me – that’s my preference, though) which will tie all the blocks together.  If the blocks are primarily constructed of solid colored fabric, I will choose a print fabric I’ll use as part of the border for the strips.  And if the blocks are varied and use lots of different colors, my go-to color is white.  Why white?  Because when you add enough white to any scrap quilt, it serves as a great buffer and eventually all the blocks will play nicely together. 

Now let’s take another look at fabric panels. This same process works if you purchase a panel that has different sized prints on it, like this one:

Remember I ran into this situation with the Fish Almighty quilt I made Bill for Christmas.  I had four small fish pictures and one large one.  And in the case with this quilt, the size needed was really dictating the layout.  It basically became big enough to put on a bed.  The great thing about panels like this is your coping strips are borders and they can be pieced ones or simply floaters.  The goal is to get the panel pieces large enough to fit in with the blocks you’ve constructed to go with them.  In the case of a panel with several different sized prints, I design my layout first, then begin to make the borders.    

We’re really accustomed to quilts which have blocks marching across the top in rows or columns, whether or not the quilt is straight-set or on-point.  We’re used to seeing this kind of uniformity.  However, the seemingly random (but not really random) use of different-sized blocks visually shakes up a quilt.  It’s unique and really not that difficult to pull off.  It does take a bit more pre-planning than the “standard” quilt, you need somewhere to lay it out, and you gotta use a bit of math; but the payoff is a quilt which is visually stimulating and just plain fun to look at.   I’d like to encourage you to give it a try.  Grab some of your orphan blocks or plan a layout and make blocks of all sizes.  You have the tools to do this.  Push yourself out of your comfort zone.

Until next week, Level Up Your Quilting!

Love and Stitches,

Sherri and Sam

Categories
Uncategorized

Your Machine Needs a Spa Day

With everyone in “hunker down” mode due to COVID, a lot more sewing has been happening.

That means more time spent on your sewing machine.

Which means that thing has probably been humming away for hours/days/weeks at a time.  The quilters I’ve talked to have either been whittling away at their UFOs or making masks out the yin-yang. 

If this is the case, then right about now, you need to give your sewing machine a spa day.  Clean it, oil it if necessary, and maybe even give it a hug.  It probably has kept you very productive and on the right side of the thin line between sanity and insanity.  Since this is the case with my Big Red, I thought it may be the same for you and your machine.  So, today we’re talking about sewing machine maintenance.  But first, let me issue a word of warning:  Before undertaking any of my suggestions, READ YOUR SEWING MACHINE MANUAL.  Some of these points are universal (such as changing your machine needle) and others are brand-specific (such as oiling).  And even if you have two different machines that are the same brand, the procedures may be slightly different for each.  My little Juki requires less oiling than my Juke 2010Q. 

Under normal circumstances, I recommend cleaning your machine regularly and taking it to a tech every 12 – 18 months for servicing.  A sewing machine is an investment, whether you’ve paid $200 or $2,000 for it.  If it’s taken care of, it should last you for years.  I have a loose schedule for keeping up with these two tasks.  I clean my machine the first weekend of every month and take it to have it serviced before I leave to go on my fall quilt retreat.  Knowing when to change my needle is a little trickier, but we’ll get into that later.

Since there is a difference between maintenance and cleaning, this blog is broken into two parts.  In the first part we will deal with maintenance – those activities which should be done regularly to keep your machine in good working order.  The second half of the blog will discuss cleaning your machine.

One thing you want to do is keep your machine covered if you’re not using it every day.  Most quilters use at least one of their machines almost daily.  If that’s the case, you don’t necessarily have to keep that machine covered.  However, according to the last quilting statistics I received from the Craft Industry Alliance, the average quilter has six sewing machines (this does not include long arm machines).  Chances are the average quilter is not using all six sewing machines at the same time.  The ones which aren’t in use really need to be covered.  This keeps dust out of the machine.  Big Red is rarely covered unless she’s going somewhere.  But my Baby Lock Embroidery Machine, my Featherweight, and both Juki’s stay covered because I don’t use those every day.  Most of today’s machines come with at least one soft cover or a hard one.  Some older machines – such as my Featherweight – come with a carrying case but no cover.  Since I don’t use Marilyn the Featherweight regularly, I made her a cover.

Another maintenance issue doesn’t have to do with the machine itself, but does take into account what type of thread you use.  While your stitches may not show the difference between short-staple thread and long-staple thread, the inside of your machine will.  Short-staple thread is linty and can make a mess on the inside of your machine, especially around the bobbin casing.  Long-staple thread isn’t as linty.  If you use the short-staple thread, be prepared to clean your machine more often.  If you want to know more about thread, you may want to take a look at my blog: https://sherriquiltsalot.com/2019/04/17/a-love-affair-with-thread/ .

The type of needle used in your machine is just as important as the thread.  As quilters, we know it’s important to have the right size needle for the job.  Quilting cottons don’t use the same size needle as denim.  A top-stitch needle is great for machine quilting.  However, it’s equally necessary to have the right brand of needle in your machine, and it’s necessary to consult your sewing machine manual to make sure you have the right one.  Some machines, such as Big Red, work best with Schmetz or Organ needles.  Same with my Jukis.  My Baby Lock likes Schmetz.  My feather weight uses Organ.  I’ve learned the hard way that “universal” brands don’t work well in my machines (those generic needles that claim they can be used in multitudes of machines). Some sewing machines, such as most Singers, use only Singer needles.  When you use the wrong size needle the results will render skipped stitches.  If you use the wrong brand of needle, you can damage your machine. 

Changing the needle regularly is just as essential as using the right one.  Even if the needle looks perfectly straight to your eyes, after it’s been used awhile, it can be slightly bowed, even if you can’t see it.  The tip of the needle also will blunt after hours of use.  The general rule is to change the sewing machine needle after eight hours of sewing.  If a titanium needle (my favorite!) is used, you can double the amount of time to 16 hours.  However, I’ll admit it’s difficult to keep up with all the hours you’ve used a needle.  Years ago, when I first started quilting and was only working on one project at a time, I simply changed the needle after every project.  This seemed to work well for my machine and for me.  But now I work on multiple projects at once and more on one machine than another.  Due to this, I’ve developed some general rules I follow:

  1.  If I’m using titanium needles, I change those every three weeks.  If I’m sewing with regular sewing needles, I change those every two weeks.  I do this for the machine which is being used the most.  The other machines will go longer between needle changes, and for those I generally change the needle after I have to refill my bobbin twice.
  2. If I’m performing what I call a “high density stitch project” such as machine quilting or paper piecing, I change the needle (no matter what kind I use) as soon as I complete that quilt.

If you’re a stickler for getting every second out the needle you can, just keep a notebook near your sewing machine and log your time.  And I’ll throw this out right here – I swear, the longer you sew on a machine, the more in tune you become to it’s sounds.  When I hear Big Red make a distinct “thunk” as the needle moves through the fabric, I know it’s time for a needle change.  And if you find yourself replacing needles frequently, do what I do and purchase them in bulk.

The last thought I want to throw in under general maintenance is clean the outside of your machine regularly.  Even if it’s covered, every couple of weeks take a clean cloth and wipe down the outside of your machine.  Dust can do a number on your machine, and it doesn’t take much time to wipe down the outside.  If you don’t cover the machine your using for a project, wipe it down every couple of days or so. 

Now let’s talk about actually cleaning the inside of the machine.  Big disclaimer here:  Every sewing machine brand is a little different and it’s vitally important that you read your manual before cleaning and oiling your machine.  If you’ve misplaced your manual or purchased a used machine which didn’t come with one, Google your brand, make, and model number of machine.  Chances are it’s on-line and you can download it.  Most manuals are available for free downloads.  I even found the one to my Featherweight 222 on the internet.  I am covering generalizations for cleaning and oiling.  Be sure to confer with your machine’s manual before proceeding.

These are my tools for cleaning my machines:

Q-Tips, make-up brush, soft toothbrush, and toothpicks.  Know what’s not in this picture?  Canned air.

While canned air may seem like a great way to blow out lint and dust, it can actually harm a machine in two ways.  First, instead of blowing out the grime, it can force it down into tiny crevices and make it super-difficult for even a sewing machine tech to remove.  Second, canned air contains moisture, which is bad for all machines, but especially computerized ones. 

This is the inside of my Janone 7700. It has a top loading bobbin, which in my opinion, is the easiest bobbin set-up to work with. I remove the needle plate and clean the entire inside.

The bobbin area is the first place I start my cleaning process.  I remove the needle plate on Big Red, my Baby Lock Spirit, and my little Juki because they have drop-in bobbins.  My other machines have separate bobbin cases and they load under my needle plate, but I can get to those without removing the plate. 

Side-loading Bobbin Mechanism

I use a small make-up brush and a Q-Tip to clean the bobbin area out.  Next, I move to the feed dogs and use the soft toothbrush to clean the teeth on those.  If there are large clumps of lint visible, often a toothpick can get those out.  The universal rule for cleaning all machines is don’t force anything into any of the mechanisms to clean them.  Clean only the areas you can see with your eyes.  With Big Red I can remove the entire bobbin case mechanism, so I can clean her pretty thoroughly. 

After you clean the machine, go ahead and oil it if your manual tells you oiling is necessary, and then oil only the areas it tells you to.  With Big Red, I have one spot and one spot only that I oil. 

The only place I oil Big Red.

My Juki 2010Q has several areas, as well as my Featherweight.  Some machines are self-lubricating and don’t require you to oil them at all – the tech has to.  In any case, be sure to read your manual before oiling and use only sewing machine oil.  Most machines come with a small bottle of oil.  When that runs out, I recommend Nifty Notions Zoom Spout Oil.

This is why I like Zoom Spout. You can get into the small spaces on machines that have lots of spots to oil.

During the normal piecing process, I clean my machine after I’ve used up two bobbins or the first of every month, which ever comes first.  If I’m paper piecing, using flannel fabric, or quilting, I do it as soon as I’m through with the project, no matter how small that project is.  All of those processes are notoriously linty.  Also, if you’re using short-staple thread, remember you will need to clean the machine more frequently. 

The last issue I want you to think about is your sewing technician.  I’ve always thought   every woman needs her own village – every woman needs a BFF who will tell her the brutal, honest truth; a good auto mechanic who she trusts and won’t price gouge her; an equally good and honest appliance repair person; and a great general physician she trusts.  If you sew, you need to add one more person to your village: a good sewing machine technician.  In the past, I’ve always encouraged those who are in the market for a good sewing machine to buy local.  Purchase the machine at the locally owned fabric or quilt shop.  This is a good idea for two reasons.  First, it supports your LQS.  Second, if you purchase at a LQS, most of the time the first year cleaning and tuning is free.  When you take the machine in, you meet the technician, who most of the time, is also a local person and wants to make sure your machine runs like new.  With more and more LQS’s shuttering completely or closing their brick-and-mortar stores, this is getting more difficult.  Often there is no local shop to purchase a machine from and on-line ordering is the only way to get a good machine.  If this is your situation, ask around for a good, local sewing machine technician (take it from my personal experience – you don’t want to ship your machine off for servicing – remember what happened to Loretta, my first long arm?).  If you’re not sure who to ask, see if there is a quilt guild in your area and post the question on their Facebook page or send them an email through their website.  Ask other folks who sew or quilt.  Find out from several people who they use and if you see the same tech popping up with glowing reviews, this is who you need to call and add to your village. 

How often should you take your sewing machine to the tech?  Of course, if it’s skipping stitches, the tension is wonky, or some other issue pops up and you’ve done everything the manual has said to correct it, call the tech.  Chances are it’s just a minor issue, but it may be something only the tech knows how to do.  Otherwise, if you have several weekly sewing sessions, take it in once a year to have it thoroughly cleaned, serviced, and oiled in areas you’re not supposed to.  If you’re a less-frequent sewer, you can go up to 18 months between servicing.  But I wouldn’t go any longer. 

Let me throw this in here, too.  If you’re thinking about purchasing a new machine, call your tech.  They will know the best brands for the dollar, those which give the least amount of trouble, and those that still need some time to get the bugs worked out of their computerized systems. 

Take care of your machine(s) and it will give you years of enjoyment and service.  And after all the COVID quilt making, I know Big Red needs a couple of days off and the spa treatment.

Until next week, Level Up Your Quilting!

Love and Stitches,

Sherri and Sam