Categories
Uncategorized

A Full Heart and Busy Hands

I love this time of year.  I love the leaves changing colors and the temperatures edging lower.  The sky is so blue it nearly makes your eyes ache to look at it.  I love that it’s nearly Thanksgiving.  When I was growing up, my mom’s big holiday was Christmas.  She and Dad would pull out all the stops on presents and on decorating.  Jingle bells jingled and the tree was always huge.  There were tons of presents and tons of relatives and Christmas is still that sweetest of sweet spots in my childhood memories.

In 1983 I married into a huge family.  My husband had two sisters and two brothers and nieces and nephews nearly as far as the eye could see.  And Bill’s mother’s big holiday was Thanksgiving.  The family was too big and too spread out for everyone to get together at the same time for Christmas, but by-golly-gee when Thanksgiving Day dawned, Lena had pulled out all the stops for her favorite holiday.  Turkeys.  Dressing.  Cake.  Green Beans.  Pie. And her potato salad.  Oh, my goodness could that lady cook.  Don’t even get me started on her biscuits….my beloved paternal grandmother could not even rival Lena’s biscuits and gravy.

Probably unbeknownst to her, she transferred her love of Thanksgiving to me.  I love that holiday because it’s a little slower than Christmas and it is a wonderful beginning to the holiday season.  I love it because there’s a little more time to linger at the table and talk.

And it’s also my birthday…which is pretty darn sweet.  My birthday falls on the 24th, so it’s right around Thanksgiving.  As I was waltzing into the Thanksgiving season this year, I was thrown a loop by my tribe of Sit and Sew buddies – they threw me a little surprise birthday party.

I’ve never had a surprise birthday party before.  It made me just a bit teary.  My best bud Janet made me this cake…

Bday Cake

There’s a story behind this cake.  See, Janet is the Hospitality Chair for the guild.  When we had our Quilt Reception after the judging this year, I asked her to make a cake for the occasion.  And I kept texting her pictures of all these 3-D sewing machine cakes that I thought was just perfect for the reception.

She quickly let me know she didn’t do fondant.

I have no clue what that is…but evidently it’s important on a 3-D cake.   “Fine,” I huffed.  “Then how about a long arm cake?”

She said no to that too.

Hence the reference on my birthday cake.

I got some nifty presents…these girls know me too well.

I have gotten some work done this week.  I finished my pinwheels for Halo.  I had forgotten how much I love those little blocks and enjoy making them.

Pinwheels

I was deeply saddened by the death of Nancy Zieman on November 14.

NZ

She had been seriously ill for a number of months.  I never had the opportunity to go to Beaver Dam, WI, or sit in on one of her classes.  But back in 1985 when a young 24-year old woman discovered she was pregnant with a baby girl and wanted to learn to sew, Nancy’s programs taught her how to do just that.  I watched her show every Saturday and subscribed to her lessons by mail.  At that time, I knew I couldn’t afford to buy Meagan the dresses I wanted her to wear, but between Nancy Zieman and Martha Pullen I learned to make them.  Those were sweet, precious times as I discovered not only could I sew, but I thoroughly enjoyed it.  I grew more and more confident as I read through their information and taught myself how to sew.  I am one of many that count myself as part of Nancy’s legacy.

With Thanksgiving next week, there won’t be a blog the week of November 23.  My big birthday plans are to clean out the closet next to my studio and move some project boxes into that and straighten my studio.  Right now, it looks like a hurricane has ripped through it.  I also have treated myself to some zippers for my long arm.  Those will also be installed.


Have a wonderful Thanksgiving….


Still quilting fearlessly…


Love and Stitches,

Sherri and Sam

DSC01089 (1)

Categories
Uncategorized

And The Countdown is On…

It is really hard to believe that there is so little time left in the year 2017.

I mean, it just seems like yesterday that I put up a new calendar and cleaned up after Christmas.  This past week I deep cleaned the house for Thanksgiving and put up my decorations for that holiday.

In a couple of weeks, all of that will go back into boxes and the tree will come out along with the twinkling lights and greenery.

And suddenly 2018 will dawn.  A New Year with new possibilities.

All of which means one thing for me:  I gotta finish our Quilt Club’s Mystery Quilt.  It’s supposed to be shown at the January guild meeting. That quilt and Sue Garmin’s Halo have been front and center on my machine for about  a month now.  I will show pictures of Halo’s progress soon, but wanted to share what I’ve designed for the Mystery Quilt with this blog.

As I’ve said before, we were given six blocks with the option of making either 12-inch or 6-inch blocks (finished).  I didn’t want to make the large blocks, and was more than happy to make the 6-inch ones since I love making small blocks.   The problem with that is six 6-inch squares makes for a very small quilt, even with setting triangles and setting blocks.  After working with a layout,  I made ten additional 6-inch blocks to form a border with the quilt squares and decided to use a medallion in the middle.

I had hoped to come up with an original design for the middle, but I ran out of time before I ran out of imagination. So, I chose one Esther Aliu’s flower designs on her newest pattern, On My Window Flowers Bloom.  I love her designs and never seem to have enough time to work with them.

DSC01120

I wanted to make it look as 3-dimensional as possible, so I decided to do all sixteen leaves with two colors of green, as well as make the poppies (I think they’re poppies) in two colors of coral.  I introduced a floral black in the cornerstones and will echo that again in the final borders, so I used it again for the vase and a green that is not in the leaves but used in the blocks.  My goal was to use only the fabrics in Connecting Thread’s Firenze collection, and I am happy that I’ve been able to do so.

DSC01122

But let me tell you, getting all of those leaves and stems down was no easy task.  The flowers were much easier.  I think I ended up pretty close to the original pattern, so I ironed everything down and laid out what I had done up to this point.


I am fairly pleased.

And Sam seems to like it.

DSC01123

And yes, he will make an appearance in the quilt….just wait….

This is raw-edge applique, so the next decision that needed to be made was thread.  Fortunately, my mom gave me this thread kit (also from Connecting Threads) for my birthday and the greens and corals match perfectly.

DSC01125

DSC01126

I pulled a black from my Mettler connection.  As soon as I get through making the pinwheel set for Halo, this will be under my needle this weekend.

The High Point Quilt Guild had an awesome meeting last night with the quilter that designed the Harry Potter quilt, Susan Owenby.  She is a powerful quilter with a powerful message.  More on her later.

Until next week, take care and quilt fearlessly!


Love and Stitches,

Sherri and Sam

Categories
Uncategorized

I Was In The Right Place, At The Right Time…

Every once in a while, I find myself at the right place at the right time…

In last week’s blog, I told you that I was spending the weekend with my mom in Graham.  She had a follow up appointment with the hematologist and I wanted to go with her.  First things first, the doctor’s appointment went wonderfully great and Mom is well on her way back to normalcy.  No more iron infusions are required now and there is another follow up appointment in three months.  Everything is holding steady, but if she gets to feeling “puny” again, she needs to call the doctor’s office immediately.

THAT has been a year-long, hard journey, my friends.  I am so very thankful that her health is better.  And a huge “thank you” from me to all of you who emailed, texted, messaged, or called to ask how she was doing and to tell me you all were praying for her.  I appreciate that and you all more than I can say.


So anyway, back to being at the right place at the right time.  One of Mom’s friends needed my help sorting through some sewing machines.  This lady’s mother-in-law had to move into assisted living.  And she was a quilter.  Her machines and sewing supplies were moved from her home to a storage unit. There were a couple of Pfaffs that I was to look at as well as sort through some boxes of thread and miscellaneous sewing supplies.  So, Friday, before Mom’s appointment, she and I went over to the unit to kind of get a “lay of the land.”  There were boxes of notions, the two Pfaffs, and to the side of them sat a very inconspicuous black box.  It was not very big, but I immediately knew what it probably housed…a Singer Featherweight.

I have been drooling over these machines for years.  Several of my quilting friends have one and I’ve always been just a bit envious of this link to the past of our sewing history.  I opened the case up, saw what was inside, immediately shut it and asked what was the asking price.   A little eBay research later and I walked away with a Singer Featherweight.

What is so special about Featherweights?  They were made to last, for one thing.  The last Featherweight rolled off the line in 1964 and the first one was produced in 1933.  Adapted from the Standard Sewing Machine Company’s SewHandy (bought out by Singer), this little machine was touted by Singer as the “Machine you will sew on, teach your daughter to sew on, and your granddaughter to sew on.” And they are.  They are little work horses that although they only sew a straight stitch, can sew through miles of fabric without a whimper.

Ironically, the Singer Company never called them Featherweights.  Yes, the name is on the manual and like a lot of iconic ladies such as Madonna and Cher, she’s well-known by only her first name – Featherweight.  However, the title Featherweight is nowhere on any of the machines.

From 1933 until 1964 this little jewel was mass produced and shipped all over the world.  It traditionally came in black, although there were a few variants.  Some of the later ones were kind of a cross between white, cream, and mint green.  During World War II, the military had their own Featherweights with a special “crinkle” paint that was mil-spec black to prevent glare.  Those beauties had a leather case that was Army green with military issue numbers on the box.  As a matter of fact, the only thing that stopped the production of the Featherweight was World War II, when metal was in short supply.

Back to my purchase.  Most Featherweights are a 221.  Mine is a 222K – which means it’s kind of an odd-ball Featherweight.

DSC01103

My machine does a few things that the other Featherweights can’t.  For instance, it is a freearm machine, meaning the bed is detachable.  This made sewing cuffs and darning easier.  You can also drop the feed dogs on mine.

The serial number is located on the bottom of the machine and you can use that to find out where the machine was made and the date it was manufactured.  My machine came from Clydebank, Scotland and her birthday is March 14, 1955.  She was one of ten thousand 222K’s made that year.

DSC01102

She doesn’t have a scratch on her and she came with a lot of feet and other gadgets.  I even have a Little Foot made specifically for Featherweights.

DSC01105

DSC01108DSC01104

DSC01109

Look at these prices!

DSC01110

And a really old packet of needles

DSC01113

DSC01114

The case is in excellent condition and the keys came with it.  I don’t know how many hands this machine has passed thought, but she has had excellent care.  The only thing I’m not sure of is what the clamp-thingie is on the side of the case.  The apparatus in the top of the box is where you slide your foot control into to hold it.

DSC01115

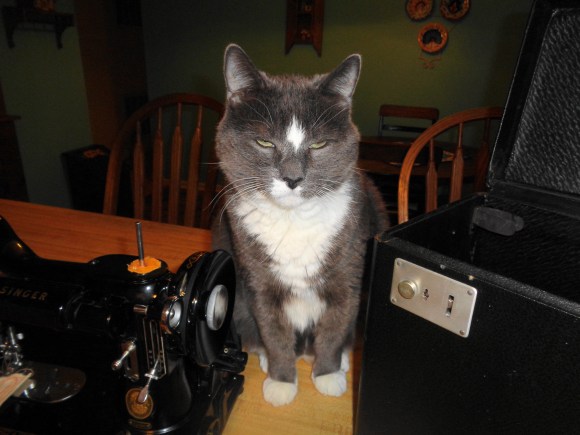
I think Sam approves…

DSC01107

I am happy to have this little baby as my new addition to my ever-expanding sewing machine family!  She has found a good home and I look forward to spending many hours with her in the future.

Love and Stitches,

Sherri and Sam

DSC01112


Categories
Uncategorized

I’m Home!

So, I’m back from my guild’s sixth annual “Drop Everything and Just Quilt!” Retreat.

I am tired, but I’m feeling accomplished!  I finished the top of my Farmer’s Wife!!!  Go me!  Why is it ever a good idea to make a quilt top with 111 six-inch blocks, set on point with cornerstones?  Please tell me…

 FW

All of the blocks were completed before I left, and I had all the setting triangles, sashing, and cornerstones cut out before I set up shop at Haw River State Park.  But even with all that preparation, it still took me from Wednesday night until Saturday morning to finish.  And that was all I worked on…believe me.  I did start a jelly roll quilt afterwards and managed to make all the half-square triangles for that.

Saturday after I had sewn myself silly with the Farmer’s Wife, several of us snuck off to Madison, NC to Stitch Party Quilt Shop.  If you’re in the area, do yourself a favor and go there.  Kathy  (the owner) is a sweet heart and a real help.  The shop is truly awesome!  I came away with these…

DSC01096

To go with this yardage I purchased several weeks ago from Sewingly Yours in Lewisville, NC.

DSC01098


DSC01099

At my guild’s quilt show in August, I purchased a basket with red, white, and blue fat quarters.  I got this to go with those…

DSC01100

This piece of fabric spoke to me, so I came away with three yards of it…

DSC01101


Now I have to decide on the borders for the Farmer’s Wife.  The book has plain borders, but I think that really underwhelms the quilt.  After all the work that is put in piecing those delightful blocks, I think the borders should be a little more intricate.  Carol Doaks has a wonderful book, Carol Doak’s Creative Combinations,  that gives wonderful border options that are paper pieced.  It comes with a CD that allows you to resize the border blocks and print them out.  This is a great addition to your quilting research library – by the way.  The holidays are coming.  You may want to put this on your gift list for yourself.  I’m browsing through this resource to get ideas and finalize my border design.  Stay tuned – I’ll keep you informed.

I’m unpacked and prepping for the applique class I’m teaching next week.  This weekend I will be in Graham with Mom.  It’s time for her follow-up appointment with the hematologist after her iron transfusions.  She’s doing so much better and is back teaching her stained-glass classes.  I’m hoping and praying for the best.  She’s so close to normal again!  And I am exceedingly thankful.


Love and Stitches,

Sherri and Sam

Sam


Categories
Uncategorized

The Pull of the Stripe….

I am trying to break free from my stripes addiction, but the pull is strong! I need help buying non-stripes.

–Gillian Jacobs


I like stripes.

I also realize some quilters don’t.

And I’ve never understood why.

I do have an affinity for fabric that tends to give a quilt “movement.”  So, material with swirls and irregular motifs or paisleys play a prominent role in my quilts and my stash.  These fabrics tend to make the viewer’s eyes move across the quilt and then up and down it instead of focusing in on only the center.  They also go a long way to help disguise any quilting mistakes.

However, for me, striped fabric is one of the most versatile materials that has movement.  There’s just so much a quilter can do with it.  You have to be careful when you use it, but to me, that extra-step in fabric layout is more than worth it when the quilt top is completed.  Some folks may fear that extra step, but if you think about it, quilters have been dealing with stripes on some level all the time.  Made a Log Cabin quilt?  That’s working with stripes.  Made a Rail Fence quilt?  Again, you’ve worked with stripes.  Sewed two strips of fabric together and then sub-cut into squares to make a four-patch or nine-patch?  Stripes.

Strip piecing

nine patches (2)

Rail Fence Quilt

Log Cabin Quilt

Trust me.  You’ve played with stripes before and you will again.

The first issue that must be dealt with is that striped fabric is that it is directional and directional fabrics are not always suited for all quilt blocks.  A directional fabric is defined as fabric that has an obvious an up and down and/or left and right on the outside of the material due to the manufacturing process.  It does require some extra planning and additional care when cutting the quilt out.  Blocks that are strip pieced may not work because segments cut this way often have to be turned and flipped, so all the stripes may not run the same direction once the block is completed.  You must think through the layout and cutting before grabbing that rotary cutter and ruler. In other words, that glass of wine you may have while your quilting?  Leave that alone until after everything is cut out.

Another issue you have to think about is the scale of the stripe.  In many ways, this is the same characteristic you must consider with any fabric – we know large-scale prints can lose much of their beauty and definition when confined to blocks comprised of small pieces.  If the stripes are large, cutting them into two-and-a-half inch blocks may make their beauty dissipate; however, if the stripes are narrow, those two-and-a-half inch blocks can take on great movement and character.

Most stripes are printed to run parallel to the length-wise grain of the fabric (parallel with the selvedge).  There is some that will run on the cross-wise grain, and occasionally the stripes will run diagonally on the 45-degree bias angle.  The easiest way for me to begin to plan my quilt pieces is to take myself back to the very basics of quilting and use templates.

Yes.  Templates.

Most of the time when we read the cutting directions, they will ask us to cut out strips and then sub-cut these into squares or rectangles.  With a little practice, we can usually cut those out without templates and have all the stripes running the same way (at least with the squares – I would still recommend templates for the rectangles).  If your pattern has setting triangles, often the directions will tell you to cut out a square and then cut the square on the diagonal once or twice.  This is where your stripes can get really wonky.  They can run horizontal across two ends of your quilt and vertical across the other two ends.  If this is the look you’re going for, you’re good to go. But if it’s not, try this – cut out templates the unfinished size of your setting triangle and use this as the pattern to cut out all of them.  This takes longer, but it assures you that all your stripes will run in the same direction.

Templates on fabric

My favorite kind of striped fabric are the border prints.  Border prints are fabric with wider stripes that can be used to frame your quilt.  It gives the borders more pizazz and looks like you’ve spent tons of time planning that part of your quilt, when it really all it consists of is carefully cutting the stripes apart on the length-wise grain of fabric.  It’s really great if you can miter these stripes in the corners so that everything matches up.  If not, use cornerstones and go with that.  One quilt and pattern designer that takes using border fabrics to a whole new level is Jinny Byer.  Go to her website and be prepared to be awed.  Border fabric is also great to use with kaleidoscope quilts or for creating columns between vertical rows or sashing for horizontal rows.

Border print

Yes, I  have used stripes for borders!


I like narrow-striped fabric, too, and not just for pieces of my quilt block.  I love to cut the narrow-striped fabric on the bias and use it for binding.  This makes the stripes run diagonally along the bias and add that last bit of movement to the very end of the quilt.  It’s just another “zip” in the “do-dah” of the quilt.

Striped binding


Give stripes a whirl.  You may love them or hate them.  You may want to reserve them only for borders or binding.

Or you may find yourself like I do myself: the pull for the stripes is strong…


Love and Stitches,

Sherri and Sam


PS… There will be no blog next week as I will be at the High Point Quilt Guild’s “Drop Everything and Just Quilt!” Annual Retreat with 33 of my closest quilting buddies…Sam’s minding the  quilt studio while I’m gone.  I know I’m leaving it in good paws.

DSC01089 (1)


Categories
Uncategorized

My Generation….

I had planned a blog on stripes.  I like stripes and how they can add movement to blocks and are really handy-dandy to use when planning borders.

And then Vegas happened.

My generation has been somewhat defined by heart-stopping, soul-sucking, emotionally wrenching events.  I am a child of the 1960’s and can clearly remember (even as a toddler) seeing the newscasts of the Kennedy assassination.  I remember the turmoil of the Summer of Love and the murders of Robert Kennedy and Martin Luther King., Jr.  I remember my parents waking me up in the wee hours of the morning when I was in first grade or so and to watch a grainy black and white TV report of Neil Armstrong walking on the moon.

I can remember where I was when Ronald Regan was shot by John Hinkley, Jr (the Student Center at Elon University).  I was in my second trimester of my first pregnancy when the Challenger tragedy occurred.

And I was making copies of a vocabulary test in the teachers’ office when Columbine happened.  I was teaching science when 9/11 began.

My generation has seen some serious stuff.  And the worst mass shooting in the history of the United States definitely made working with stripes seem a whole lot less important in the scope of everything else that was very important.

In times like this I struggle to try to understand why things like this happen.  And I struggle equally hard to try to explain it to others.  So I’m going to reflect here  with what I told my students after Columbine and  the Terror Attacks on the Twin Towers.

  1. There is evil in this world.  We could theorize for days on why people are evil and want to hurt others, but that does no one any good and only exhausts you.  The fact is that ever since sin entered this world, there has been evil.
  2. It’s up to each of us to counter-act this evil by kindness. Kindness has crossed more borders than any armies and has settled more arguments than any court in any land.  Be kind.
  3. If you see an opportunity to do good and make a difference – no matter how small – do it. It has been put in front of you for a reason.  You may never know that reason, but that’s okay.  You’re only responsible for taking advantage of that opportunity.

I see things differently now than I did even 10 years ago.  I worry about the society that my children are now a part of and the one my granddarlings will grow up in.  Whether it’s the results of a never-ending 24-hour news cycle full of talking heads or if in fact the world is just more evil now (or some kind of weird combination of the two), it does certainly seem that there are  more people hell-bent on destroying as much and as many as they can.  And politicians are not helping.  Instead of seeking to calm and unify folks, every jot and tittle are politicized to death. The bodies had not been taken away from the Vegas concert area before cries of gun control (pro and con) were heard and both parties were having finger-pointing contests.

Just. Please. Stop. This type of catastrophe should not be made a talking point of late night television or even Meet the Press type shows.  There is a real, hurting, human element here.  Quit shoving it out of the way to make your point.

Be kind.  Do good.  Make a quilt for someone that needs a little extra love.  Hug your kids, your grandkids, your significant other, your parents…quit defining this generation as one that spreads derisiveness and hate.

Do unto others as you would have them do unto you.

Categories
Uncategorized

No Quilt Police Will Be Called…

I belong to this Quilt Club that is a part of my guild.

No, it’s not like Fight Club.  Not really.  It began as a History Club and we discussed different historical eras and their quilts and different groups and their quilts until I think finally we were all discussed out.  So, we changed the name to from History Club to Quilt Club so we could do lots of things – not just historical issues.  Susan Pierce is our leader and one of the events she plans for us each year is a Mystery Quilt.  She picks out some blocks for us to make.  Each different set of blocks has a theme. This year it was Patriotic/Election-Related/Presidential blocks.  There were six blocks total and she gave them to us in two different sizes (6-inch and 12-inch) and from there it’s ours to do with what we want.

I love projects like this.  It allows me so much creativity.  Since there was a patriotic theme, it was suggested that we do them in red, white, and blue.  However, since my last Mystery Quilt with these folks used those colors, I didn’t want to use them again.  Hence, my Mystery Quilt began to meld with the goals I had set out for myself in my Year of Fearless Quilting.  Remember one of those goals was to use a color way that I had never used before and definitely wouldn’t be my first choice in the quilt store.  With that in mind, I picked Connecting Threads Firenze line.

firenze

These were the six blocks that Susan gave use – one a month, for six months.

Those of you who know me can readily recognize that while I am more than comfortable with small blocks, these definitely were not colors I have used before in any quilt.

So now that I have them made, I pondered what to do.  This is where your creativity can run wild.  Instead of feeling limited with the number of blocks, my mind was all over the place with what I wanted to make.  I am one of those quilters who happens to love Electronic Quilt, so I began to play with layouts until I came up with this rough draft.

DSC01087

While not all my blocks were going to be the same, now I had a good idea how many additional ones I would need to make – 10.  Since the blocks that Susan gave us were older blocks, I began looking through Barbara Brackman’s Block Base and my Farmer’s Wife Quilt books to see what I could find.  I wanted blocks that would echo the lines and patterns of the blocks that I had made with the original six blocks, but not were not quite the same.  And I expanded my color palate with additional Firenze pieces.  These are the blocks I came up with:

I began to frame them with my focus fabric…

DSC01088 (1)


It was at this point that Sam began to take particular interest in this project – more so than his usual sitting stance of sitting on my sewing machine so I will stop and pet him.  It’s as if he knew he was going to take center stage in this project…and maybe he will.

If I could wish anything on quilter’s it’s this:  Don’t be afraid to do your own thing with what you are given.   Quilting is a lot like life.  We go day-by-day with the ordinariness of it.  We get up.  Go to work.  Come home.  Take care of the house and the kids and the yard and the laundry.  Life is compounded with ordinariness.

It’s what you do with the ordinariness that makes it a life.

Same with quilts.  Don’t be intimidated if you’re handed a bunch of blocks you don’t know what to do with.  Don’t be worried about following a pattern right down to every period in the instructions.  Let your creativity come out to play and try new things.  Make it your own.  In every quilt you make, go out of your way to change something – no matter how small – in order to make it yours.  I promise you the Quilt Police won’t arrest you.

And you’ll have a wonderful time unleashing that creative part of you.


Until next week, Quilt Fearlessly.


Love and Stitches,

Sherri and Sam

DSC00923

Categories
Uncategorized

Fearless Scrappy

As you know, this is the Year of Quilting Fearlessly…


Part of the reason I wanted this challenge for myself is that I have found myself quilting in my comfort zone for quite some time and was no longer happy with the results.  I found my quilts becoming too predictable and too much of the same thing over and over again for me to be challenged with my art.  Now don’t get me wrong, sometimes at the end of a hard day, sitting down to the sewing machine with some mindless piecing is just the thing I need to reconnect with my inner creative Sherri.  However, I have learned over the course of my now almost 56 years that the people, ideas, and things I value the most are the ones that challenged me to think out of my comfort zone.  The students that I still seek out to stay in touch with and think of fondly are the ones that kept me on my toes the most – in a good way.  They were the ones that were always one or two steps ahead of me in their thinking with the curriculum and they were the ones that made me push myself as an educator.  The ideas that have had life altering effects are the one that made me think out of the box.


So, as you know, the first thing I have worked with is Santa’s Loading Dock.

santa's loading dock

I am still working hard on this, but can only do work on this one in starts and stops, as it literally sucks all the brain power out of my head.  It’s a detailed quilt with poorly written directions.  But I’m having lots of fun and have learned to let Linda and Lisa stay about two steps ahead of me so I can learn from them.


The other type of quilt I wanted to learn to make is a scrap quilt.  To those folks who don’t quilt, it may seem like scrap quilts should be the do-all and end-all of all quilts, since a great deal of the quilts our foremothers made were just that – scrap quilts.  But to those highly initiated into today’s quilt world of guilds, bees, workshops, Craftsy Classes, and Facebook groups, a scrap quilt is almost a foreign idea. Lines of cotton and flannel fabrics are carefully designed to appeal to quilters and the colors weave their way into a quilt almost seamlessly and the results are beautiful.  There are countless lines of blender fabric and basic colors out there to guarantee that your stash is workable and almost any quilt would benefit from some of them.


Heck, I’ve written countless blogs on fabric.

But all the quilt making that I’ve done owes itself to The Quilt That Started It All for me:

DSC01066

Some of you may remember this quilt.  This is a quilt made by this lady:

Grandma Perry 2

This is my Great-Grandma Perry.  I know this isn’t a very good picture of her, but it’s all I have.  She made this scrap quilt.  According to my mother (her granddaughter), Grandma Perry and her sisters would piece and then get together to quilt or tie the tops.  This quilt is quilted with large-ish stitches and the batting and backing were blankets from the nearby Fieldcrest Mill in Eden, North Carolina.  I think that it’s the neatest thing in the world that my mom can identify some of the fabric in this quilt.  Yes, some of the pieces are Feed Sacks, but Mom can look at this quilt and tell me, “This was from one of my mother’s dresses,” or “This is piece is from one of my granddaddy’s shirts.”


After Mom gave me this quilt, I researched it and wrote up what I know about it.  And then it stayed in my bedroom on a bench and every day I would look at it and think, “I want to learn to do that.”


So, I learned how to piece.  And then I learned how to quilt.  I am largely self-taught, and have made lots of mistakes and learned from each one.  However, in these days of coordinated fabric lines and tons o’ material choices, I had never ventured to make a scrap quilt.  Frankly, the thought of adding lots of pieces of different values and hues of all colors intimidated me quite a bit.  But recently I had the wonderful opportunity to attend a workshop taught by Augusta Cole, whose theory is “It all goes together, honey.”

I had to bring 288 colored squares to this workshop, matched with 288 squares of a background.  It had to be scrappy.


For years, I was known as the Fat Quarter Queen because almost every project I made was small. I didn’t have a lot of time as a single mom (at that time) with two kids and a full-time job.  Nearly every project I made was small so I could compete it and feel like I had accomplished something.  I only made one large quilt every year to eighteen months.  So, my stash has lots of fat quarters of all colors.  I literally just pulled them off the shelves in random order and began cutting.  This was the results.


This is only the first block of my scrap quilt.

DSC01069

There are a few things I want to change, but I can’t tell you how liberating it was to use up most of my stash (!) and to truly see that everything does work together.  Scrap quilts are like life – no people are the same, but don’t we all work together to make a world that’s interesting!


I can mark one more item off the list of my Year of Quilting Fearlessly.  My scrap quilt will go on retreat with me and I hopefully will finish most of it there.  I can’t wait to see it completed. Pictures will follow for sure.


Until later, quilt fearlessly!


Love and Stitches,

Sherri and Sam

dsc00699

Categories
Uncategorized

Don’t Go Against the Grain

Once upon a time, a long time ago, I used to teach heirloom sewing.  Heirloom sewing is a type of garment construction primarily aimed at children – or rather the parents and grandmothers of children – and primarily female children.  The clothing drips in shaped lace, entredeux, yards and yards of batiste, and hand embroidery.  It is decadent, gorgeous, and tons of fun to create.

One of the first details I had to learn (and in turn, teach my students), was to make sure that the fabric was put “on grain.”  This term means that the warp and weft threads of the material were as close to 90-degree angles as I could get it.  If the fabric was nearly perfect in warp and weft, it meant that the skirts of the dresses wouldn’t sag in the middle of the hem – the hem would lie at an evenly, parallel to the floor all around the  skirt of the dress.  And when a garment takes three yards of material for a dress for a three-year old, “on grain” becomes very important.  No one wants to put that kind of money and time in a frock only to have it sag in the middle of the front.

When I began quilting, I assumed that warp and weft and being “on grain” didn’t matter that much since the pieces in quilt blocks were so much smaller than the pieces in a dress for a little girl.  But with quilting, as in lots of fiber arts, the devil is in the details and it really does matter.  The larger the quilt and the larger the blocks, the more apparent it comes when something is off-grain instead of on-grain.  If you’re making a large quilt with large blocks (and by definition, this for me is any block eight inches or larger), the blocks can distort far more easily and the top sag in places.

So, let’s consider the following drawing:

warp and weft

With fabric, when it is cut from the bolt and unfolded, on either edge of the length of fabric is the selvage.  The material that runs parallel to the selvage is the lengthwise (warp) grain of fabric.  The material that runs perpendicular to the selvage is the crosswise (weft) fabric.  When quilters cut strips of fabric to sub cut into other pieces, the strips are generally cut along the crosswise grain because this gives the pieces a little more ability to stretch.  That may not sound important, but when you have anywhere from an eighth of an inch to a quarter of an inch difference in pieces, that added ability to meet ends of rows or points becomes very important.  Ideally, borders are cut on the lengthwise grain because that grain cut is not stretchy.  Borders should be firm, framing your quilt, and keeping the finished measurements stable.  The 45-degree angle cut across the lengthwise and crosswise grain is the bias cut, and this cut has the most stretch in it.  Bias cuts are sometimes used for binding, such as if the border is scalloped.  The ability of the bias binding to stretch and lie flat around curves and sink easily into the valleys of the scallops make this cut ideal for those situations.  And for those of us that applique, the bias cuts are particularly wonderful for loopy stems and vines and curvy petals and leaves.

Scalloped borders

When purchasing fabric from a quilt shop, the material is usually of better quality than big box store fabric and it’s handled a little differently.  Salespeople generally use a rotary cutter or tear the fabric, which helps keep the grain straight – especially if the fabric is torn.  Fabric will always tear on the straight of grain, which means that when you fold the fabric to cut it, when you match up the torn sides, it’s automatically on the straight of grain.  Fabric from big box stores is often the second-runs and may be really off grain.  However, we all buy that fabric, so how do you correct it?


The easiest way is to tear it from selvage to selvage. Snip the fabric about one inch from one of the sides of the fabric, making sure to cut through the selvage and then tear it.  When you get a clear tear from selvage to selvage the fabric is now on grain.  This could take place in one try or it may take several. “Now wait a minute,” I’m hearing some of you say.  “That’s wasting fabric.”  And clearly it could be.  Sometimes straightening fabric this way can use as much as an eighth of a yard.


So, what’s a quilter to do?  If the quilt blocks are comprised of tiny pieces, then don’t worry about it too much.  By the time all the pieces are sewed together and quilted, the quilt is stabilized and it won’t matter too much.  However, if the blocks are large and have large pieces, it will matter.  And if you’re sinking that much money and time in a quilt, and you’re worried about the fabric being on grain, purchase a little extra and give it a tear to make sure that warp and weft are on 90-degrees.

Large blocks, such as these from The Country Inn Quilt, should definitely be cut on the straight of grain.  Small blocks, such as the ones below from  The Farmer’s Wife Quilt wouldn’t necessarily need to be cut on the straight of grain because the blocks are 6-inches finished, the pieces are so small, and I paper-pieced them


There are a couple of exceptions to this rule – stripes and plaids.  Sometimes putting these fabrics on grain will skew the print of the stripes or plaids, since fabric isn’t always printed on the grain.  When cutting these fabrics, follow the design and not the grainline.  If, while working with these prints, you discover that the fabric is so horribly off-grain that it’s bowing and skewing, you may want to completely discard it.  Or you may want to try paper piecing the blocks, if they lend themselves to this technique.  Quite often, the additional paper or muslin foundation will add a little more stability to the fabric.


I hope that everyone made it through Irma safely.  I read truly heartbreaking accounts of quilters faced with hard choices – what to take and what to leave.  And their hopes that when they did get to return home, that everything they held dear would somehow make it through the storm.  We got a little wind and about two days’ worth of rain but that was it.  For that I am very thankful, but am worried about my quilter friends in Florida that I haven’t heard from yet.


Love and Stitches,

Sherri and Sam

DSC00737

Categories
Uncategorized

Irma is No Joke…

irma-tuesday


Okay, so this blog was supposed to be about the importance of the straight of grain, warp, and weft, and how to straighten your fabric when it comes off the bolt looking like it’s one martini short of a three martini lunch.

However, Irma has interrupted my plan.

When I write what I consider to be instructional blogs, I make sure I have ample time to research them and even more ample time to write them.  Sometimes it’s harder to make people understand a “word picture” than an actual picture.  I often find myself deleting entire blogs paragraphs because I don’t think they’re very understandable.  I knew that would be the scenario this week – lots of writing and editing.

Then came Irma.

I don’t live in Florida, but am concerned because I have friends there and it looks like the entire state is going to take a hit.  I just read a headline that said Disney World is considering closing, so this hurricane is serious, folks.  I do live in North Carolina and we are supposed to begin feeling Irma’s wrath somewhere between Sunday and Monday – at least that’s what the weather forecasters are saying now.

But Irma’s flexible.  She could change her mind and come earlier.

And since I’m the one in our household that thinks about such things, I morphed into “Hurricane Preparation Mode” this afternoon. Now you have to understand this situation in North Carolina.  Our entire state will shut down if there’s less than an inch of snow.  Lots of other folks make fun of us because of this.  But the fact is we know we don’t know how to drive in the stuff because we get so little of it.  So, if the Weather Channel breathes a whisper that we may get snow or ice, there’s a mad dash to the local Teeter my grocery store of choice because of the wine selection for bread, milk, coffee, and alcohol, and then we hunker down because we know sooner or later, the power is going to go, too.  Unlike some of our Northern neighbors, we have not learned to run our utilities underground.  If we get ice, we just assume that our power is going to be down for at least 24-hours.

We understand snow and ice.  Hurricanes, not so much.

You would think living in the state that has been such a big part of historically huge hurricanes that we’d react a little quicker.  Nope.  I believe that the fact that we’ve survived so many of these makes us a bit jaded about the inconvenient possibilities this girl could punch.  When I checked out my groceries at the Teeter at Adam’s Farm this afternoon, the lady commented that I bought more than usual.

And I did…two cases of water, two bottles of 19 Crimes, charcoal, fresh fruit, extra cate food, cat treats, and two disposable litter pans, etc.

“I’m prepping for Irma,” I replied as I fished out my debit card and swiped it through the meter-thingie.

She looked at me for a long minute, like she thought I had grown three heads.  “You’re the first one…”

Never let it be said that I’ve ever been fashionably late for anything.  Even a hurricane.

Irma is serious folks.  If your state has ordered an evacuation, evacuate.  If not, and there’s local flooding, stay off the roads.  Hunker down.  Let Irma pass.  If you keep your power, piece some of those UFOs that have been languishing for months because you never have the time to get to them.  If the power goes out, pull up a chair to the window and hand applique or hand piece for a while.

I’m at the age where I don’t like inconvenience and appreciate the little things in life.  So, I have chocolate.  And coffee.  And water. And good wine.  And extra cat food because Sam has got to be happy, too.  I filled up my car with gas.  I have hexies cut out to hand piece in case the power does go out. I’m about ready as I can be.


Irma can come…I just hope she doesn’t stay long.


Please be careful folks.  Keep yourself, your family, and your pets safe.  We’ll deal with warp and weft later.


Love and Stitches,

Sherri and Sam
DSC00848