I am writing this blog on December 2, 2020. It will be published December 30 — near to New Year’s but not quite 2021 yet. But close enough for me to give my quilty yearly predictions and announce our theme for the next year.
Overall, this is how I feel about the year 2020.
Yep. It’s been that bad. Personally, I’m ready to put this year in the rearview mirror.
Over the past 15 years, the quilt world has changed dramatically. We’ve seen more and more LQS’s shutter and go out of existence or change over to on-line sales only. With the rise of such sites as Craftsy, YouTube, and AQS classes, the momentum was already there for more web-oriented instruction. If anything, 2020 pushed both of these into the fast lane and then accelerated them to 120 mph. To be honest, when I looked back at this year and tried to predict what will happen in the next, I really had a difficult time.
Last year, if you remember, I had three predictions:
Technology would change our quilt world for the good and the not-so-good.
Quilt groups would become smaller.
There would be a resurgence in quilt preservation.
As a “seasoned” quilter (read that as someone who has been around the quilt block a few times), I had a love/hate relationship with technology. While it allowed thousands of us to take classes via Craftsy, YouTube, and AQS, I was afraid we would lose our person-to-person interaction.
Then enter COVID and everything came to a grinding halt until we were introduced to a little tool called Zoom. Not only did this allow me to continue to meet with most of my groups, but it also allowed me to attend guild meetings all over the world. I’m now involved with a monthly sit-and- sew with women all across the United States and beyond. I’ve had the indescribable privilege of taking classes with internationally renowned instructors from the comfort of my studio.
It. Has. Been. Amazing.
I’ve met so many wonderful quilters I would have never met if not for Zoom. While I miss the face-to-face meet ups horribly, I can’t not appreciate the technology which has opened so many doors. As a result of the virus, our physical quilt groups became smaller, but our virtual ones grew. And I think once most folks get the vaccine, our guilds, bees, and sit and sews will swing back into regular sessions and grow. I firmly believe quilters will want to see each other in person. And I also think that during all this stay-at-home time, hundreds of folks have started sewing. I can’t help but think they also dabbled in quilting and would like to join a guild or bee.
As far as quilt preservation goes, I do think there is an increased interest out there. I’ve seen more questions asked about old quilts via internet sites than I’ve ever remembered. And with Barbara Brackman and Electric Quilt publishing the updated Block Base, I’m sure that interest will continue to grow. I really hope in the next couple of years we can see another round of quilt documentation days. In North Carolina, the last gathering of such information was in 1985-1986 and it only included quilts made in the late 19th century through 1976. I think it’s time for us to procure additional documentation before another generation of quilts are lost.
As far as my quilty predictions for 2021, COVID and its aftershocks have turned the quilt world upside down (just as it has nearly everything else). Some of you know my daughter now works in logistics with a major international company. We were talking over breakfast the other day and Bill asked her how the upcoming holidays plus COVID was affecting shipping and shopping. “Is the genie out of the bottle now? Will people keep ordering stuff online like this forever?” he asked.
Meg, who is working 16-hour days at this point, rolled her eyes. “There is no bottle now. There’s just lots of genies…running amok.”
In short, COVID has changed retail forever. COVID may have changed everything forever. The quilt world is no different. So, my predictions are:
More brick-and-mortar quilt shops will close – with most of them being the small mom-and-pop operations. They may go online only or opt to completely shutter.
There will be few in-person quilt shows in 2021. As a matter of fact, I don’t think in-person quilt shows will resume until most of the population has the vaccine (or at least the opportunity to receive it). However, Mancuso currently has virtual shows and they are awesome. You can access vendors, quilts, and classes. Take advantage of this while the opportunity is out there. I kind of hope virtual quilt shows remain even after the in-person exhibitions resume.
Get used to Zoom. It’s here to stay. My third prediction is that Zoom classes and meetings will remain long after its safe to meet in person. It’s easy. Security has improved a lot, and it allows quilters all over the world to sit, sew, chat, exchange ideas and tips, and fellowship. Not to mention quilt instructors can now teach from the comfort of their own studio. No packing or unpacking, no travel. While I do think (and hope) in-person classes will resume, the opportunity to have instructions from great quilters all over the world is amazing.
Quilt groups will grow. The folks who were already involved in quilts and bees more than likely will want to return to meeting in person as soon as we’re able. However, if you’re a numbers geek like I am, and you’ve been looking at how many sewing machines and yards of fabric and elastic sold during this pandemic, you’re more than aware of this fact: Hundreds of people started sewing in 2020. I was in a local Walmart around June and it was completely sold out of sewing notions, including sewing machines. I can’t help but believe (and hope) that out of all these sewing consumers, some of them have either learned to quilt or want to learn and will join bees and guilds once we’re able to start meeting again.
It’s against the backdrop of COVID I decided what our theme for 2021 would be. This past year was long and hard. Collectively, we did some difficult things. We shut down. We didn’t meet. Many of us pushed aside our quilting and made masks until PPE manufacturers could catch up with demand. We wore masks and made darn sure everyone we loved had one. We washed our hands multiple times a day (I finally quit wearing my rings. They were taking a soapy beating and I was scared I’d lose one). We social distanced. We’ve put up with toilet paper shortages, meat shortages, and other scarcities. We watched an economy (which was the best it had been in my lifetime) dwindle down to a near-recession. We’ve been both afraid and determined and now we’re fatigued. And you have no idea I wish I had some kind of Harry Potter magical power to wave a wand and make it all go away.
With those thoughts, plus knowing we’re all kind of tired, this year’s theme is “Quilting Survival.” What does this mean? It means this year I’ve gleaned all kinds of tips, tricks, and other information to make your sewing life a little easier. I want to explain what some quilting terms really mean. Due to an impressive response I received about blocks, I want to dissect certain quilt blocks – from their history to their construction. I also want to delve into hand sewing and hand applique. I love applique and haven’t really written any blogs on it in a couple of years. I’ll also feature machine applique.
Hopefully, this year will be a little easier on all of us. That’s my prayer.
If someone, anyone would have told me during Christmas 2019, that I would be spending most of 2020 wearing a mask, washing my hands, and standing 6-feet away from people… well, I wouldn’t have believed them. If you remember last Christmas, we were excitedly planning to surprise the grand darlings with a trip to Disney World.
There are days I think we’re handing this Pandemic well. There are days when I want to smash my television set and berate total strangers for not wearing a mask. I sail through most days okay, following my ever-present lists, attending Zoom meetings, and quilting like a mad woman. This year my sanity has been saved by stitches and my quilting buddies who send funny texts (those of you out there know who you are…and you’re the best).
Thanksgiving was different this year. Christmas will be, too. However, let us hold tenaciously onto the fact that the Christmas before AD 1 was pretty rough, too. And humanities’ need for salvation was answered by a baby’s cry from a manager.
Merry Christmas from my quilt studio to yours.
Love and Stitches,
Sherri and Sam
God said: “I need someone willing to take perfectly good fabric
and cut it up into dozens of pieces.
Then, with the patience of Job,
take those pieces and sew them back together in a completely different order.”
So God made a quilter.
God said: “I need someone who makes sure her children
are involved in music concerts, sporting events, theatrical productions.
And then, when it’s time for the child to graduate into the world,
Will collect all the tee shirts they’ve accumulated
And make a memory of what they have accomplished.
Showing them they can be successful in the future.”
So God made a quilter.
God said: “It has to be someone whose hands are never idle.
Who’s willing to take her projects on vacation, to play groups, and while waiting in line at the DMV.
Someone who’s willing to rip out an entire row of stitches in order to make the corners line up perfectly.
But who also knows that perfection is a goal, never truly attained,
and that “handmade” means, by definition,
Bumps and “oops,” and “I’ll do it better next time.”
So God made a quilter.
God said: “I need someone smart enough to cut on a bias, miter corners, and chain piece.
Someone who’s not afraid of pattern names like “Drunkard’s Path,” “Broken Dishes,” or “Storm at Sea.”
Someone brave enough to make that first cut and stitch that first seam and never look back.
Someone who gets goose bumps at the idea of a new project,
Who searches high and low for the perfect shade of blue,
And thinks a good pair of scissors is a better investment than a new pair of shoes.”
So God made a quilter.
God said: “I need someone who enjoys working with needle and thread,
And enjoys even more lending them out for a good cause.
Someone committed enough to make projects for every conceivable occasion or no occasion at all.
Someone willing to stay up all night to finish a project,
then give it away the next day to a newlywed couple or a wounded soldier or a newborn baby.”
God said: “I need someone who can send a word of thanks, of love, of you’re important to me
Without saying a word, but using only fabric and pins.
Someone who can gather together their friends and neighbors
and share the same thing.
Someone who understands intuitively why family hand-me-downs are precious,
and who stands ready to teach the next generation,
So that they too can create beautiful treasures for their children.”
We’re still discussing quilt studios today. I promised storage ideas, lighting and electrical solutions, and the ultimate quilt studio sanity saver. Let’s just dive right in by dealing with rulers. Ruler storage requires an entirely different mind-set. Quilters use small rulers such as this:
And larger ones like this:
And falling between the two are a variety of sizes and shapes. It seems there is a specialty ruler out there for any imaginable quilt block. I found ruler organizational sanity on two fronts: a filing system and vertical imagination.
I have quilted a total of 35 years. During this time span, I’ve amassed quite an impressive number of rulers. I divided this impressive ruler collection into two groups: Those I use occasionally and those I use weekly. Let’s work with the occasional-use rulers first. I decided I needed some sort of “filing” system for them – somewhere I could store them but still knew what I had at a glance. I purchased a plastic filing tub (I think I actually got this from Target) and several hanging file folders. I wrote the name of each ruler on a file folder, put the ruler and any instructions for it in the folder, and then put the file folder in the plastic filing tub. By arranging the files in alphabetical order, I know what rulers I have with one quick glance at the tub. The plus factor in this storage method is it fits neatly under my ironing board – in a convenient spot, but completely out of the way.
The rulers I use every week … and sometimes everyday… must be handled differently. I don’t want to spend time searching for them in a filing system, even if it is a very organized filing system. I have four rulers I use every time I work in my studio: My Creative Grids 4 ½-inch x 12 -inch ruler, my Omnigrip 6-inch x 24-inch ruler with a lip, my Omnigrip 2-inch x 18-inch, and my Creative Grids Binding Tool. Those are simply left on my cutting table. However, the other rulers needed a space which was easy to access and easy for me to see what I had. There are ruler organizers/holders which sit on top of a flat surface, but I didn’t want anything taking up additional cutting or sewing space. With that consideration in mind, I decided to go vertical:
This ruler holder mounts to the wall, organizes my rulers in such a way I can see them, and doesn’t take up valuable horizontal sewing or cutting space. You may not have thought about vertical storage beyond the possibility of cabinets. Don’t sell it short. Ruler holders which hang on the wall are just the beginning. Pegboards are another wonderful vertical storage idea. You can group your storage (thread in one area, hoops in another, etc.) and see what you have in a glance. My dream quilt studio would have one wall of nothing but a huge pegboard and I would have allllllllll my thread on it — because you all know I’m a thread snob and I may have hundreds quite a few spools of thread.
Moving on to where you do your cutting — ideally, you need two cutting areas – a large one and a small one. Obviously, the large space would be where quilts are cut out. You need enough space to spread out the fabric so it can be accurately cut. And depending on the size of your sewing area, this cutting space may or may not be in your studio. When I started quilting, my large cutting area was in the dining room, which was at the other end of the house from my then tiny studio. Now it takes up one wall in my quilt room and it’s only several steps away from my sewing machine. You must keep in mind that not all your cutting will need such a large space. If you’re trimming block units or cutting the dog ears off of half-square triangles, a small cutting space works great. I keep a small Martelli round cutting mat (the kind which can be turned) on a TV tray near my sewing machine. This saves me time (and steps).
The same large/small concept holds true with pressing. Quilters press fabric – a lot. And when I really critiqued my sewing area, I have three pressing options – small, medium, and large. Let me show you how this breaks out. Next to the TV tray which holds my round Martelli cutting mat, I have a wool pressing mat.
This is my small pressing area, and it’s near my sewing machine. As a matter of fact, to do small pressing or cutting, I simply turn my chair around and there’s the TV tray. I don’t have to get up at all. This saves me time and steps.
The next area consists of my ironing board. I have a quilter’s ironing board which is a little wider and doesn’t taper at one end like the standard ironing board.
It also has a rest for my iron and any spray bottles. I use this for pressing blocks (sometimes) and rows (all the time). What I’d like to draw your attention to is my ironing board cover:
The horizontal lines really help when I am squaring up a block or making sure the fabric or block is on grain. This pressing station is several steps away from my primary sewing area, but right next to my large cutting area – this room layout is important, and I’ll explain why in a bit.
My last pressing station is my kitchen counter. I have an L-shaped counter configuration, and the long end of the L is where we eat. I had never really thought about the counter as a viable pressing option until my friend, Cindi, had some of this:
At our last quilt retreat and was using it to make a pressing station out of a table. A lightbulb went off. “Wow,” I thought to myself, “I could get two or three yards of that, tape it to the kitchen bar, and have a huge area to press my quilt tops!”
Bingo! My third pressing station was born. And the large area makes pressing quilt tops a super-easy process. Again, I had to think out of the box, but sometimes the best ideas are the ones not even in the same room as the box. If you have a table, counter, or other large area which could be used, it may make your pressing life easier. As soon as you’re through, the ironing surface fabric can be folded and put away. I purchased three yards of the ironing surface fabric from Joann’s – available on-line only.
Regardless of how many and what sizes your pressing stations are, make sure you have adequate room for your iron (because an iron falling on your foot is no fun – ask me how I know) and any pressing tools you use, such as Flatter, spray starch, Best Press, Tailor Clapper, or pressing cloths.
Now let’s talk about why the location of your large cutting area, ironing board, and sewing machine is important. To do this, let’s take a detour into your kitchen.
If you take a look at your kitchen set up, most of the time location of the sinks, refrigerator, and stove form a triangle. Contractors do this for a reason: it’s the easiest set up for the person who does the cooking. It saves steps and is convenient. Your sewing space should be set up in the same manner for both ease of use and speed.
The pressing area, cutting table, and sewing machine should form a triangle (it doesn’t matter what kind of triangle – 60-degree, right, isosceles –just as long as it’s a triangle).
Since we’ve mentioned iron and pressing areas, let’s also hit on a quilter’s electrical needs. We plug sooooo many things in outlets – our machines, scan and cut, lights, irons, computers, and printers – just to name a few. And some of those items (such as the irons) can pull some serious amperage. If you are lucky enough to own a custom-built sewing studio, have a frank and long discussion with your electrician. Sketch a layout of where you want to place your machines, irons, and other gadgets which require electricity. Electrical contractors are well aware of the amperage things like irons take and will make adjustments for that in your fuse box. They will also make sure you have adequate outlets along the baseboards. If you’re planning on installing cabinets and countertops, don’t forget to allow for some outlets along the top of them. And if you can get outlets put in the floor, you’ve just entered quilting nirvana.
However, if you’re like most of us, you’re making do with whatever current available space you have in your house or apartment. The electrical outlets are already in place. And those outlets will determine how and where you set up your machines and other electrical gadgets. I’m lucky my quilt studio was the family rec room for a number of years. There are lots of outlet along the walls. However, I still have to use these:
I’d like to zero in on the power strips and extension cords. Even if you don’t use them in your studio, chances are you’ll take a class or attend a retreat and need one. The first rule in using these is to remember they have a shelf life. Yes, you can use them for years – until they short out or simply quit working – but most of them become unstable after a year. My husband and I own an environmental business which requires the use of extension cords and power strips to run our negative air machines. OSHA requires we write the date purchased on every cord and replace them a year later because they can become a fire hazard. If you’re only using an extension cord or power strip occasionally, you can go longer before replacing them. If they’re used daily, then plan on replacing them annually. It’s a cheap fix for peace of mind. I do plug my machines into power strips, but I unplug them when I’m through for the day, as well as turn off my extension cord/power strip. As much as possible plug irons directly into an outlet. Plugging an iron into an extension cord or power strip can cause fuses to blow or trip because the cord is pulling too much amperage.
In past blogs, I’ve dealt with fabric storage ideas (and by the way, I just came across a new one I want to share next year). However, I haven’t touched on how to store thread. First, I want to dispel the myth of freezing thread. A few years ago, there was a myth circulating around some quilt circles that freezing cotton thread would prolong its life. This is not true. Storing thread in your freezer just takes up perfectly good space which could be used for ice cream. And the only thing it does for your thread is make it cold.
The longer you quilt, the more thread you’ll accumulate. If you only piece tops, your collection will more than likely be limited to neutrals. However, if you machine or hand applique, or quilt your own tops, be ready for your thread stash to grow exponentially the longer you quilt. And if you own an embroidery machine, you’ll end up with more spools of thread than you know what to do with. Today’s threads – unlike the thread which is on spools like these –
Have a long shelf life. The mechanics behind manufacturing today’s long-staple cottons or tri- and bi-lobed polyesters have improved tremendously over the last twenty years. Polyester thread – which used to be reviled in quilt circles – has improved so much that it now has a welcome place in the quilting world. In no time at all, the average quilter finds his or herself with quite a few spools of thread.
The first criteria for thread storage is keep it somewhere relatively out of direct sunlight. Thread can fade. The next important idea is be sure to separate your thread. In other words, it’s not a good idea to store your piecing thread with your embroidery thread, hand quilting thread, etc. This won’t affect its quality, but when you’re in a hurry and go to grab a spool of thread, it’s easy to pick up the wrong one ask me how I know. Even if you’re storing all of your thread in one area, have some clear boundaries about where one type ends and another begins. I keep the thread for my embroidery machine in a drawer all by itself. My hand and machine applique threads make their home shallow bins. And my piecing thread is stored on these:
Because I tend to purchase cones of this thread instead of spools. I save money in the long run purchasing it in bulk.
I also keep my hand quilting and machine quilting thread separate. I don’t use as much hand quilting thread, so it lives in a small plastic tub with a lid. The cones I use on my long arm also have their own cone storage just like my piecing thread does, but the two are kept separate.
One last word about thread. If you do have some thread which is wooden spools or those plastic gold or silver ones, there are two places to store it.
Here:
Or here:
It’s old. It was produced before thread manufacturing methods and standards changed. This thread has a shelf life and it’s probably way over due to be tossed. If you can’t bear to throw it away, find a pretty jar, put the spools in it, and display it somewhere in your home.
The last two items I’d like to discuss are lighting and doors. I can’t begin to emphasize how important good lighting is. Again, if you’re lucky enough to have a custom-built quilting studio, insist on good lighting. And good lighting for a quilt studio is different from good lighting in a family room or bedroom. Lighting for most rooms in a house (except a kitchen) is meant to give a feeling of warmth and coziness. It’s not necessarily bright and clear. You want the clearest and brightest light you can possibly get. If you’re inheriting a spare bedroom or other room as your quilt studio, just make a plan to supplement the overhead lighting as needed. Hands down my favorite supplemental lighting is Ott. While yes, Ott lights can be expensive when compared to other brands, their light is clear and bright. I have an Ott light on each of my sewing tables and want to purchase another one for my cutting area. You will also want a good light for your hand sewing area if it’s in another location than your sewing room.
And finally, doors. Not these Doors…
These doors.
Take it from someone who started sewing in a corner of her kitchen. Doors are your BFF. If your space is messy or you have to leave a project out, having a door between your studio and everyone else’s line of vision is a sanity-saver. For me, it was always such a pain to have to put my project up and have to drag it back out every time I had a few minutes to sew. Being able to stop at a certain point and then have the ability to come back to that same point without having to rummage through boxes and drawers is a time saver. Also knowing you have to pull everything back out to start sewing can kill any enthusiasm you have.
To sum all of this up, as you arrange and re-arrange your sewing space, keep these points in mind:
Your quilting space is important and should work for you and be ergonomically friendly.
Space and sewing machine use determine which machines are kept out and which ones are properly stored.
Be sure your chair or stool is comfortable, supportive, and can be adjusted for your comfort.
Be open minded when it comes to ruler and tool storage.
Have a workable hand sewing area.
Have both large and small pressing and cutting areas.
Remember the sewing triangle.
If you use extension cords or power strips daily, it’s a good idea to replace them on a yearly basis.
Separate your thread.
Don’t skimp on good lighting.
Insist on a door.
Don’t store your thread in the freezer. It takes up the space meant for ice cream.
I hope this helps you evaluate and re-evaluate your sewing space. This is truly an ongoing process and what works for you today may not work for you five years from now. Be flexible and think outside the box. And don’t be afraid to insist on what you need. Your quilting is important.
We all have two sewing spaces in our head. The first is our dream quilt studio – spacious, well-lit, organized, full of wonderful fabric, and state of the art machines. Lots of storage. Lots of electrical outlets. A huge design wall. My dream studio looks kind of like this:
Unfortunately, in my real-life, it doesn’t exist. Not even close.
It’s easy to look at Pinterest and come up with all sorts of plans and dreams for the perfect quilt studio. It’s just as easy to think in your head, “One day when all the kids leave home, I’ll have my own space.” Or “When we upgrade our house, I’ll make sure I have room,” or “We just need to finish that basement! That’s my space!” Dreams are great. But reality is what it is and it’s best to deal with the sewing space you have now. That way when your dream space does happen, you’ll know exactly how you want to arrange it.
And this is what I want to talk about for probably the next couple of blogs – your present sewing area. This can be a corner of your bedroom or kitchen. A walk-in closet. A spare bedroom. When I first started sewing, it was a small area in my kitchen. Then it went to a finished room in an attic (which was so cold in the winter), to my living room, to the smallest bedroom in the house, to finally the old rec room – which is by far the largest space I’ve had to date. The one characteristic I have noticed about quilters is they tend to “make do.” They always put their quilting last – everything else must be done first. And they tend to work with whatever leftover space is available they can use. Our quilting is important. While your space may be limited due to the square footage in your home, that doesn’t mean it has to be subpar. And I’m not talking about spending huge amounts of money for upgrades. Nope. I’m just sayin’ your space should be safe, well-lit, and ergonomically friendly.
I want to be upfront here and say if you make garments and quilt, your needs are different from someone who only quilts. If you’re the type of sewist who dabbles in a lot of different types of projects, your studio will need more room for buttons, zippers, interfacings, and a dress form. These types of sewing areas need to be set up differently. For the sake of this blog, I’m only working with a quilter’s sewing area. And please do not think just because your quilting area is small, it can’t also be organized and awesome. Whether your studio is large or small or somewhere in between, it has the potential to be terrifically workable. It simply takes some effort and the ability to think outside the box.
Let’s deal with sewing machines first. According to the Craft Industry Alliance 2020 Survey of Quilters, the average quilter owns four sewing machines. This does NOT include long arms (which were up 11 percent in sales from 2019). I have five machines in addition to my long arm. Let your sewing space dictate how many you have out and available for use. My quilt studio could accommodate all five of them out at the same time. However, if they were all out, I would have precious little room for anything else. I decided which ones to keep out by weighing these factors:
What machines must stay out all the time?
Which machines do I use the most?
It goes without saying my long arm must stay out. Leighann has a 12-foot frame. This girl gets significant floor space and can’t be shifted or moved. Leighann dominates an entire studio wall. Big Red, my Janome 7700, also must stay out all the time because I do 90 percent of my piecing on her. I also tend to quilt small projects on Big Red instead of loading them up on the long arm. Not only does she have to stay out, but she also needs an entire 8-foot table to manage quilts as well as some tools.
Out of the five machines I have, I use those two the most. Therefore, they had to stay out. Now I had to decide between Jenny (my small Juki), Barbara (Babylock Spirit Embroidery Machine), Jerri (my Juke 2010Q) and Marilyn (my Featherweight). This decision was actually pretty easy. My embroidery machine has a large throat and a long carriage. And I use it a lot. It stays out on one end of my quilt studio, next to my writing area. I can scoot my laptop and Brother Scan and Cut over if I need to use Barbara. I also love sewing on Marilyn. There’s just something about sewing on an antique Featherweight and it’s connection to the past. Since I use her several times a month, Marilyn sits on the small sewing table my dad bought me over 30 years ago. Putting Jenny and Jerri in storage was an easy decision. The only time I use my small Juki is in classes (which during the time of COVID are not existent) and I honestly haven’t used my 2010Q since the long arm came into my life.
You will go through a similar process. If you have a couple of machines, it’s not a difficult choice. You may have room enough to leave them all out. If your sewing space is small, there may be no other option than to shift them around as you use them. If you do put a machine in storage, make sure it’s cleaned, oiled, covered and kept in a temperature-controlled environment (in other words, not the attic). The primary concept in this decision is to free up as much floor and surface space as possible and still keep your sewing area functional and easy to use.
Ergonomically speaking, it’s important to have your machine at a level which doesn’t put strain on your arms and neck. If you’re a young whippersnapper, this doesn’t mean much. But since the average quilter is 63, the machine set-up is important. Not only are our bodies older, we’re more prone to arthritis and a host of other aches and pains. I became personally aware of the ergonomic importance of my sewing area a few years ago after I took a hard fall. Despite intense physical therapy, my neck hurts nearly all the time now. I know surgery is looming on the horizon, but until then, I must pay attention to how I sit, look at my laptop, and sew in order to minimize the pain. Let’s take a look at how to set your machine space up correctly. If we minimize the stress it can put on our arms, back, and neck, we can sew for longer periods of time – which is something we all want. Ideally you should have your machine set on as surface which allows you to keep your elbows bent at a 90-degree angle.
You really shouldn’t have to look up at the throat of your machine or bend your neck to look down. However, the good Lord in all His wisdom, has not only made our bodies uniquely wonderful, He has also made them uniquely different. I’m 5-foot, 3-inches (on a good day when I’m standing up straight), but I’m very short-waisted. If I sit down in a regular chair at any of my sewing tables, I sit low. This means my arms aren’t at that 90-degree angle and I’m looking up at the throat of my machine. Both of those scenarios mean I’m putting additional strain on my back, shoulders, and neck as I sew. And I imagine your body is different from mine. Since it’s difficult to change the height of a sewing table (unless you’re prepared to spend scads of money for a custom-built one), it’s easier to change the chair you’re using.
Adjustable chairs or stools on casters are just what you need. In my space, because it is fairly large, I can use a chair. The back of it won’t brush up against anything. But if your space is small, an adjustable stool may work better. Both of these can be raised or lowered to adjust to the perfect height for you. And let me throw this in here – test drive your chair. Go to an office supply store which has adjustable chairs on display. Plan to spend some significant time sitting in them. Have a good idea of how big (or small) you need it and focus on chairs or stools that size. Remember your body will spend considerable time in the chair. It should support your lower back well. Also pay attention to the arms on the chair (if it has them). Arms add width and those additional inches can make a difference how it fits in your sewing area. And casters are a must. You’ll move the chair a lot, no matter how small the sewing area is. As a matter of fact, I think casters or glide pads should be on sewing and cutting tables, too. Those little items make changing things around so much easier.
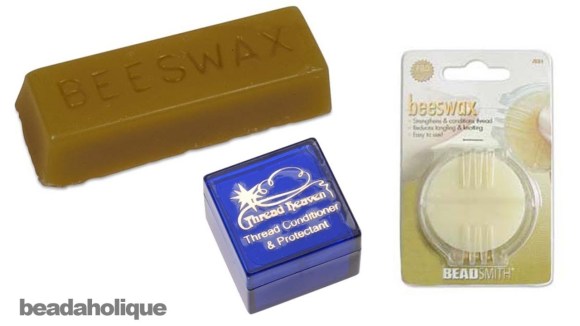
While we’re talking about sewing spaces, let’s also discuss hand sewing areas. Their set up is just as important as how a sewing machine is staged. There are two crucial factors in a great hand sewing station: Somewhere you can leave your supplies and somewhere that’s ergonomically friendly. Let’s talk supplies first. When I sit down to either hand piece or hand applique, I’ll use assorted threads, needles, a pin cushion, water-soluble basting glue, applique pins, beeswax, a thimble, and scissors along with my fabric units. I like to keep all of these in one place – preferably close to a comfy chair, my heating pad (for my neck), good lighting, and the TV. I also want to be able to tuck them away at the end of a sewing session to keep the dust out of them and keep my den looking neat. There are lots of different storage ideas out there. Ott not only makes some great lights, but also great lights with storage space.
I already had an Ott light, but needed somewhere to store everything after a hand sewing session. I searched around High Point for a while (because I in live in the furniture capitol of the world) and found this:
This is a small end table, but it packs a pretty big storage punch, plus it’s easy to assemble. The top lifts like this:
And it has a drawer:
And a shelf at the bottom where I can park books I want to read and a small trashcan.
I can neatly store all my hand sewing supplies when not in use and it’s readily accessible when I want to spend an evening binge watching PureFlix and doing handwork.
In this hand sewing area, it’s also important to have a flat sewing surface – or at least it is for me. I find I hand sew much faster on a flat surface. I have more control over my fabric and my stitches when I either piece or applique on a tabletop or similar surface. If you find a great storage table with a large surface, then you really are set. As much as I love my little storage table, the surface isn’t big enough. To solve this issue, I purchased this from a thrift store:
It’s an over-sized TV tray which folds up when not in use, so it can be tucked away neatly.
Setting up a hand sewing station is much like finding out what works well with your sewing machines. You must analyze the space, the lighting, and your needs to come up with an area which works for you in your space.
Next let’s talk about tools and gadgets. It seems like all crafters have hundreds of tools and gadgets and quilters are absolutely no different. In fact, we may be worse.
There are tools you will keep stored. These are helpful, but not ones you use on a daily basis. Then there are the ones you use daily. And at this point, we’re not even considering rulers raise your hand if you’re a ruler junkie like me. Tools such as seam rippers, scissors, basting glue, screw drivers, marking tools, pressing tools (other than irons), machine oil, pins, machine cleaning tools, and stilettos are items which are used on pretty much a daily basis. These need to be somewhere within an arm’s reach and organized so we can find them without a great deal of searching. To determine what I used regularly and how much storage I needed, I put a large plastic container beside Big Red. Then for two weeks, I would drop in that container every quilting tool I used. At the end of two weeks, I knew I would have a good idea about what tools I used regularly – which would give me a good idea of how much easy access storage I needed. All in all, I used about two dozen tools on a consistent basis. Which led me to purchase this:
And this.
The white Depression-era candy dish is wonderful. I can hang my stilettos, scissors, and screwdrivers in the holes along the side and a pin cushion sits neatly in the dish. An office desk organizer cleverly stores the rest of my stuff including a few small rulers I use on a regular basis while sewing on Big Red. The idea behind this storage is it should be small enough to sit near your machines and not encroach too much on your sewing surface. Hands down, the best place I’ve found such storage is either at an office supply place or a dollar store. I’ve seldom found such storage containers at a fabric or quilt shop. My advice is to think outside the box. Know what tools you need to keep out to make your life easier and how much storage space these require. Then peruse the aisle of both types of establishments with an open mind.
Next week we’ll have one more blog about your sewing space. Ruler and thread storage, pressing and cutting stations, and the nuts and bolts of your electrical needs (and safety) and lighting will be discussed — as well as the ultimate quilt studio sanity saver.
Before we start, you need to know something about me. I’m pretty much a black-and-white person. And by that, I mean I either like something or I don’t. I don’t do “maybe” very well. I like yes or no answers. Numbers are my friends (because the raw data doesn’t lie), but statistics are my sworn enemy (that’s just a way to twist the numbers to make them say what you want them to say).
Thus, my relationships with pre-cuts. For those of you who may not recognize the term, a “pre-cut” is fabric which is cut into measurable units before it is sold – such as fat quarters, jelly rolls, and charm packs. These are generally packaged and sold as part of a line of fabrics. I love these things, and at other times have a difficult time accepting them. We definitely have a love-hate relationship. And I blame our rocky friendship on fabric manufacturers.
As with most relationships, my affair with pre-cuts began innocently enough. It started with fat quarters. In my early days of quilting, between kids, job, and grad school, I mainly completed small quilt projects and fat quarters fit into my schedule (and wallet) nicely. I loved them and they made it possible for an entire fabric line to come home with me, take up comparatively little space, and didn’t break the Fields family budget. They were high quality and most of the time held the true measurements of a fat quarter – 18-inches x 22-inches. Add to those facts there were plenty of fat-quarter friendly quilt patterns, and I was a happy quilter.
Then jelly rolls entered the picture. While perusing a quilt shop at Myrtle Beach, SC, I came across this roll of fabrics, comprised of 2 ½-inch strips. It was lovely – all the colors of the fabrics could be seen through the top and the prints were visible on the sides. When I asked what this was, the salesperson told me it was “A jelly roll – forty-two 2 ½ inch strips of fabric.”
I was duly impressed. “But what do you make with this?” I inquired.
“A quilt! You sew them together and make a small lap quilt,” was the answer. To give a point of reference, jelly rolls were introduced to the sewing population in 2006. This could not have taken place long after that. So at this time, there were no “jelly roll races” and jelly roll patterns were few and far between, if not non-existent. But the roll I had in hand was pretty and I figured if nothing else, I could use it in my applique. It came home with me and sat on a shelf for several months before I unwrapped it and tried to sew it together.
Only to be completely underwhelmed. The strips were not all the same width (some were 2 ½-inches, others 2 1/4-inches) and more than a few were cut crooked. I sorted them according to color and tossed them in my scrap fabric bins. I didn’t believe another jelly roll would ever be in my future.
Which was completely wrong, of course.
In the ensuing three years, I either won or was given a total of eight jelly rolls. All of which sat on the shelf for a long time. Once bitten, twice shy. I didn’t know what to do with fabric strips which were probably cut crooked and not uniform in width. Since that particular time in my life, I have seen the quilting market flooded with pre-cuts and patterns designed specifically for them. And this is the topic I want to discuss in this week’s blog – pre-cuts. I want to touch on what they are, how they fit into our quilting world, and what to do with them.
Let’s talk about Fat Quarters first. These pre-cuts were the first ones introduced to the quilting public back in 1980. These are made by cutting a ½-yard of fabric, and then cutting the half-yard in half on the width, so you have an 18-inch x 22-inch piece of fabric. Generally, there is a selvege one end, so the quilter is aware what is the lengthwise, crosswise, and bias grains of the fat quarter. The edges are not pinked (this is important and will be addressed a bit later). These are sold individually and in bundles. These bundles may have a fat quarter from each line of fabric in a family or may only have selected ones. Single fat quarters average costing $3.00 each and a typical bundle of fat quarters (about 26 pieces of fabric) runs about $78.00. Solid fat quarters are more expensive more than prints.
For a long time, I’ve believed fat quarters are the most versatile of the pre-cuts and I still believe it’s true. A fat quarter can be cut into two 10-inch squares (layer cakes) with extra fabric for four 5-inch charm squares. It can be cut into twelve 5-inch charm squares and a 22-inch jolly strip. It also can produce fifty-six 2 ½-inch mini charm squares, seven 2 ½-inch x 22-inch jelly roll strips, or eight 2 ½-inch x 18-inch jelly roll strips. If matched with another fabric, you can sew a nearly endless array of half-square triangles or quarter-square triangles. When you purchase a typical fat quarter bundle of 26 cuts, pair it with a few yards of a neutral and an additional yard or two of your focus fabric, you have a quilt.
Those are the pros of fat quarters. Now for the cons. Usually with a fat quarter bundle, you get an array of prints from a line of fabrics. The collection will include solids, small and medium prints, and at least one large print (which for most quilters is the go-to focus fabric). This is where you can run into problems. Sometimes the print is too large for the fat quarter. You may only get one full rendition of the print or sometimes just parts of the print. If you’re counting on using all your fat quarters as part of the fabric requirements, that one piece can give you serious issues. If your fat quarter bundle is a recent purchase, chances are you can find yardage of the large print at your LQS.
However, if you purchase your fat quarters on-line, you actually may have better options. Most (not all) fat quarter bundles in a brick-and-mortar store are wrapped in cellophane to keep them clean. Which means you can’t always determine what fabrics are in the bundle because you can’t see the surface of the material. When purchased on-line, generally the website will give you tiny thumbnails pictures of all the fabrics in the bundle and list the available yardages which coordinate with the fat quarters. This really helps you make wise purchases. Most large on-line quilt stores have fat quarters available. My favorite sites are Pineapple Fabrics, The Fat Quarter Shop, Shabby Fabrics, Stitch Party Studio, and Missouri Star. However, one selling point the LQS and some big box stores have over on-line establishments is single fat quarter sales. Most brick-and-mortar stores have individual fat quarters for sale, so you can pick and choose what you want.
My second-favorite pre-cut is layer cakes. A layer cake is a precut pack of fabric, generally consisting of forty-two, 10-inch squares (although that number may vary). These fabrics are grouped together by designer line, color, or theme. The edges may or may not be pinked.
Layer cakes are almost as versatile as fat quarters. One layer cake can produce a twin-sized quilt and two of them make a queen-sized. They can be cut down into charms and mini-charms, if needed. They can be sliced and diced to make half-square and quarter-square triangles. A yard or two of a neutral and a focus fabric can be added and only one layer cake may be needed to make a quilt.
The problems encountered with layer cake purchases are the same as those with fat quarters, except the large print issues are even worse for a 10-inch square. However, for whatever reason, many layer cakes are usually not wrapped. This means you can thumb through the fabric and see what prints are repeated and which ones have large repeats. This makes purchasing layer cakes in a brick-and-mortar store easy. And let me throw in this observation – most layer cake pieces are true-to-size. Overall, they do tend to measure 10-inches square.
Jelly rolls are third on my list, and they have come a long, long way since 2006. I recently purchased a Boundless ombre jelly roll from Ebay and every one of the strips was 2 ½-inches. The quality of cutting has greatly improved. I also think these pre-cuts are packaged wonderfully. While most of the time they are wrapped in cellophane, they’re arranged so it’s easy to see the colors and prints.
The strips are generally 2 ½-inches wide and cut the length of the fabric – between 44 and 45-inches. The edges are pinked, and larger prints are lost in the narrow width – something manufacturers realize and often opt not to have the larger prints in a jelly roll. Be aware there are rolls out there which are 1 ½-inches wide and these are called Honeybuns (and we’re not discussing them today because I’ve never used one but I have seen them used as sashing and they’re wonderful). Jelly rolls usually have 40 strips in them. One roll can make a twin-size quilt and two will make a queen. I honestly was not crazy about these pre-cuts until I discovered this ruler:
Which allows you to make half-square triangles from the strips. Now I’m slightly in love with them. There are hundreds of patterns for jelly rolls and almost every fabric line offers these pre-cuts. And they make four-patch and nine-patch construction super, super fast and easy.
In fourth place are charms and mini-charms. The charm packs consist of forty-two 5-inch fabric squares. Anyone who has pieced even a short amount of time can attest to the fact that 5-inch squares are used a lot. Mini-charms are 2 ½-inch squares and these packs also have 42 pieces of fabric in them. The 2 ½-inch measurement is also a pretty common one in quilt patterns. With both of these, it’s usual to find most of the fabrics from a theme or a line of fabrics. What you probably won’t find (especially with the mini-charms) are any of the large prints from the fabric line. I like both of these pre-cuts because they make half-square and quarter-square triangle production fast and easy.
Can you actually make an entire quilt from just these small pieces of fabric? The answer is yes, but it takes a lot of them. It takes 12 packs of the mini-charms to make a baby quilt. Five-inch charm packs are a larger cut, and they break out like this:
Baby quilt – 1 pack
Crib quilt – 2 packs
Lap quilt – 3 packs
Twin quilt – 5 packs
Queen quilt – 8 packs
Of course, like the other pre-cuts, when you add a few yards of a neutral and a focus fabric, the number of packs needed lowers somewhat.
Now that we’ve described the pre-cuts, I’d like to give some over all great things about all of them – even the ones we didn’t discuss. For me, the best thing about pre-cuts is they are time-savers, which in my world breaks down like this:
The colors/fabric selections are already made. This means I save time looking at bolts of fabric either in my LQS or on-line. And while shopping is fun, I don’t always have the luxury of time. When I find a pre-cut I like, I can purchase it, maybe a yard or two of focus fabric and a neutral and I have a quilt I know will look nice.
I’ve minimized my cutting time. Of all the steps involved in making a quilt, I like cutting it out the least. Even if I have to slice and dice my precut, I’ve still saved time by not having to cut out 2 ½-inch strips, 10-inch strips, 5-inch strips, etc., and then sub-cutting.
Another wonderful thing about pre-cuts I mentioned earlier: It’s an affordable way to have most, if not all, of a line of fabric. Obviously, unless you’re a fabulously rich quilter or a fabric designer, it’s impossible to have major yardage of an entire line. Pre-cuts give you a taste of what you want with the possibility of purchasing more of your favorite.
The last absolutely wonderful pre-cut attribute is the patterns available for them. The pre-cut patterns have gone from an absolute wasteland in the early to mid-2000’s to an overloaded abundance. And many of these patterns are free. They either come with the precut (Pineapple Fabrics gives you a selection of free patterns to choose from with every precut order) or they’re available for immediate download from the manufacturer’s website.
Now for the not-so-great precut attributes. I mentioned the pinked edge earlier. Many of the pre-cuts come with a pinked edge, which looks like this:
Samples of colorful cotton fabrics with zig zag edge row arranged
The idea behind this zig-zaggy edge is to prevent fraying. Which is a good idea, except two things happen with the pinking: The pre-cuts become terribly linty and there is a lot of confusion about what should be considered as the fabric’s raw edge – the peak or the valley? Let’s deal with the lint first. I don’t open any pre-cuts in my house except fat quarters, which generally are not pinked. With the others, I grab my lint roller and step outside. I open the precut outside and run the lint roller all over the top, bottom, and sides of the jelly roll, charm pack, etc. This does not eliminate all the lint, but it does a really good job in reducing the amount of lint that can get on your floors, furniture, and clothes.
As far as what is the edge of your fabric, most pattern designers agree it’s the valley, not the peak. However, it’s more important you remain consistent. If you begin construction with the peaks as your fabric edge, piece the entire quilt that way. Don’t switch back and forth between the two.
Another possible drawback with pre-cuts concerns those with stripes, plaids, or checkered prints. If any of the pre-cuts you purchase have those types of prints in the bundle, make sure they’re printed straight. The lines should be at 180-degrees and where they cross (as in plaids or checks), they should make 90-degree angles. If you’re sub-cutting those pieces into smaller units, sometimes you can make do with an off-print. However, if they’re used as a unit or as a large piece in a block, and the lines aren’t straight, it will be obvious no matter what.
Another drawback to all pre-cuts is the fabric itself. While yes, there is no worry about the colors harmonizing, you have no choice about the fabrics chosen in each package, and I’ve found there usually is no true dark among them. When you lay them out, take a picture with your phone, and then view the photo through the black and white filter in your app, all the fabric tends to look gray. If you’re purchasing additional yardage of neutrals and a focus fabric, you may want to add a yard of a true dark.
The final issue to consider is price. Overall, pre-cuts are more expensive than yardage. When you take the price of the precut and the price of a yard of fabric and break it down, pre-cuts are several cents higher per inch than a regular yard of fabric. There is a formula you can use to discern if you’re getting a workable value in a precut. Take the usable inches of a width of fabric (for this example we’re using 40 inches) and multiply that by 36 – the number of inches in a yard – and this gives you 1,440 usable inches in one yard of fabric. This means:
A forty-strip jelly roll has 4,000 square inches or 2.78 yards of fabric (40 x 2 ½ = 4,000 then 4,000 / 1,440 = 2.78)
A layer cake of 40 squares also is 2.78 yards of fabric (40 squares x 10 x 10 = 4,000 then 4,000 / 1,440 = 2.78
A 40-piece 5-inch charm pack has .69 yards of fabric (40 x 5 x 5 = 1,000 then 1,000 / 1,440 = .69)
A 40-piece 2 ½-inch charm pack has .17 yards of fabric (40 x 2 ½ x 2 ½ = 250 then 250 / 1,440 = .17)
Let’s zero in on jelly rolls to continue this example. I looked at five random fabric sites and took each of their mid-priced jelly rolls and came up with an average price of $37.17. When we take the yardage of a 40-piece jelly roll (2.78) and divide the average price ($37.17) by 2.78 this gives us an average cost of $13.37 per yard for a jelly roll. So, price point per yard, pre-cuts are a little more expensive than yardage.
The last couple of points I want to make are not necessarily drawbacks to pre-cuts, but they are points of interest you need to be aware of.
If you purchase a pre-cut and it’s really off-kilter – not cut accurately, off-print, or super off-grain, let the manufacturer, on-line store, or brick-and-mortar store know. Usually they’ll either refund your money or replace the pre-cut.
This second point concerns prewashing. By now most of you know I’m a dedicated pre-washer. But pre-cuts make this process a little tricky. Most of the patterns for pre-cuts assume you’re not prewashing. So if you do prewash and there is some shrinkage, just know your finished project may be slightly smaller than the dimensions given on the pattern.
Now let’s talk about the prewashing itself. I don’t advise doing this in a washing machine, even if you put the pre-cuts in a lingerie bag. Although most of the pre-cuts are pinked to prevent fraying, the agitation in the washing machine will still cause some unraveling. And that can be a real pain to deal with when you’re trying to pull them apart to dry them. I’ve found it’s best to simply allow the pre-cut to soak in a sink of warm water which has some laundry detergent or blue Dawn dish detergent in it. Agitate by hand, rinse in cool water, and lay flat to dry.
Pre-cuts are wonderful tools for quilters to have in their studio. If you see a precut and you love it, go ahead and buy it. The price points aren’t enough to beat yourself up over. The additional cost may be made up in the time and trouble it shaves off in cutting.
Today I want to talk about how to handle your curves.
And no, I’m not talking about these curves.
I’m talking about these curves.
That’s right. Quilt blocks with curved units.
Several quilt block units claim curvy fame – Clam Shells, Orange Peels, and Drunkard’s Path to name a few. And if you toss in all the applique blocks which have curved pieces, the list would literally be endless. But today I just want to discuss the quilt blocks which have curvy pieced units. Curvy applique is another blog for another day. I’m using the Drunkard’s Path to demonstrate the different ways to handle curves. I choose this for a couple of reasons. First, it’s a familiar block – even if you haven’t sewn it, you at least probably know what it looks like. Second, the convex to concave ratio is steep – in other words, if you can successfully sew this curve, all the others will be easy-peasy.
However, before we get into construction, let’s take a dive into the history of this block. We know this block best by the name Drunkard’s Path. But it also is identified by Wonder of the World, Robbing Peter to Pay Paul, Solomon’s Puzzle, Endless Trail, Country Cousin, and Pumpkin Vine. I had heard some of these names, but others were totally unfamiliar. I threw them into my EQ 8 (which has Barbara Brackman’s Block Base on it – the old one, not the new one due out soon), and received no results for Country Cousin or Pumpkin vine. Robbing Peter to Pay Paul was a star block which used half-square triangles. All of which I guess goes to show how quickly block names can change and even go obsolete.
This block which has so many names became primarily known as Drunkard’s Path during the Temperance Movement. And it does kind of look like an inebriated trek home. Drunkard’s Path and the T-Square (shown below – and it came to be known as the Temperance T Block during this era) were embraced by this movement.
Both were used in quilts representing the anti-alcohol society. Many of these quilts were blue and white, since those were the colors chosen to represent the Temperance Movement. But just as many were not. I think the ones made in red and white fabric are the most stunning – but then again, I really like red and white quilts.
However, the block has an even earlier history than the Temperance Movement (which lasted roughly from 1820 to 1933 when the 21st amendment was nullified). Archaeologists have found this block on the Roman ruins in Egypt. So, the block is pretty old – or at least its concept is.
Drunkard’s Path works like this: There’s a convex curve:
Which must be sewn to the concave curve.
And when they’re joined, this is what they look like:
They appear as if they snuggly and easily fit together. But I’ll be the first quilter to tell you, those looks are deceiving, because you have to put them together like this:
To sew them.
And it’s trickier than it looks. However, the purpose of this blog is to give you a few tricks of your own to successfully navigate this curving, winding path. I will be honest with you – if you want to take a deep dive into quilting curves and never have tried it before, you may want to stick your toe in the water with a gentle curve. Use the techniques given in this blog to work with curves which don’t have such a steep gradient before moving on to something like this:
Whenever I’m faced with blocks which are difficult or have lots of pieces, the first question I ask myself is “Can this thing be paper pieced?” To me, if a complicated block can be broken down into units and paper pieced, I’ve accomplished two things. First, I’ve upped my accuracy, as paper piecing is very accurate, and second, paper piecing makes difficult units easier to work with. So, I searched EQ 8 for Drunkard’s Path blocks I could paper piece and had no luck. On each block I received the information: “This block has curved lines so it cannot be automatically numbered for paper piecing.” In other words, paper piecing these curves is not an option. At least for EQ 8. Could you possibly do it? I have seen blog posts with instructions on how to paper piece these curves, but to me it’s no different than piecing it the regular way. However, English Paper Piecing the Drunkard’s Path is a viable option – especially if the block is small. And there are several on-line quilt shops which can supply you with the laser-cut cardstock ready for use.
The next question I ask myself with a block like Drunkard’s Path is “Can it be appliqued?” The answer is yes. As a matter of fact, one of the first quilts I made had a block made of red and white Drunkard Path units arranged to look like Cardinal birds. I needle-turned every one of them and am still really pleased with the results. The units came out the correct size and they all looked identical. So, that was a huge win for me as a beginner quilter.
But that was only one large block made from 12 Drunkard Path units. If you’re constructing a quilt like this:
It’s a lot of blocks to applique. Even though machine piecing this block is a slow process, it’s still faster than hand applique (although the speed would be about the same if machine appliqued). There are two ways to machine piece these rascals – the traditional way and my way. But before we begin construction, let me give you some general tips for each.
Starch every inch of your fabric. Even if you haven’t prewashed your fabric and the finish is still on it, starch it. And for the Drunkard Path block, I use real starch (such as Faultless or Niagara), not a starch substitute (such as Best Press). This is important because both the concave and convex curves have lots of bias and the bias needs to be stabilized as much as possible. Real starch does this so much better than a substitute. I would really recommend starching the fabric twice.
More than likely you will use templates. With most — if not all – Drunkard’s Path and other curvy blocks, templates will be used. The quilter traces around the templates (usually made of cardstock or template plastic or acrylic). Speed is not your friend here, accuracy is. Trace slowly and be careful not to drag the marking tool across the fabric so that the fabric distorts, and the bias is possibly stretched. If card stock is used, it saves time to go ahead and make several templates, so they can be replaced as needed. My favorite curvy templates are made from acrylic. Missouri Star Quilt Company has several Drunkard Path acrylic templates. The Perfect Patchwork Company also has them, as well as the John Flynn Frame Company. I’ve made several quilts which used the Drunkard’s Path block and for me, the acrylic templates were worth the money.
Prepare to pin. And pin some more. I know some of don’t like to pin, but it’s almost impossible to have a pretty curvy block without the judicious use of pins. You’ll pin a lot. This is be explained a bit further down the blog.
Speed is not your friend. Straight seams can be sewn fairly quickly. Curved seams cannot. Sew slowly and make sure the raw edges stay aligned as you go along. Some quilters do great with using their ¼-inch quilting foot. Others swear by a walking foot for sewing curves. Try both and see what works best for you. Regardless, sew slowly to maintain your accuracy and stop frequently (with the needle down) to adjust the fabric so you don’t get pleats, tucks, and puckers. If you do all of this and you still have issues, you may want to switch to a scant ¼-inch instead of the full one. Sometimes the narrower seam allowance works better.
I find it easier to sew with the concave piece on top. If you can’t remember which is concave and which is convex, think about it like this:
This is pie:
This is pie ala mode.
This may not work for you. If it doesn’t, switch the pieces so the pie is on top and try it.
Even with all the precautions, you may still get puckers. The tighter the curve, the more you’re apt to get puckers. If this happens, try stopping frequently (with the needle down) and smooth the fabric out with your fingers. I find using a stiletto is a big help.
The first construction method we’ll try is the “traditional” method. If you want to make one with me, I’m making a 6-inch finished Drunkard Path block. That means I need to use at least 6 ½-inch unit pieces to allow for the seams. However, any block with this much bias involved can turn out a little wonky. I would cut the pieces at 6 ¾-inches and plan to trim them down.
My first step is always prep several blocks at a time. It’s a wonderful idea to cut all your pieces out at the same time, but since this block unit requires a great deal of pinning, you may find it helpful to pin a dozen or so block units and then sew them. This seems to go faster than make a block, prep the next block, sew that block, prep the next block, etc. It also helps you get a rhythm up sewing those curves.
After your pieces are cut out, fold the pie shapes in half and press it so there’s a crease running down the middle of each piece of pie.
Next, fold the “ala mode” pieces in half:
And press them so there’s a crease in the middle of it.
Now match the two pieces, right sides together, so the creases line up and put a pin in them.
I’m throwing a personal preference for pins at this point. When I machine piece any curvy block, I prefer using the glass head pins:
These are fine and sharp, and shorter than a lot of pins quilters use. They don’t get in the way and are easy to remove before they reach the needle. Don’t sew over them. This can damage your sewing machine needle.
After you’ve pinned the middle, then you want to pin the ends of the ala mode piece to the ends of the pie like this:
Here’s where the tricky part comes in – now you want to pin the rest of the curves together, working out tiny tucks and wrinkles as you pin. This process will require the judicious use of pins. As a matter of fact, I think the more you pin the better the block will look, and the better the chances of it coming out perfect.
Take the unit to your machine and sew the seam slowly and carefully, removing the pins before you get to the machine’s needle. I know this is a lot of stopping and starting, but this also gives you a chance to smooth out the fabric, keep the raw edges of the fabric aligned, and correct any mistakes. I also find a stiletto is very helpful with this step, and remember to stop sewing with your needle in the down position.
Once the two pieces are sewn together, they need to be pressed. Even though the seam is sewn together, there still are bias edges involved and they can still be stretched if you’re not careful. I press my edges toward the concave unit. If your block doesn’t want to lie flat, try clipping the curves of the seam and pressing again. Usually this will help the unit lie pretty flat. After pressing, trim your block to the correct unfinished size.
The traditional method of piecing a Drunkard’s Path works well for a two-piece block unit. However, if you remember this year’s blog theme is Level Up Your Quilting – which means this year we’re pushing the boundaries with what we’re comfortable doing. We’re taking what we know and expanding it to bigger and better quilting experiences. So…what if you want to make a three-piece Drunkard’s Path with a pieced middle ring? Sounds complicated, right? It really isn’t. It’s a few more steps, but the look is stellar. Here’s how it goes….
When we look at the drawing, we know we want that center piece to be the star attraction. Why? Because if pieced carefully in the quilt, those center arcs can match up and create circles which add movement to our quilt. So that middle ring must be made true to the unfinished template size. The middle ring can be made of a single piece of fabric. If this is your choice, I would suggest using a dominant color or a print which immediately draws your eye to it. I would make the other two pieces – the pie and the ala mode – out of a neutral tone-on-tone or solid regardless of whether the middle ring is pieced or not.
The first step is making sure all the fabric has a good starching and pressing – especially the middle ring fabric. This particular piece has exposed bias on the inner and outer curve. It’s important to stabilize it as much as possible. If you’re piecing your middle ring, you’ll want to make sure all the fabric has some starch in it, and if you can paper piece it, so much the better. The papers will add additional stability to the bias edges. I don’t remove the papers until I’m ready to sew, and if I can avoid it, I don’t remove them until after the entire quilt top is ready for quilting. But if you struggle to join the middle ring to the two other pieces while the papers are on, go head and remove them, but starch the ring before sewing. If you’re using a template to draw the ring onto fabric, don’t drag the pen or pencil across the fabric and stretch the bias. I cut my middle ring pieces out with scissors (more accurate than a rotary cutter) and store them flat. I don’t pick them up until I’m ready to sew and have been known to give them another shot of starch and a quick press with a hot iron before sewing.
Now let’s talk about the pie and the ala mode piece.
Here are my templates:
And here’s how big I cut each out of the fabric:
I increase the size of both templates by as much as two inches. Why? Well, it makes the middle ring fit easily onto the pie piece. I find the center of the pie and the center of the middle ring and pin those two together, but I don’t have to keep shifting and pinning to avoid puckers. This helps keep the bias in both pieces from getting stretched. I sew these two together, and then add the ala mode piece, finding the center and pinning the same way.
After it’s over, I trim the pie and the ala mode piece down to fit the middle ring.
This makes your Drunkard’s Path look impressively difficult. Only you will know how easy it truly is. And that middle ring gives so much motion to your quilt. Remember the Halo Medallion?
When you look at those circling geese, they’re the middle ring of a three-pieced Drunkard Path block.
Yes, this Drunkard’s Path takes a little more time and a little more prep, but man, is it fun!
The last curvy unit I want to talk about is what I call the Curves of Deception. This means the quilt looks as if it has curved pieces, but it doesn’t. Thus, my name, The Curves of Deception. This effect all has to do with color and fabric placement. Take a look at this quilt on EQ 8:
This quilt consists of two blocks, with absolutely no curved pieces in either one: The Monkey Wrench
and the Garden Path Star.
The manner in which the half-square triangles of the Monkey Wrench lock into the white squares of the four-patch in the Garden Patch triangles makes the quilt look as if it has gently curving pieces when in reality no curves exist at all. This isn’t an effect you can get with a lot of blocks but I have learned if the blocks have HSTs at the corners and they can be linked up with a four-patch, they have the possibility of this effect. It’s a good idea to play with this on EQ 8 or graph paper before cutting out the quilt or even choosing fabric.
There is absolutely no reason at all to dread curved piecing. Like a lot of quilt techniques, it does take a bit of advanced planning and some prep work. But it’s not as hard as it looks as long as you slow your sewing down and use pins. And when you expand a block like Drunkard’s Path into a few more pieces, the look is dramatic and the skill set is easy. You may want to start with a small curvy quilt to make sure you have the technique well in hand before you move onto a bed-sized one.
A few blogs back when I wrote about hand sewing needles, I promised in the future I’d write one about thimbles. I must confess I’ve had a love/hate relationship with thimbles for a long time, and it wasn’t until the last few years I made peace with using one. Now I generally reach for it every time I pick up my hand sewing. This week we’re taking a deep dive into the world of thimbles, their history, how to use one, and how to make sure you have one that fits.
By definition, a thimble is a “small, pitted cup worn on the finger that protects it from being pricked or poked by the eye of a needle while sewing.” The Old English word for thimble is pymel. Pymel is derived from the Old English word puma – meaning “thumb.” And while today we tend to picture using thimbles on the middle finger, they were and are also used on thumbs.
Historically, the earliest thimbles closely followed the invention of what we recognize as “sewing.” Thimbles have been found in England dating back to the 10th century and by the 14th century, they were in widespread use in nearly all households. Most of these early thimbles were made of brass, although Queen Elizabeth I is rumored to have given one of her ladies-in-waiting a thimble inlaid with precious stones. These brass thimbles were either made of cast brass or from hammered sheets. Eventually the mass production of these brass thimbles moved to Nuremburg in the 15th century and then to Holland in the 17th.
But by 1693, John Lofting – a Dutch thimble manufacturer – moved things back to England. He began producing thimbles at Islington in London. His company grew quickly, and he moved his mill to Buckinghamshire to take advantage of water-powered production, eventually making over two million thimbles per year. Without getting into a lot of the manufacturing details, by the end of the 18th century he had changed production methods to produce thinner thimbles with a taller shape. In addition, by this time cheaper sources of silver were available and silver thimbles also became part of his production. These silver thimbles were very popular and sold well. Manufacturing speed also increased when a machine was invented to punch the small dimples in a thimble. Before that, all of those dimples had to be put in by hand. So, if you’re perusing antique shops for thimbles and you find one with irregular dimple patterns, chances are it was made before the 18th century.
Thimbles weren’t manufactured in America until the 1830’s. Ketcham and McDougall of New York were the first mass producer followed in 1839 by Simon Brothers in Philadelphia – who, by the way, are still making thimbles. However, a gold thimble, circa 1850, is attributed to Paul Revere, Jr. It has engraved script initials LD with a wrought domed top and it sold for a whopping $10,000.00 in 2014.
While brass was the choice for mass thimble manufacturing, thimbles were and are made of other substances: metal, leather, rubber, wood, glass, and china. Those thimbles pre-dating mass production were made of whole bone, horn, ivory, Connemara marble, bog oak, and mother of pearl. Occasionally they were adorned with diamonds, sapphires, or rubies. Today, in addition to precious and semi-precious stones, thimbles are sometimes topped with cinnabar, agate, moonstone, or amber. They’re enameled or may even use the Guilloche’ techniques advanced by Peter Carl Faberge’.
Yes, thimbles have come a long, long way since their humble beginnings. And while at the end of this blog we will discuss collecting them and some other esoteric (but fascinating facts) about them, what I want to focus on is the here and now – what most utility thimbles are made of, how to use one, and most importantly how to make sure you have one that fits correctly.
Chances are if you have either purchased or been given a beginner’s sewing or quilting kit or have looked at thimbles in the notions aisle of a store, this is what usually comes to mind:
A very generic, one-size-fits-all, silver-colored thimble. And I think the trouble begins here, because most folks assume this is the only thimble out there. If it doesn’t work, then it must be something wrong with them, not the thimble. This is how I felt for years. No matter how many of those silver thimbles I purchased, none of them worked for me. They didn’t feel right and were awkward to use. I asked my fellow quilters what kind of thimble they used, and learned today’s thimbles are made from leather, silver, gold, plastic, silicon, and pewter. Determined to find something that worked, I dropped those metal thimbles into a drawer and began my quest to find the perfect thimble.
After months of research and a handful of thimbles, I still found nothing which worked for me. While my quilting buddies were hand sewing up a storm with their thimbles, I wasn’t. It was only when I discovered thimbles came in different sizes and it had to fit correctly that I found the perfect one for me.
Thimbles work like rings — a fact not a lot of beginner sewing enthusiasts realize. Most of us think the generic one-size-fits-all silver thimble is the only one available. A thimble should fit comfortably on your finger, be snug enough it doesn’t fall off, but not so tight if feels as if it’s cutting off the circulation. You should be able to put your thimble on your middle finger, then hang your hand down by your side and it does not fall off. So, let’s talk about how to determine what size thimble you need.
If you’re purchasing a thimble made in the United States, all you need is the ring size for your middle finger. American-made thimbles use ring sizes for their measurement. This makes it pretty easy if you’re purchasing a custom-made thimble. For instance, if your ring size is seven, then you order a size seven thimble. Thimbles sold in fabric stores, on-line, or big box stores often are simply labeled small, medium, and large. These are harder to determine, because like clothing, some brands run small and some run big. Read the package to see if there is any information indicating what ring size falls into these categories. If your purchasing a thimble from another country, quite often these establishments will convert your US ring size into millimeters. You also may notice that you wear two different sizes of thimbles – if your hands tend to swell at certain times (such as in the hot summer months), you may need a larger one for a while and then when the swelling goes down (like in the winter), you need a smaller one.
If you still have a hard time finding a thimble that fits, there are a couple different thimble constructions to keep in mind. First, there are leather thimbles which fit over your middle finger.
These work great, and I’ve used one in all but the hottest of weather, when it just gets too uncomfortable temperature-wise. There are also adjustable thimbles:
You can push the bendable rings to form-fit your finger.
And there are also these:
Which are called Thimble-It or Thimble Pads. These are small, plastic disks which have adhesive on one side, so you can press it onto the area of your middle finger which receives the most abuse from the eye-end of your needle. I love these things, and they can be used several times before the adhesive loses all its stickiness.
For those of us who have long fingernails, especially the kind you buy at a nail salon, it’s even more difficult to find a thimble we can use. I finally discovered open-topped thimbles. These are my two cherished, silver, open-topped thimbles custom made for my right hand:
My SNS nail can slide right through the opening. Tailor’s thimbles are also an option:
There is no top on these, and they fit snuggly over your fingertip, down to the first knuckle. Please note that a thimble which stops at the first knuckle is a long thimble. Personally, I like the extra length. If you decide to custom order a thimble, you can request it be made long enough to reach your first finger joint. The biggest difference between in using a tailor’s thimble and a “regular” thimble is remembering to push the needle with the side of your finger and not the fingertip.
Once you find one which works for you and fits well, it’s important to know how to sew with it. And if you’ve hand sewn for a while without a thimble, it’ll really feel like you’ve slowed down to a snail’s pace until you get used to the process. But in the long run, you’ll catch your rhythm and actually sew faster with a thimble than without it. Keep in mind the thimble is there to allow you to use more of your hand while sewing – instead of pinching the needle between your finger and thumb and then pushing the needle through the fabric, the thimble takes the brunt of the work and allows the hand to relax so you can actually sew longer with a thimble than without it.
To begin, I want you think about two things – how you hold a pencil and relaxing your fingers. First, you hold the sewing needle between your thumb and index finger and allow the eye of the needle to rest in one of the dimples of your thimble. The position of your hand should be the same as it is when you’re holding a pencil. It will be slightly different because you’re holding a needle between your index finger and thumb, but the position of the middle finger should be the same as it is when you’re holding a pen or pencil.
Another perhaps-new idea to consider at this point is how to hold your work. Hand sewing in general works better if you keep your project flat on a table. Most of us (me included) tend to hand sew with our work in our laps. If you can position it on a flat surface, not only does this make working with a thimble easier, it also makes the entire process so much faster and you don’t manhandle your work so much.
The type of stitch you take is also important. Newbies want to take what I call a “stab stitch” — you poke the needle in from the top, pull it out through the bottom, then insert it from the wrong side of the work back to the top. This will result in uneven, unstable stitches. A fine, running stitch works wonderful for hand piecing – just don’t make your stitches too big. Give yourself time to get used to the process, but once you find a thimble which fits, and you get comfortable using it, the thimble will become one of your most cherished sewing tools.
Lastly, I promised some fun facts about thimbles. Some of these made me giggle and others are just fascinating.
Nearly 30 lots of Meissen porcelain thimbles were purchased for $189,813 on May 14, 2014. A single Meissen thimble dated circa 1730 with a landscape scene sold for $20,000.
The precursor to the thimble dates back nearly 10,000 years.
French and English thimbles have size markings on the band of a thimble. German thimbles have markings on the second row of indentions (knurlings) on the side of the band. American and Norwegian thimbles have their sizes on the side of the band and sometime the cap. Thimbles made in England and America during the 19th century have a domed cap, and thimbles made in the 20th century have a flat cap.
Thimbles have served as advertising vehicles for lots of businesses and presidential campaigns — up to and including Jimmy Carter’s Presidential run. This custom began in the 1920’s.
There is a museum in Creglingen, Germany devoted entirely to thimbles. The Fingerhut Thimble Museum opened in 1982 with 800 exhibits. Today it has over 4,000 thimbles from all over the world.
A hand-forged brass thimble said to have belonged to Abraham Lincoln’s mother sold for $3,500 in 2008.
The official term for a thimble collector is digitabulist.
In the game Monopoly, first created in 1904, the thimble was one of the eight traditional metal game pieces. However this piece was replaced with newer versions of the game beginning in 2017 (boo….hiss….).
Thimbles are given as gifts in Peter Pan, who thinks thimbles are kisses.
In the 1992 version of Batman, Michelle Pfeiffer (who played Catwoman) used thimbles to create the base of her claw.
The popular TV show and comic strip Popeye was originally called Thimble Theatre Starring Popeye.
The character Elizabeth in the video game BioShock Infinite uses a thimble to cover her severed little finger.
Video montages and series of clips are often called “thimble collections.”
In the 2000 movie Chicken Run, Nick and Fletcher attempted to sell a couple of thimbles to Ginger as a “quality, hand crafted tea set.”
During the World War I, silver thimbles were collected from “those who had nothing to give” by the British government and melted down to buy hospital equipment.
An old superstition says that if you are given three thimbles, you will never be married.
In the 18th and 19th centuries, leaving a sandalwood thimble in a fabric store was common practice for keeping moths away.
Thimbles were used to measure alcohol and gunpower, which brought about the phrase “just a thimbleful.”
Prostitutes used thimble-knocking as a means of attracting customers — they would tap on a window to announce their presence.
Thimble-knocking also refers to the practice of Victorian schoolmistresses tapping on the heads of unruly students with thimbles.
One of the first collectible thimbles was manufactured to commemorate the Great Exhibition held in the Crystal Palace in Hyde Park, London.
Okay, now armed with more than just a thimbleful of knowledge, go find yourself a thimble which works for you. And hey, if you’d rather wear that thimble on your index finger instead of your middle finger, go right ahead. For some hand sewers, this works best for them. A thimble is a wonderful tool which not only protects your fingertip, but also speeds up your work and makes hand piecing so much easier and accurate. Thimbles, as a whole, are not expensive. Give yourself permission to try several before deciding which one works best for you.
About this time last year, I wrote a blog about quilting gadgets and notions you may want to either gift another quilter or buy for yourself. Since 2020 has brought about unprecedented “stay-at-home-ness,” I realize two things: Those of you who have picked at the fringes of quilting want to dive in, and those of you who have already taken the deep dive into the art may have worn your faithful sewing machine completely out. If you fall in either group, a new machine may be on your Christmas list and this blog addresses what to look for in a machine. I don’t recommend particular brands of machines, but want to highlight the features I feel are important. As you’re shopping for machines, you’ll have to weigh your budget against the features which are absolutely necessary for you and those which would simply be nice to have. I’ve listed the features in no particular order, but have ranked them in my opinion of importance. Please note, this blog concerns the domestic, stationary sewing machine, not mid-arms or long-arms. That’s another blog for another day.
The Harp
For those of you who don’t know what this is, here’s a picture:
It’s roughly the area between the needle and the right side of the machine. If you plan on constructing bed-size quilts, you want the harp to at least be standard-sized – roughly 7- to 9- inches. This area allows you to comfortably piece blocks, and then have plenty of room to join the blocks into rows and sew the rows together. Anything smaller than the standard harp size may make things a bit too crowded. For those of you who want to quilt your quilts on a domestic machine, a larger harp (those 11-inches and above) may be worth the investment, as the larger space allows for more bulk and makes it easier to turn the quilt. The machines with larger harps not only have more room from left to right, but also in height, which is important if you’re quilting a queen-size or larger quilt. In addition, the larger harp allows you to turn your machine sideways and use a portable quilt frame such as this one from John Flynn
As a sort of makeshift mid-arm. This can also be done with machines which have standard harps, but the extra room sure makes it easier. You will pay more for the extra harp space.
Rank: If you only plan to piece tops, a standard harp will do great. If quilting those large tops are in your future, it should have careful consideration.
Needle-Down Function
How this function works varies from machine to machine, but as a whole, it means when you stop sewing, the needle remains in the down position, holding your fabric in place. This is important if you must raise your presser foot and pivot. Without this feature, your material can shift, and throw your block unit or applique off – even with the judicious use of pins.
Rank: Must have.
LED Lighting
Believe it or not, not all sewing machines come with lights. I know this from personal experience. A few years ago, I purchased a sewing machine for my oldest grand darling (and yes, it was a “real” sewing machine, not a toy). When I got it home, unpacked it, and plugged it in, I was astonished the machine had no light. None. Moral of this story: Buyer beware. Read the outside of the box to see what comes with the machine.
Let me also add this is not normal. Nearly all sewing machines have some kind of lighting. Newer machines come with LED lighting. Most of us are familiar with this type of light. It’s brighter and clearer than standard bulbs. And when you’re sewing late at night, the LED lights are extremely helpful – even more so as your eyes age. However, if the machine you purchase doesn’t come with this feature, don’t despair. There are other wonderful lighting options such as Ott lights or LED light strips which attach to the machine’s harp, etc.
Rank: This is a work-around. If the machine you can afford doesn’t have LED lights, you can purchase an alternative LED light source that’s extremely affordable. I do imagine in the future, LED lighting will become a machine standard.
Automatic Needle Threader – This is now pretty standard on nearly all machines except the very basic ones. After you’ve worked your way through the threading process, during one of the last steps, you’re able to have the machine thread the sewing machine needle for you. This takes the guess work and squinting out of pushing the thread through a tiny eye.
Two of my machines have the automatic needle threader. Three do not, and neither does my long arm. I have found this feature is the one which gives me the most issues and the one that tends to breakdown first. I also find myself avoiding this feature and threading all the machines manually.
Rank: For me, this isn’t a deal breaker, since I don’t typically use this feature. However, if you have really bad eyesight, you may want this option.
Top-Loading Bobbin
I’ll admit, this one’s a deal breaker for me, and it’s probably due to traumatic experiences in high school home economics class. When I was in middle school, this class was mandatory for eighth graders. In high school, juniors and senior had to take it. Typically, it consisted of one semester of cooking and one semester of sewing. And I swear the school purchased the cheapest sewing machines they could find and they all had front-loading bobbins. The bobbins and bobbin cases were constantly giving us problems. In fact, it was so bad, once I was through with the classes, I pretty much had sworn off sewing. Push the clock forward several years and I had a daughter and wanted to sew for her. My husband decided to buy a machine for me, and my biggest caveat was it could not use a bobbin case. With my limited history in all things textiles, those had been nothing but a HUGE pain.
I will also admit that bobbins and bobbin cases have come a long way. I use one with my long arm and it really gives me no issues at all. But all my other machines? Except for the Featherweight, they’re all top-loading. To me this type of bobbin is easier to use, easier to trouble shoot, and easier to load.
Rank: For me, this is a must have. In fact, it’s a deal breaker. I avoid purchasing machines which use a bobbin case. However, this is entirely a personal preference.
Open-Threading System
I feel I must explain this one. This part of the machine:
Is called a take up lever. Some of these have a slot which you thread, and others have a hole. You really want a slot. It speeds up the threading process. I also like machines which allow you to access the inside next to the thread take up lever. My Janome swings open on the left side so I can access the bulb and the lever. Why is this important? If your machine is not working correctly, the first trouble shooting process you undertake is making sure the machine is threaded correctly. Having the slotted take up lever and being able to look on the inside of the machine just makes your life easier. You really don’t appreciate these features until one of two things happen:
Your thread keeps breaking and you have to determine why, or
You’re working with raw-edge applique and you have lots of thread changes (because most of the time your thread should match the fabric with this applique process).
Rank: This is a must have for me – an avid machine applique artist.
Easy Needle Access and the Ability to Move the Needle to the Right or Left
It’s an inevitable fact the machine needle will break – even if you change the needle religiously. There are two factors which should be considered about the needle mount – ease of access and security. In other words, the machine should be structured so not only is it easy and quick to change the needle, but when a new needle is inserted, the mount securely tightens around the needle so it doesn’t fall out. Most machines have this feature, and when a new needle is inserted, the needle clamp screw is tightened with a screwdriver. This is a pretty standard item, but when you purchase a machine, I would ask the dealer if changing the needle is an easy process. If you purchase the machine in a shop (verses on-line), I would ask for a demonstration.
I also think it’s important the sewing machine has the ability to move the needle. Remember the ¼-inch seam is not the Holy Grail of Quilting. It’s more important the block come out the correct unfinished size. Most often, the standard ¼-inch seam will take care of this. However, there are times when you need to make your seam larger or smaller to achieve the right unfinished size. The ability to move the needle makes this not only easier, but also keeps all the seams a consistent width.
Rank: Must. Have.
Various Ways to Stop the Needle
My Janome 7700 (affectionately known as Big Red) has three different methods I can use to stop my needle. There’s a stop-and-go button I press with my finger which is right above the needle, the standard pedal, and a knee-lift. Most of the time, I use the button – because most of the time, I’m piecing. However…if you are actually quilting the quilt, it’s important to have the ability to stop sewing on a dime, no matter whether you’re straight-line quilting with a walking foot or free-motion quilting. When you use the button there is a second or two delay because you must remove your hand from the quilt and press the button. A couple of seconds doesn’t sound like a great deal of time, but it can mean a half-an-inch or more of quilting you didn’t want. In contrast, as soon as you stop pressing the petal or knee lift, the needle stops immediately (and hopefully with the needle down).
Rank: If you plan on quilting any quilts on your domestic machine, you at least want the machine to have either the knee-lift or pedal option. If the machine will only be used for piecing, any or all of these ways to stop the needle will be fine — I wouldn’t pay extra for another option. One will be plenty.
Stitches
Sewing machines – even the most basic ones – now come with an array of stitches. I purchased two basic sewing machines for the grand darlings this year and they came with 32 stitch options. And the more bucks you invest in a sewing machine, the more stitches it has. I brought Big Red home in 2008, and she has over 250 stitches, plus can perform monogramming in four fonts.
Now ask me if I’ve used all those stitches…go ahead…ask.
Nope.
I purchased her for her large harp – not the stitches. Out of all those stitches, I probably use about 25 pretty regularly. I’ve dabbled with about 100 of them. I’ve never used the monogram function because I have an embroidery machine.
Truth be told, a quilter needs only one stitch if he or she is just piecing and quilting– a straight stitch. If you plan on machine applique, you’ll need a zigzag stitch (for finished-edge applique) and a blanket stitch (for raw-edge applique). Those three stitches are really all you need to get started.
What should be taken into consideration is the machine’s ability to control stitch length/width and sewing speed. No matter if you only see piecing in your quilting future, the ability to lengthen or shorten stitch length is important. It’s a function quilters use regularly. Likewise, the ability to control speed is equally important. There will be instances where you will need to sew slowly – curves, tiny seams, complicated piecing – and if your machine has a speed control function this really aids in accuracy because the machine controls the speed, not you. If you want to sew faster, you must manually change the stitch speed.
Rank: Minimally, the machine needs a straight stitch and a zigzag stitch. It must have speed control and the ability to change stitch width and length.
Feet
The more money you spend on a machine, the more feet comes with it. The day I walked out of the quilt shop with Big Red, I had a total of 15 feet in the storage compartment, in addition to the zigzag foot which was already on her. Some of these feet I have used so much I’ve had to replace them. Others have never seen the light of day. So, with all those feet, which ones do quilters really need?
The Standard Foot — This is the foot which is typically used to sew a garment seam or a straight line of stitches. Chances are this foot was on the machine when you purchased it. I use this foot anytime my seam needs to be larger than ¼-inch – for instance on the rare occasion I make bags.
Quilter’s Foot – This is the ¼-inch foot. Generally, it has a phalange on the right side to help you keep the edges of your block units lined up, so you sew a consistent ¼-inch seam. Keep in mind this is a full ¼-inch. If you’re purchasing a sewing machine which has been designed with quilters in mind, this foot usually comes with the machine.
Zigzag Foot – With Big Red, the standard foot is also the zigzag foot. But this may not be the case with yours. If not, make sure it comes with a zigzag foot under the circumstances you need to finish seam edges or you decide you want to try finished edge applique.
Open-toe Foot – This foot is used for the blanket stitch. If you see raw-edge applique in your future, you will want this foot. It’s also used with other decorative stitches.
Walking Foot – You all know how much I love this foot. I’ve written an entire blog on just this one foot (https://sherriquiltsalot.com/2020/09/30/almost-everything-you-need-to-know-about-a-walking-foot/). If you want great straight-line quilting (without rulers), easy paper piecing, or the ability to sew on binding without a lot of hassle, you want this foot. With some machines, it’s part of the purchase. If you’re paying major bucks for a machine and a walking foot isn’t included, I would insist that the dealer throw it in for free – they’re not that expensive. Otherwise, generic walking feet can be purchased from a machine dealer or on-line – you just have to know if your machine has a high shank or a low shank – which should be in your manual.
Darning Foot – This is typically used for mending clothing, but quilters know it’s also used for free-motion quilting. Even if you can’t see yourself quilting your quilts right now, at least be sure a darning foot is available for your machine (if it doesn’t come with it). You never know when you’ll catch a wild hair to drop those feed dogs and free motion quilt.
Those are the six feet I would recommend for any quilter’s sewing machine. There are some optional ones I would suggest.
Scant ¼-inch Foot — Like the Quilter’s Foot, this produces a quarter-inch seam, but a scant one. Some quilt patterns call for a scant seam, which is a thread or two less than a full ¼-inch seam. Also like a Quilter’s foot, the Scant Foot will keep your seams a consistent size.
Ruler Foot — This is a fairly new foot to the domestic machine arena. Typically found on long arms and mid arms, these now have been designed for either high or low shank domestic machines. Quilting with rulers and other acrylic templates once were the sole domain of long and mid arms. With the ruler foot for the domestic sewing machine, all sorts of quilting possibilities have opened up. This may not be the first additional foot purchase you make for your machine, but if the free-motion quilting bug bites you hard, this foot is worth the investment – which is way less than $100.
Zipper Foot – This foot may come standard with your machine. If not, you may opt to add it to your wish list if making bags are in your plans. It’s just too hard to sew in a zipper without a zipper foot.
No matter what, make sure all the feet you bring home accommodates all the stitches on your machine. If one of those stitches require a “special foot at an additional cost,” ask that it be thrown in as part of the purchase. It’s not fair you have to pay extra in order to use one of the stitches on your newly purchased machine.
Rank: Standard foot, quilter’s foot (1/4-inch foot), zigzag foot, and open-toe foot are theminimum number of feet you need. I would push to have the walking foot and darning foot thrown into the purchase price. The other feet are great to have, but can wait to be purchased at a later date.
Dual Feed
I touched on this feature in my blog about the walking foot. Dual feed is the machine’s ability to feed the fabric through the top and bottom at the same time – both fabric layers are fed evenly over the feed dogs. This keeps the top fabric from crumpling or shifting. We know it works in tandem with the walking foot, however, it also works independently of the foot. This means more accuracy in piecing – the pieces of fabric will start and stop evenly – and it makes lining up the seams much easier. Dual feed also is a great help when sewing on borders. This feature doesn’t come with all machines and honestly, I can’t find a price variance that makes sense. I’ll play on my home court with this one: Janome. Some of the less expensive Janome machines have it and some of the more expensive ones don’t.
Rank: Must have. This is one feature I don’t think you’ll regret having.
The Ability to Lower the Feed Dogs
All those quilters out there who are piecers and appliquers, and have no desire or simmering compulsion to quilt their own quilts on a domestic machine can breeze over this part. But for those of you who think quilting is a certainty or even a probability, let’s talk feed dogs for a second.
If you read my blog about cleaning your machine (https://sherriquiltsalot.com/2020/09/09/your-machine-needs-a-spa-day/) you know what feed dogs are. They are the are metal teeth-like ridges which emerge from a hole in the throat plate of a sewing machine. Feed dogs move as you sew, gently gripping the bottom fabric to help it pass through the sewing machine and produce a high-quality stitch. If you’re quilting with a walking foot, you leave the feed dogs up. If you want to free motion quilt, then most of the time you’ll drop the feed dogs. This means they stay beneath the throat plate and don’t grip the fabric at all while your free motioning.
There are a couple of items you should consider if you think you’ll drop your feed dogs in the future. The first is the machine’s ability to handle it. Some of the machines produced with garment sewers in mind don’t handle dropping the feed dogs well. Eventually it will throw the timing off if you’re dropping them a lot. And by a lot, I mean your free motioning several large quilts a year. Machines which are advertised as Quilters’ Machines (those made with quilters in mind – and everything quilters do to a machine), generally don’t even hiccup if you drop the feed dogs 365 days a year. They’re built to withstand it.
The second item to consider is the ease of dropping those feed dogs. It should be a quick and easy process. With Big Red, it’s a button on the side of the machine. With my Juki 2010Q, the button is on the front. My point is you shouldn’t have to dissemble anything to be able to drop the feed dogs. It also shouldn’t be an additional up-charge.
Rank: If quilting your own quilts on your domestic machine is a certainty, make sure it can handle dropping the feed dogs and make sure it’s an easy process. With some of the more inexpensive machines, you want to make sure the machine actually will let you drop the feed dogs at all. For me, this is a deal breaker. My machine must let me drop those dogs.
Thread Cones and Thread Cutters
Quilters use thread – and lots of it. Because of this, it’s usually more economical in the long run to buy it in bulk, and sometimes this means purchasing cones of thread instead of the standard spools. So, it’s a great thing if your machine can handle cones of thread fed from a cone stand like this:
Most machines can, but it’s a good idea to check with the dealer to make sure.
Another wonderful feature on some machines is an automatic thread cutter. I never had one until I bought my Janome 7700. And I quickly became spoiled to it. I find there’s always that moment of aggravation when I’m sewing on a machine which doesn’t have an auto cutter and I actually have to pick up my own scissors and cut my own thread.
Rank: Both are must-haves. Once you use an auto cutter, you’ll never go back to not wanting one.
Free Arm Capabilities
This means the sewing machine can do this:
And while this feature is primarily for garment making (think sleeves, cuffs, and other small, tight clothing areas), the free arm comes in handy if you want to make bags (which a lot of quilters like to do) or if you find yourself sewing tiny seams. I use this feature when I make miniature quilts.
Most, but not all, machines come with this feature.
Rank: Not absolutely necessary if all you can see yourself making is quilts. However, if you think you may dabble in clothing construction at all, you probably will want a free arm. And FYI, all of my machines have free arms – even my Featherweight 222. Yes, I use this feature that much.
Bobbin Alarm
If you sewed for any length of time, you’ve played Bobbin Chicken. It goes a little like this: You’re nearly through with a seam and the thread in your bobbin is running dangerously low. You try to finish the seam before the bobbin completely empties out. On a good day, you win big – even if there’s less than an inch of thread left on the bobbin.
On a bad day, you think you’ve got a 5-foot border sewed on only to find your bobbin thread ran out four inches after you started the seam.
This is why, sewers of all types of projects, a bobbin alarm is important. It lets you know when your bobbin thread is running low. Some machines come with them. Big Red does not have one. My next machine will.
Rank: Must. Have. And it needs to sound like an airhorn.
Extension Table
This is literally a tabletop which attaches to your machine and expands your sewing area:
If you’re sewing a large quilt or something equally as bulky, an extension table helps steady that extra bulk. Many of the newer machines come with these tables, especially those made with quilters in mind – the table supports the quilt as you join the rows together to make the top. If you’re quilting your quilt on your domestic, the extension table is invaluable, as it holds the bulk of the quilt sandwich and supports it.
Rank: I feel it’s a must have. If you think only small quilts are in your future, you can get by without one, but even with those, an extension table is a big help. How firm am I in this belief? Every one of my machines have an extension table – even if I had to pay extra to get it. If your sewing machine brand doesn’t have an extension table, sometimes you can find a generic one that works or if there’s someone in your life who’s good with tools, one can be made to fit your machine. Google “make your own sewing machine extension table” and lots of sites will pop up.
I know this is a long blog, but there’s one more item I want to discuss and that’s where should you buy your machine. If at all possible, purchase your machine from a local dealer. This idea has more to it than simply supporting your local quilt shop or machine dealer. It has to do with support, service, and education. When you buy local, there’s a better chance if you have a question about the machine, you can pick the phone, call the shop, and get an answer pretty quickly (or send them an email or text). The usual scenario when you go into a shop to purchase a machine, no matter how much or how little you’re spending, they’ll let you test drive that machine and compare it to others. If you’re trading an old machine in, they generally will give you at least what the trade-in is selling for on Ebay. If it’s a complicated machine, they’ll walk you through the basic steps of threading, changing the needle, and programming the stitches before you take the machine home. When you need your machine cleaned or it has other problems, you return the machine to the shop because the shop will have a tech who can perform cleaning and repairs. And many times, the shop will offer free classes with your machine so you can really learn how to use all its features. This type of purchase is a win-win. It’s good for you and the shop owner.
I am also realistic enough to know we’ve lost a lot of quilt and machine shops even before this pandemic hit. I stopped counting the ones which have closed for good because of COVID. Buying a machine from a local store may not even be an option for you. So let me offer this advice – no matter if you had to drive miles to purchase your machine, or you bought it on-line or from a big box store — find a good sewing machine technician in your area. Ask local guilds or other quilting groups for recommendations. If the same name keeps popping up again and again with great reviews, add that person’s name to the contact list in your cell phone.
Another option facing the sewing machine consumer is dual machines – machines which can sew and embroider. Most of these machines are stellar – they do both equally well. What has to be considered is the machine can’t do both at the same time. An embroidery machine with a single needle can take quite a while to stitch out a pattern (I did a llama for my daughter that took five hours and 30 thread changes). Time-wise, if you can make it work for you not to have access to the regular part of the sewing machine, and you have the budget for a dual machine, you may want to invest in one. If you don’t want to tie up your primary sewing machine for a long time with an embroidery project, you may eventually want to invest in a separate machine which only embroiders – which is what I did.
Hopefully, all of this information isn’t too overwhelming. Everyone purchasing a sewing machine must weigh their budget against what features they absolutely must have and those they simply want. Don’t buy the first machine that crosses your path. Do some research. Read some reviews. Talk to some other quilters (in person or online). Find the one which is the best fit for you.
Now for a little administrative change. As a blogger, I’m constantly looking for platforms to increase my readership. My blog is announced on Twitter, Instagram, and Facebook at this time. And many of you are my beloved friends on Facebook. However, in the past several months leading up to and through the political upheaval in the United States, Facebook has become a very unhappy, ugly place.
This makes me very sad, because Facebook is one way I keep up with my friends from all over the world and stay connected to relatives who live far away. However, for my own mental well-being, I have decided to limit my Facebook activity on my page to this blog only. Sherriquiltsalot will continue to be linked to my Facebook page, but for at least the immediate future, that will be the ONLY item showing up on my page. If you want to continue to see pictures of my quilts, please follow me on Instagram @sherrifields61. Yes, I know Instagram is owned by Facebook, but at least it’s a happier, more politically neutral space.
I’m also on MeWe as Sherri Fields. And as always, you can leave comments on my blog and I do respond.
We’ve dealt a lot with piecing and quilting techniques this year. And in these blogs, I frequently mention quilt patterns and how you can change them up to suit your favorite quilting methods and sizes. However, there is one factor I haven’t written about which needs to be taken into consideration when choosing a pattern: your quilting skill level.
On the face of it, your quilting skill level seems kind of cut and dried. If you just started quilting, then you’re a beginner. If you’ve quilted for a few years, then you’re an intermediate. And if you got lots of years under your belt, then you’re advanced, right? Not exactly. I sewed garments for years before I started quilting. I had at least five solid years of sewing history and yet, I started my quilting career on the beginner’s level. Why? Well, piecing is different than garment sewing – the seam width is smaller, there rarely was pattern templates to use, rotary cutters and mats were employed instead of scissors – the list went on and on. While I was more than comfortable using my sewing machine, I wasn’t as much at ease with quilting techniques.
And also, to be truthful, there are some shades of gray between the different skill levels. For instance, applique is usually considered to be an advanced technique, yet my first quilting instructor taught her beginners quilt class this skill in our first sampler quilt. It was a simple applique design, but the concept was introduced. What I’ve listed below are general quilt skill levels and what they entail. If you’re a beginner quilter, but you’re pretty proficient with your sewing skills and pattern reading, then you’ll be able to advance much faster than someone who is new to both sewing and quilting. However, l also want to add this – if you desire to learn and find out in the process you love quilting, you’ll also advance pretty quickly. When someone is eager to learn and has passion for a particular field of study, concepts are grasped pretty quickly. Conversely, if you took a beginner’s quilt class a hundred years ago and have only sporadically used the skill, I would still consider you a beginner. This is due to the fact you haven’t consistently pushed your skill set to the next level.
This kind of information is important to know when browsing through patterns and quilt magazines. Most of the patterns indicate somewhere what skill level is involved. Trying out an advanced pattern when you’re still hovering between the beginner and intermediate levels can suck the joy out of the process because it may be too hard. And staying in the beginner’s territory when an intermediate quilt would be a fun challenge is just … well … boring. So, let’s define the levels.
Beginner Quilters – A beginner quilter has basic sewing skills and can sew together two pieces of fabric. They can:
Sew two pieces of fabric together in a straight line (more or less…there are days when I can’t sew a straight line).
Can follow a basic pattern and know what basic quilting terms are, such binding, blocks, borders, backing, wrong side of fabric, right side of fabric, wrong sides together, right sides together, pressing, and rotary cutter.
Should be familiar with some of the quilting jargon, such as: squaring up a block, bias, fat quarter, fabric grain, and raw edge.
Can measure and cut fabric in straight lines with a mat, ruler, and rotary cutter.
Not only knows how to use an iron, but also knows the difference between pressing and ironing.
Is familiar with all the basic functions of his or her sewing machine: how to thread it, how to wind a bobbin, vary stitch length and width, move the needle, sew both a straight stitch and a zig-zag stitch, and how to clean and oil the machine.
Intermediate Quilters – An intermediate quilter has completed some projects and is proficient in multiple quilting techniques, has taken classes (in person or on-line), and has been quilting for a few years. These quilters have put in some serious time behind their machine and can move their skill level up quickly. They can:
Sew amazingly straight lines.
They either want to learn or already know how to sew other techniques such as curves, paper piecing, and applique.
Are very familiar with quilting terms and jargon.
Have learned industry tips on how to measure and cut in the most efficient way, such as correctly cutting multiple layers of fabric at a time (for me the jury is still out on this one – I think cutting no more than two layers at a time yields much more accurate cutting).
Have a repertoire of tips and tricks on such topics as how to sew straighter lines, press complicated seams, and how to efficiently piece their quilts so all the seams nest and line up.
Have taken classes at their LQS, on-line, or at quilt shows to improve their skill set.
Are becoming more comfortable combining color palettes and prints for their quilt and have ceased relying solely on kits or having someone else chose their fabrics.
Are skillful at balancing different print scales within a quilt design.
Knows a great deal about threads and needles.
Have sewn different types of fabric – such as cotton, minky, denim, and corduroy.
Advanced Quilters – These folks have many years of sewing experience, have mastered many quilting techniques, may be designing their own patterns, and have taken classes from expert level instructors. They can handle just about every quilt design thrown at them. Advanced quilters:
Have sewn many, many years (probably more than they’ll admit to – or can remember!) and have tried every type of quilt block out there.
Can now sew just about any quilting technique with precision, expertise, and near-perfection.
Knows all the quilting jargon and terms.
Discovers new tips and tricks and then shares them with the rest of their quilting community.
Now takes only advanced classes with expert teachers (sometimes…sometimes I just take a class to be with other quilters or I really like the teacher).
Has had years of experience combining color palettes and print scales.
Knows how to work with all types of fabric. Some even design patterns and quilt fabric for the industry.
Completes at least some of his or her tops from start to finish – including the quilting.
Is fluent in all characteristics of needles and threads.
Now that we’ve defined the levels of quilters, how does this feed into choosing the correct pattern for your skill set? Do the categories of patterns coincide with the categories of quilters? The answer, for the most part, is yes.
Beginner patterns usually have very detailed, step-by-step instructions. If the pattern is labeled “Beginner,” you can expect lots of pictures, graphics, and illustrations, too. Most of the designs are very basic – uncomplicated blocks or strips. They’re pretty much straight-line sewing, so you’re not going to find curves or other fancy techniques. These patterns can vary on a theme, such as square-in-a-square, triangles, hexagons, chevrons, x’s, pinwheels, and basic log cabin blocks. Even rag quilts, hearts, and spools are in this category.
Intermediate patterns are written with the assumption the quilter has general quilting skills and has all the basics down pat. So, intermediate patterns may not have lots of illustrations or detailed descriptions. For instance, an intermediate pattern that requires you to make several sets of four-patches, may simply state “Make 48 four-patches from Color A and Color B.” It won’t tell you how to make the four-patches, but assumes you know the best technique for you. The designs get more complex and usually include smaller pieces, curves, and paper or foundation piecing for more complex shapes. Many quilts will incorporate multiple techniques (such as piecing and applique).
Many intermediate patterns require a more complex color palette. Typically, they include designs like basket blocks, flying geese, Celtic squares or crosses, drunkard’s path, hundreds of star blocks, circles, more intricate paper piecing, English paper piecing, and applique. Often, they will take a beginner’s quilt block and twist it to make it more complex and detailed.
The advanced patterns skip all the basics and jump right into the super-complex skill sets. They may incorporate skills like applique to create a landscape, farm, or Santa’s sleigh. The paper piecing in this level becomes really intricate and realistic. Miniature quilts also fall into the advanced category – the scaled-down version of intermediate or beginning quilt techniques or any combination of them. These patterns will also take basic units and break those down into intricate blocks within themselves. For instance, you may be asked to make 24 large triangles for a quilt, and each triangle be comprised of 24 small triangles. These quilts may include those with optical illusions, layered applique, collages, and mitered sashing or borders. Advanced patterns are extremely detailed and time-consuming, but oh-so rewarding. And beautiful. The sky is the limit and it’s creativity at its best.
There are also patterns marked with the phrase “For All Skill Levels.” These patterns are very similar to beginner quilt patterns – they’re the most basic quilt top to sew. It assumes someone who has never quilted before can follow the pattern. All Skill Level patterns usually use precut collections such as jelly rolls or charm packs. Sometimes they’re as simple as putting two of these fabric pieces wrong sides together and sewing down one side. I have mixed emotions about precut/preassembled fabric selections and will discuss them in an upcoming blog. On one hand they’re great for beginners because all the fabric choices are made for you and they all harmonize. Fabric manufacturers have usually gone to great lengths to make sure there are darks, lights, mediums, and a variety of print scales in the bundles. A quilter can simply pick a preassembled pack which appeals to them and get busy – no fuss, no cutting, no hassle. These quilts can be assembled in a few hours and for the beginning beginner, this is a good place to start.
However…
The longer you quilt, the more comfortable you need to become choosing your own fabrics. This takes time and practice (and some miserable failures), but it truly widens your quilting world and allows you to cultivate a stash which works for you. Do I use precuts? Yes. All the time? No. But when I need a quick quilt, this is one place I start.
Now let’s talk about prices. From past blogs, my readers know I’m anti-copy-the-pattern-and-share-it. When you do that, you’re literally stealing money from pattern designers. Quilt patterns – good quilt patterns – aren’t extremely expensive, with the caveat to paper piecing patterns that include everything printed out for you in the quantities needed (such as Judy Niemeyer’s). Many of the precut bundles include a variety of free quilt patterns. Most fabric manufacturers have free patterns on their website. It only costs your time to browse and find one you like. E-patterns, as a whole, are less expensive than printed one. These require you to download the pattern and print it out using your own ink and paper. It’s instant quilt pattern gratification – no waiting on snail-mail, as they’re usually available for immediate download. Printed quilt patterns can vary from $5 to over $100, depending on the type of pattern and the designer. Most printed quilt patterns fall within the $5-$25 range.
As I’m finding my way to the end of this blog, there’s some miscellaneous pattern information I want to leave with you. First of all, let’s address those patterns which are out of print. I am definitely one of the quilters who believe if the pattern is available for purchase, you should do so in order to support the designer. And from their website, if they have one. Purchasing from third-party dealers (such as Amazon), cuts into their profit. If we don’t support our designers, they may disappear, and I don’t want that to happen. But…if you’ve searched and the pattern is out of print, not available directly from the designer, or the designer is deceased, I have no problem in asking a friend for a copy of the pattern. However, exhaust all avenues before you get copier-happy. I also have no qualms about borrowing the book or pattern from a friend (no copying involved – actually borrow the physical pattern).
Second, if you don’t take away anything else from this blog, take this: Google the pattern before purchase. Let me explain this one. There are certain pattern designers I really, truly love. I’ve used their patterns repeatedly and have been more than happy with the process. My favorite designers are those who give you the unfinished size of each block unit as it’s made. This means that you’re able to check each unit to make sure its measurement is correct before you begin sewing the block together. If the units’ sizes are correct, then the block should come out not only the correct size, but also square. There are some pattern designers that consistently update the patterns on their website to alert you if a mistake has been made in the directions, or they’ve discovered an alternate way of constructing the quilt. And if you take the time to Google the pattern and the designer, this information will appear, along with perhaps images of quilts which have been made by the pattern, and maybe even blogs like this one where quilters are recording tips and tricks as they make the quilt.
However, if you Google the pattern and nothing comes up but pictures of the quilt made by the designer and the designer’s website or Facebook page, take a deep breath and allow yourself to have second thoughts about making that quilt. This comes from a place of personal experience. If you take the time the Google the quilt pattern, and nothing comes up but information from the designer, there’s probably a good reason for this – either the directions are poorly written, or the quilt is exceedingly complicated. Or both. And as a result, few to no quilters have made this quilt other than the designer.
Last, no matter what stage quilter you are – beginner, intermediate, or advanced – it’s always good to have a few easy patterns tucked back somewhere you want to make. You never know when you’re going to need a quick quilt for a baby shower, birthday, or holiday. A sudden need for charity quilts may come up. And personally, while making a complicated quilt, I need a “palate cleanser” – something I can work on which requires little to no thought. It just allows me to have a mental break for a while before returning to that hand applique block with 3,000 tiny pieces….
Use this blog to take a good look at your skills and decide what kind of quilter you are. If you’re halfway serious about your quilting, look for opportunities to keep growing until you reach the next level. If you’re a beginning quilter, but you’ve been quilting for a year or so, try an intermediate pattern. If it’s too hard, you can tuck it away for a few months until you’re ready for it. If you’re an intermediate, try an advanced pattern.
And above all…GOOGLE THE PATTERN BEFORE YOU BUY IT!
Those who hate hand sewing and avoid it at all costs.
And those who vacillate between the two.
I quilt with a couple of die-hard hand piecers and quilters. I also quilt with quite a few folks who are hard-core second category machine quilters. Me – I’m in the third category. I love to machine piece and machine quilt. However, a part of me also loves the process of hand piecing and hand quilting. Handwork – whether it’s piecing, quilting, or applique – slows me down, allows me to take a deep breath, and find peace. It’s the steady pull of the needle and thread which allows me to sort through the trouble of my day and put things (mentally) in order.
That said, I want to talk about hand sewing needles today. No matter how much of a die-hard machine quilter and piecer you are, there will come a point where you must put a stitch or two by hand into something. The job is easier and more enjoyable when you have the right needle. There’s a lot of information in this blog, so sit back, get a cup of something warm and caffeinated, and make some notes.
Let me also put this disclaimer in right here: Much of this blog is my opinion about hand sewing needles I’ve used. What works for me may not work for you.
The popular opinion among die-hard sewing machine enthusiasts who would rather do anything other than hand stitch is this — the needles don’t really matter if you’re only occasionally sewing a corner closed or stitching on a label. I beg to differ. The right kind of hand sewing needle is just as important as the right kind of machine needle. It makes your job easier and it vastly improves the quality of your work. I’ve employed some kind of hand sewing for 35 years – both in garment making and quilting. Just as there are different sizes and types of needles for machine work, there are different sizes and types of hand sewing needles. We’re discussing this, but first some general information about all hand sewing needles. And for future reference with this blog, when the term “needle” is used, it refers to hand sewing needles only.
Needles are packaged in cardboard envelopes or these really cool clear containers.
With either type of packaging, somewhere on it there’s information about the needles and it’s important to know what the information means. First, there’s usually the type of needle – sharps, tweens, milliners, etc. If you know exactly what type of needle you need, this is where you start. However, after the name, there’s usually a number (or several numbers), and this is where it can get confusing if you don’t know how to interpret the numbers. The larger the number, the smaller the needle. The smaller the number, the larger the needle. I know that sounds completely counter intuitive, but this is the way hand sewing needles work. For example, a size 12 needle will be finer and shorter than an 8 – which will be thicker and longer. It’s the eye and tip sizes of these needles which determine what kind of thread can be used and what fabric they work best with. Eyes can be small and rounded or long and open. Points can be sharp, blunt, or be classed as “ballpoint.” All of these facts should be taken into consideration when pairing a needle with both thread and fabric.
Below are some general categories of needles, what they’re used for, and their characteristics. If you Google hand sewing needles, you can get a lot more information. I painted this blog with kind of broad strokes.
Sharps
These are general purpose, medium-length needles. They’re used for garment making and other types of general sewing. These come in all different sizes and it’s a good idea to have a pack which has several sizes in it for all your sewing needs. If you focus in on a size you consistently use, you can also purchase a pack of sharps in just one size. These are medium-length, have a sharp tip, and a small eye.
Sizes: 2 – 12
Ballpoints
Ballpoints have a slightly rounded tip, which makes them ideal to use with knits – the needle will pass through the fibers rather than pierce them.
Sizes: 5 – 10
Chenille
Chenilles are used for embroidery and thicker yarns. They have a sharp point and an elongated eye. Most commonly used for cross stitch and needle point, they can be used on any tightly woven fabric due to their sharp tip. These are used a great deal with wool applique.
Sizes: 13 -26
Tapestry
These are also used for embroidery, but unlike the chenille needle, they have a blunt point. Tapestry needles are used on loosely woven fabrics so the needle will pass cleanly through the fibers. Some cross-stitch fans and needlepoint aficionados prefer this needle over a chenille. They have an elongated eye.
Sizes: 13 – 28
Crewels
These are also called embroidery needles and have a medium eye and a sharp tip.
Sizes: 1 – 16
Upholstery
Unlike most other needles, these can be curved, which make them idea for upholstery and furniture work, as well as some doll making. They’re perfect for sewing areas where you can only access the outside of the object. They have a very sharp tip.
Sizes: 3-inches – 18-inches
Betweens, Tweens, or Quilting
I’ve heard this particular needle called all three names. These are for sewing through thick quilts and have very sharp points. They are short and fine and have a round eye. The shorter length is designed to produce nice, small, even stitches on quilts. They can also be used for fine and precise stitches in tailoring. These are thin, short, and have a sharp tip.
Sizes: 1 – 12
Beading
Beading needles are used for the obvious – sewing on beads. I’ve also used them to sew on sequins. They generally are very fine and thin, as they have to go through the eye of small beads (like seed beads). They are longer than most other types of needles and have a sharp tip.
Sizes: 10 – 15
Bodkins
These “needles” are large and blunt. And I put needles in quotations marks because these can be made of plastic. I’ve never really thought of them as needles, although I suppose those made of metal could be. They are large, flat needles used to thread elastic through casings. When my daughter was young and I made all of her clothes, I would use a safety pin to do this. Then I found Bodkins and they worked one hundred percent better than a safety pin. I also used them to run ribbons through the smocked dresses I made her. These have a very rounded point, so the tip does not pierce the fabric, which makes it super-efficient threading anything. However, if you’re making baby or doll clothes with tiny casings, a small safety pin will work better. Most Bodkins are too long to work efficiently in small areas. They are on the long-ish end of the needle family.
No sizes
Darners
Darning needles are used for mending. They have an elongated eye for thicker thread and a semi-blunt point. If you knit, you probably use one of these needles for sewing seams together.
Sizes: 1 – 9, 5/0 – 9, and 14 – 18
There are also what I call “specialty” needles which don’t fit into these categories:
Leather – Sizes 3/0 – 10 used for leather and faux leather.
Milliners — Sizes 5/0 – 10 used for hat making and crafts.
Milliners
Sailmakers – Various sizes and used for canvas.
Self-Threading – Sizes 4 – 8. These needles typically thread from the top of the eye instead of from the side. Instead of inserting the thread through the eye, you simply push it through the top of the needle. I like to use these needles when I’m tying a quilt or using really thick thread or yarn.
Self-Threading Needles
It’s worth mentioning some hand applique enthusiasts like using Milliners for needle turn. They just always seemed too big for my hand – I have trouble controlling them. However, I have small hands and fingers, so that may be the issue.
Now let’s get down to the nitty-gritty. Let’s talk about needle brands. I’ve listed my favorite brands below in the order I prefer them:
Tulip
Roxanne
Primitive Gatherings
John James (those only made in England)
Clover Black Gold
Tulip Needles
We’re going to begin with Tulip and why I like them so much. It all has to do with the way they’re manufactured. Most needles are made in small, circular motions, with the steel either rotating clockwise or counterclockwise.
Tulip needles are made like this:
They roll off with the rotation spun lengthwise, the length of the needle. While this seems like a minor manufacturing change, it actually allows the needle’s length-wise grain to work with the motion of hand sewing. The clockwise or counterclockwise manufacturing works against the motion of hand sewing. So, Tulip needles makes the hand sewing process less of a strain on your wrist and fingers. If you’re only putting in a few stitches here and there, this isn’t a huge issue. However, if you’re pushing a needle through fabric for hours at a time, this one manufacturing change takes so much pressure off of your hands. And if you’re like me and have a bit of carpal tunnel, it’s a huge benefit.
Roxanne needles are a little longer and a little finer than standard needles. The eye is also a bit bigger. So, if you struggle to thread your needles, this brand may be just what you’re looking for. They are also evenly tapered and has great plating – making them stronger than a lot of needles.
Many of you may be acquainted with Primitive Gatherings for their wool, fabric, and patterns. And they’ve always carried needles. But in the last several years they have come up with their own line of needles. I have not used their chenille or embellishing needles, but I have used their binding needles and I love them – and not just for binding. They are long, thin, strong, and have a large eye. I love them for binding, but they are a great all-around, general sewing needle.
Even if you haven’t quilted but a short while, you’ve probably heard of the John James brand of needles. This is one of the standard needle brands requested by sewing teachers everywhere. It’s one of the oldest needle manufacturers, formed in the United Kingdom in 1840. Any needle size, any specific needle you needed, John James has it. And up until most of the needles started being made in China, these were an excellent needle choice.
Clover is a familiar brand name among most sewing and crafting enthusiasts. This company produces many, many great sewing notions, including a range of needles. However, a few years ago they came out with the Clover Black Gold Needles. I came across them entirely by accident. I arrived for a hand applique class at my LQS and realized I had left my needles at home on my sewing table. When I asked the store owner if she had any John James (since this is the brand most quilt stores have in stock), she told me “No – try these. They’re way better.” And she sold me pack of Clover Black Gold Applique Sharps.
It was love at first stitch.
These needles are ultra-fine, extremely sharp, and produce 30 percent less friction than other needles (with the exception of perhaps the Tulip brand). They’re coated with a black plating to resist rust, and it’s a good idea to wipe the needle with a fabric scrap before using just to make sure there is no black residue. The only drawback to this needle is the eye is extremely small – but then again, it has to be because the needle is very fine. There are ways to deal with a small eye, and we’ll discuss them later. However, it’s the fineness that makes this needle a stellar one to use in applique. It’s so thin, it easily slips between fabric and freezer paper. It’s also one of the best needles (in my opinion) to use with silk thread.
However, as much as I love the Clover Black Gold Applique Sharps, I’m not crazy about their hand quilting needles. The needles are very thin and seem to break easily when passing through the bulk of a quilt sandwich.
Now that you know what my favorite needle brands are, let me ask a question – do you know what they all have in common? I’ll wait while you ponder this question (cue Jeopardy music).
If you guessed they’re manufactured in either Japan or England, you’re correct. The exception to this maybe Primitive Gatherings needles – I couldn’t find where they were made. So, let’s talk about why this is important. The simple fact is these countries have produced needles for a long, long time and they know what they’re doing. They don’t cut corners, rush production, or use poor quality steel. My beef with John James is that they have shipped most of their manufacturing to China. If you’re a John James fan, make sure the pack states “Made in England.” Yes, labor and goods are cheaper in China, but it shows in the product. Take a look at this:
If you look closely at the eyes of some of these needles, you can see they’re incorrectly manufactured. Look at the crud in the eyes. This would certainly make threading the needle difficult. And more than likely, these burrs would cut your thread, making the entire hand sewing experience a nightmare. When purchasing any hand sewing needle, you want to make sure the eye is clear, and the shank of the needle is smooth. Tips should be sharp (unless they’re ballpoint, bodkin, or tapestry). And generally, cheaply produced needles don’t hold up to these standards. As a matter of fact, in my opinion, if you have needles that come in these types of packages:
Toss them. Overall, they’re poor quality. Most of these are found in the “Begin to Sew” or “Begin to Quilt” kind of packaging.
I can hear some of my all-machine-quilting-all-the-time folks from here – “But we’re only taking a stitch or two. The type of needle we use doesn’t matter that much.” And in all honesty, if you’re that solid of a machine piecer and quilter, it doesn’t. However, needles – even the top-of-the-line ones – aren’t expensive. Treat yourself.
Finally, let’s talk about some needle notions which make your hand piecing life easier. The first one is this timeless little gadget:
A thimble. I’m ashamed to admit it, but I quilted over 30 years before I learned to use a thimble. I blamed it A) I was never taught how and B) I now had fake nails and I couldn’t get any thimble to fit correctly. And my dilemma wasn’t for lack of trying. I had a handful of thimbles I had purchased and just couldn’t seem to work with any of them. It wasn’t until I had my finger fitted and purchase the right size of thimble with an open top (to accommodate my nail), that I learned the joy of using a thimble. It helps you get and maintain a rhythm as well as protects your fingers. I promise a blog is coming on this soon.
The next is this notion:
A table-top needle threader. I know there are lots of needle threaders which look like this:
However, I’ve found that they break easily and I had trouble maneuvering the wire through a small, round eye. The table-top needle threader accommodates all types of needles and all sizes of eyes (even the very small ones). Plus, this is an inexpensive gadget. If the eye of the needle is so small it still is difficult to thread even with a threader, first make sure the eye is free of any burrs. After that, if you’re still struggling, check your thread. If it’s a three-lobe thread, it may be too thick for the eye. Try switching to a two-lobe thread – it will be just as strong as the three-lobed, but it will be finer.
Some quilters like these:
Needlebooks. They allow you to keep all your needles in one place, arranged by size. And they are handy. I don’t use one – I simply keep my needles in the package they come in. I’ve sewn long enough that I even prefer one brand over another for specific tasks. If I put all my needles in a book, I wouldn’t be able to tell the brands apart. However, I do use this little jewel a lot:
It’s a Quilter’s Dome and it allows you to keep threaded needles in one spot. I find this really handy with applique. Most of the time, I used fine cotton thread in a color which matches my fabric with my hand applique. I may have as many as a half-a-dozen needles threaded at one time for a project. I can keep them all in here. The needles remain threaded and the threads (for the most part), don’t get tangled.
There are also these two thread conditioners:
When you run your thread through either of these, they leave a residue on your thread which keeps it from tangling and knotting as you hand stitch. My preference is the beeswax. I’ve used beeswax since I began sewing and to me, it just seems to work better.
Lastly, when do you know it’s time to throw a hand sewing needle away? With sewing machine needles, we know those have about an 8-hour shelf life. Are hand sewing needles any different?
Sort of.
The amount of time they can be used before tossing them varies with the brand and how much you’re using them. If you only take a stitch or two now and then, the needles could last you a pretty long time. If you’re using them consistently for hand sewing or hand applique, their lifespan is shorter. Rule of thumb for me is this: When the needle becomes difficult to push through the fabric, it’s time for a new one.
What about a bent needle? Should you toss it immediately? That depends entirely on you. One of the best hand quilting needles I ever had was slightly bent. I almost cried when it did finally break. If a bent needle is still sharp and you like it, the quilt police aren’t going to force you to toss it. However, if it slows you down or makes the process difficult, don’t be afraid to throw it in the circular file.
This is probably information than you ever wanted to know about needles. In summary, here’s probably what you need to remember:
Needles made in Japan and England are the best.
Use the right needle for the right job.
Inspect your needle to make sure the eye is clear, the shank doesn’t have burrs, and the tip is sharp (for those needles that need a sharp tip).
Needles aren’t expensive – even the best ones. They’re an affordable quilting luxury. Treat yourself. Replace as needed.
Until next week, Level Up Your Quilting!
Love and Stitches,
Sherri and Sam
PS – Standard disclaimer: I don’t work for any of the companies listed in today’s blog, nor do I receive any free merchandise for recommending them. I mention them because I use them, love them, and recommend them to my friends.